iOS spectrum analyzer app that can take voiceprint, Audio SA
“Audio SA” can be used on iPhones and iPads with iOS 14 or higher.
- 1 About “AudioSA”
- 2 For the time being, try making a voiceprint with “Audio SA”
- 3 How to use “Audio SA”
- 3.1 Edit Folder
- 3.2 Get Ticket
- 3.3 Recording/playback
- 3.4 Edit dataset title
- 3.5 Writing notes
- 3.6 Settings: Analysis Range
- 3.7 Run FFT
- 3.8 Run TFFT
- 3.9 Settings: FFT Size
- 3.10 Settings: Power Spectrum Scale
- 3.11 Settings: Window Function (WF)
- 3.12 Settings: Relative Power Lower Limit
- 3.13 Settings: TFFT Color Type
- 3.14 Dataset list
- 3.15 Delete audio data
- 3.16 Export (Share audio, Share FFT results, Share TFFT results)
- 3.17 Generator: generating audio waveforms
- 3.18 Tip | Import audio file
- 4 Download “Audio SA”
- 5 Other apps
About “AudioSA”
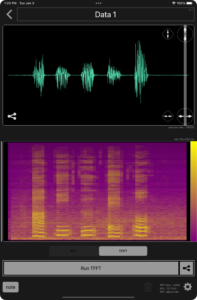
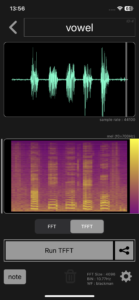
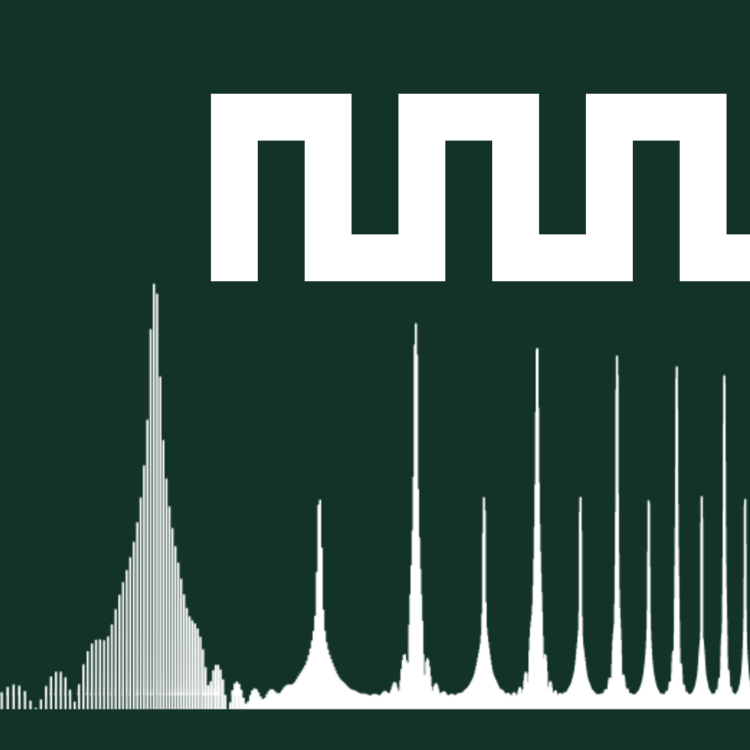
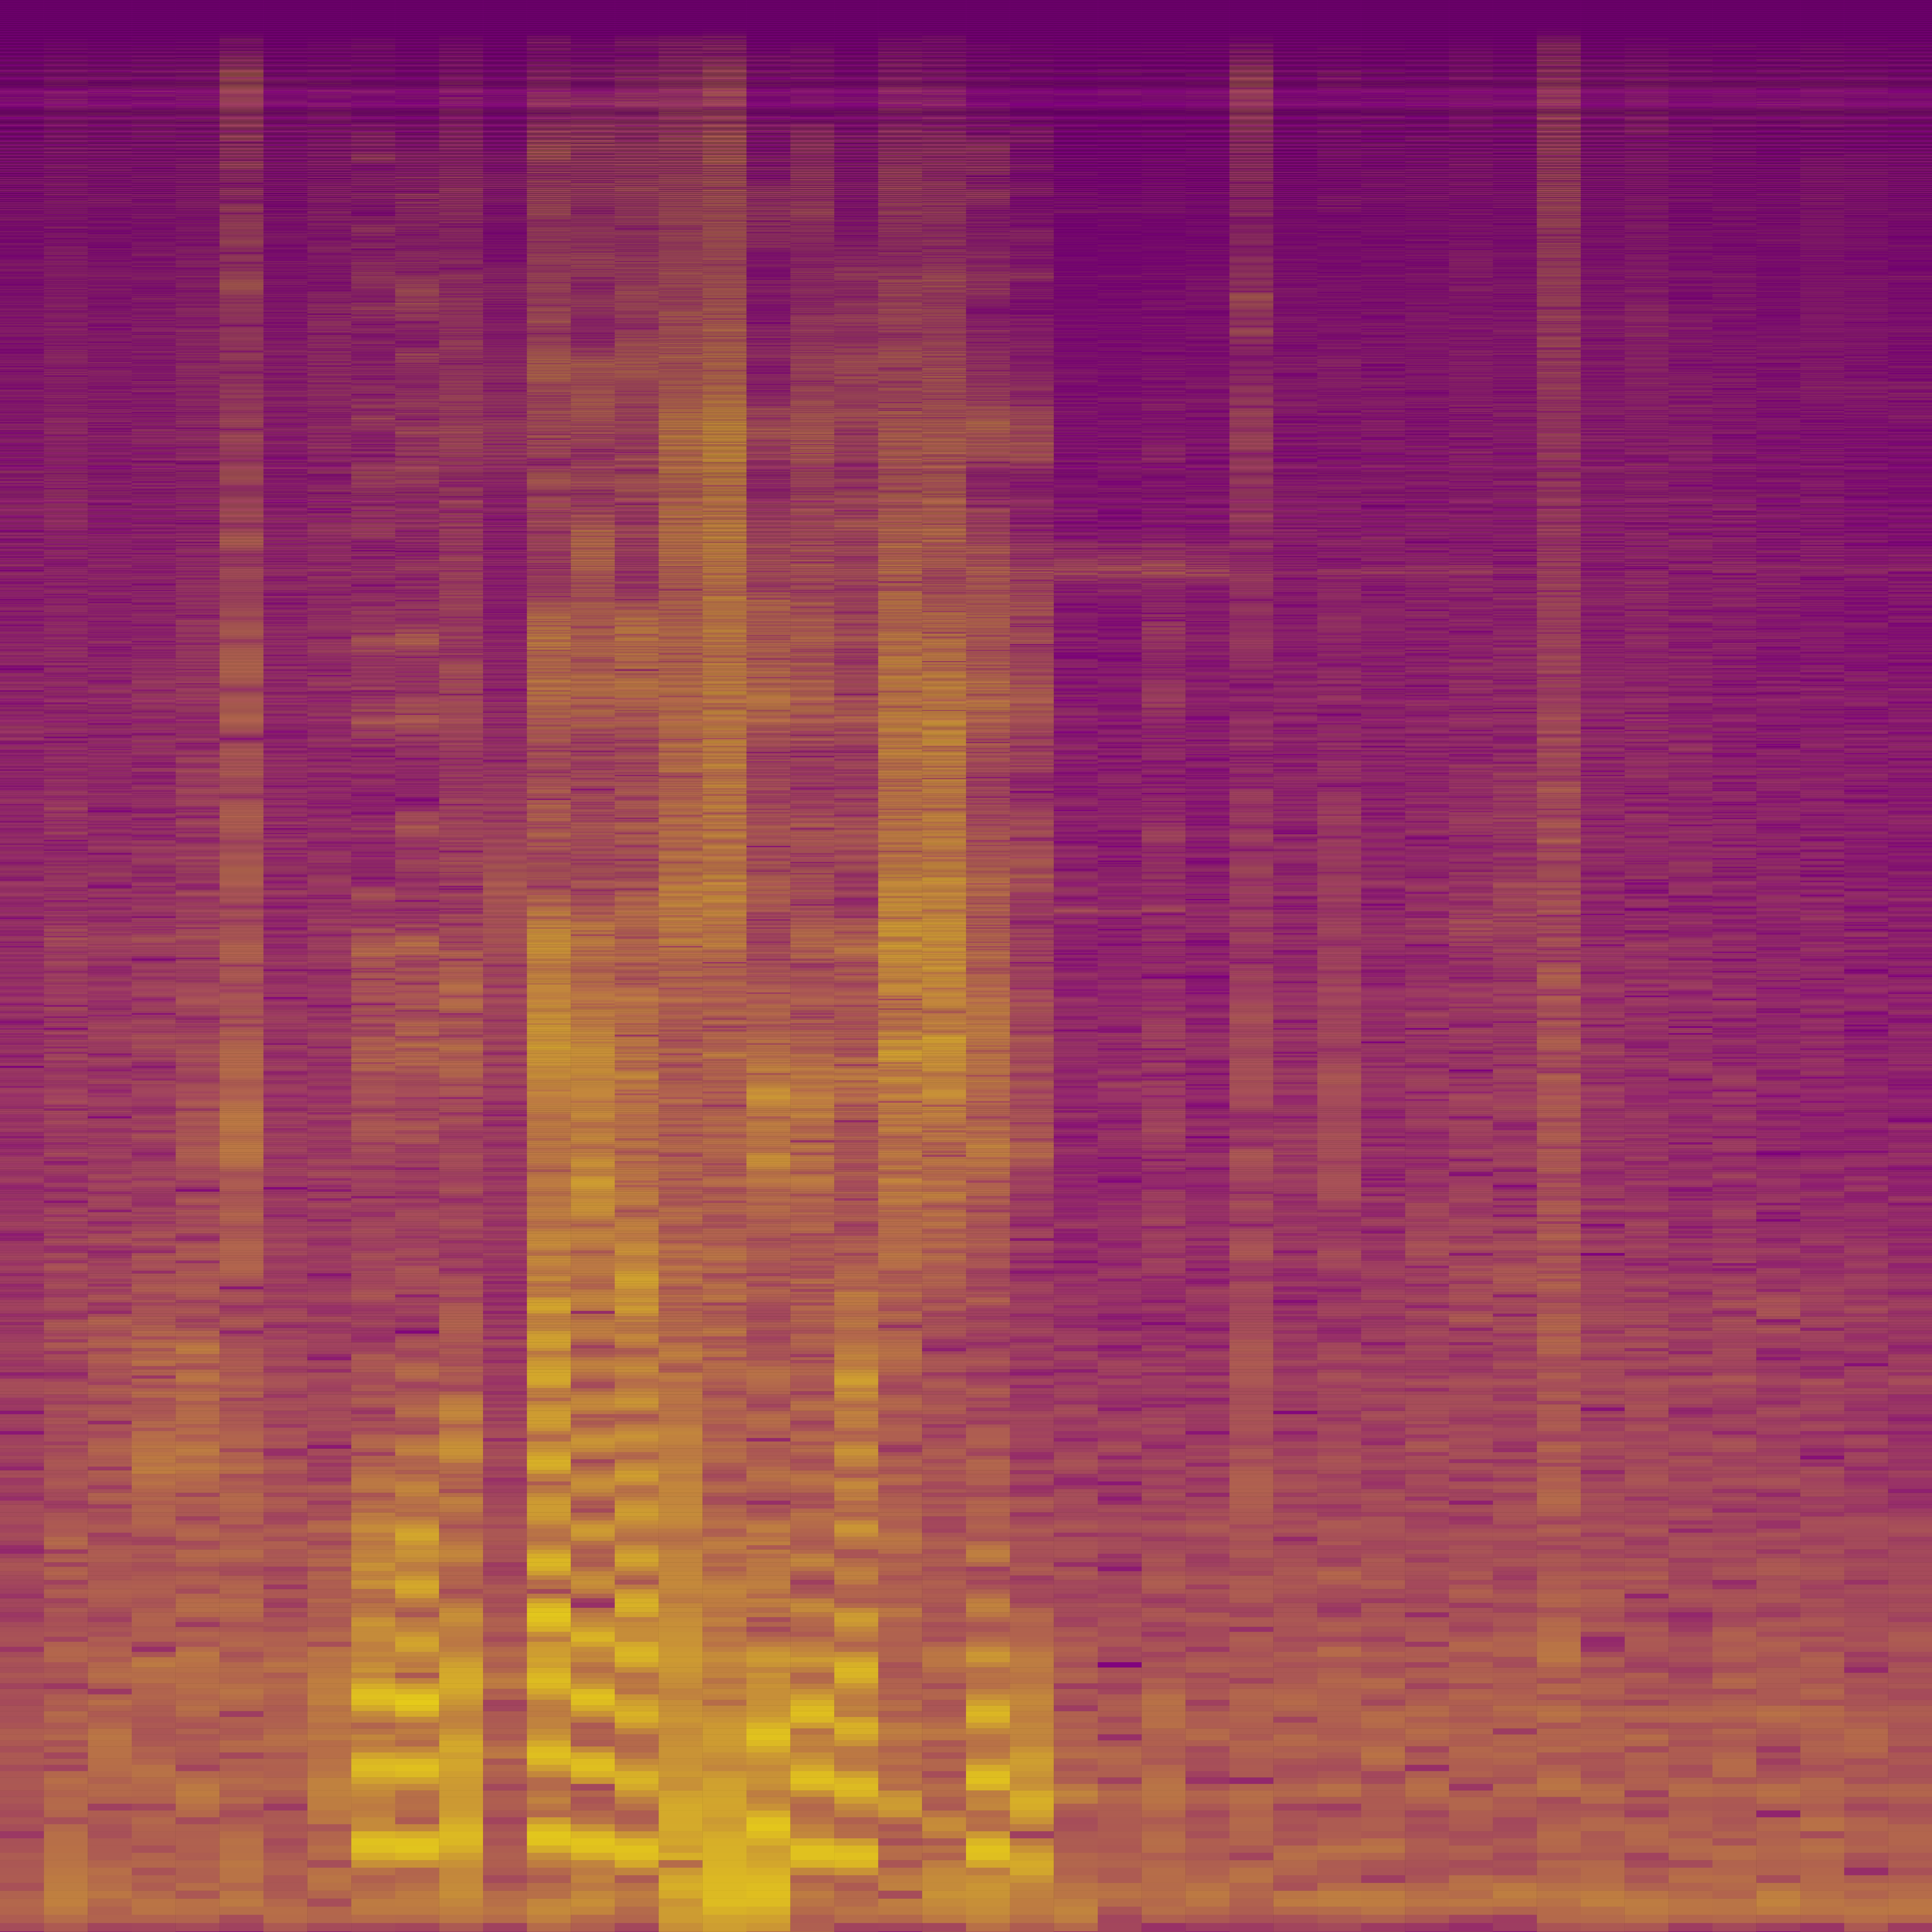
“Audio SA” is a spectrum analyzer that can capture voiceprints as TFFT images (TIme-FFT images).
The created TFFT image can be shared as a high resolution image.
In “Audio SA”, you can set the audio waveform analysis range, FFT size, power spectrum scale, window function, and drawing color type.
You can also set the lower limit of the dynamic range when drawing on the TFFT image.
“Audio SA” is a free app, but a ticket is required for recording. Tickets can be earned by watching ads.
(If you purchase “Remove ads” with in-app purchase, you can record unlimitedly without a ticket.)
For the time being, try making a voiceprint with “Audio SA”
[1] Download “Audio SA” from the App Store and start it.

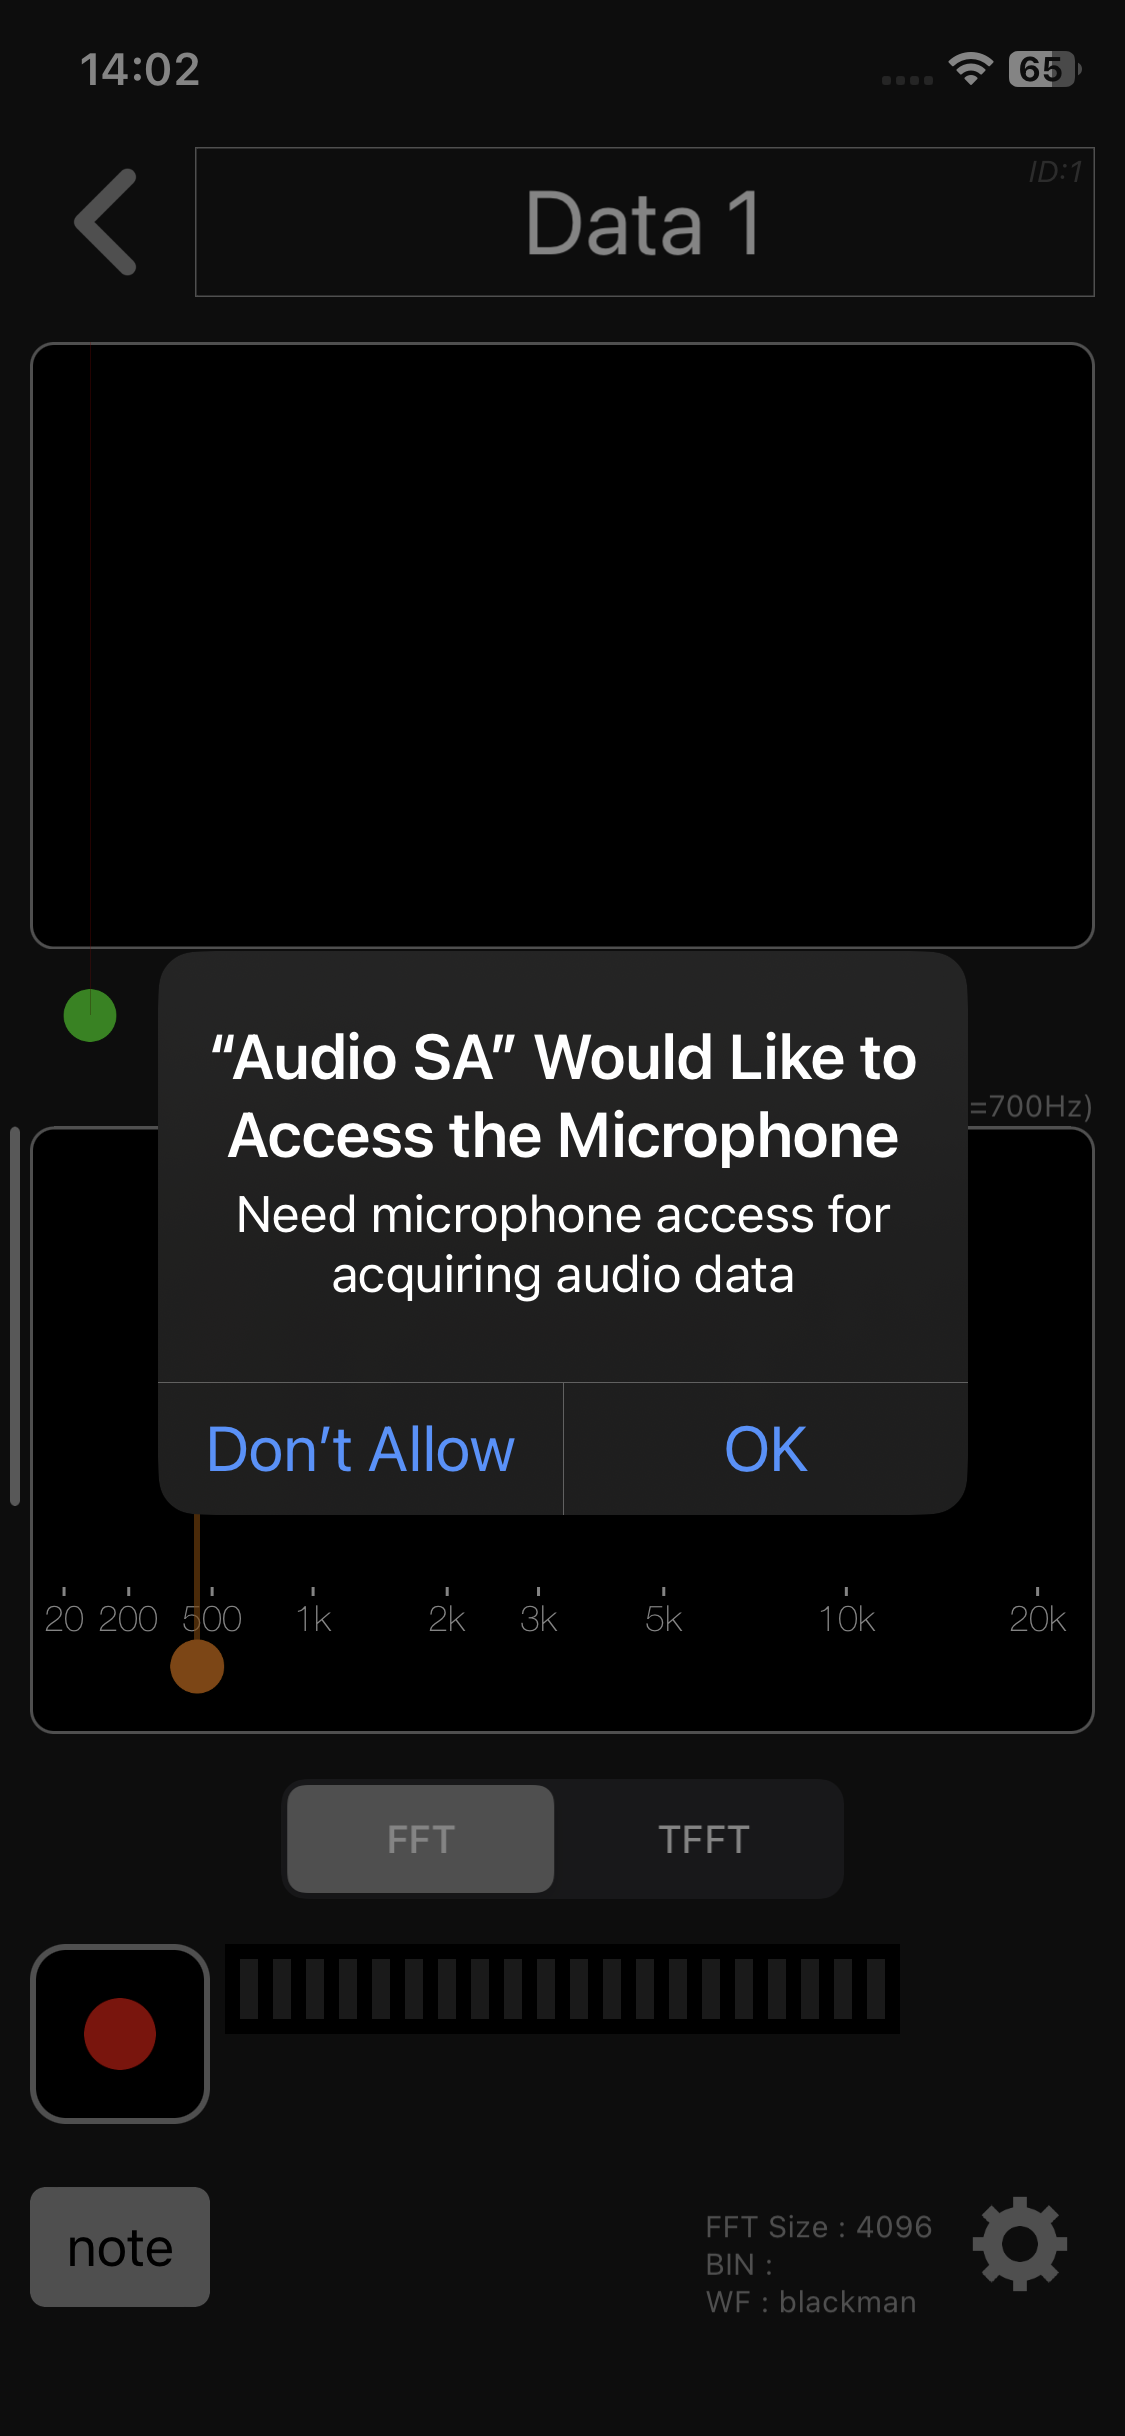
[2] Tap the “+” button on the bottom left to prepare for recording. Tap OK when a pop-up appears requesting access to your microphone.

[3] Tap the record button (red circle) on the bottom left.
[4] Speak. (For now, just say your name.)

[5] Tap the stop recording button (red square) on the bottom left to stop recording.
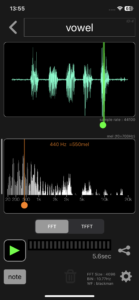
[6] Select “TFFT” from the FFT/TFFT options.

[7] Tap the “Run TFFT” button to display the TFFT image. This TFFT image is shareable.《If the recording time is short, TFFT will be automatically executed, so there is no need to tap the “Run TFFT” button》
* TFFT images vary depending on the settings.
* TFFT images can be shared with the share button on the bottom right.
How to use “Audio SA”
Edit Folder
Folders can be edited on the folder list screen. However, only when editing the folder name, do so on the startup screen.

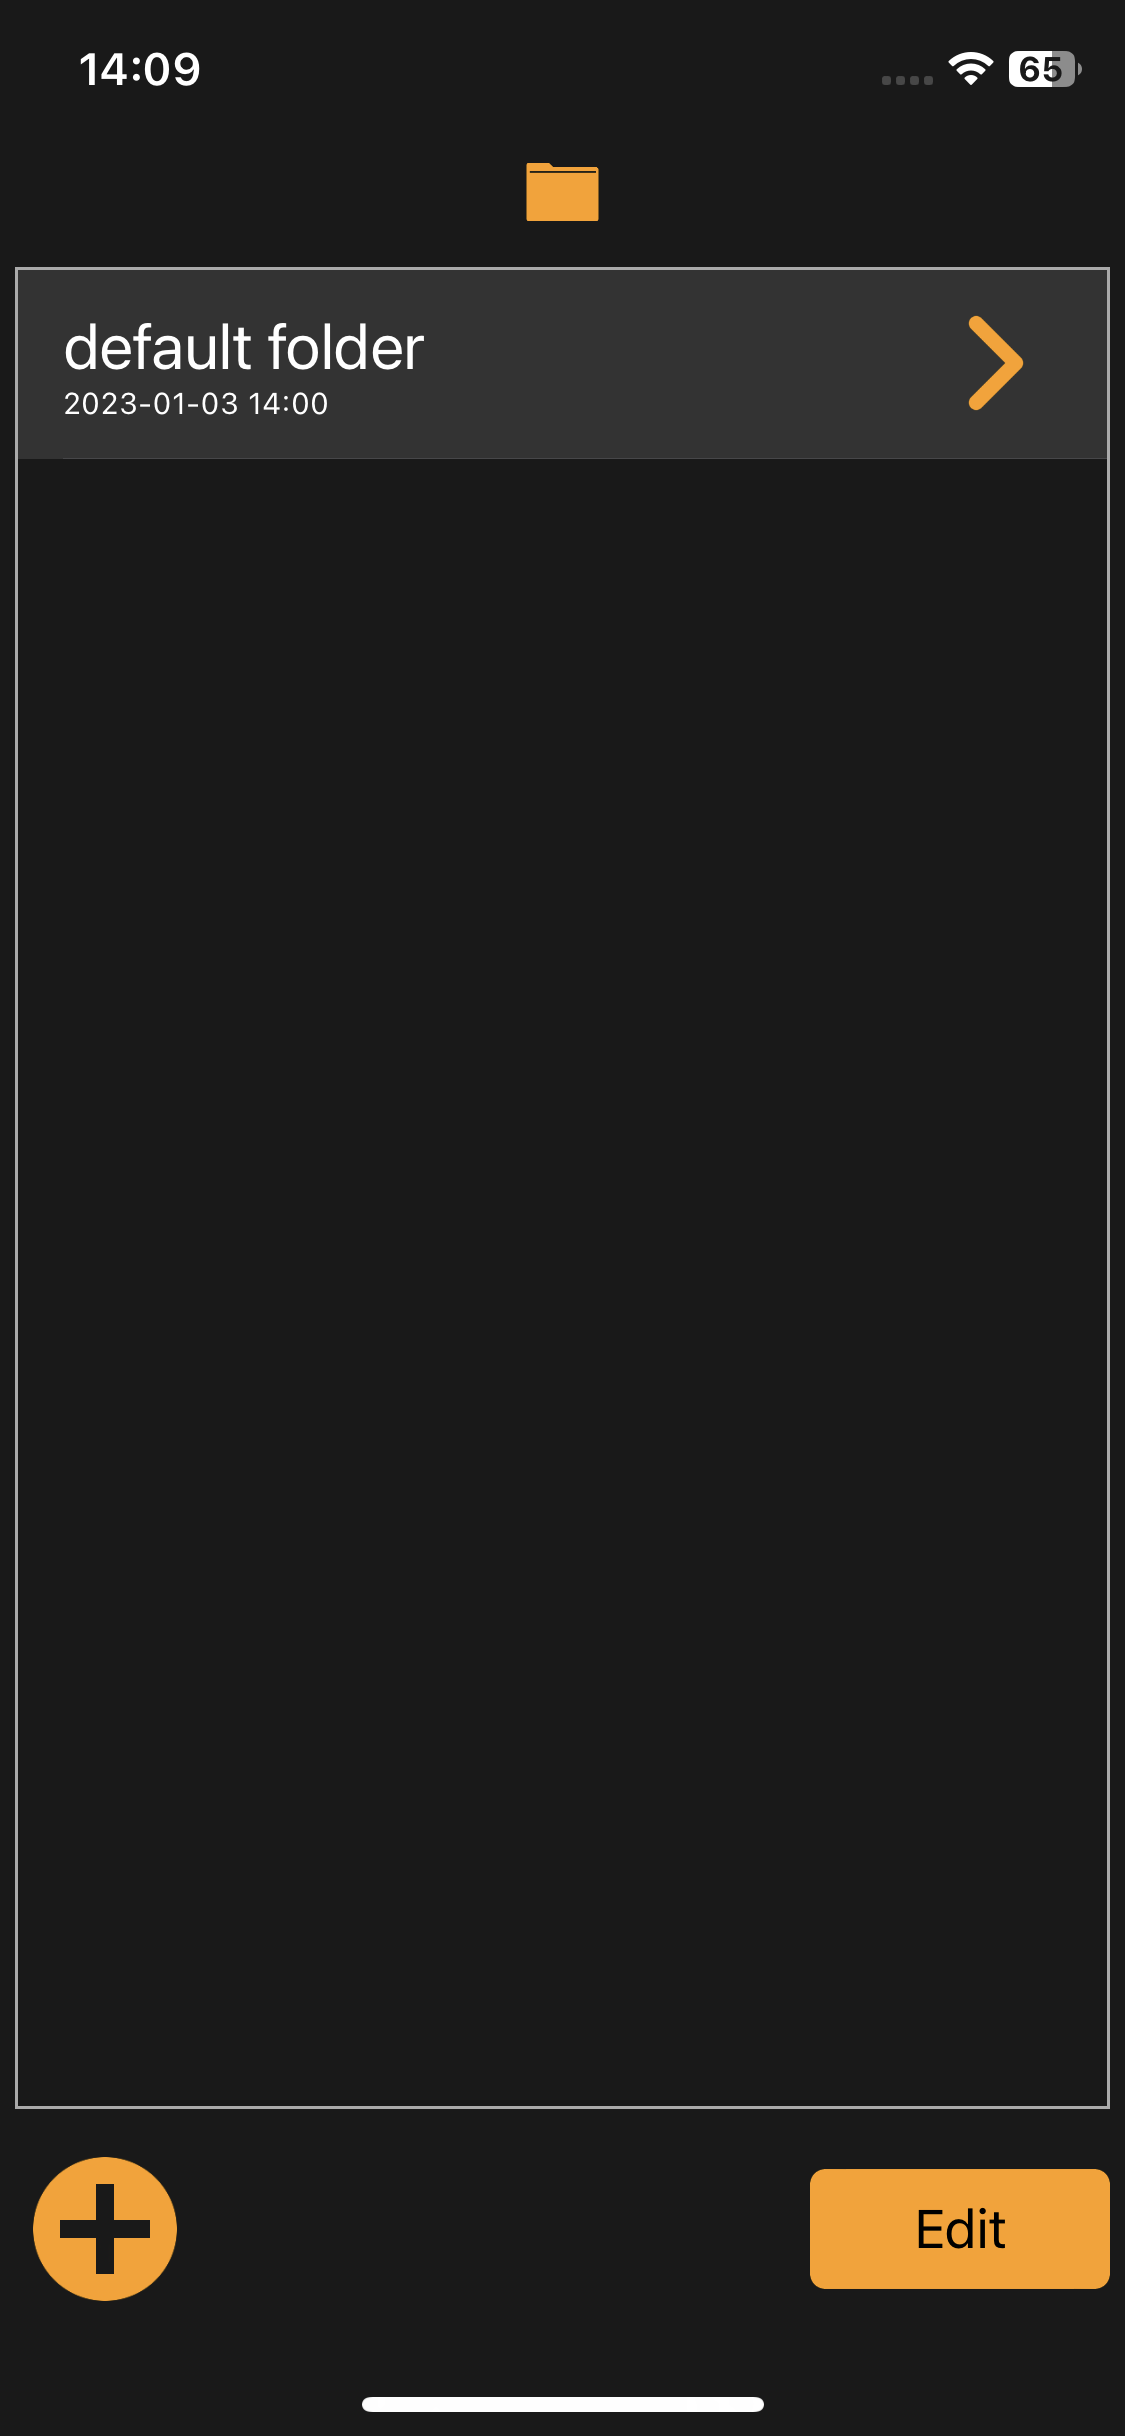
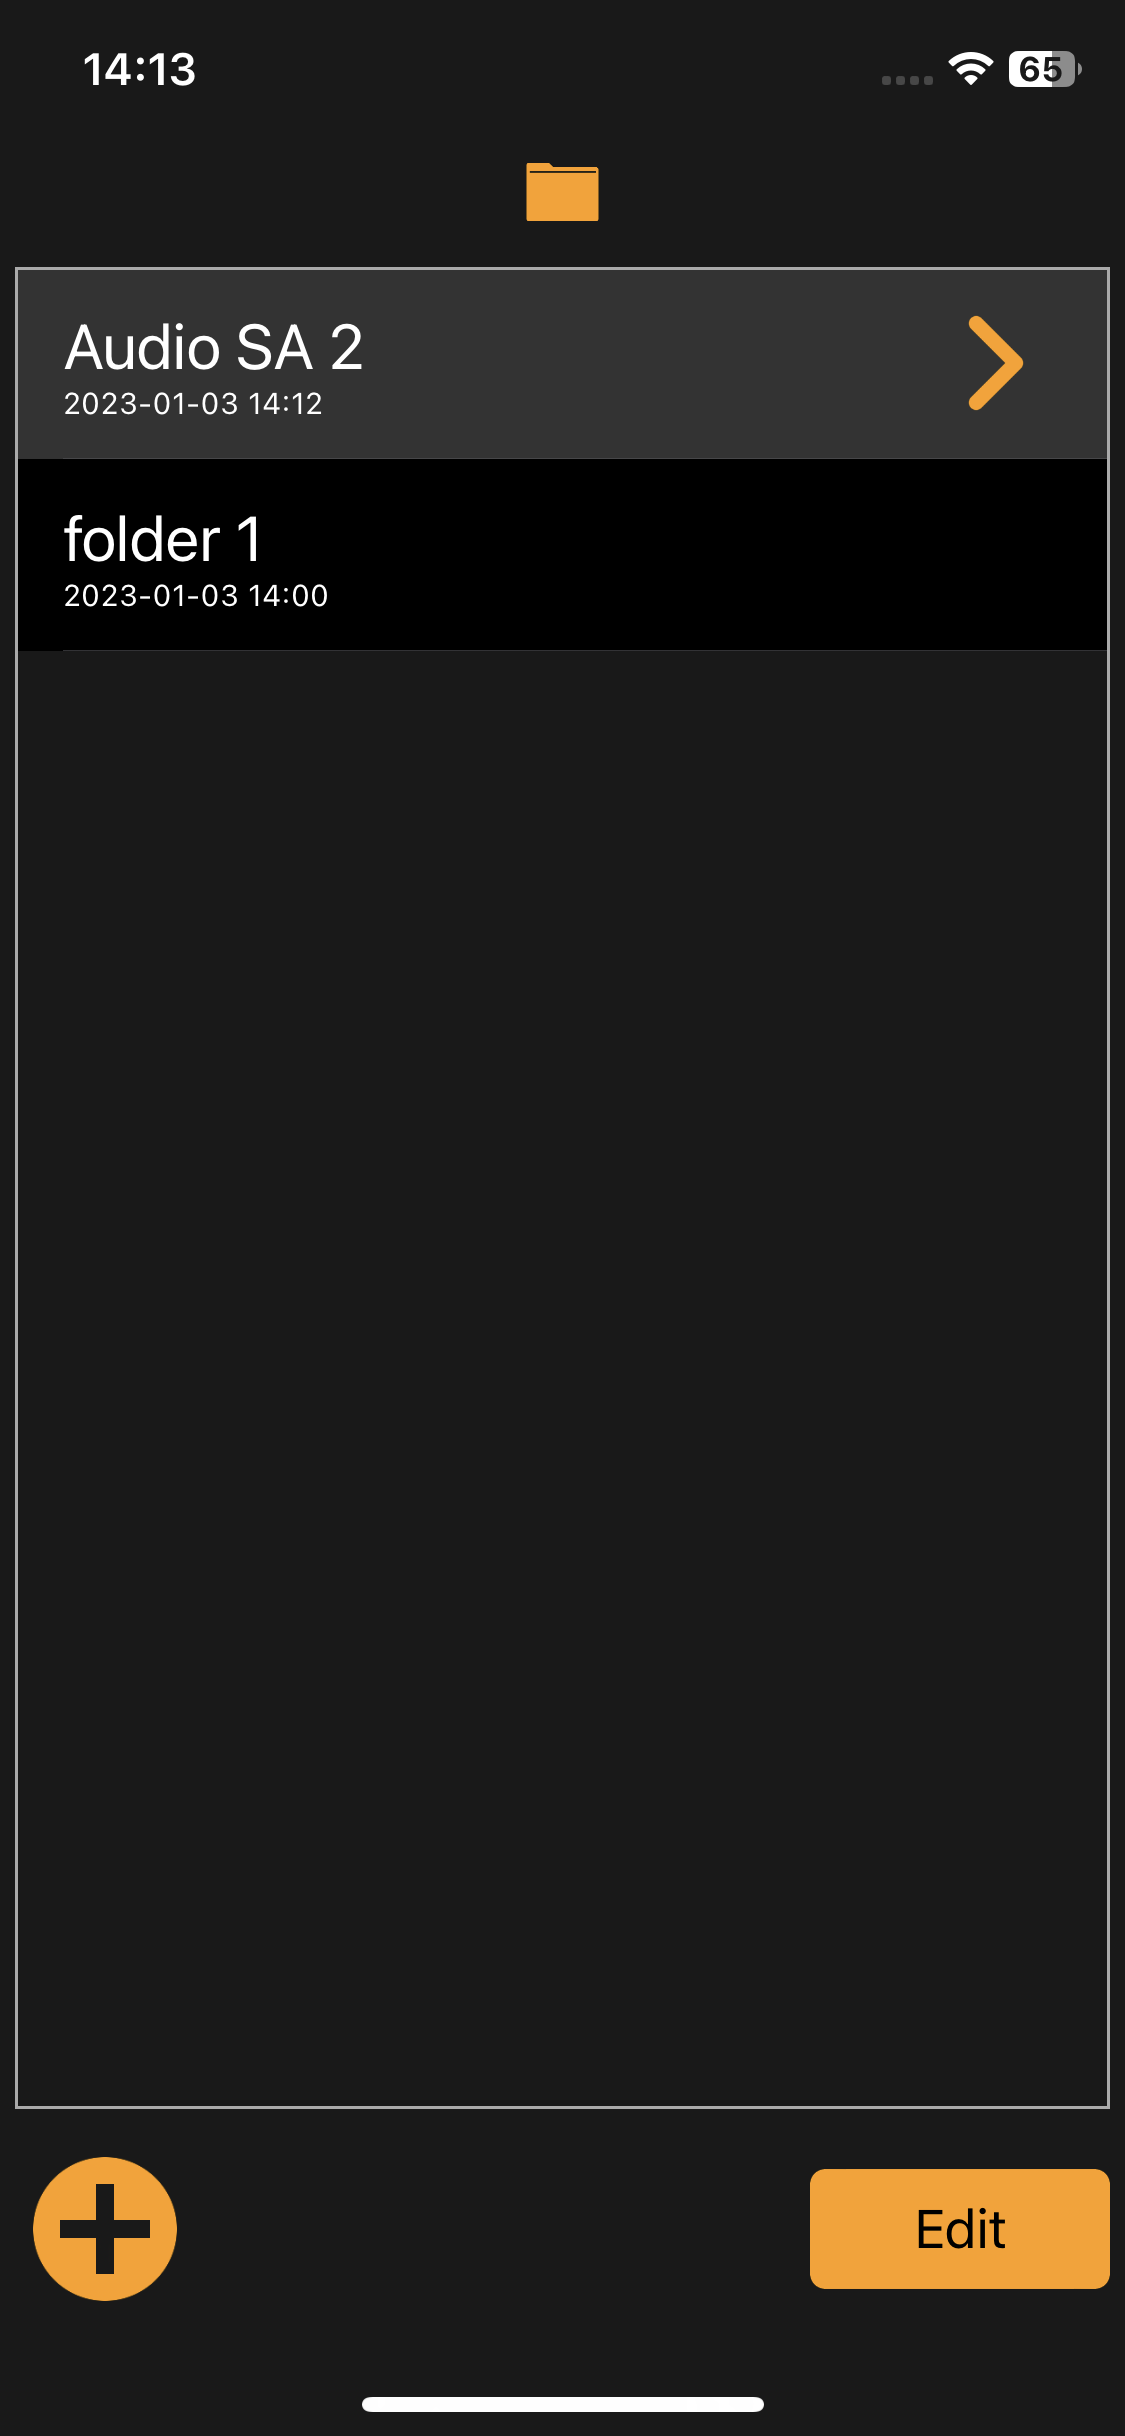
The folder list screen appears when you tap the folder button on the upper left of the startup screen.
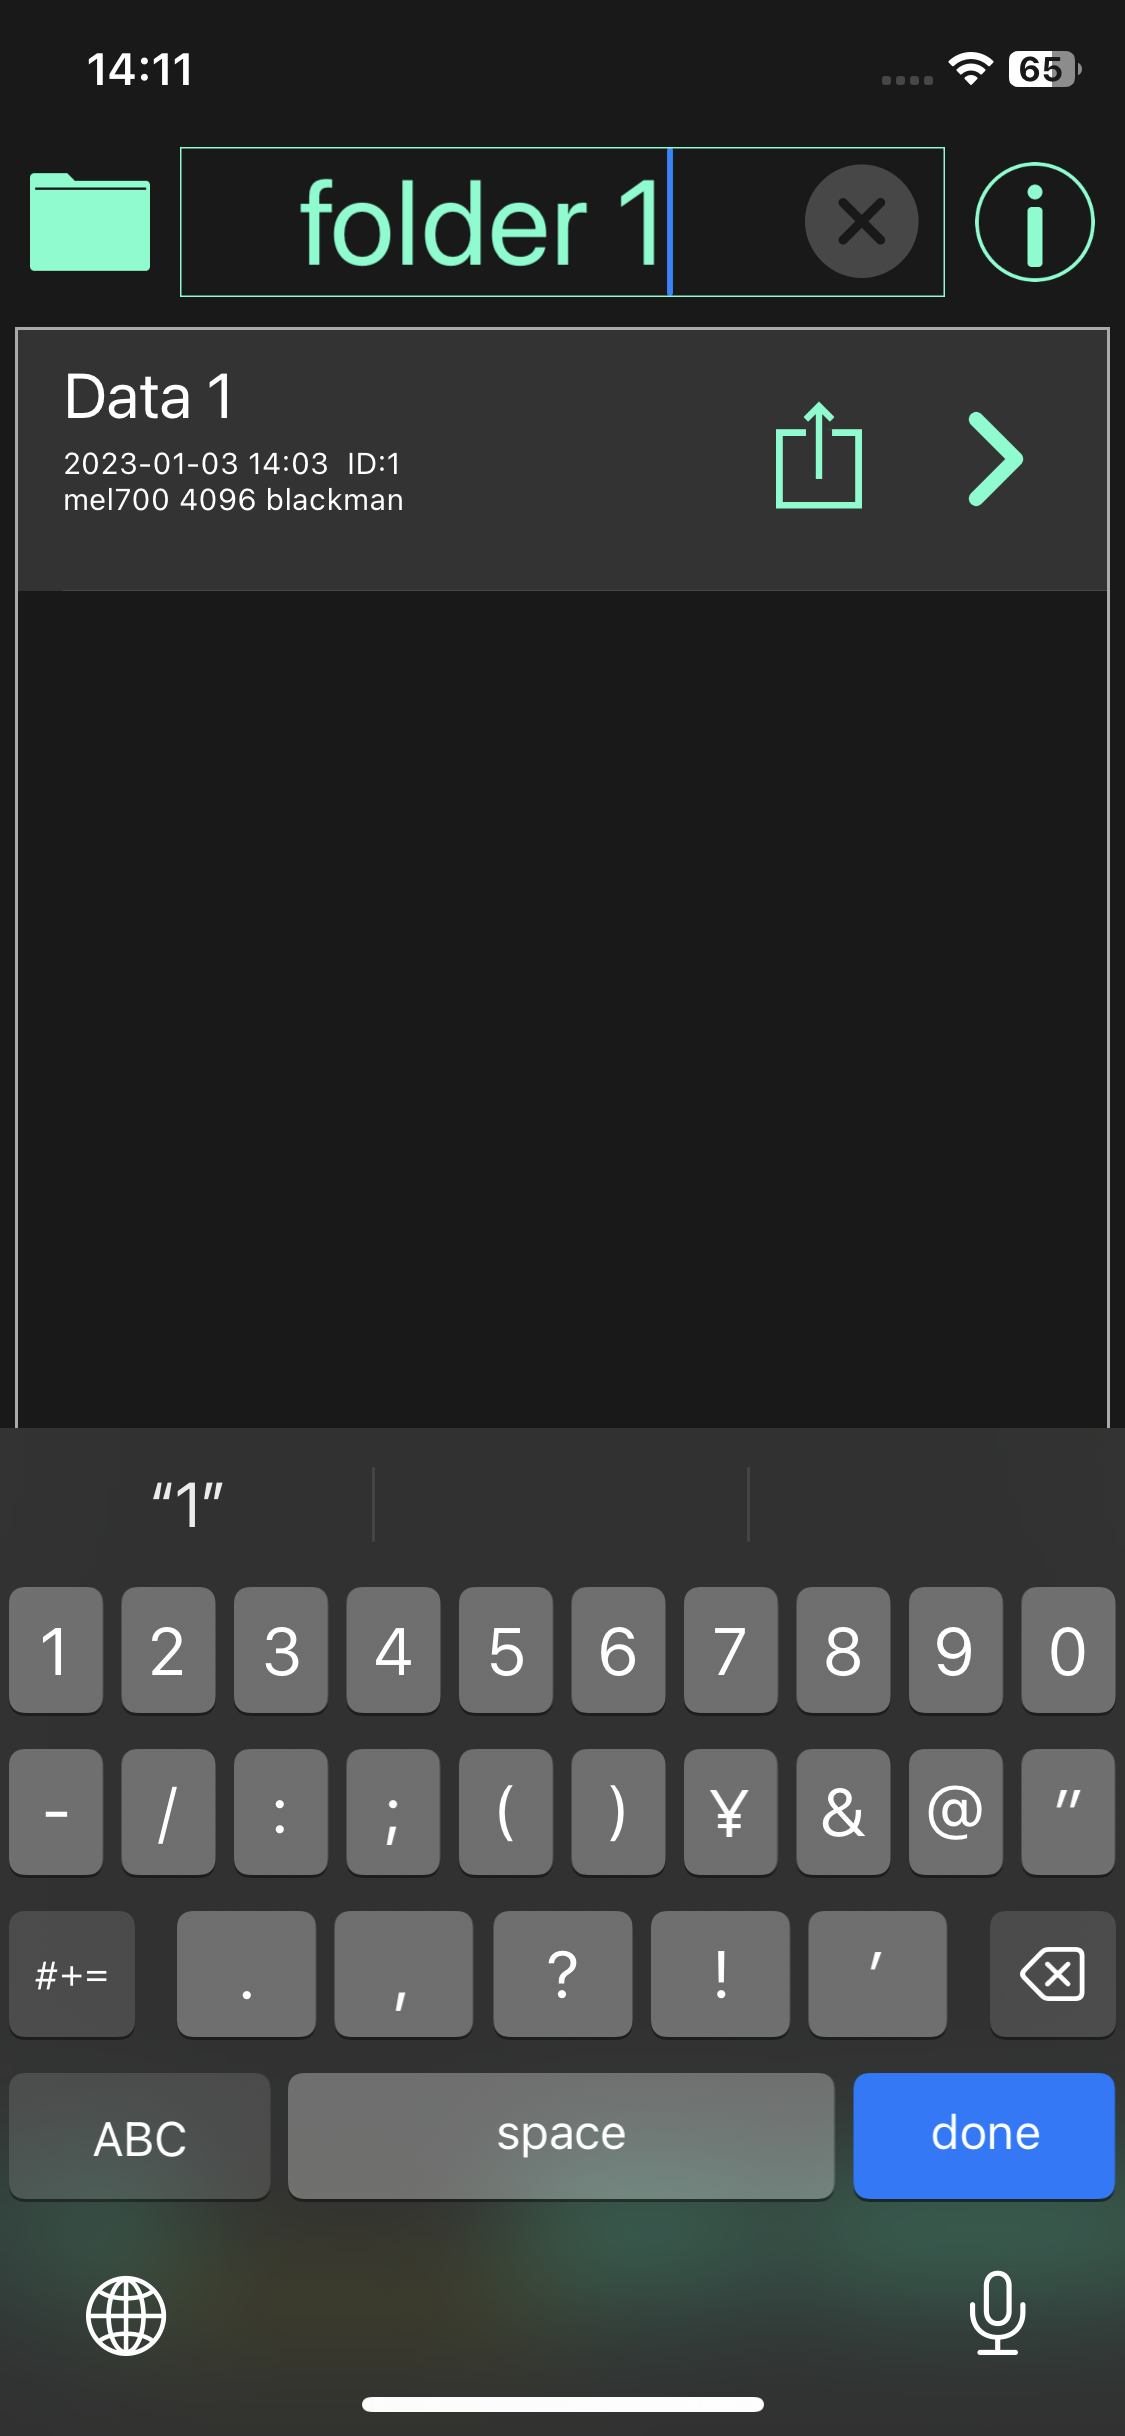
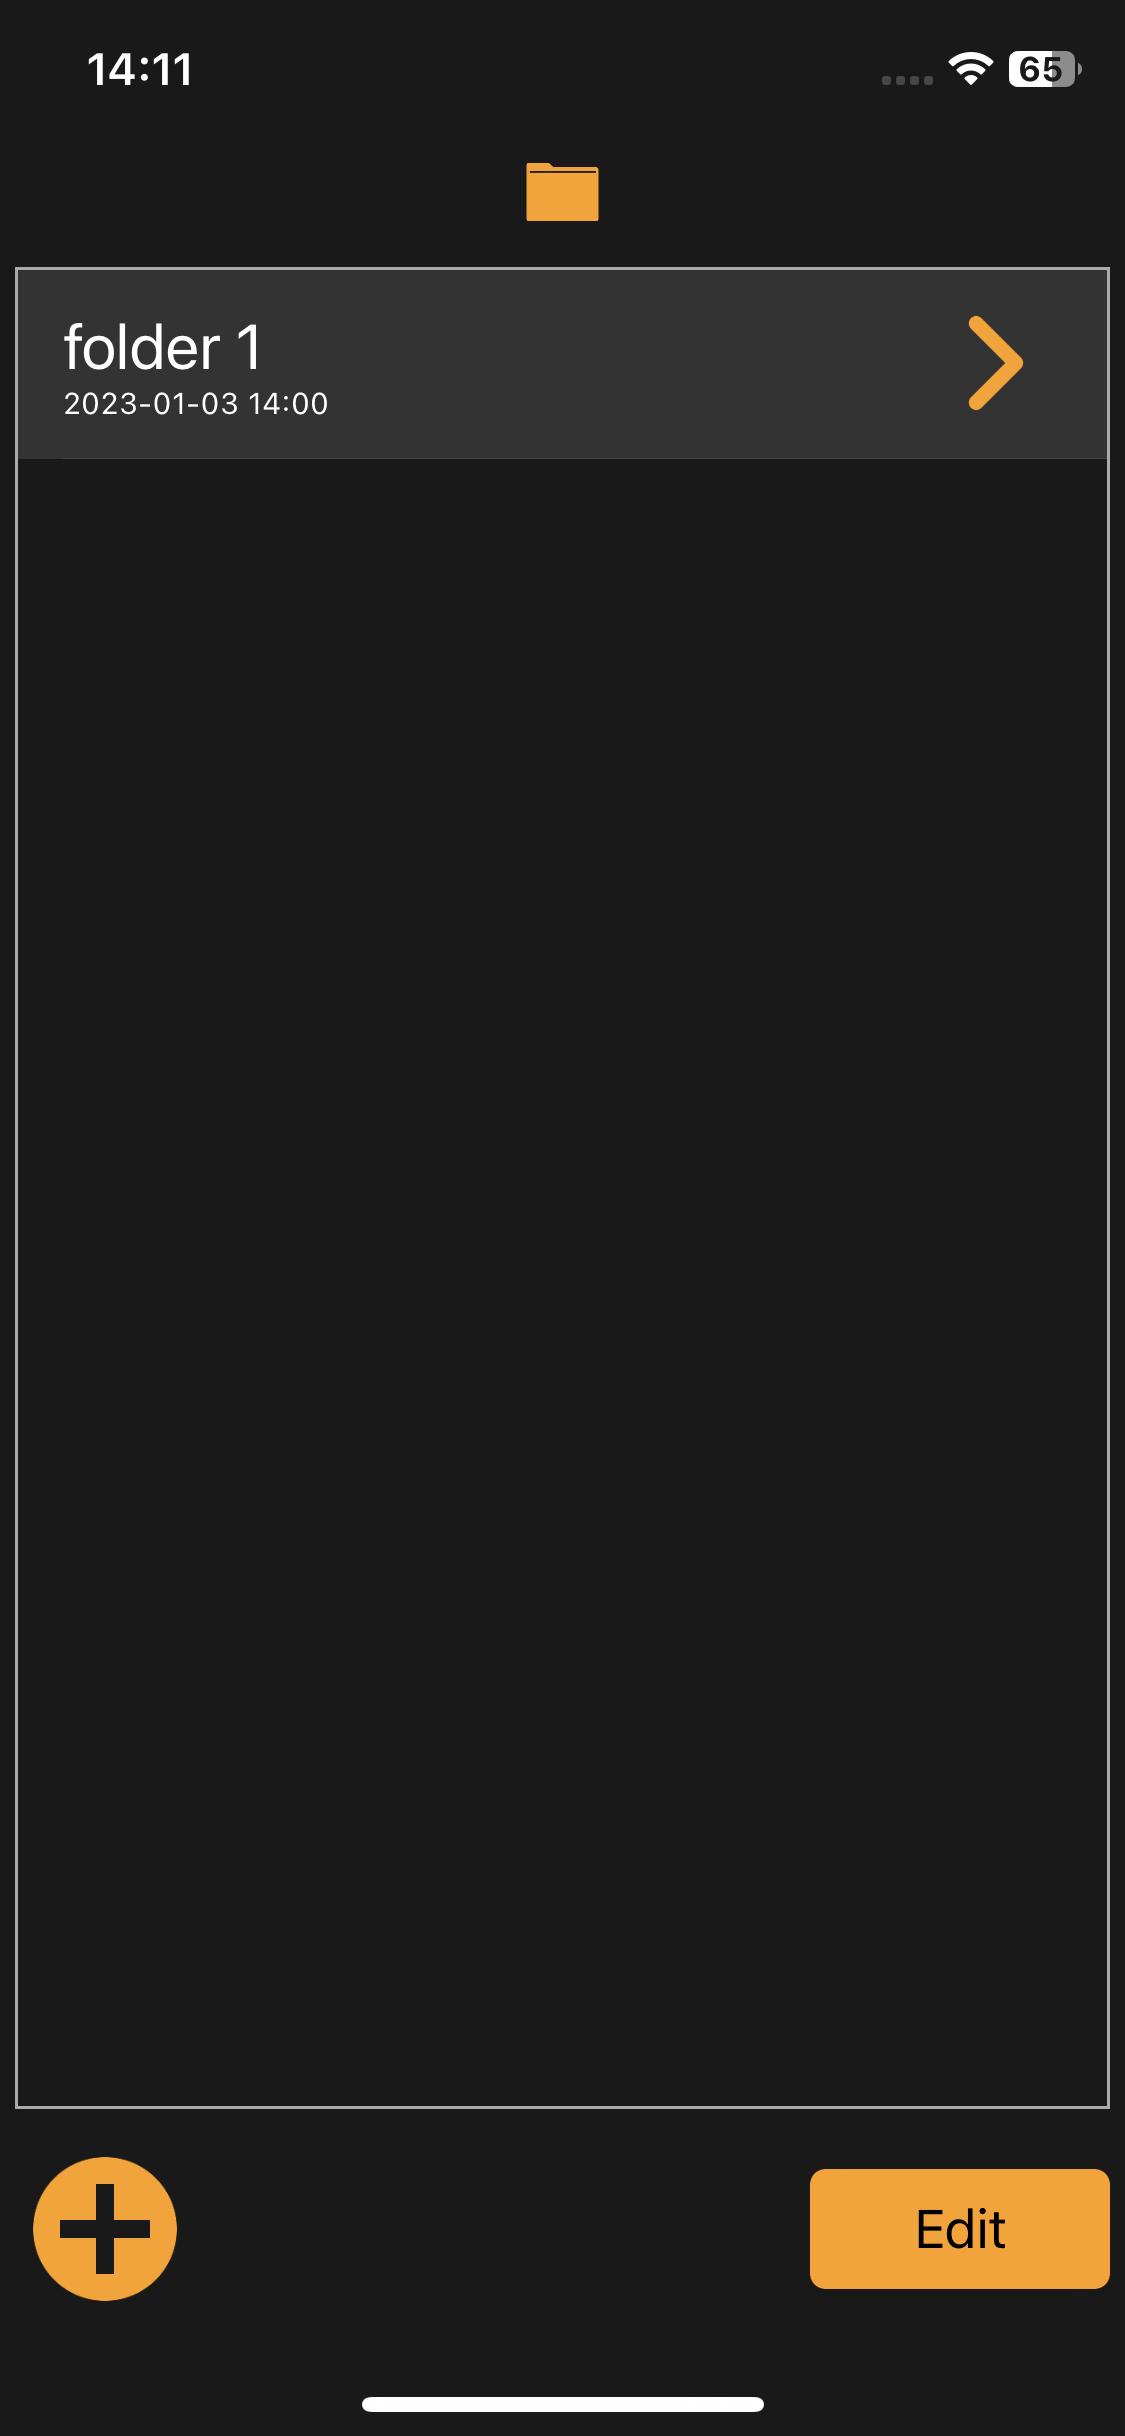
Edit folder name
The startup screen shows the folder name at the top. You can edit the folder name by tapping the folder name. (folder name can be blank)
Add Folder
You can add a folder by tapping the plus button at the bottom left of the folder list screen. After adding a folder, the added folder will be opened.
Change the order of folders
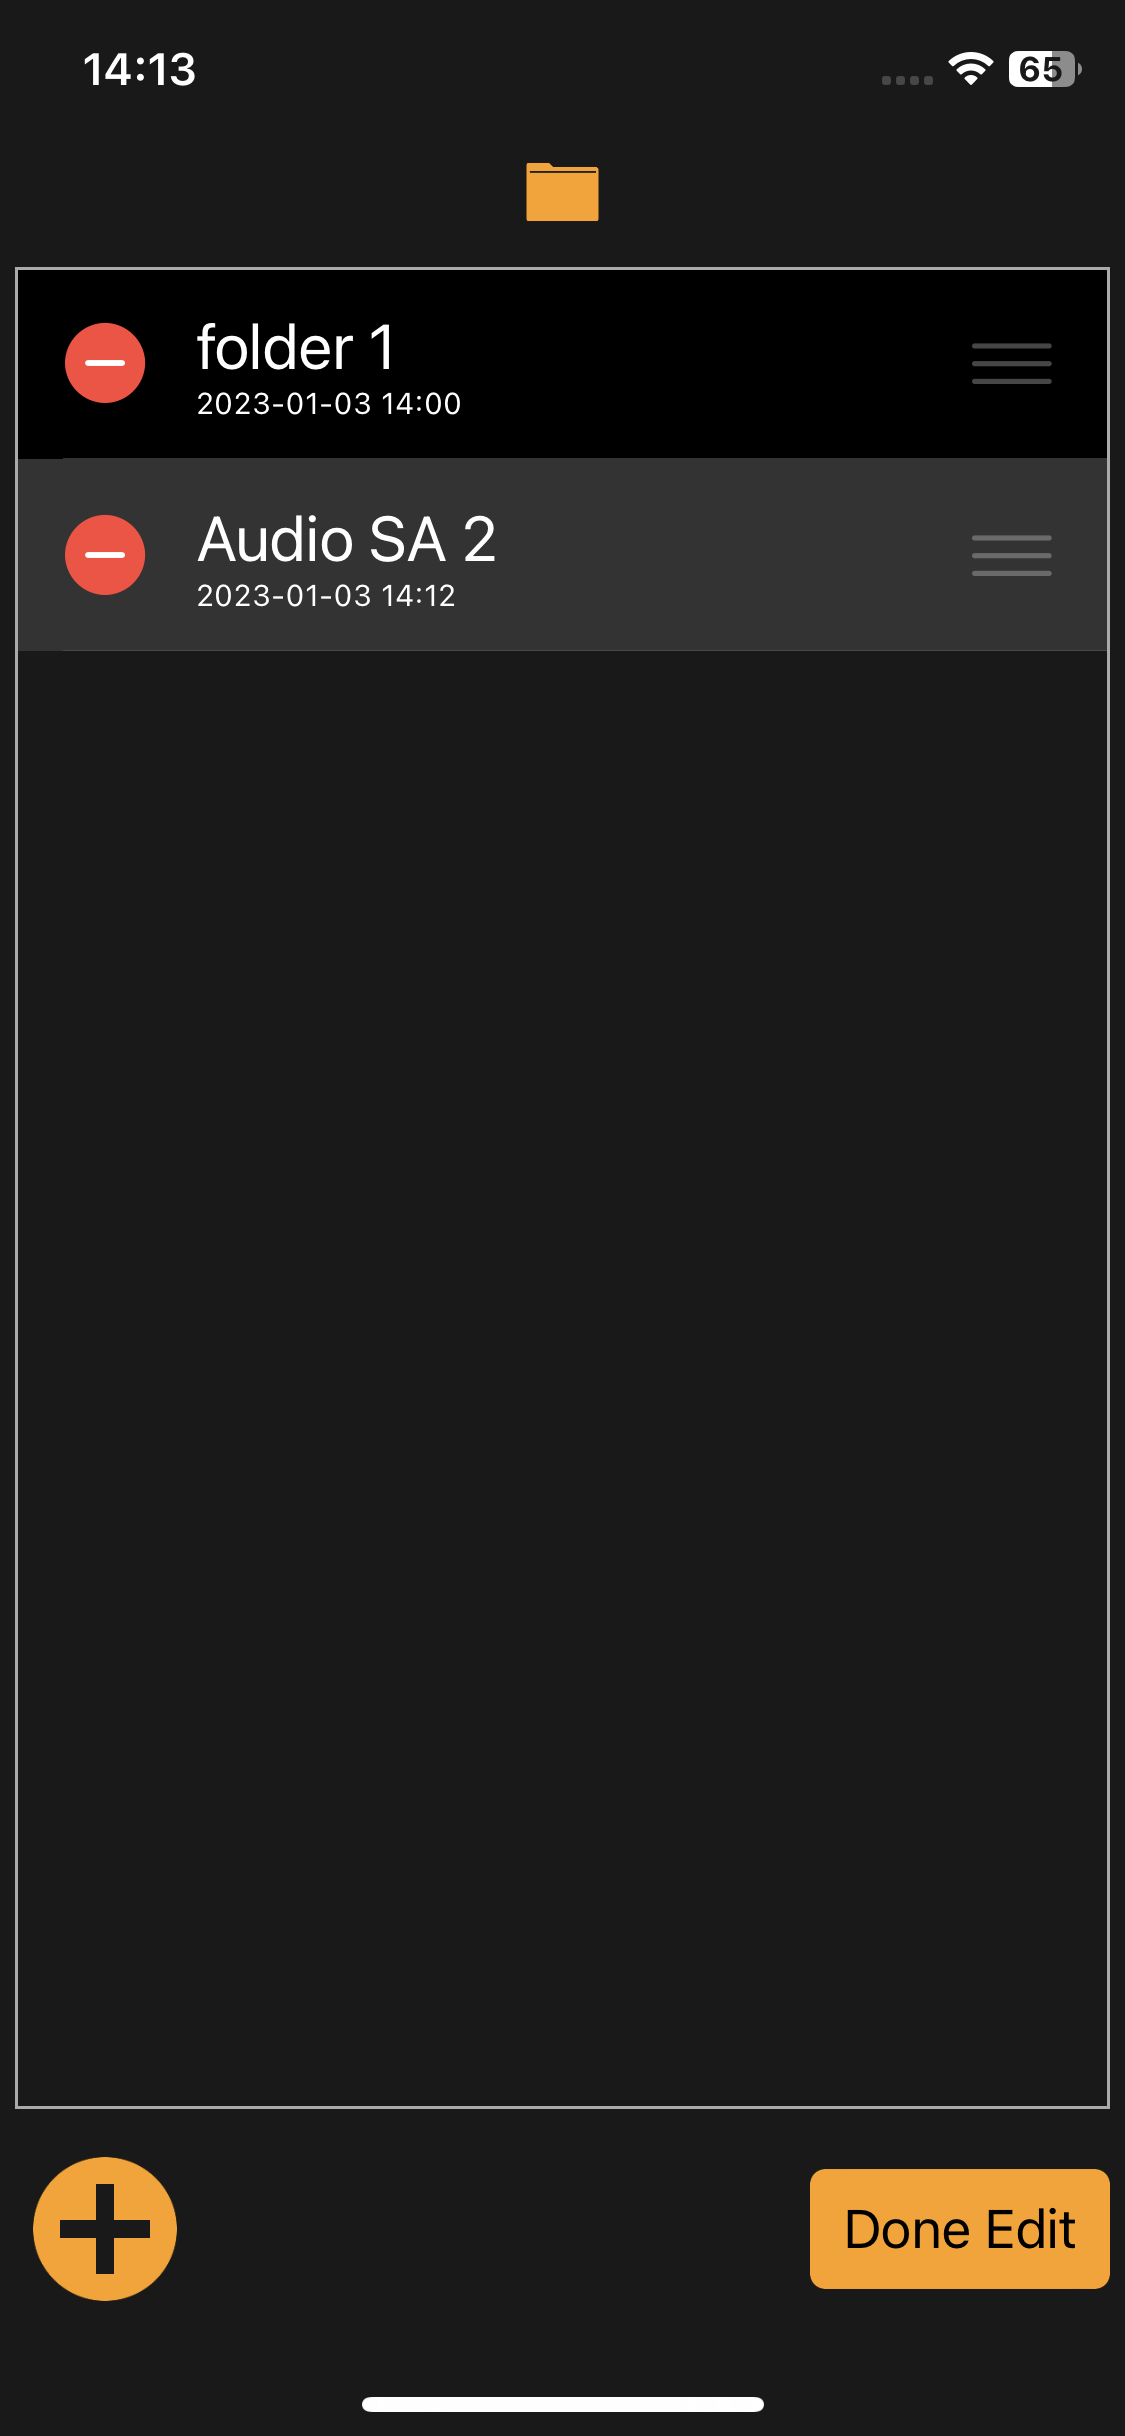
To change the folder order, tap the “Edit” button at the bottom right of the folder list screen.
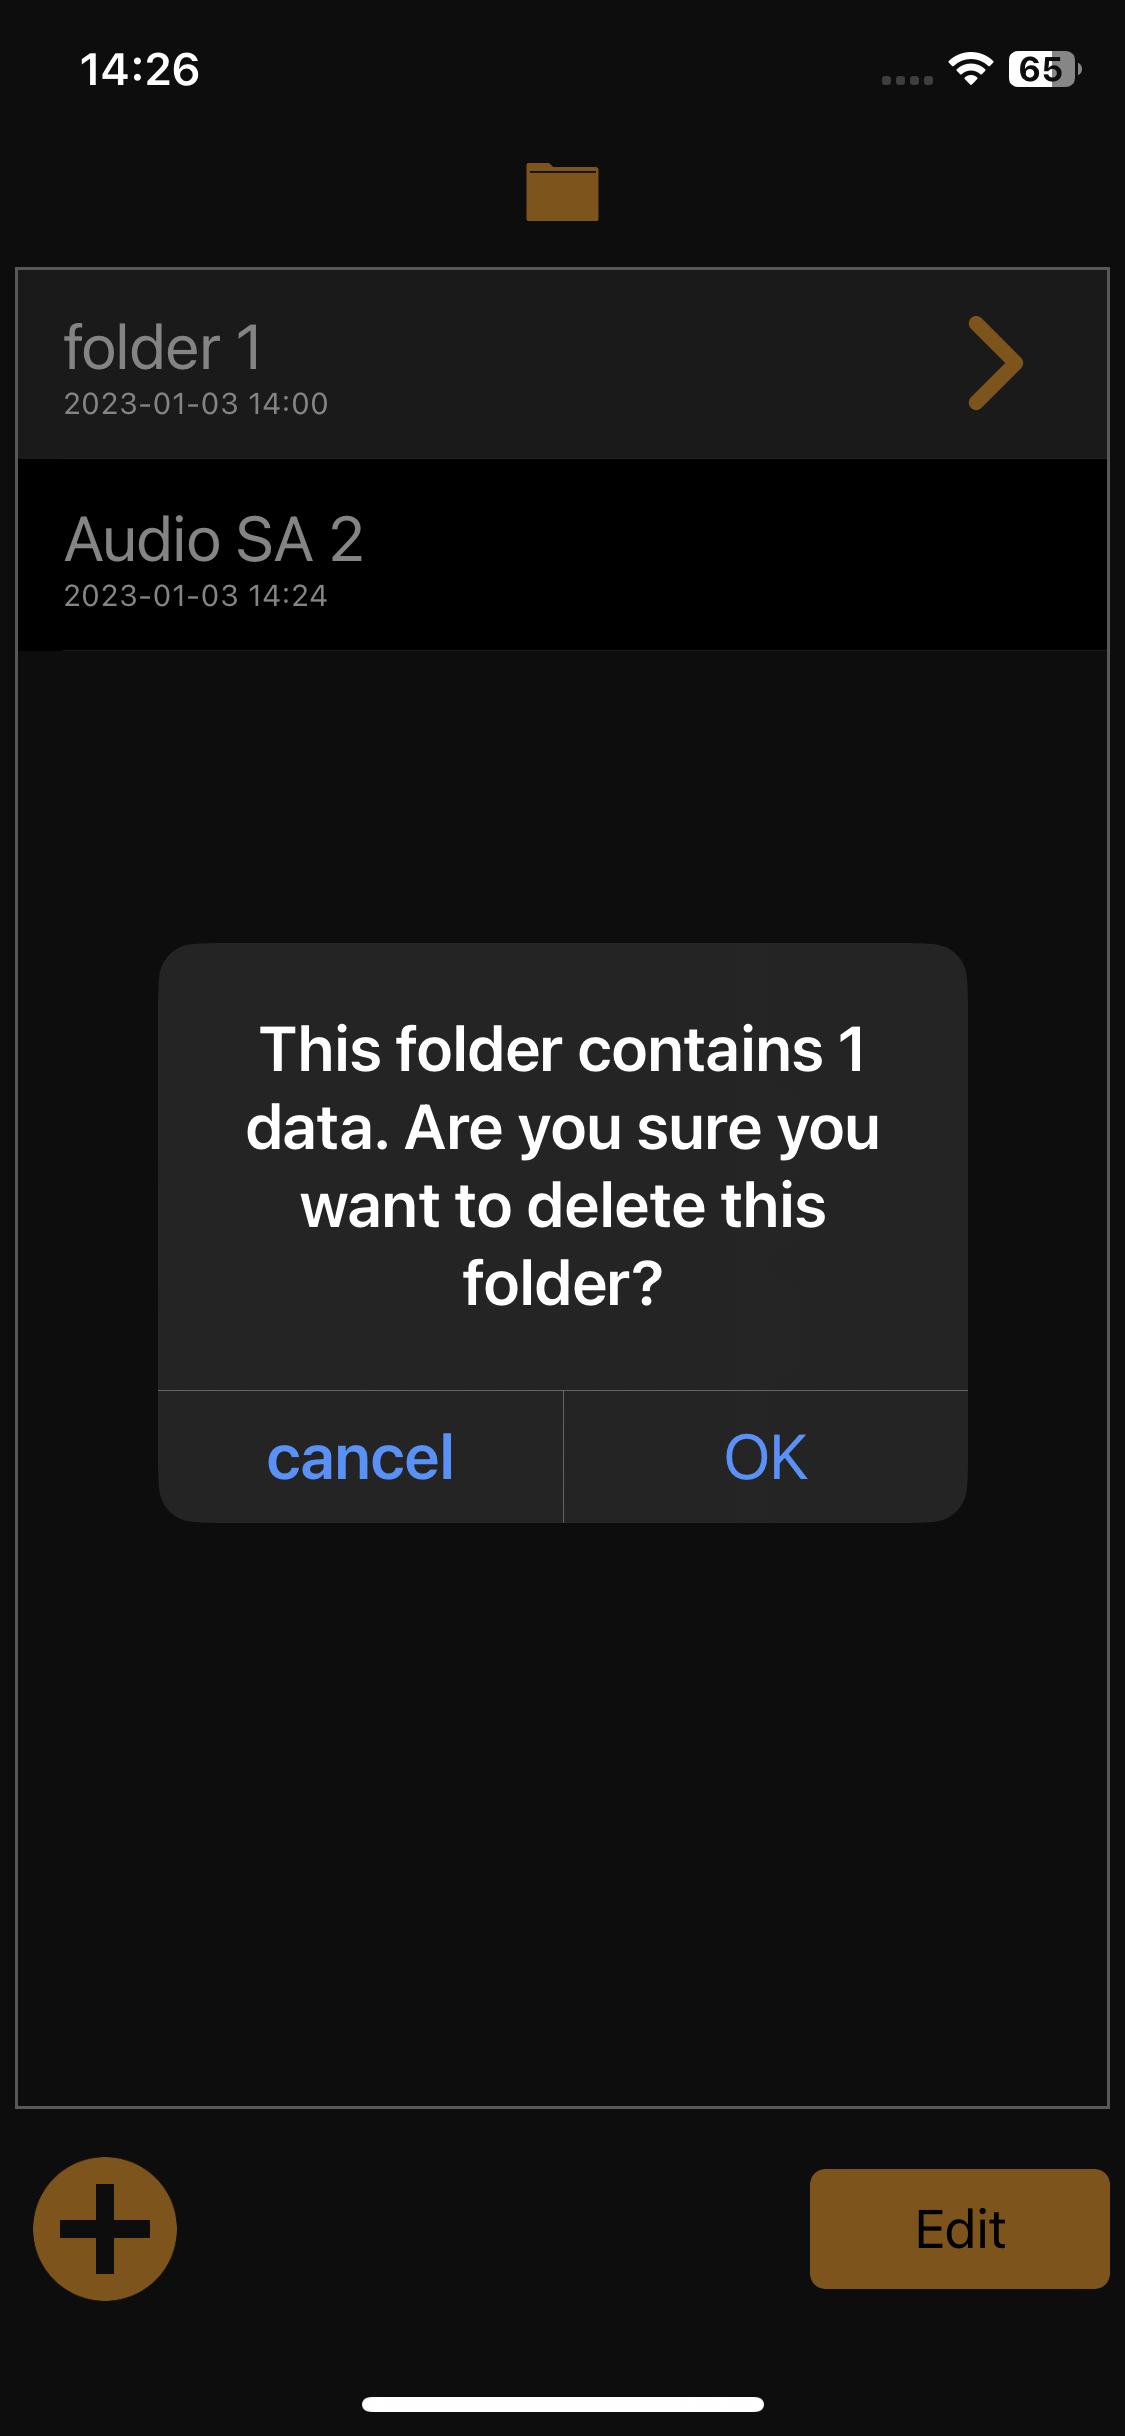
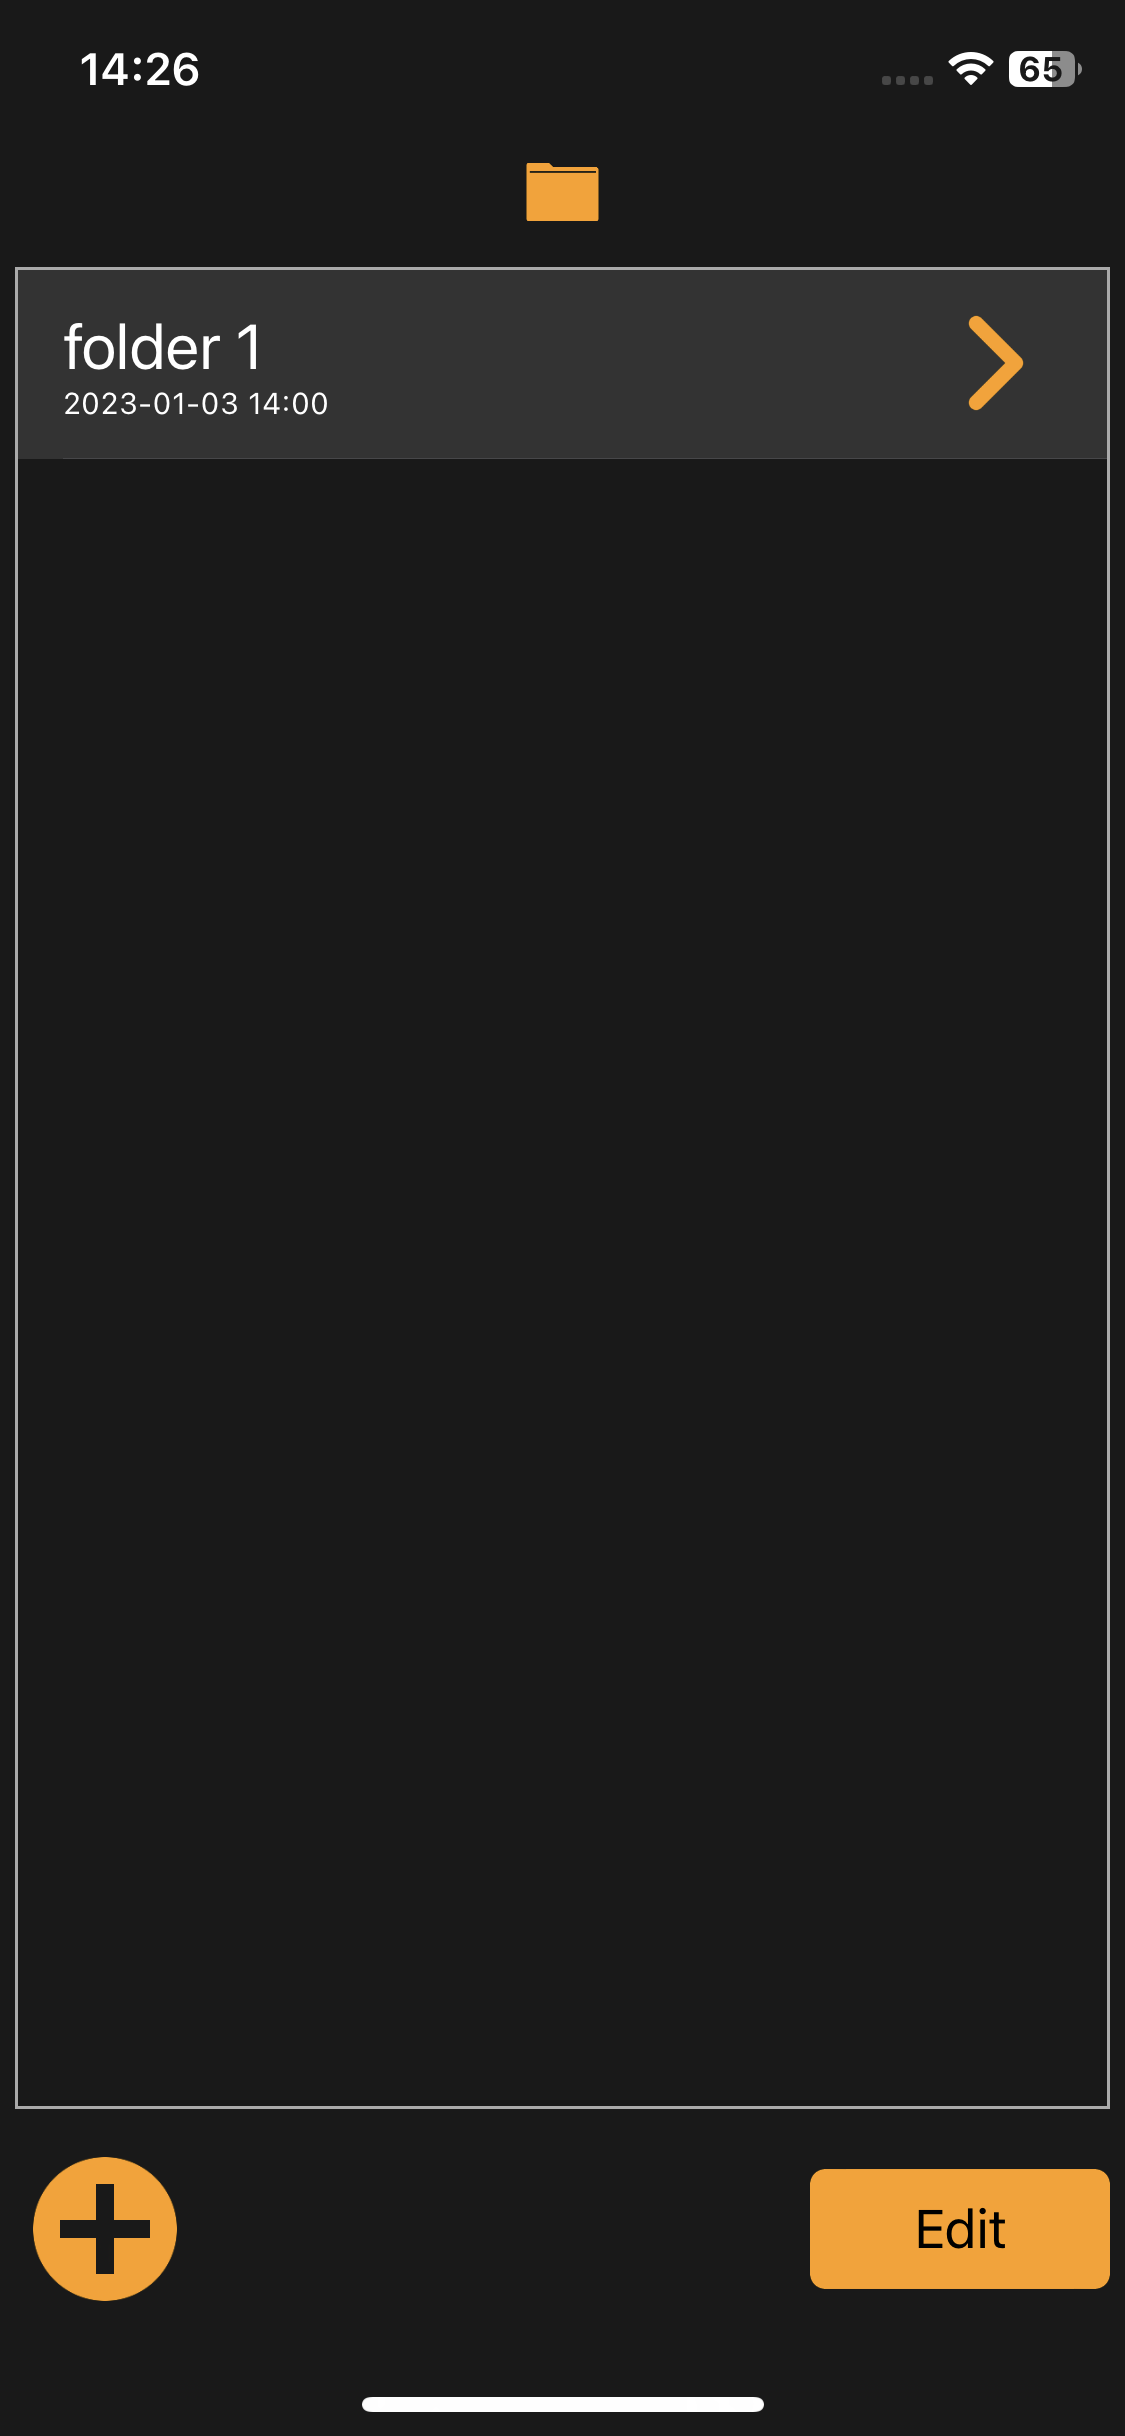
Delete folder
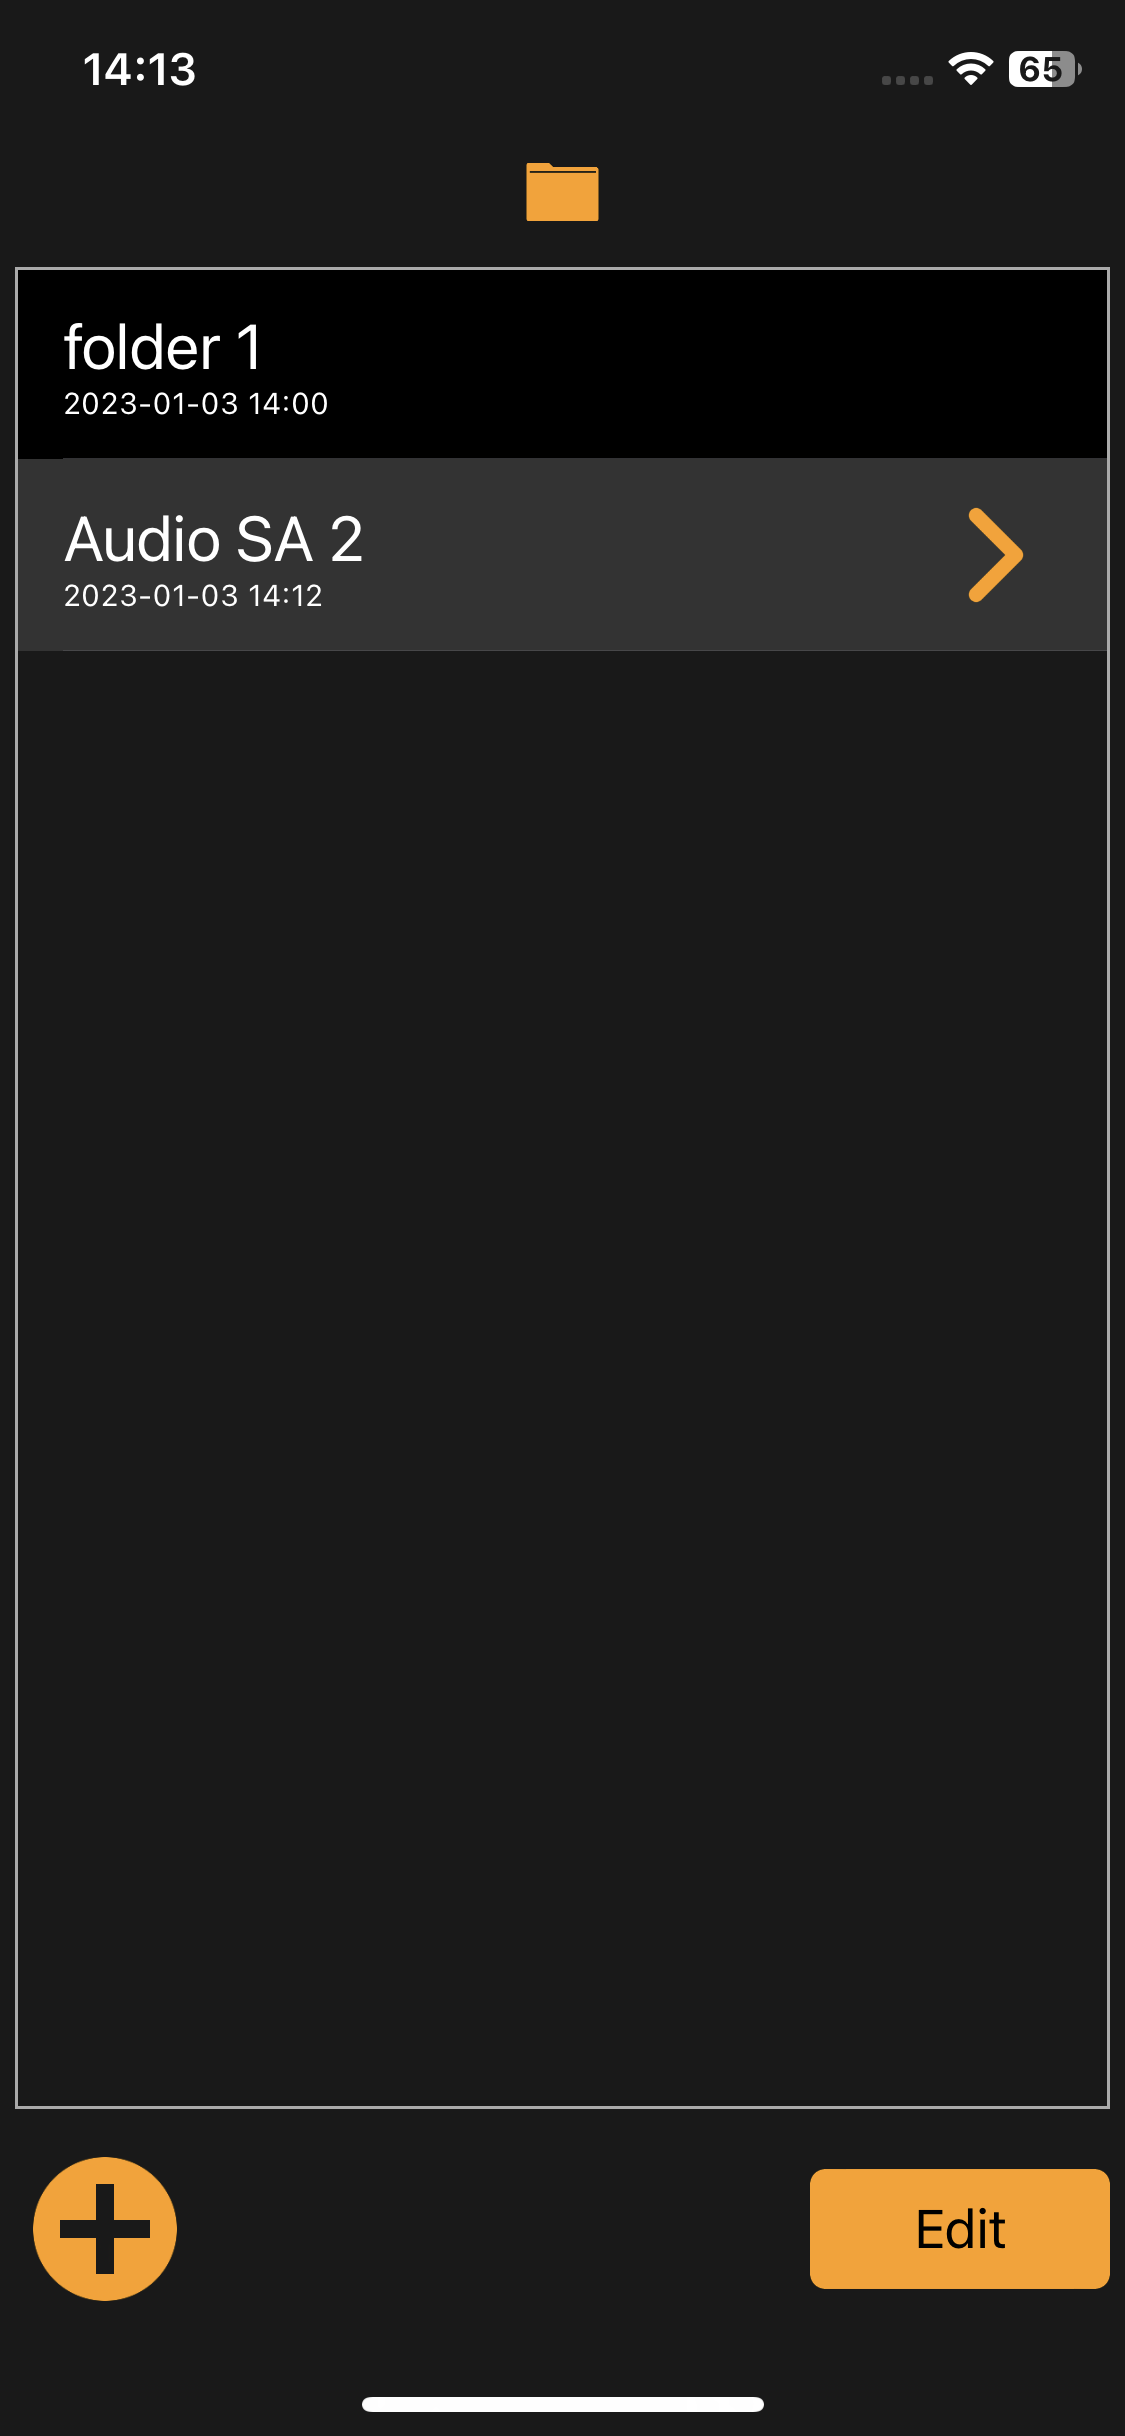
To delete a folder, swipe left on the folder row in the folder list and tap the “Delete button” that appears.
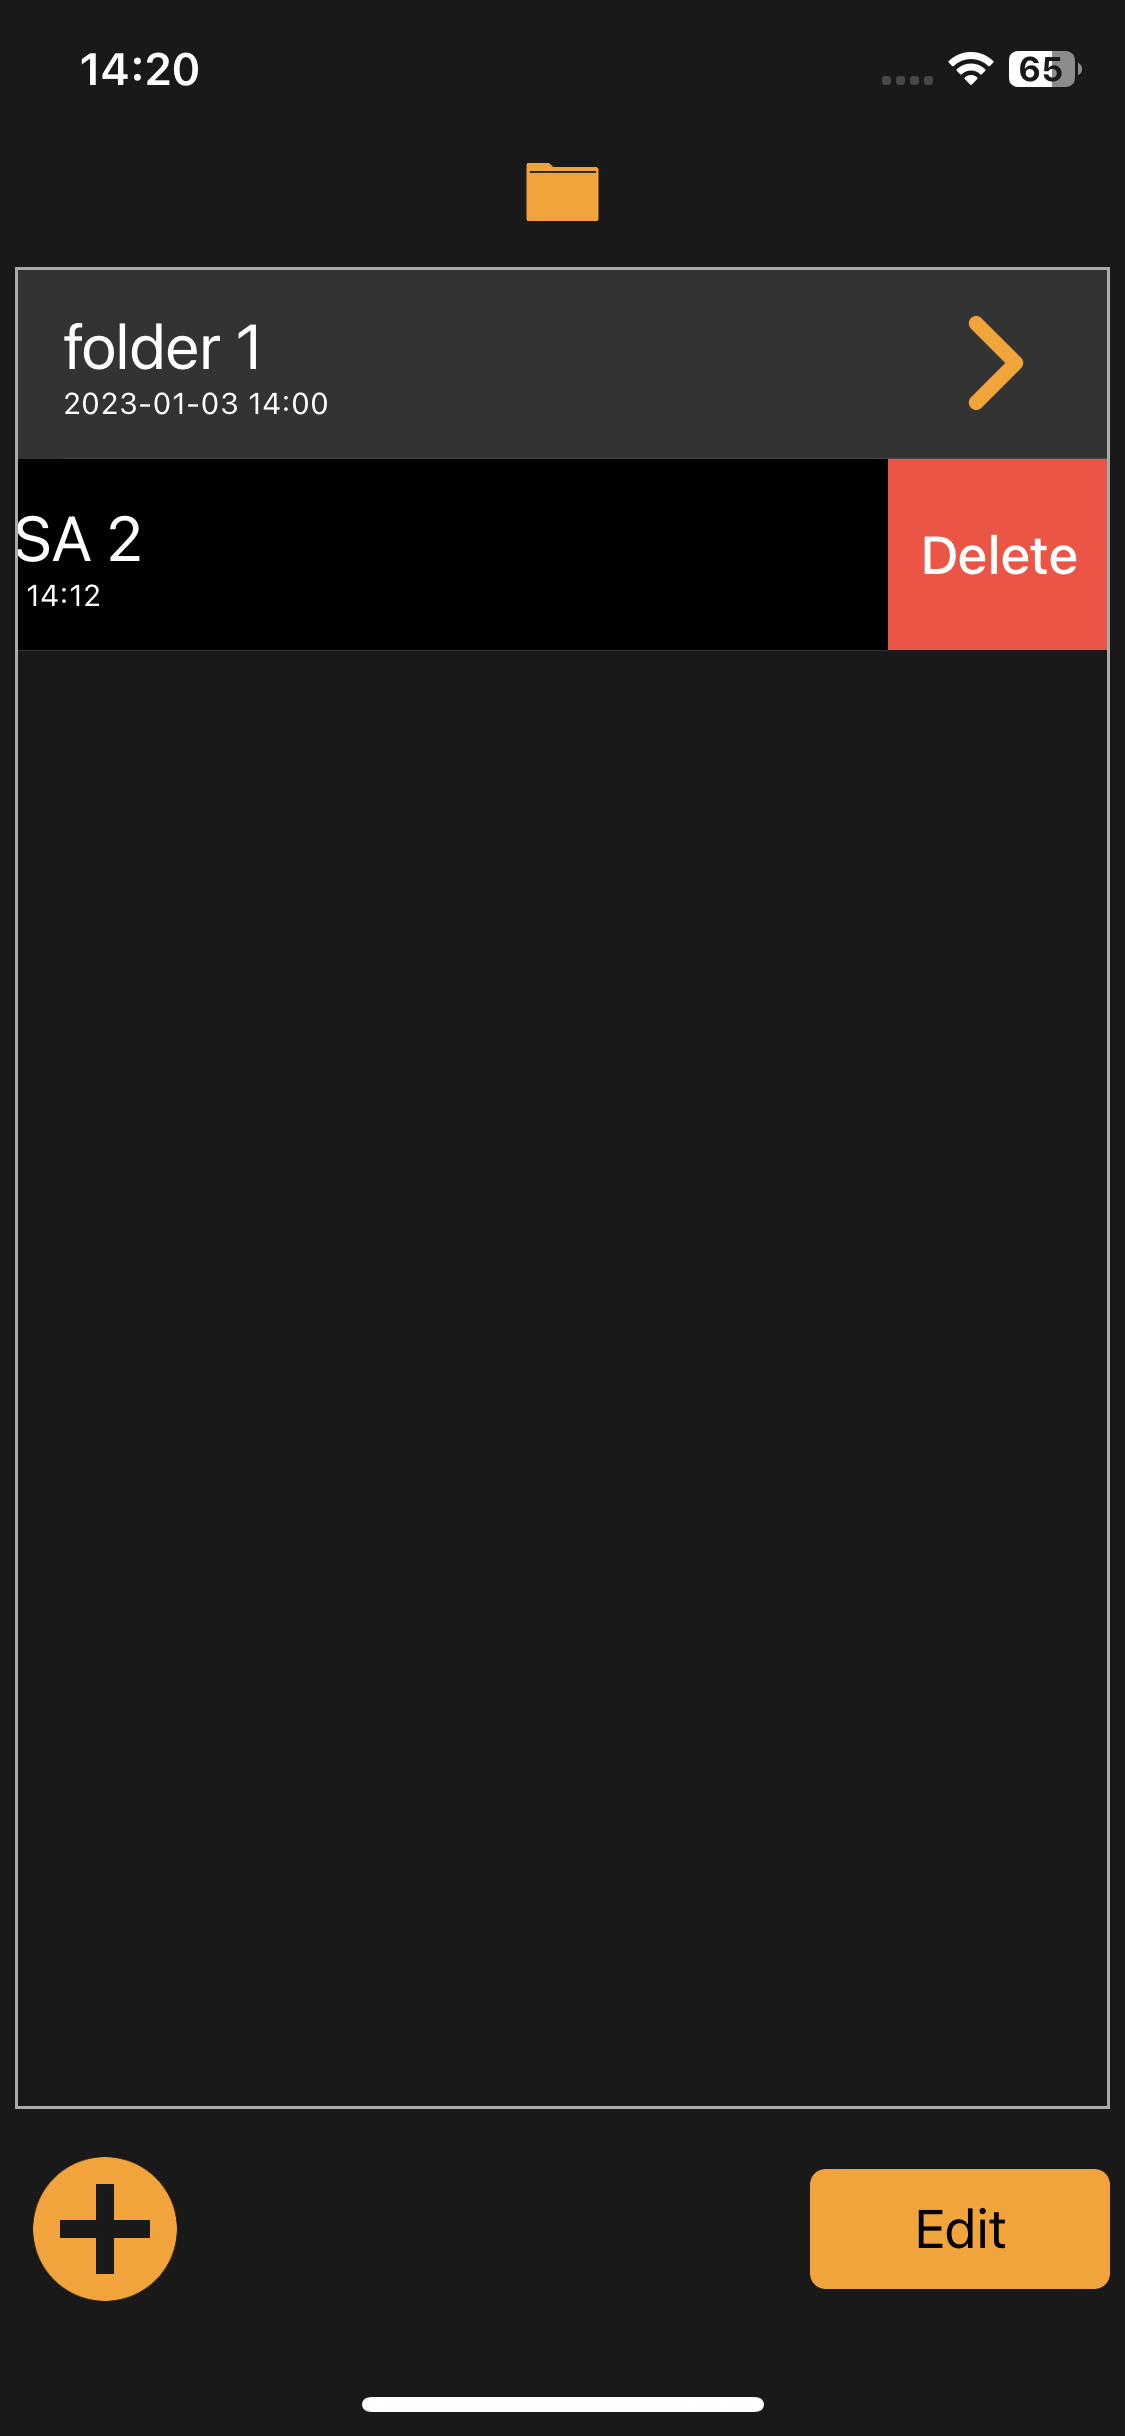
A warning pop-up will appear if there is audio data left in the folder to be deleted.
Get Ticket

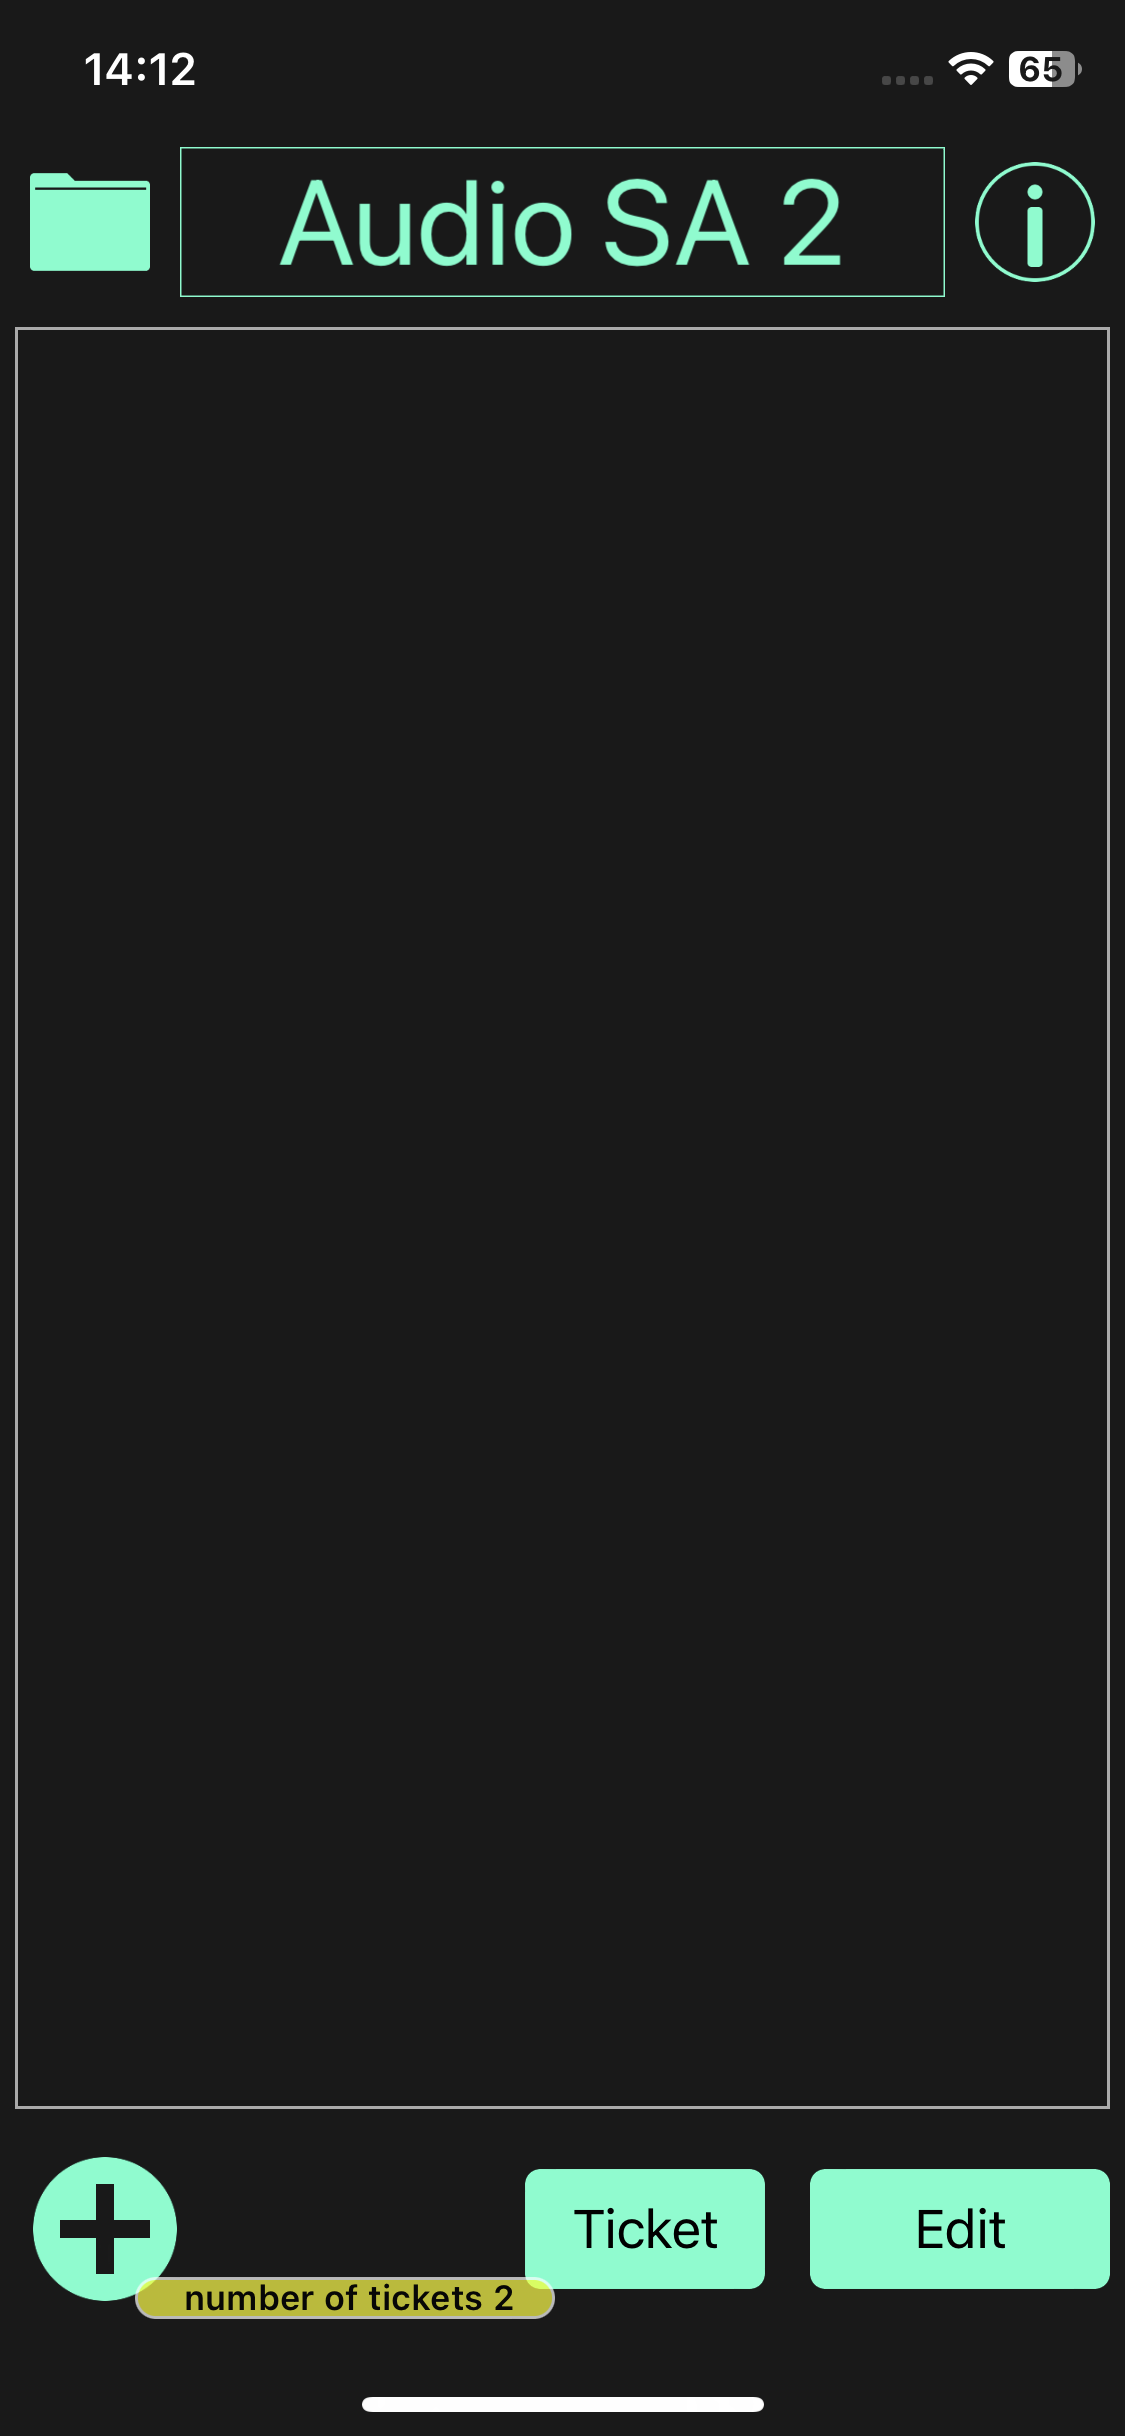
To get a ticket, tap the “Ticket” button at the bottom of the startup screen.
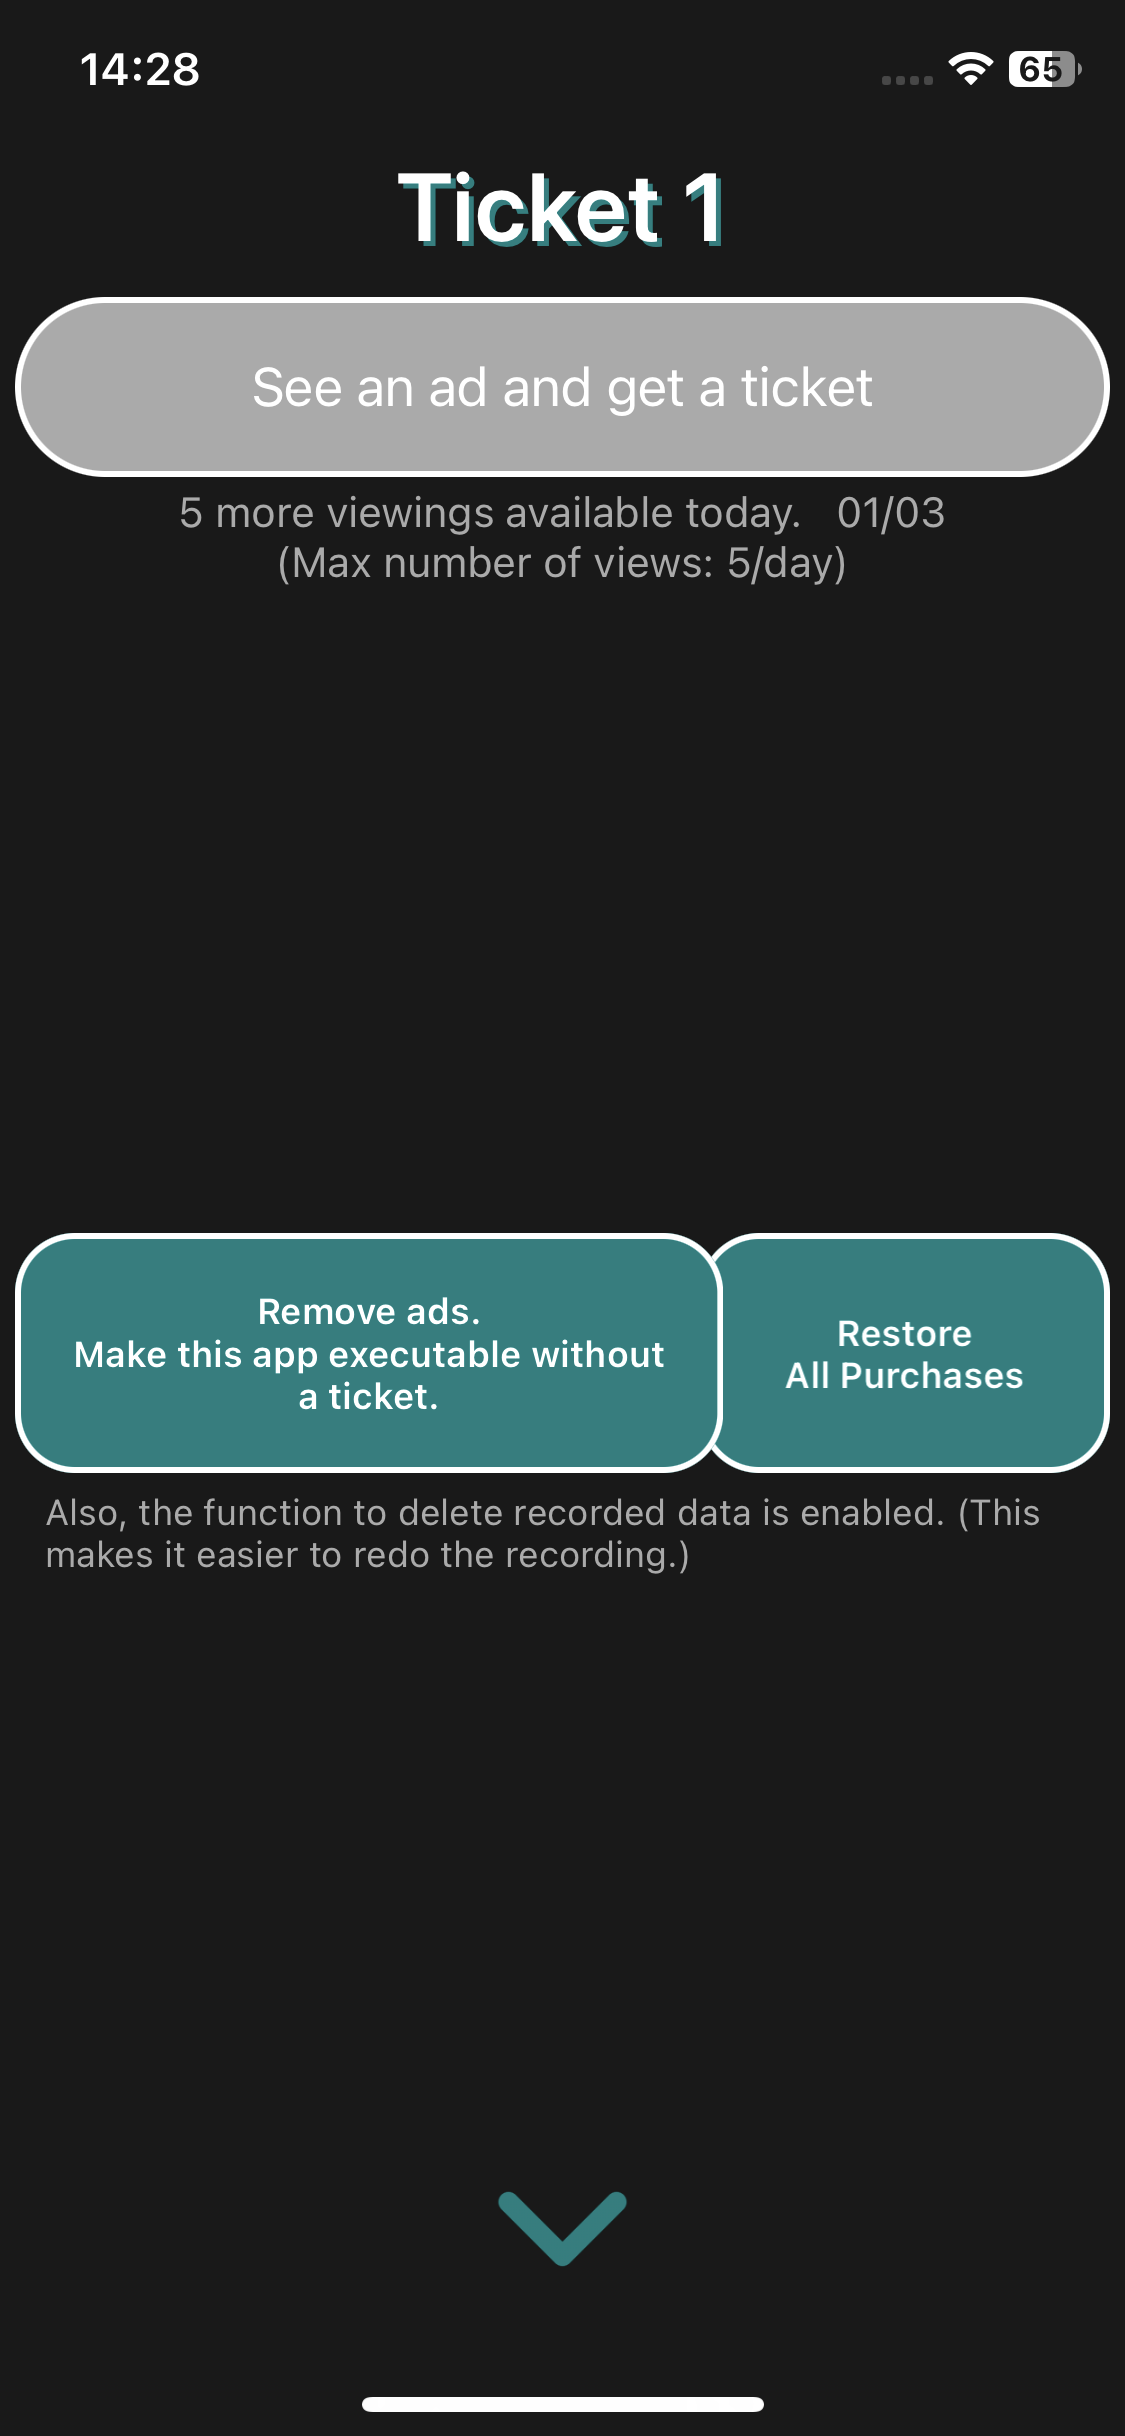
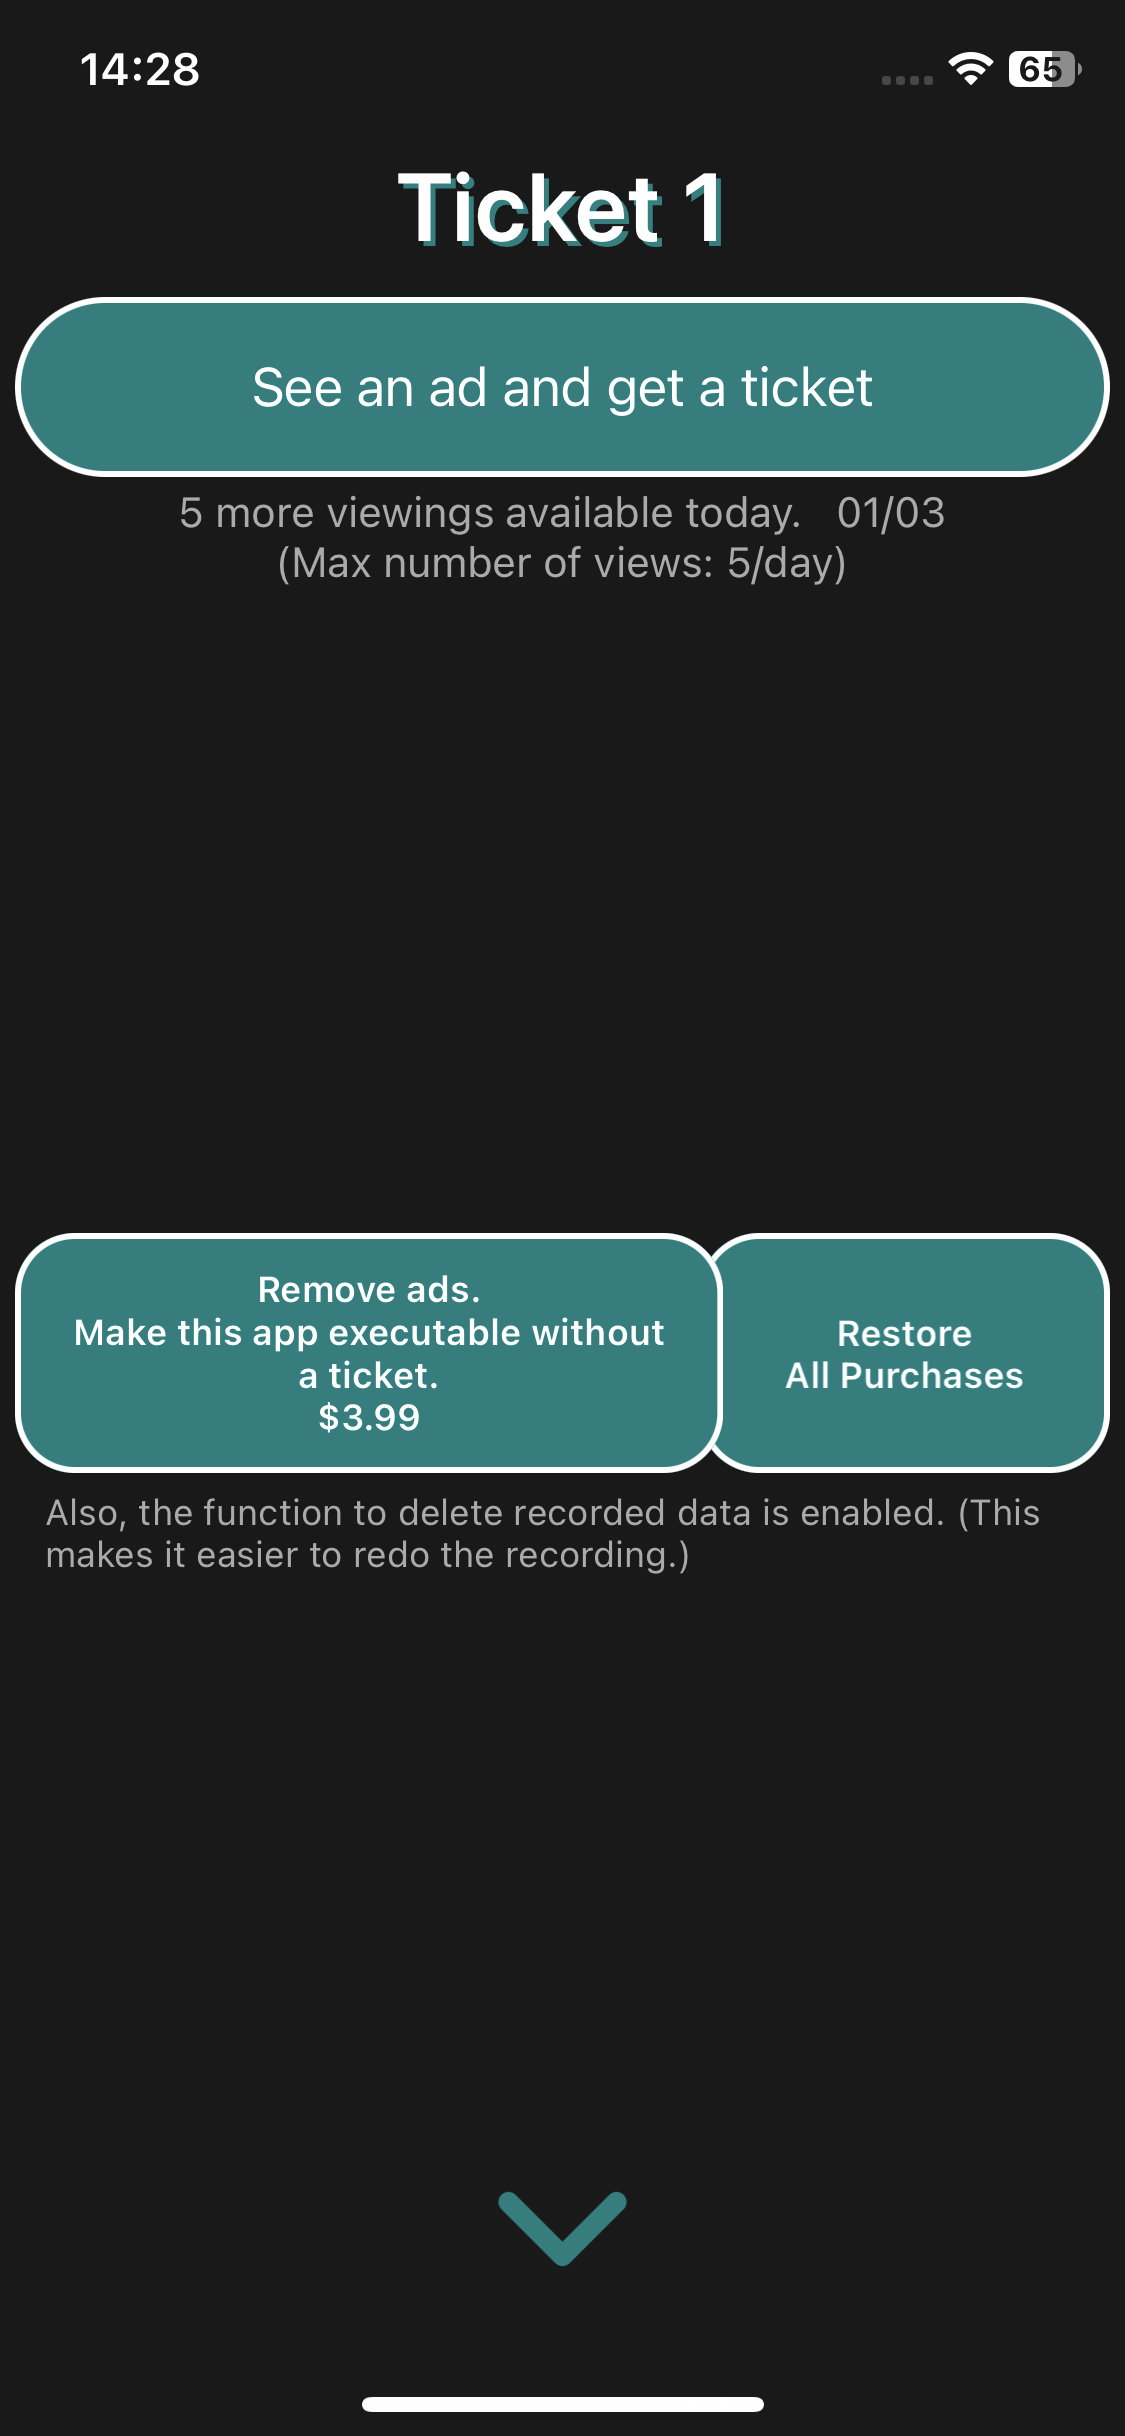
You can get tickets by tapping the “See an ad and get a ticket” button and watch the ad videos.
(You can’t watch when the background of the “See an ad and get a ticket” button is gray. Also, you can’t watch when the number of views exceeds 5 times in a day.)
Immediately after the release of “Audio SA” Ver1.0, ads will not be delivered for a while (several hours to several days). Sorry for the inconvenience, but please wait for a while.


Recording/playback
Prepare for recording by adding a dataset. To add a dataset, tap the plus button at the bottom left of the startup screen. After adding a dataset, the dataset screen for the added dataset is displayed.
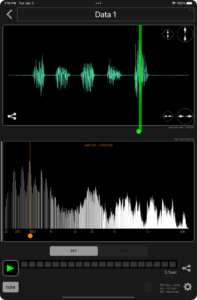
Tap the record button (red circle) at the bottom left of the dataset screen to start recording.

Tap the stop recording button (red square) at the bottom left of the dataset screen to stop recording.
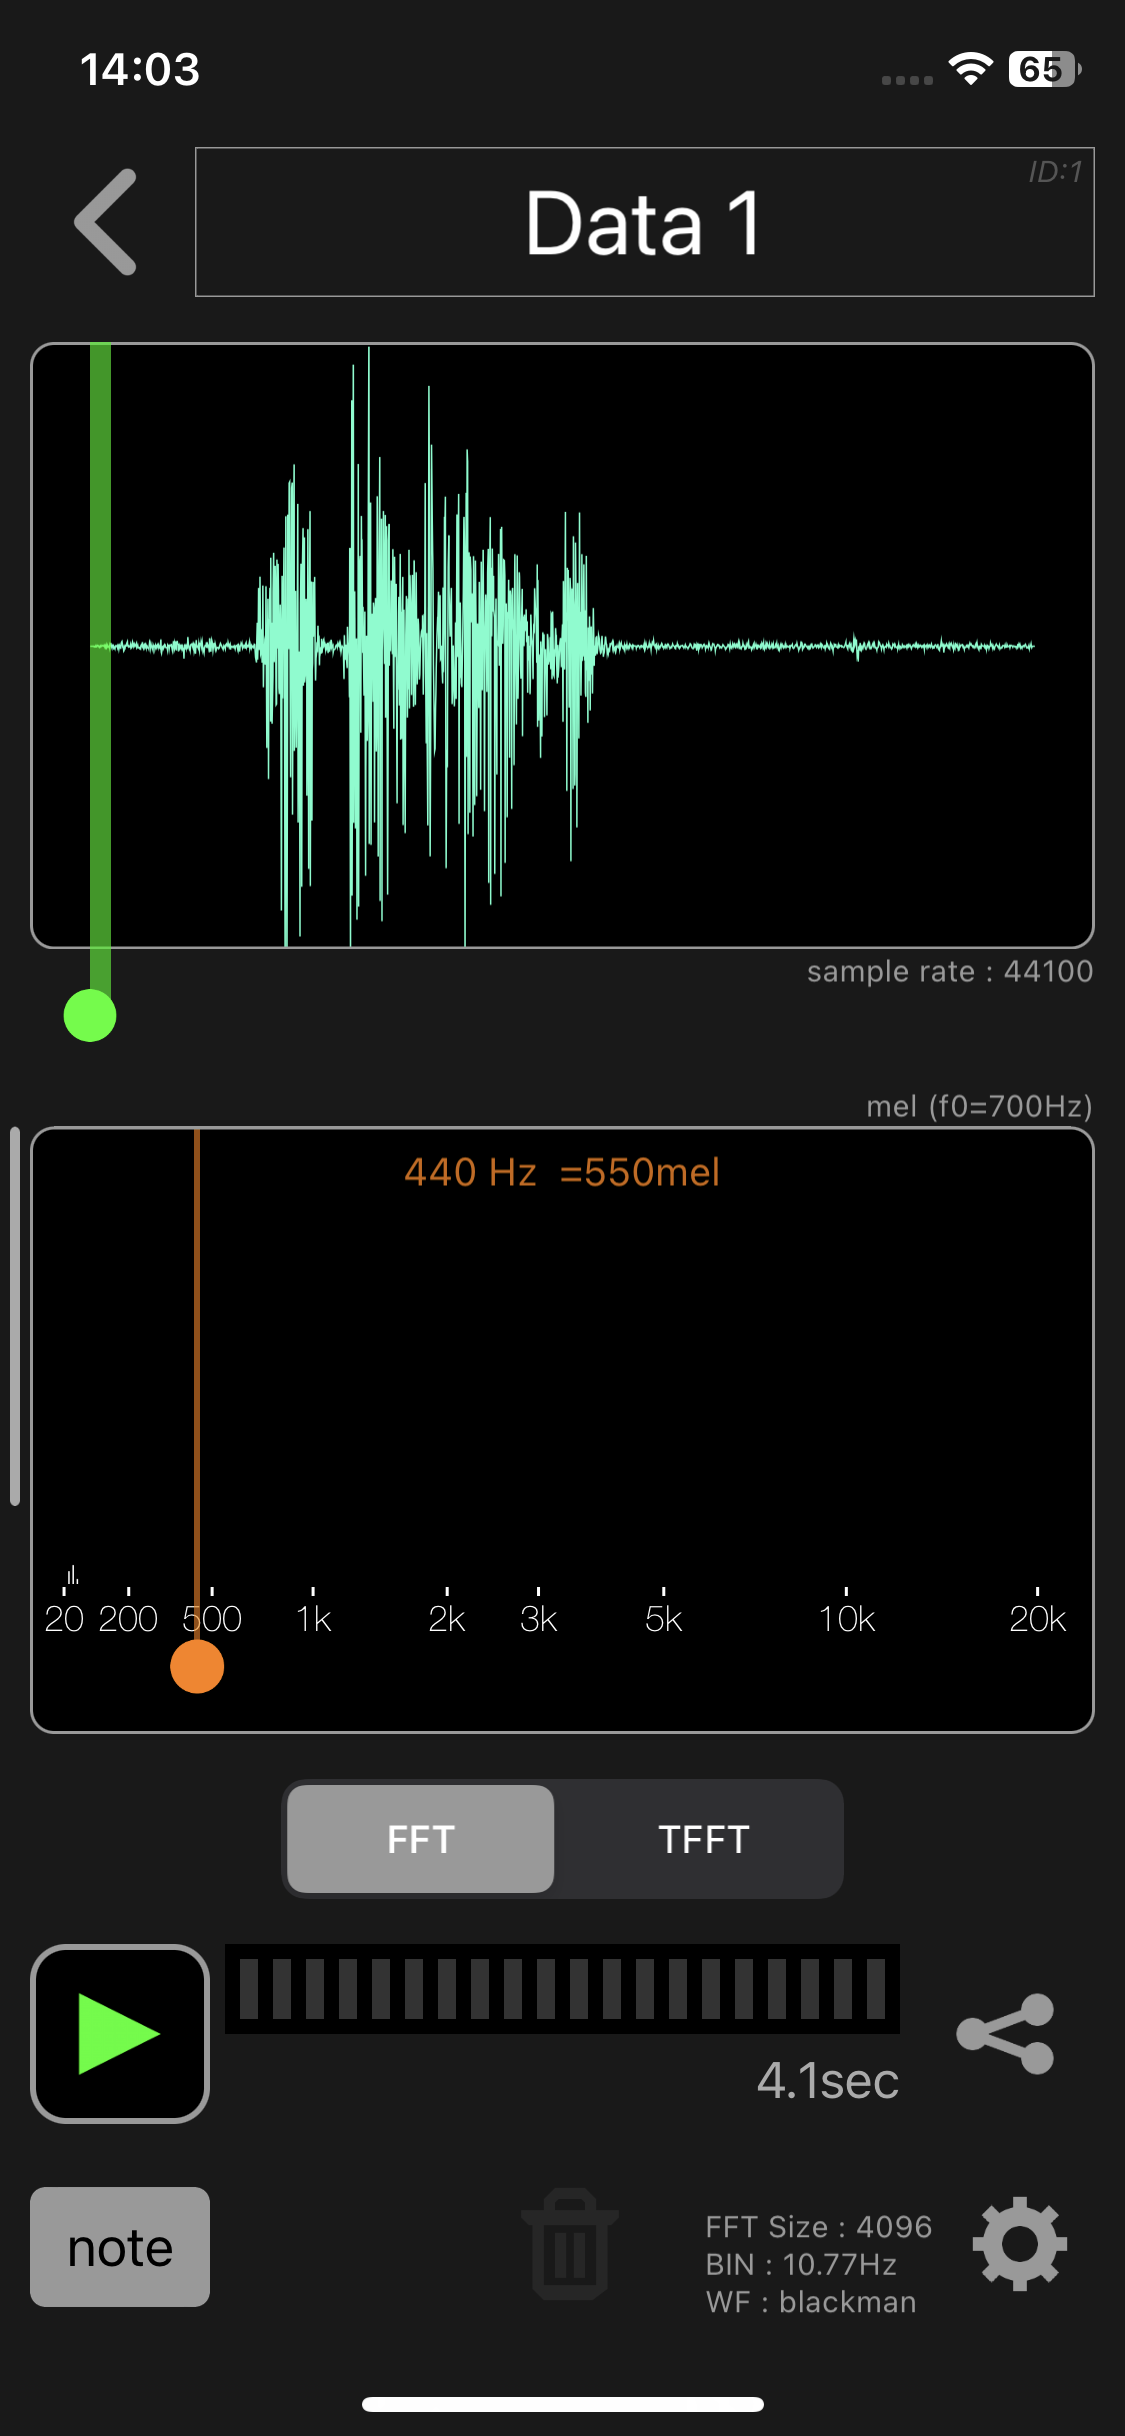
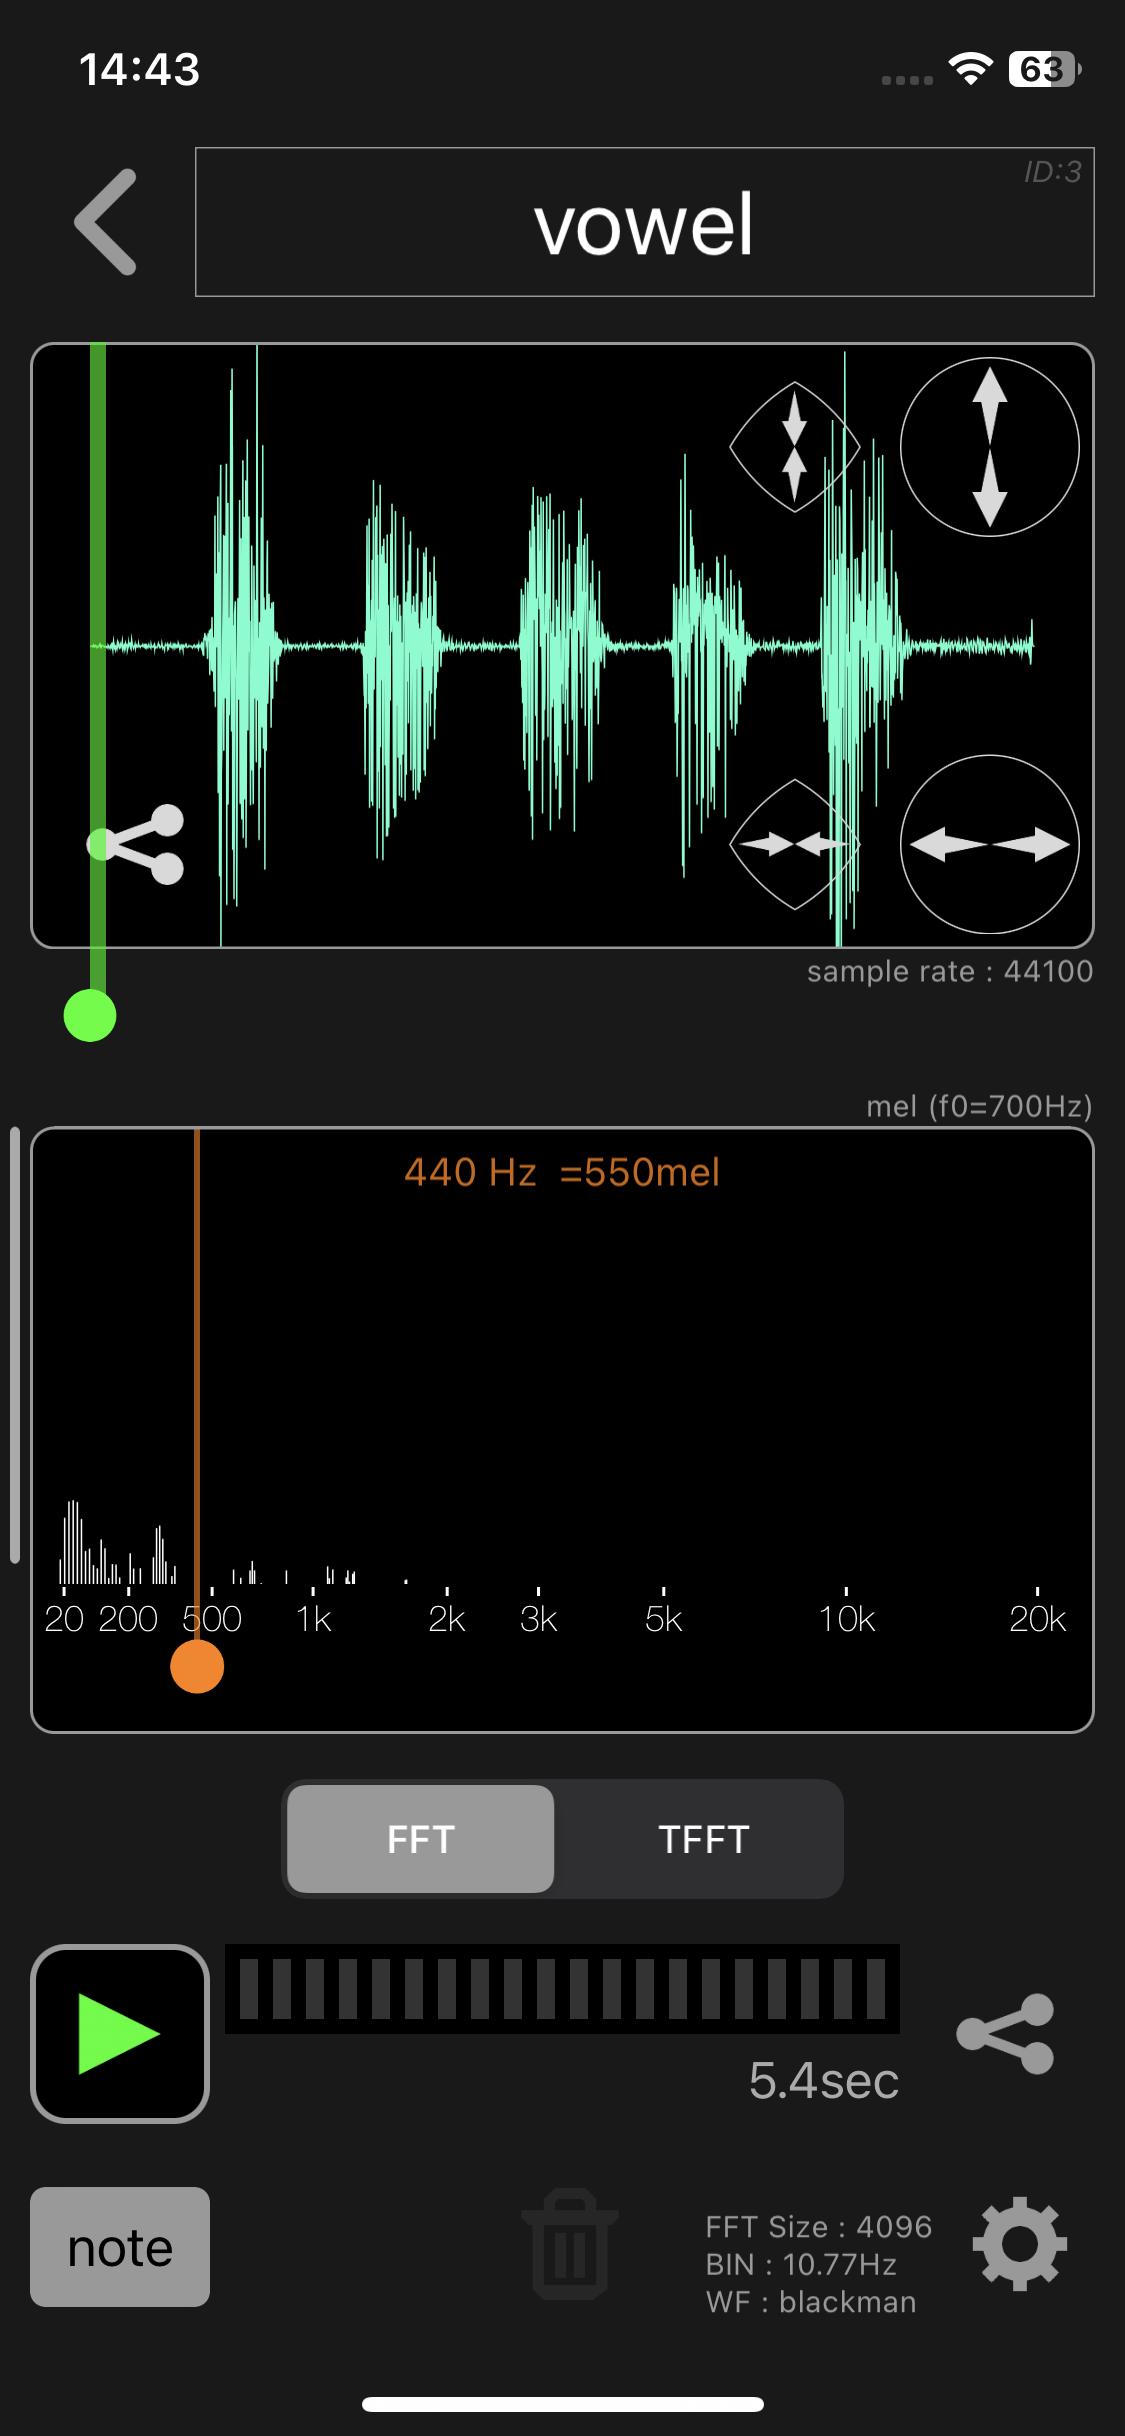
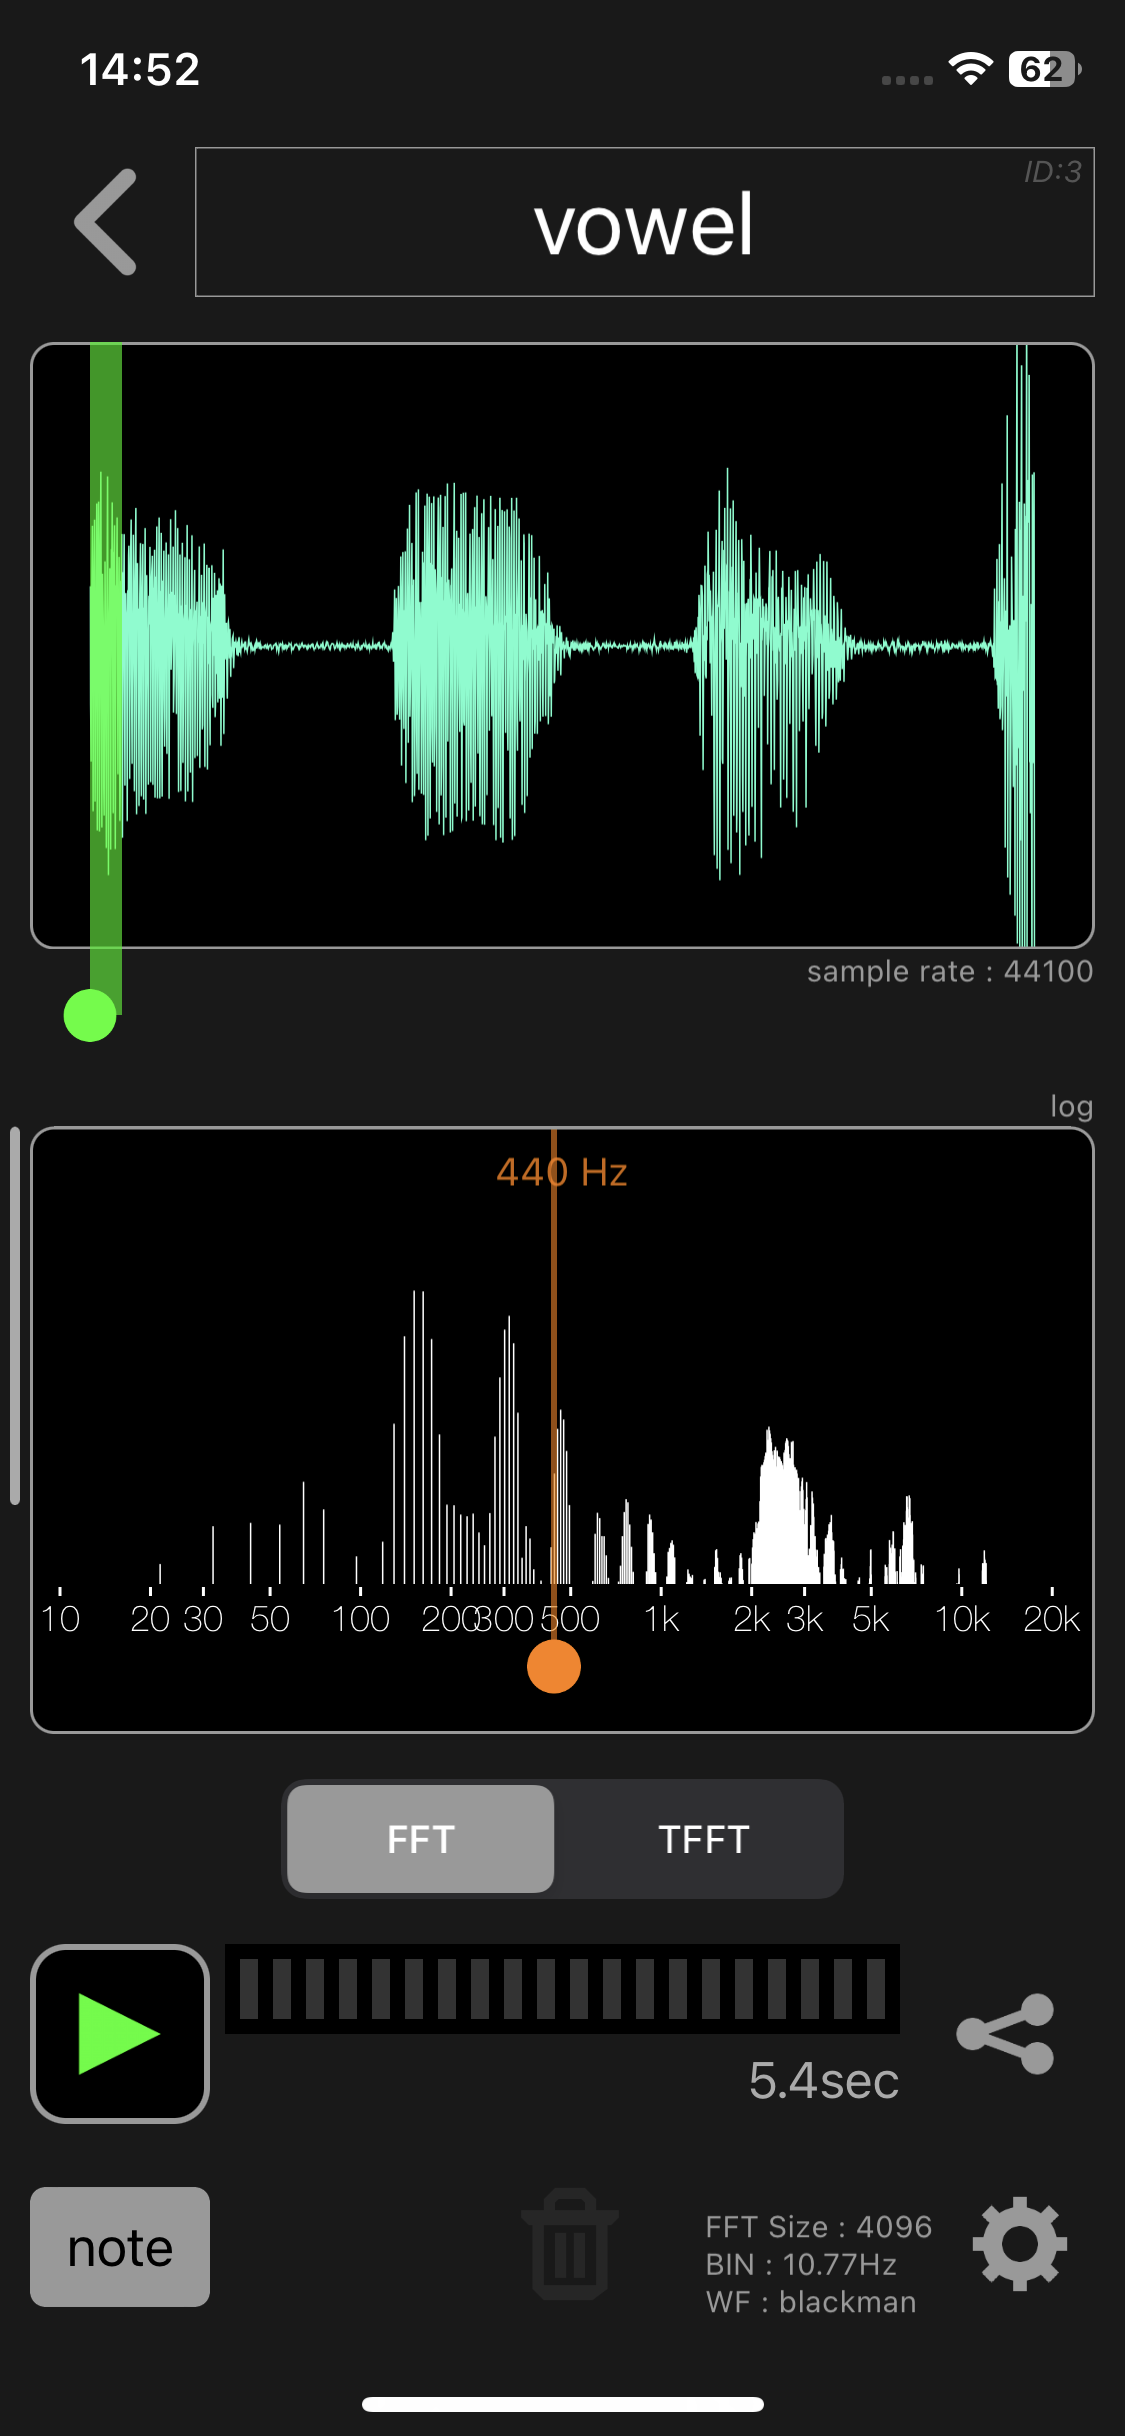
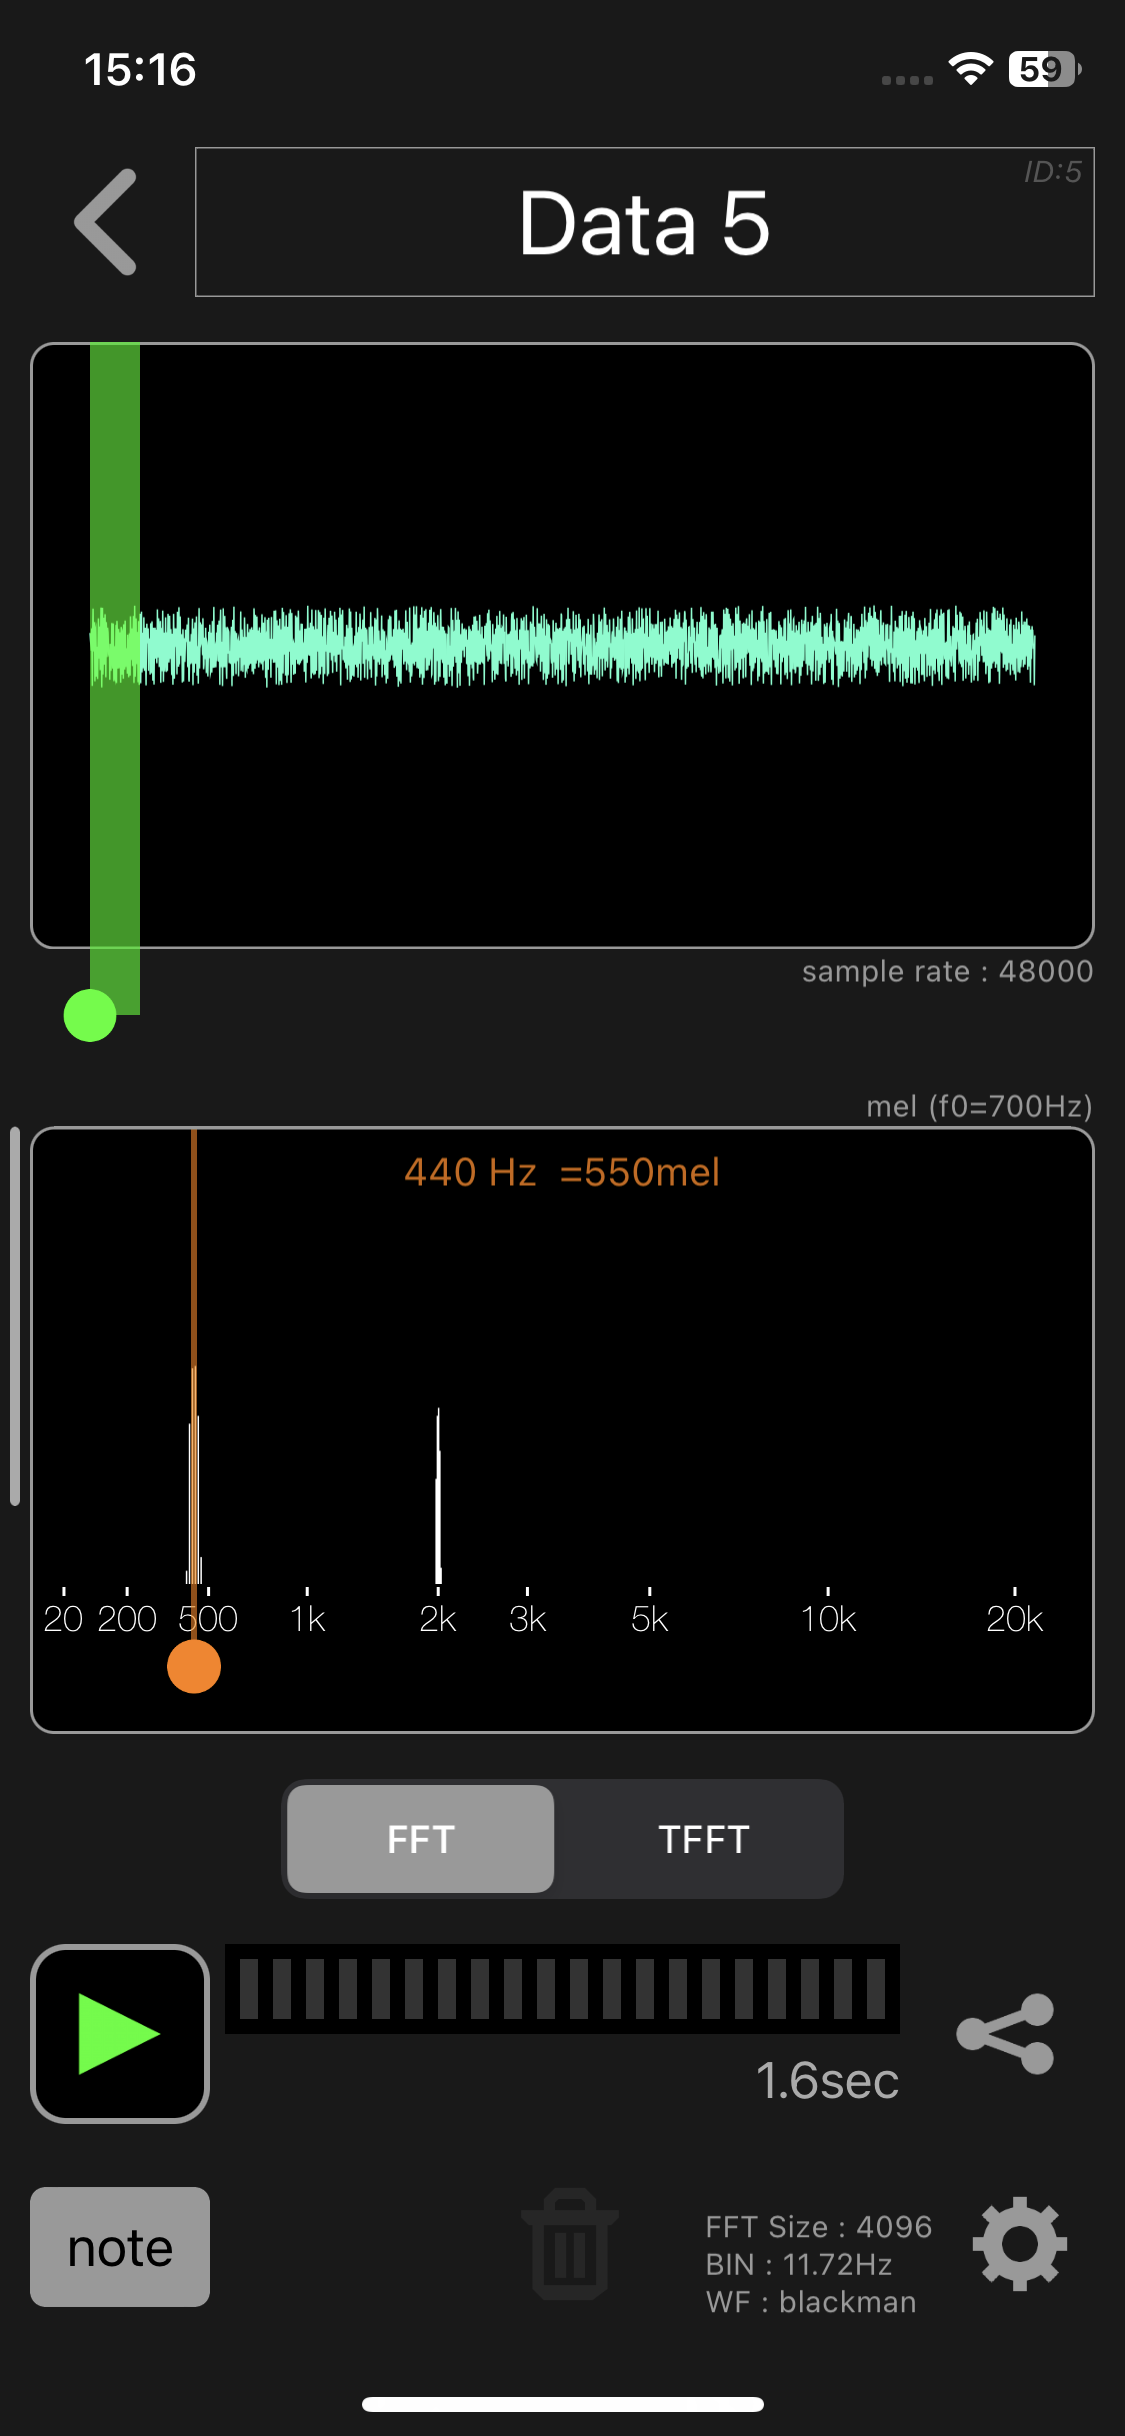
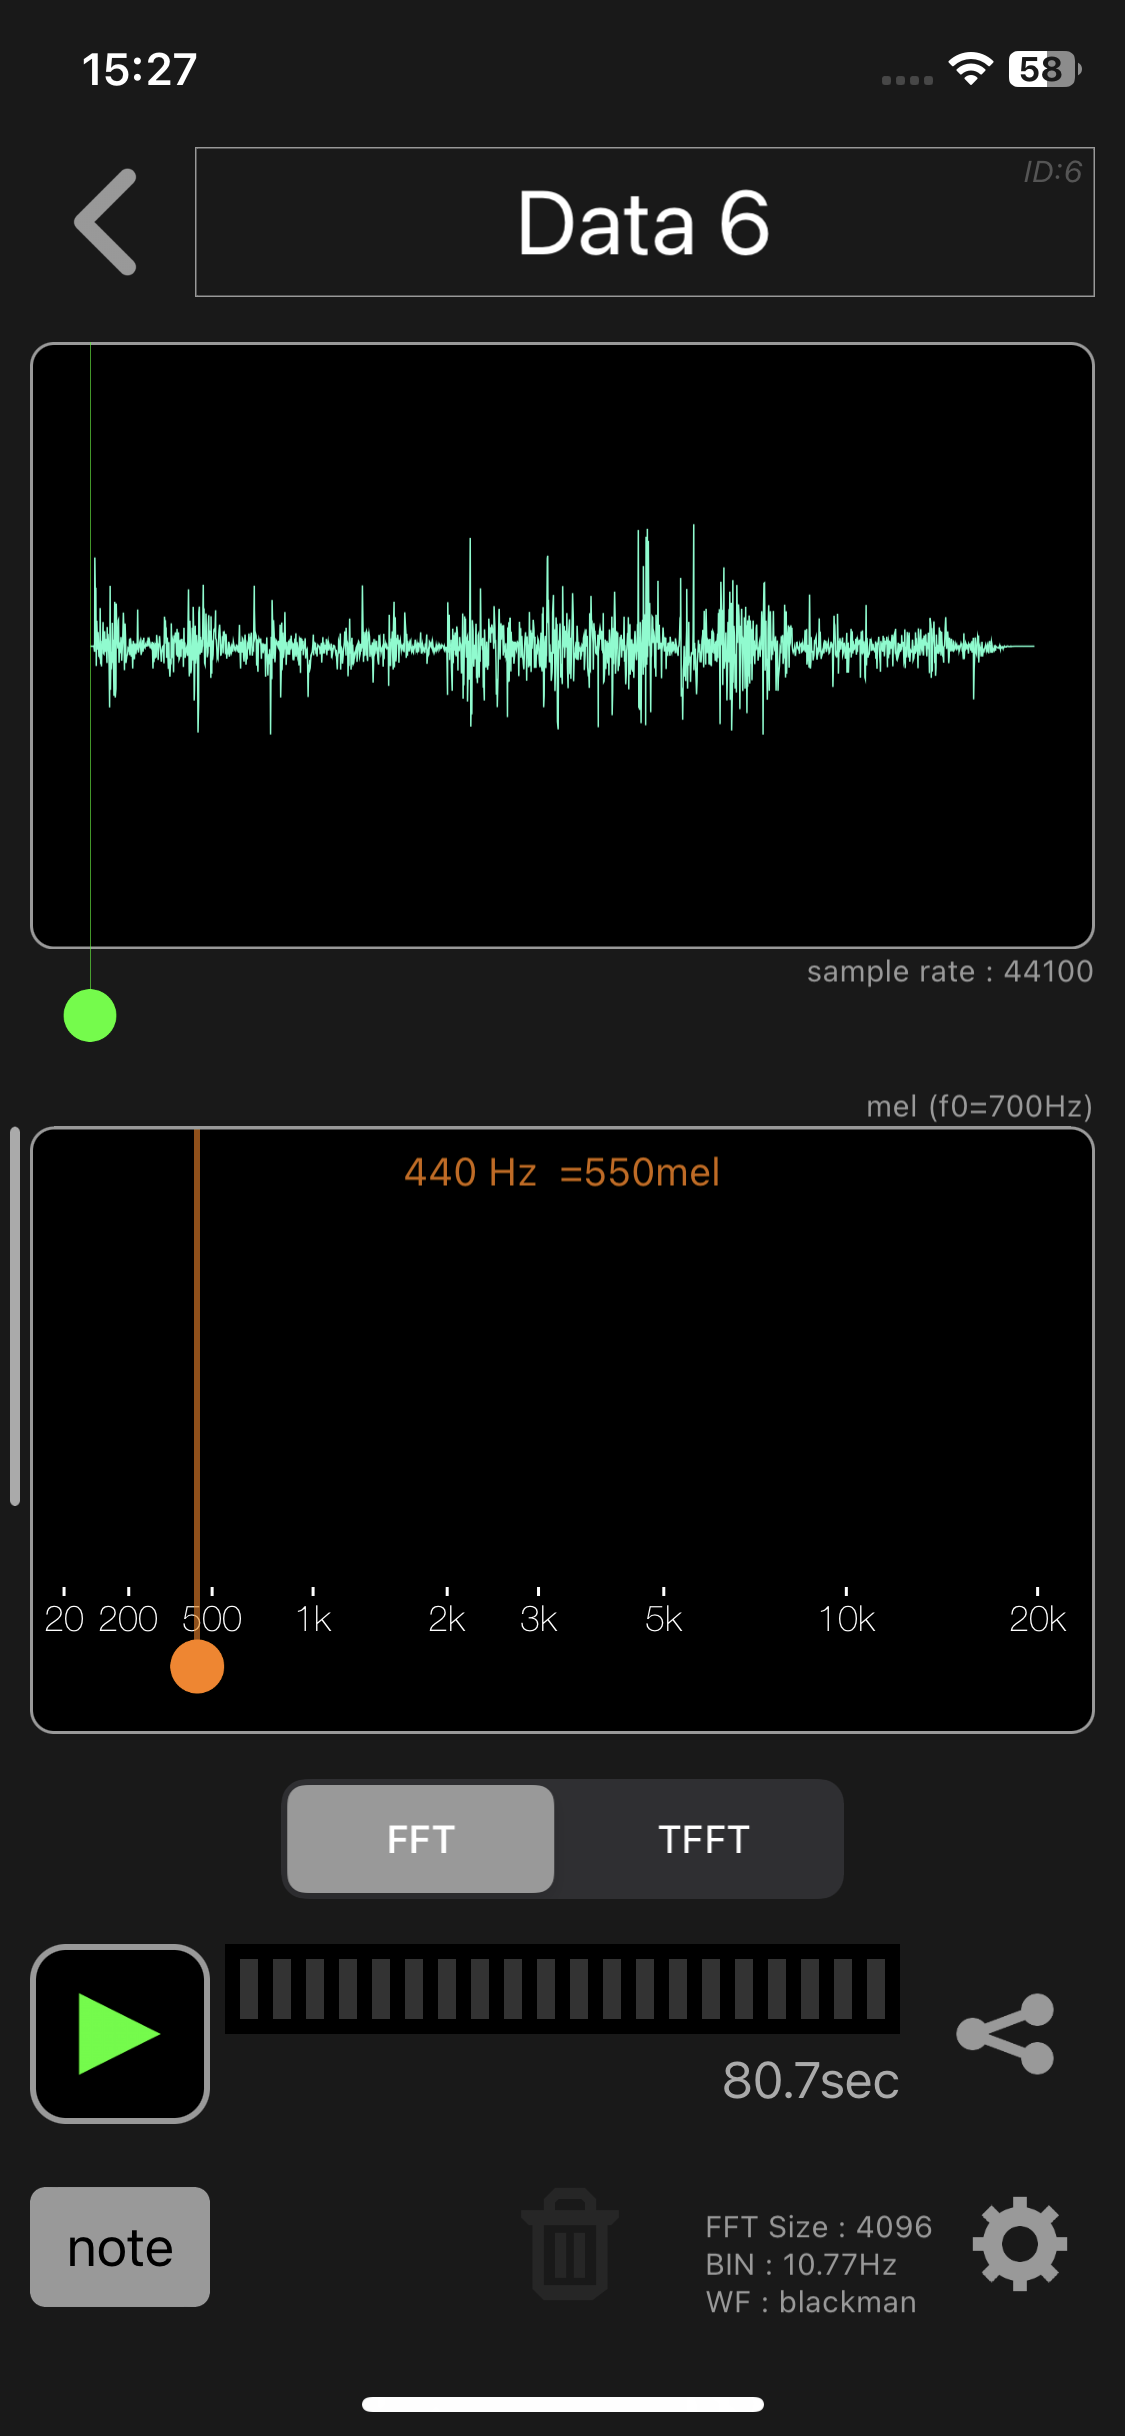
When recording is completed, the audio waveform is displayed, and the sample rate (sampling rate) is displayed in the lower right of the audio waveform. The sample rate is device specific and cannot be changed. (For example, iPhoneX is 44100Hz, iPhoneSE3 is 48000Hz)
You can play the recorded sound by tapping the play button at the bottom left of the dataset screen.
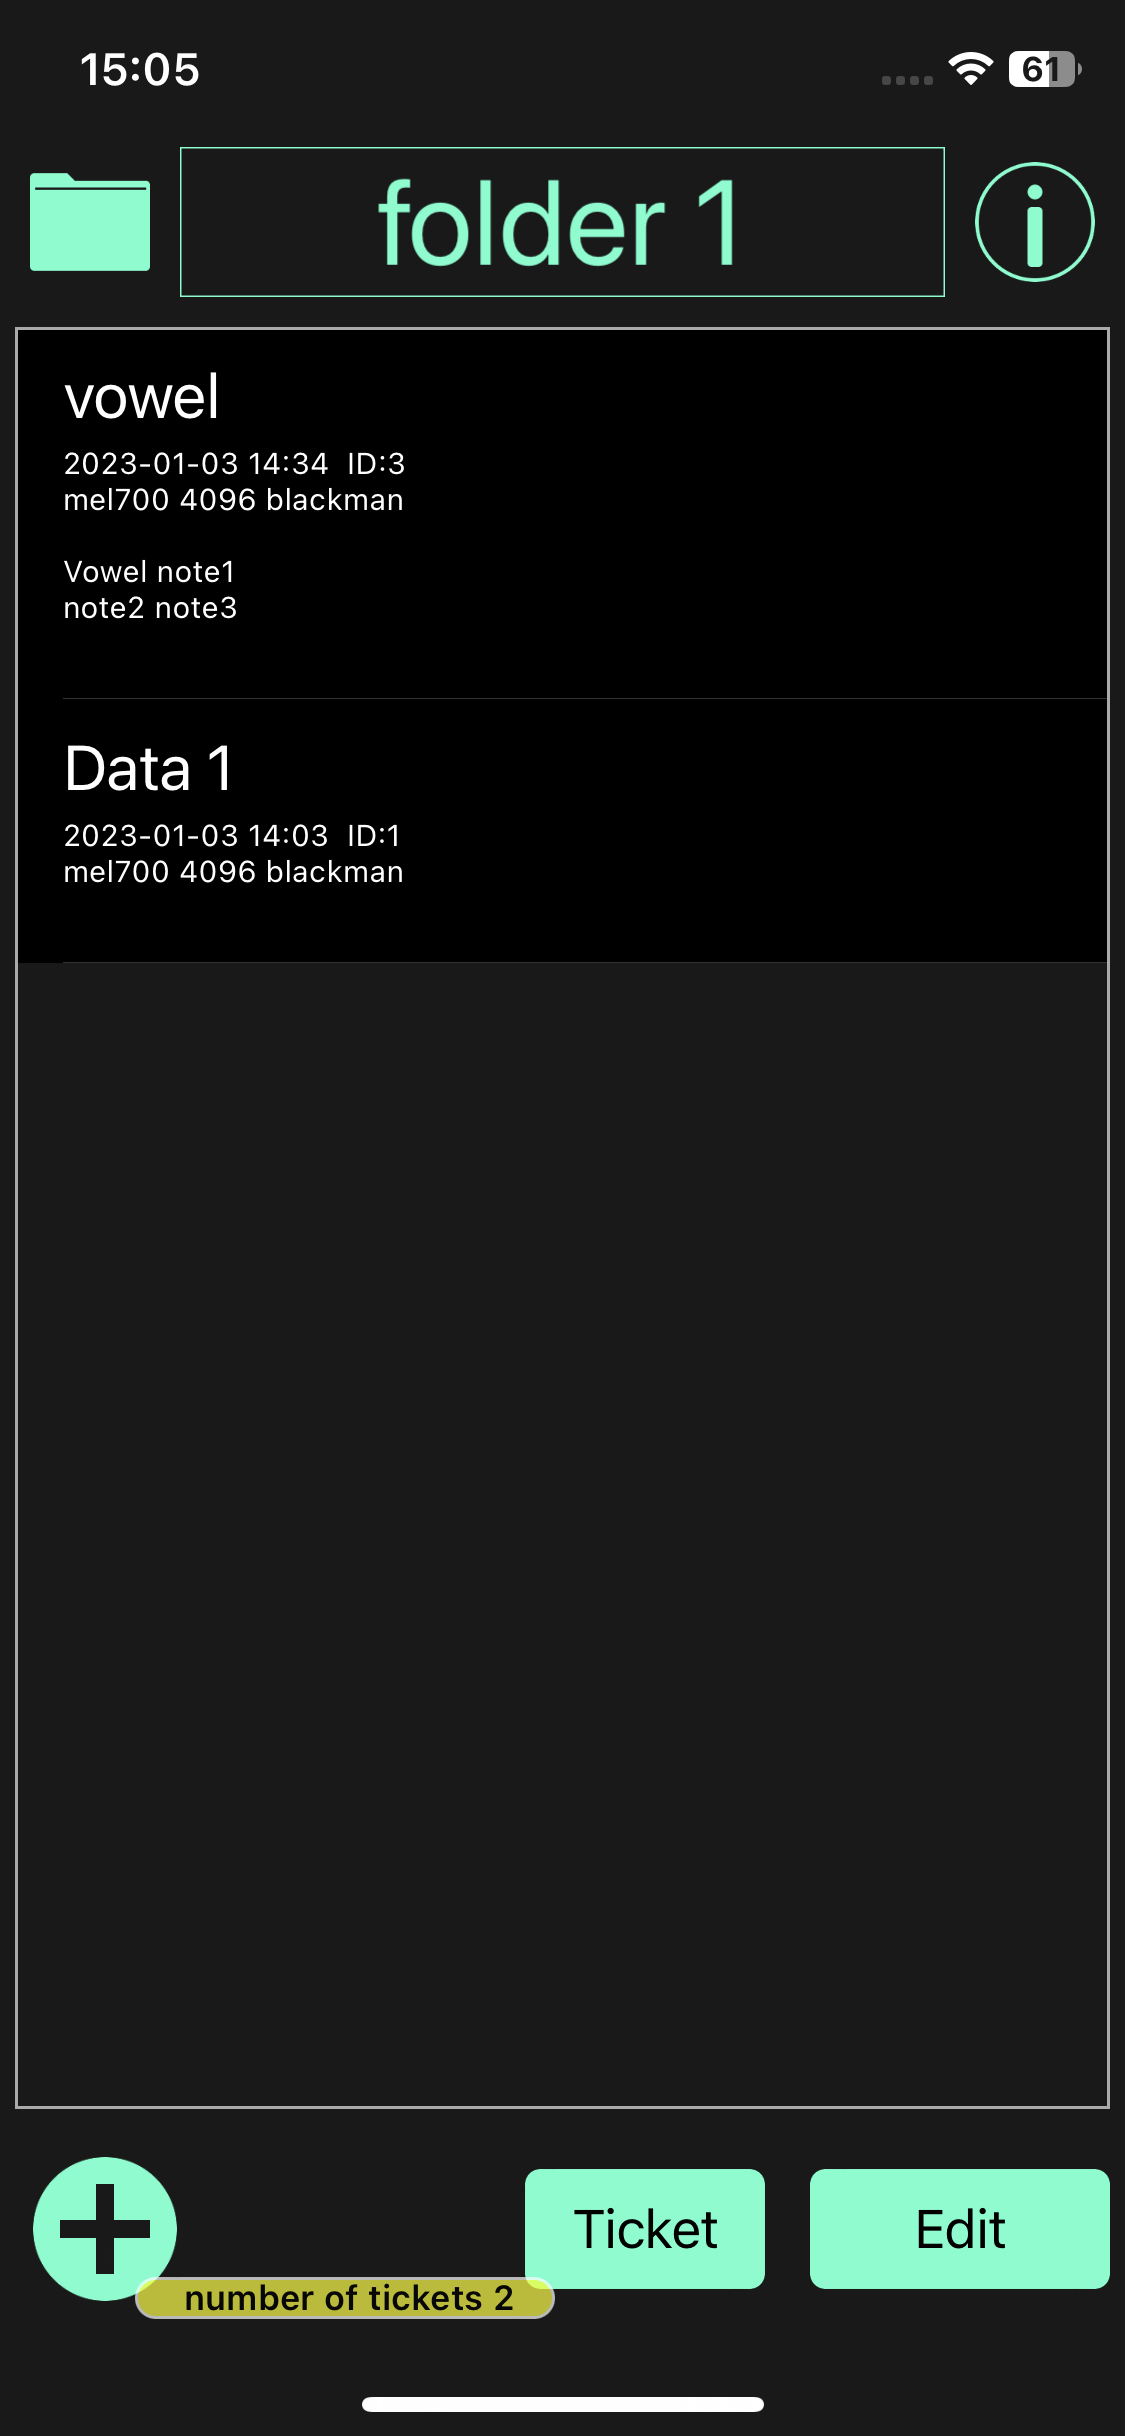
Edit dataset title

The title of the dataset is displayed at the top of the dataset screen. Tap this to edit the dataset title.

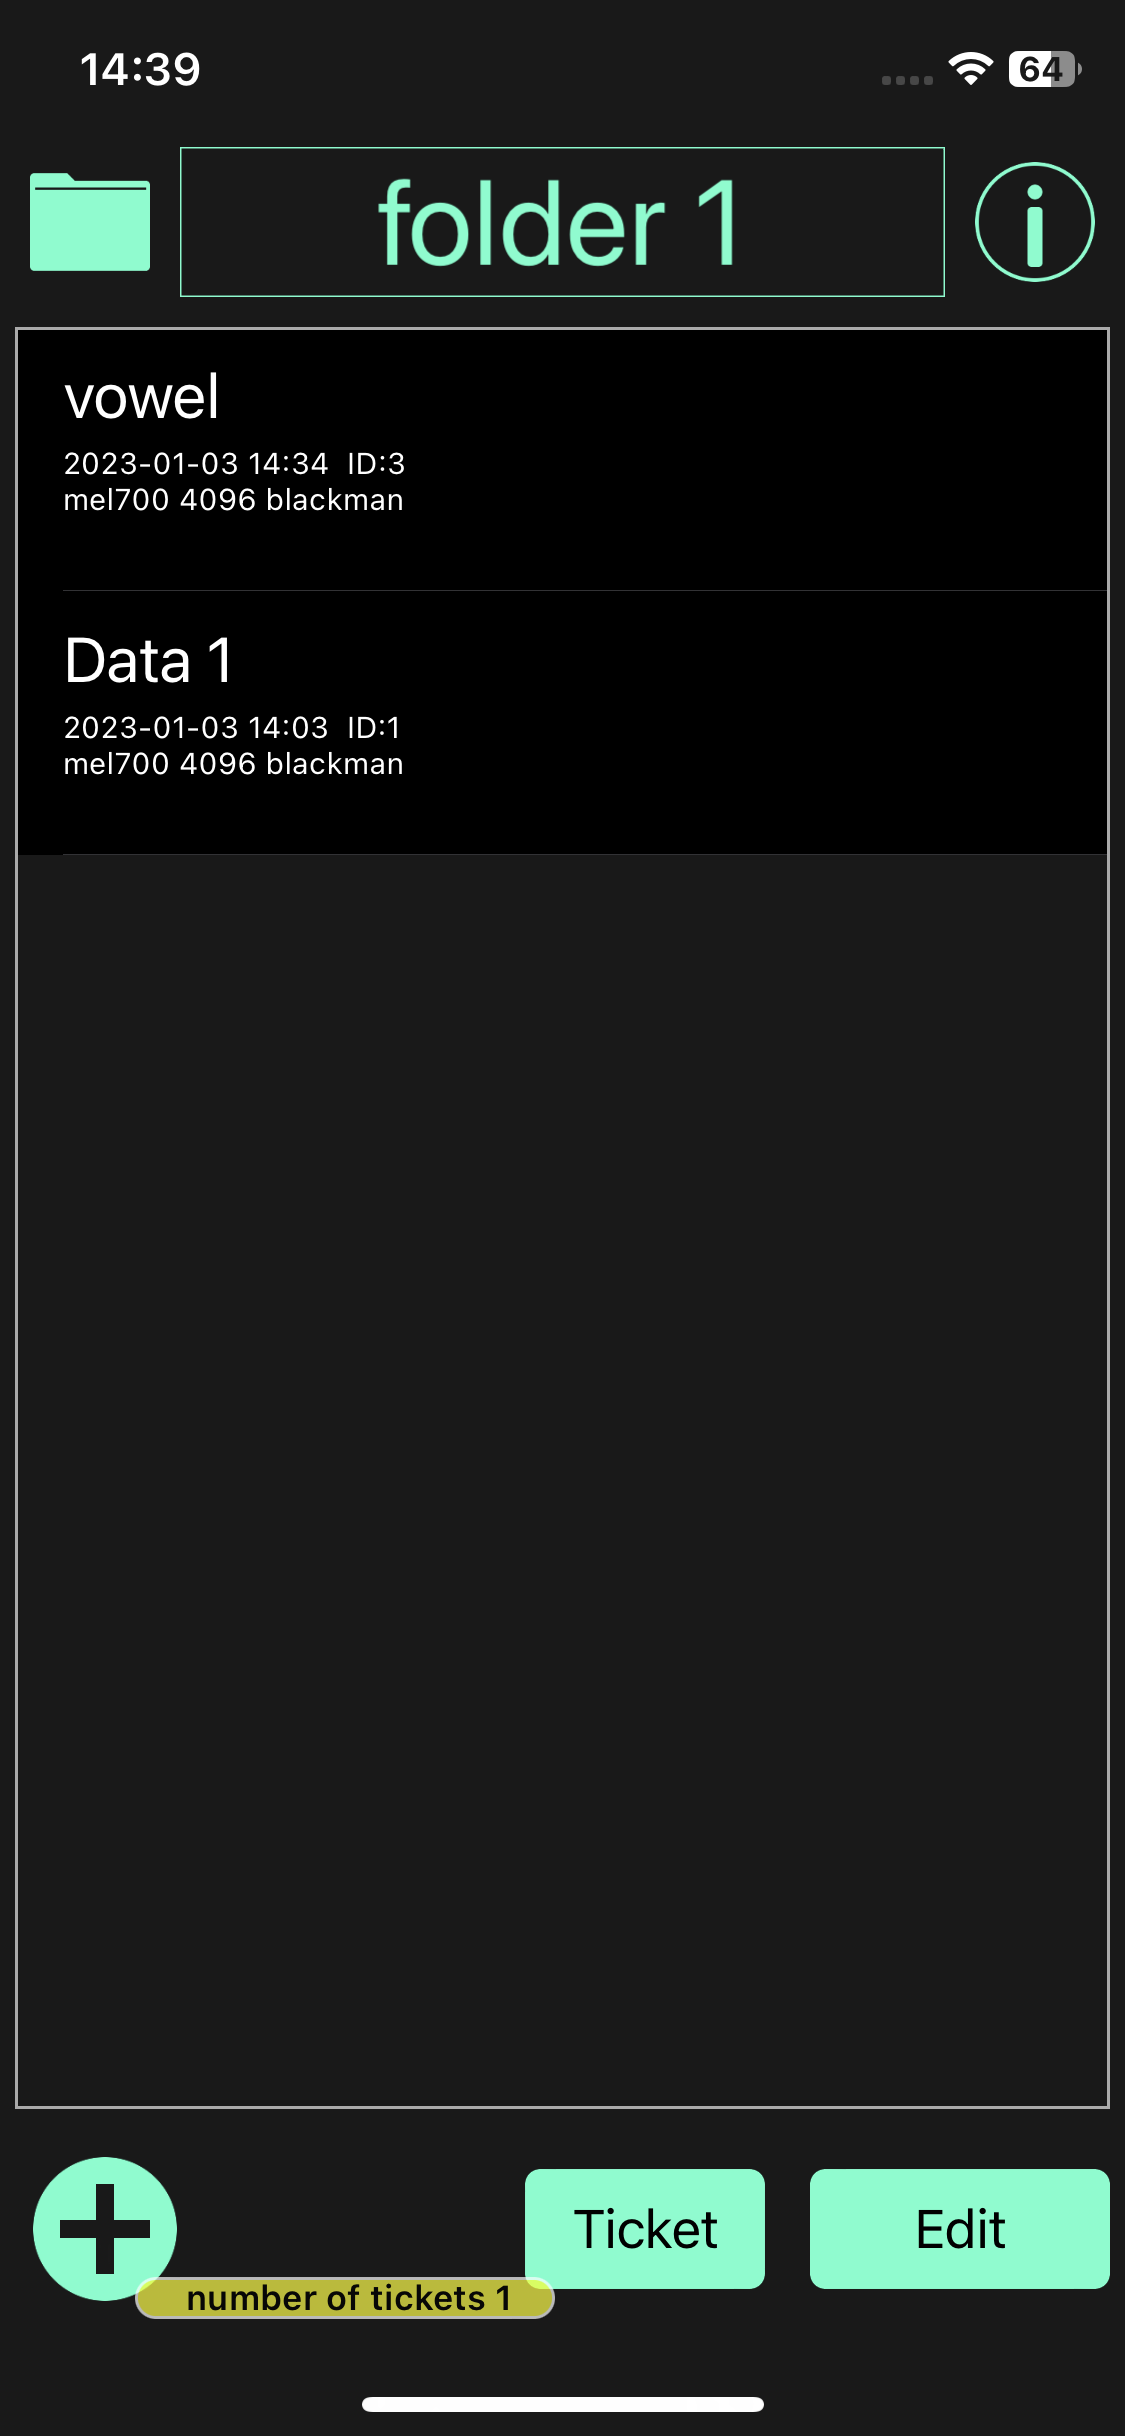
The dataset title is displayed in the dataset list.
Writing notes
To write a note, tap the “Note” button at the bottom left of the dataset screen.

The note will appear in the dataset list.

Settings: Analysis Range
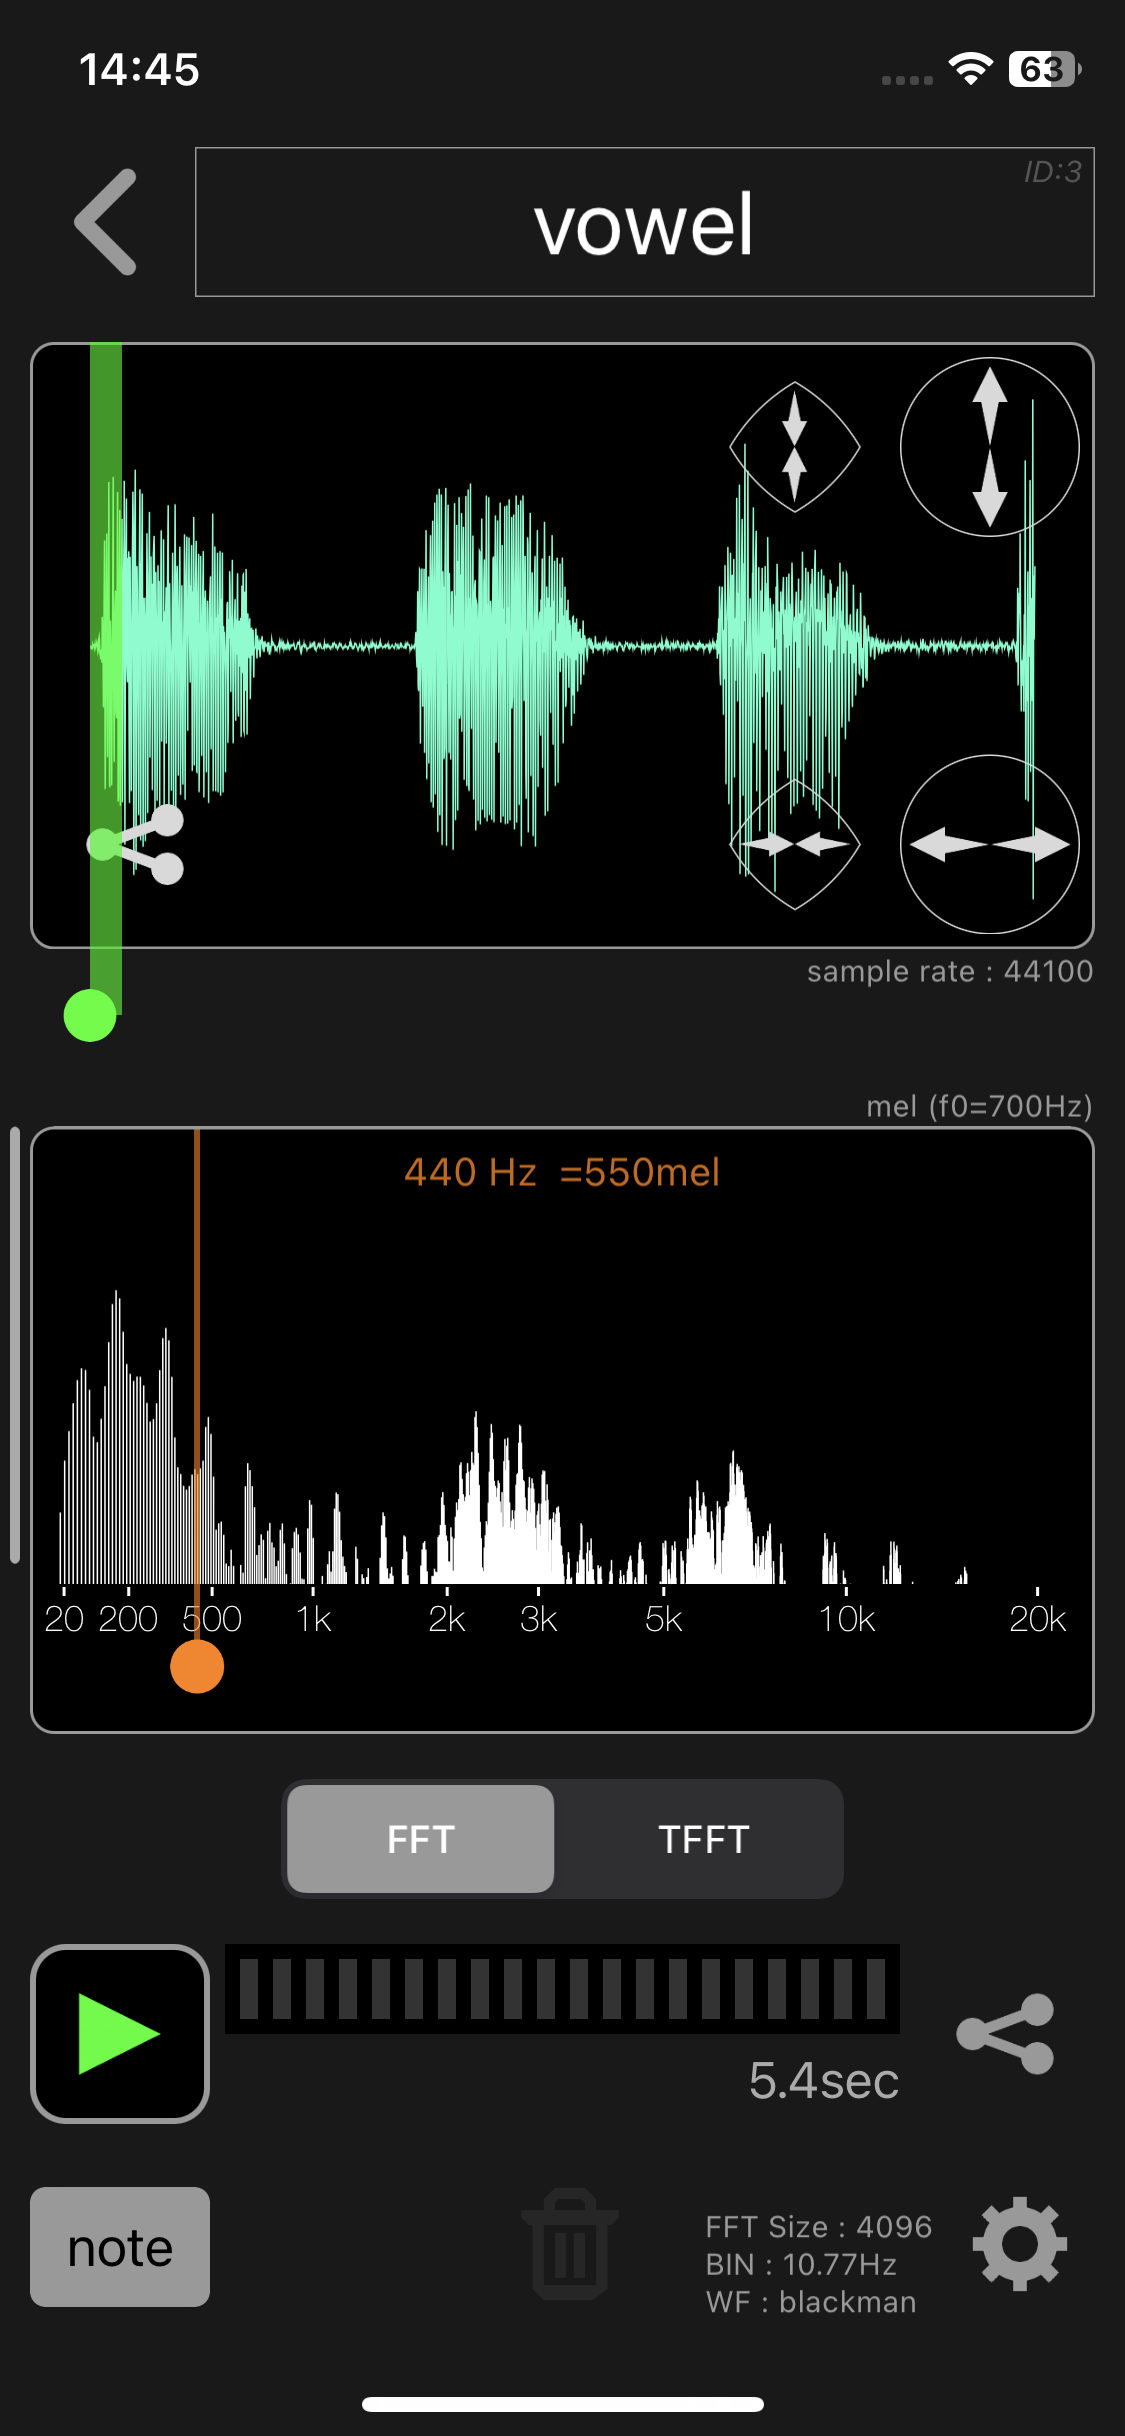
The Analysis Range is set by scaling and moving the audio waveform. The Analysis Range is the part of the audio waveform displayed on the screen.
Scaling of audio waveform

Scaling buttons appear when you tap an audio waveform on the dataset screen.
(If you tap the audio waveform again, Scaling buttons disappear.)
Tap the horizontal scaling button on the bottom right to scale the audio waveform horizontally.
Scale the audio waveform horizontally by tapping the horizontal scaling button in the lower right.
(The vertical scaling button on the top right scales the audio waveform vertically, but this does not affect the analysis range.)

Moving of audio waveform
To move the audio waveform, drag the audio waveform left or right.
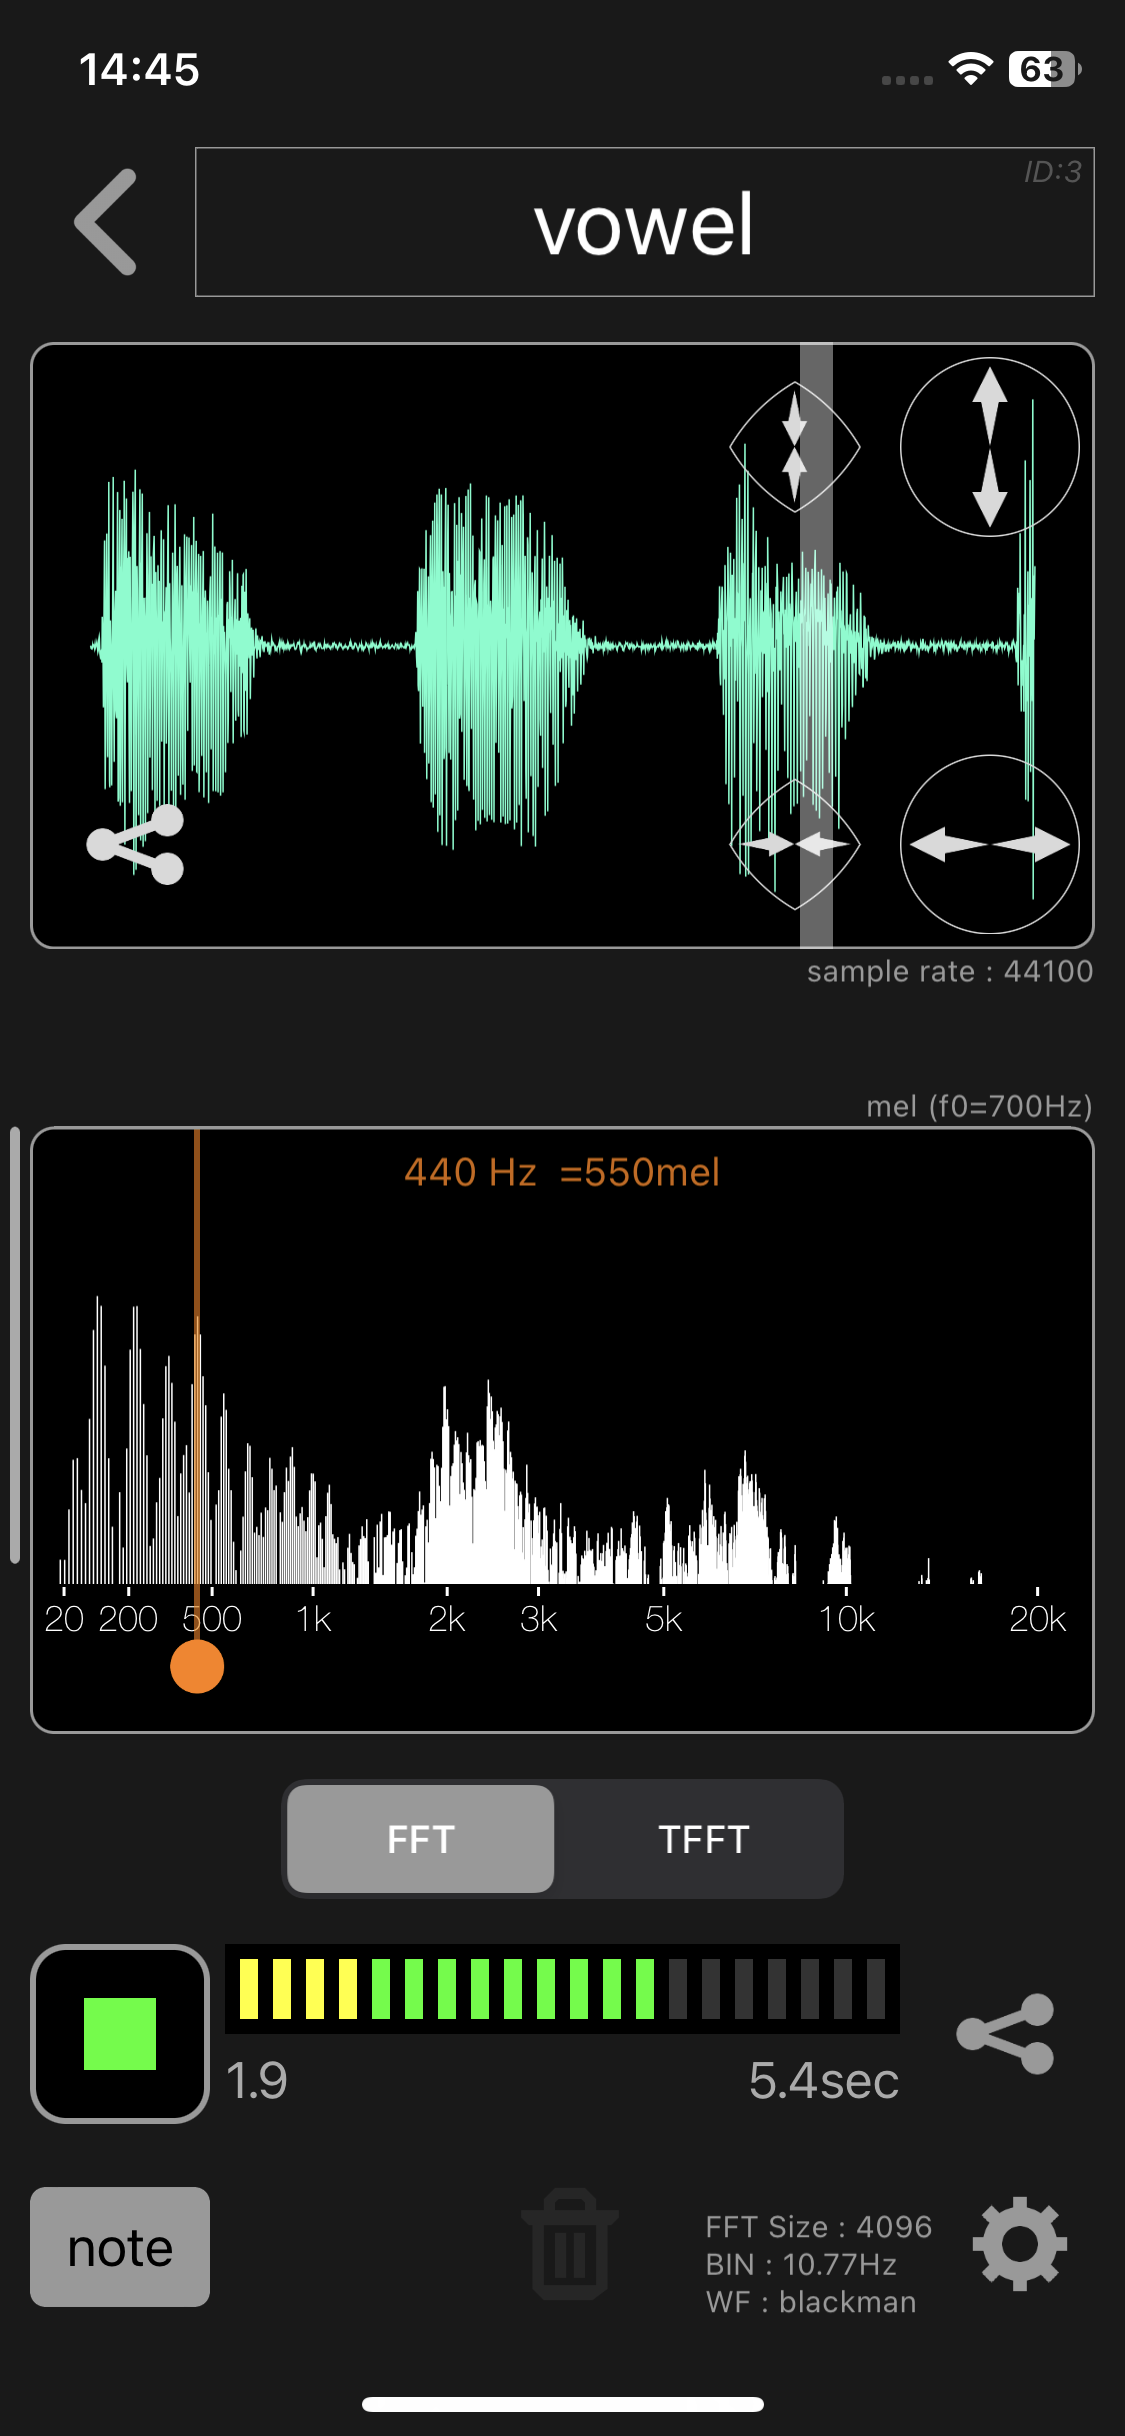
Check Analysis Range (playback)
The area where the audio waveform is displayed is the analysis range.
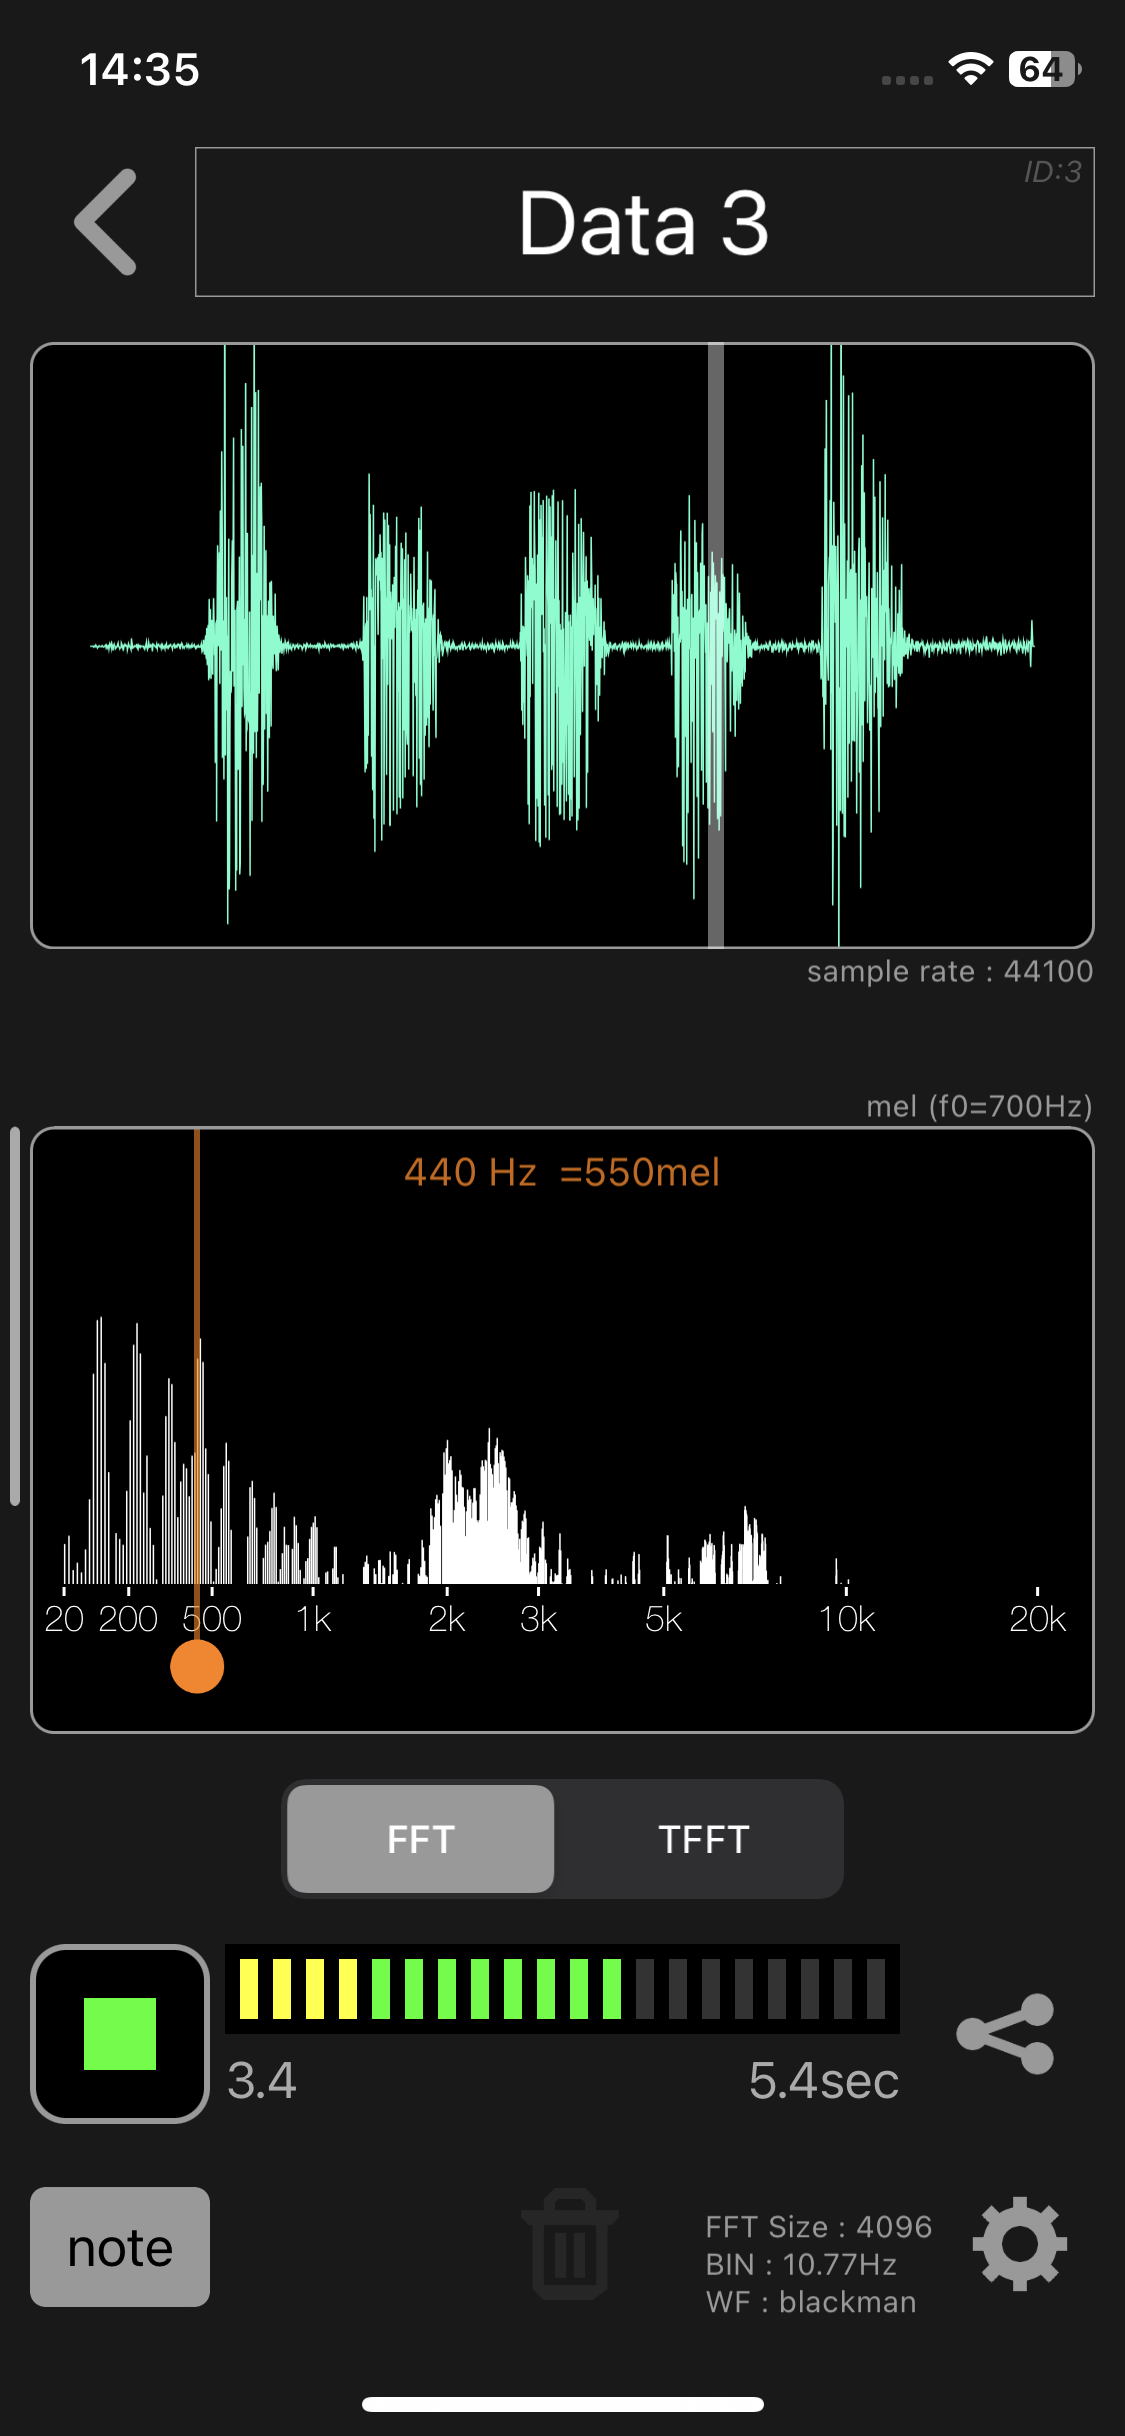
Tap the play button at the bottom left of the dataset screen to play the analysis range of the audio waveform.
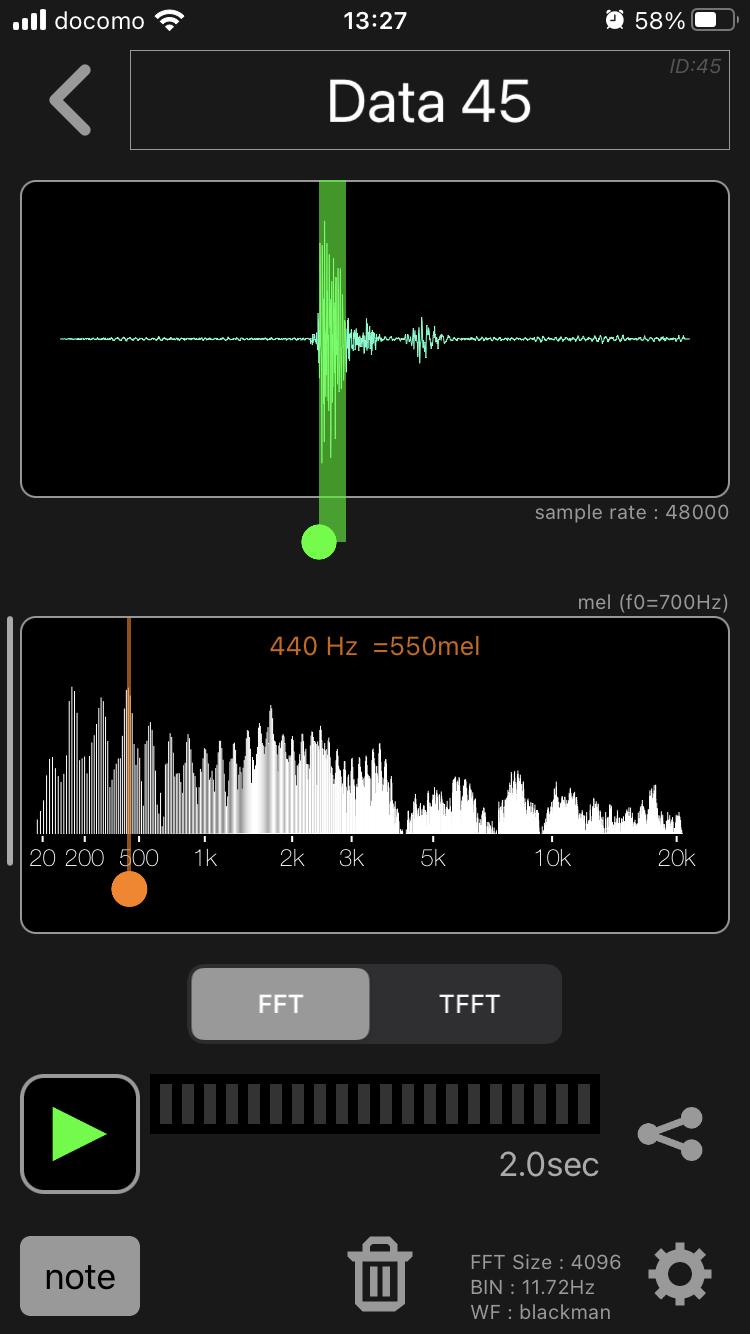
Run FFT
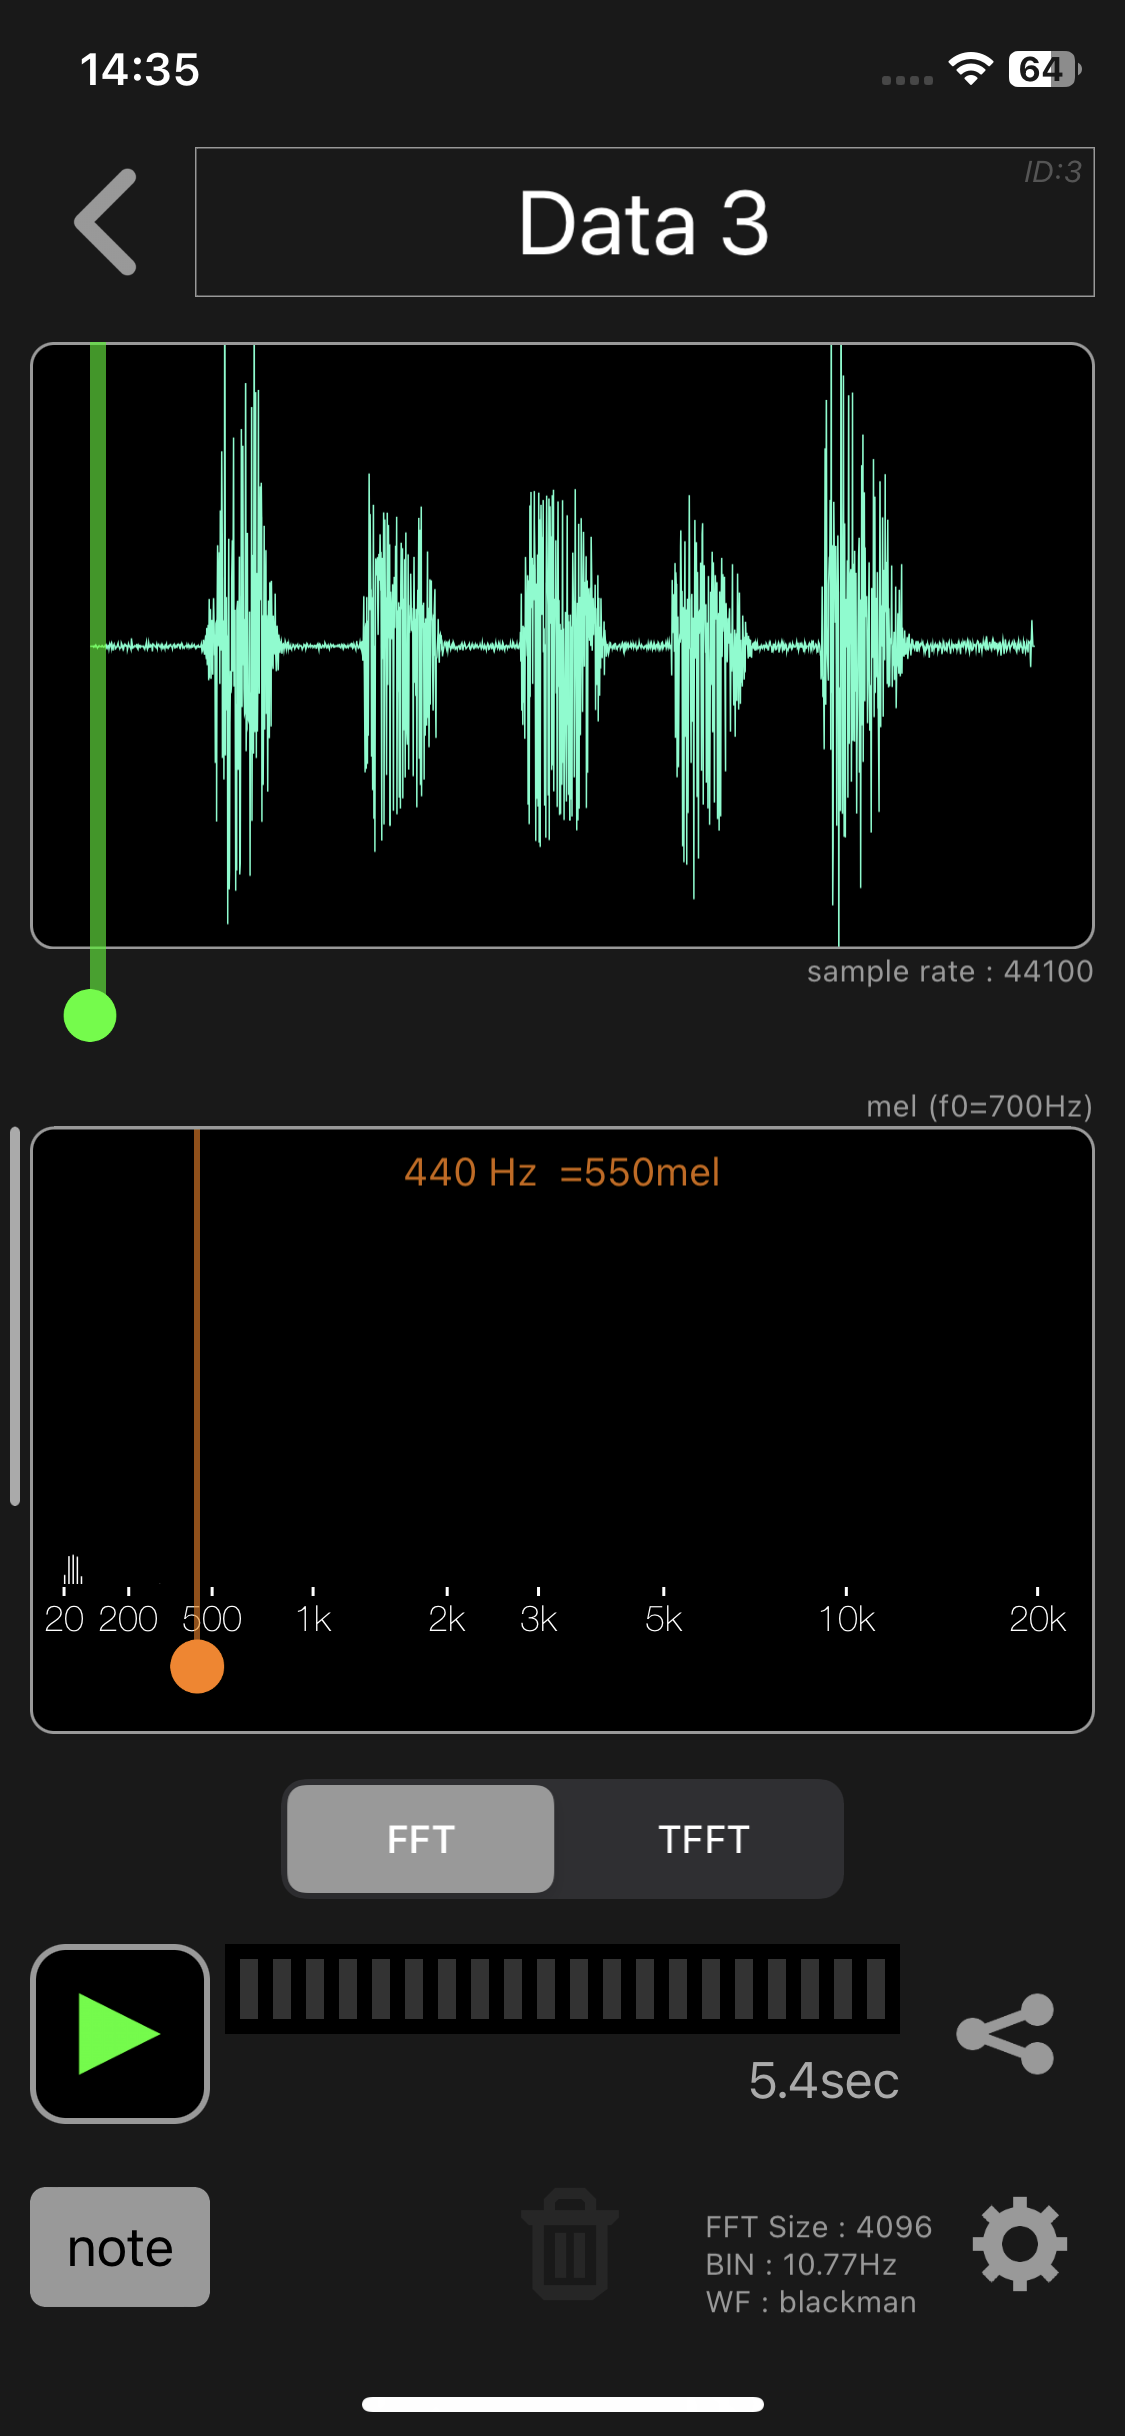
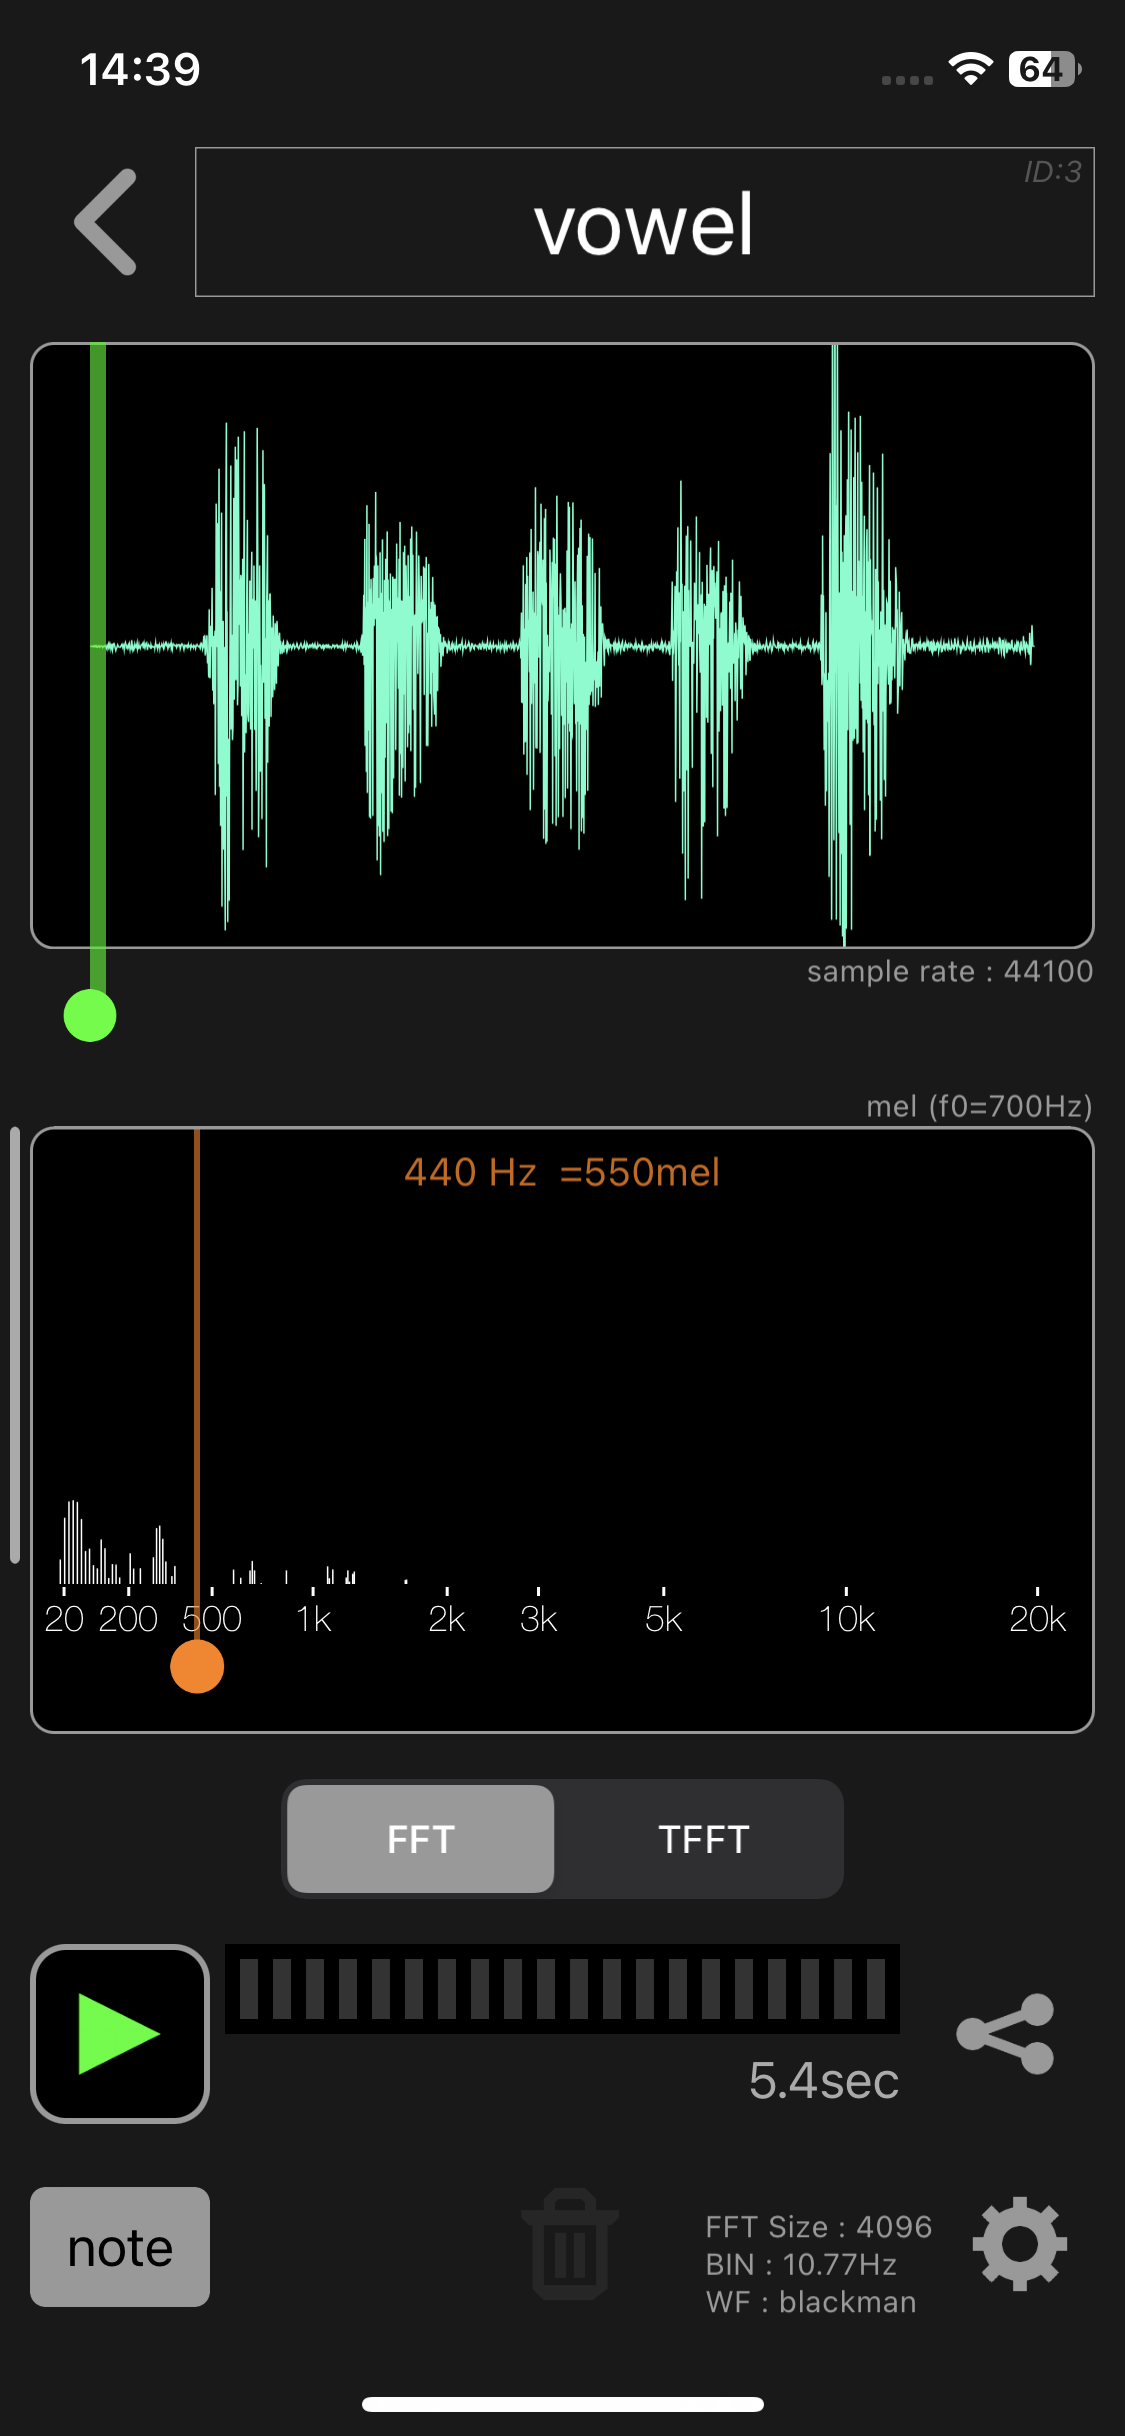
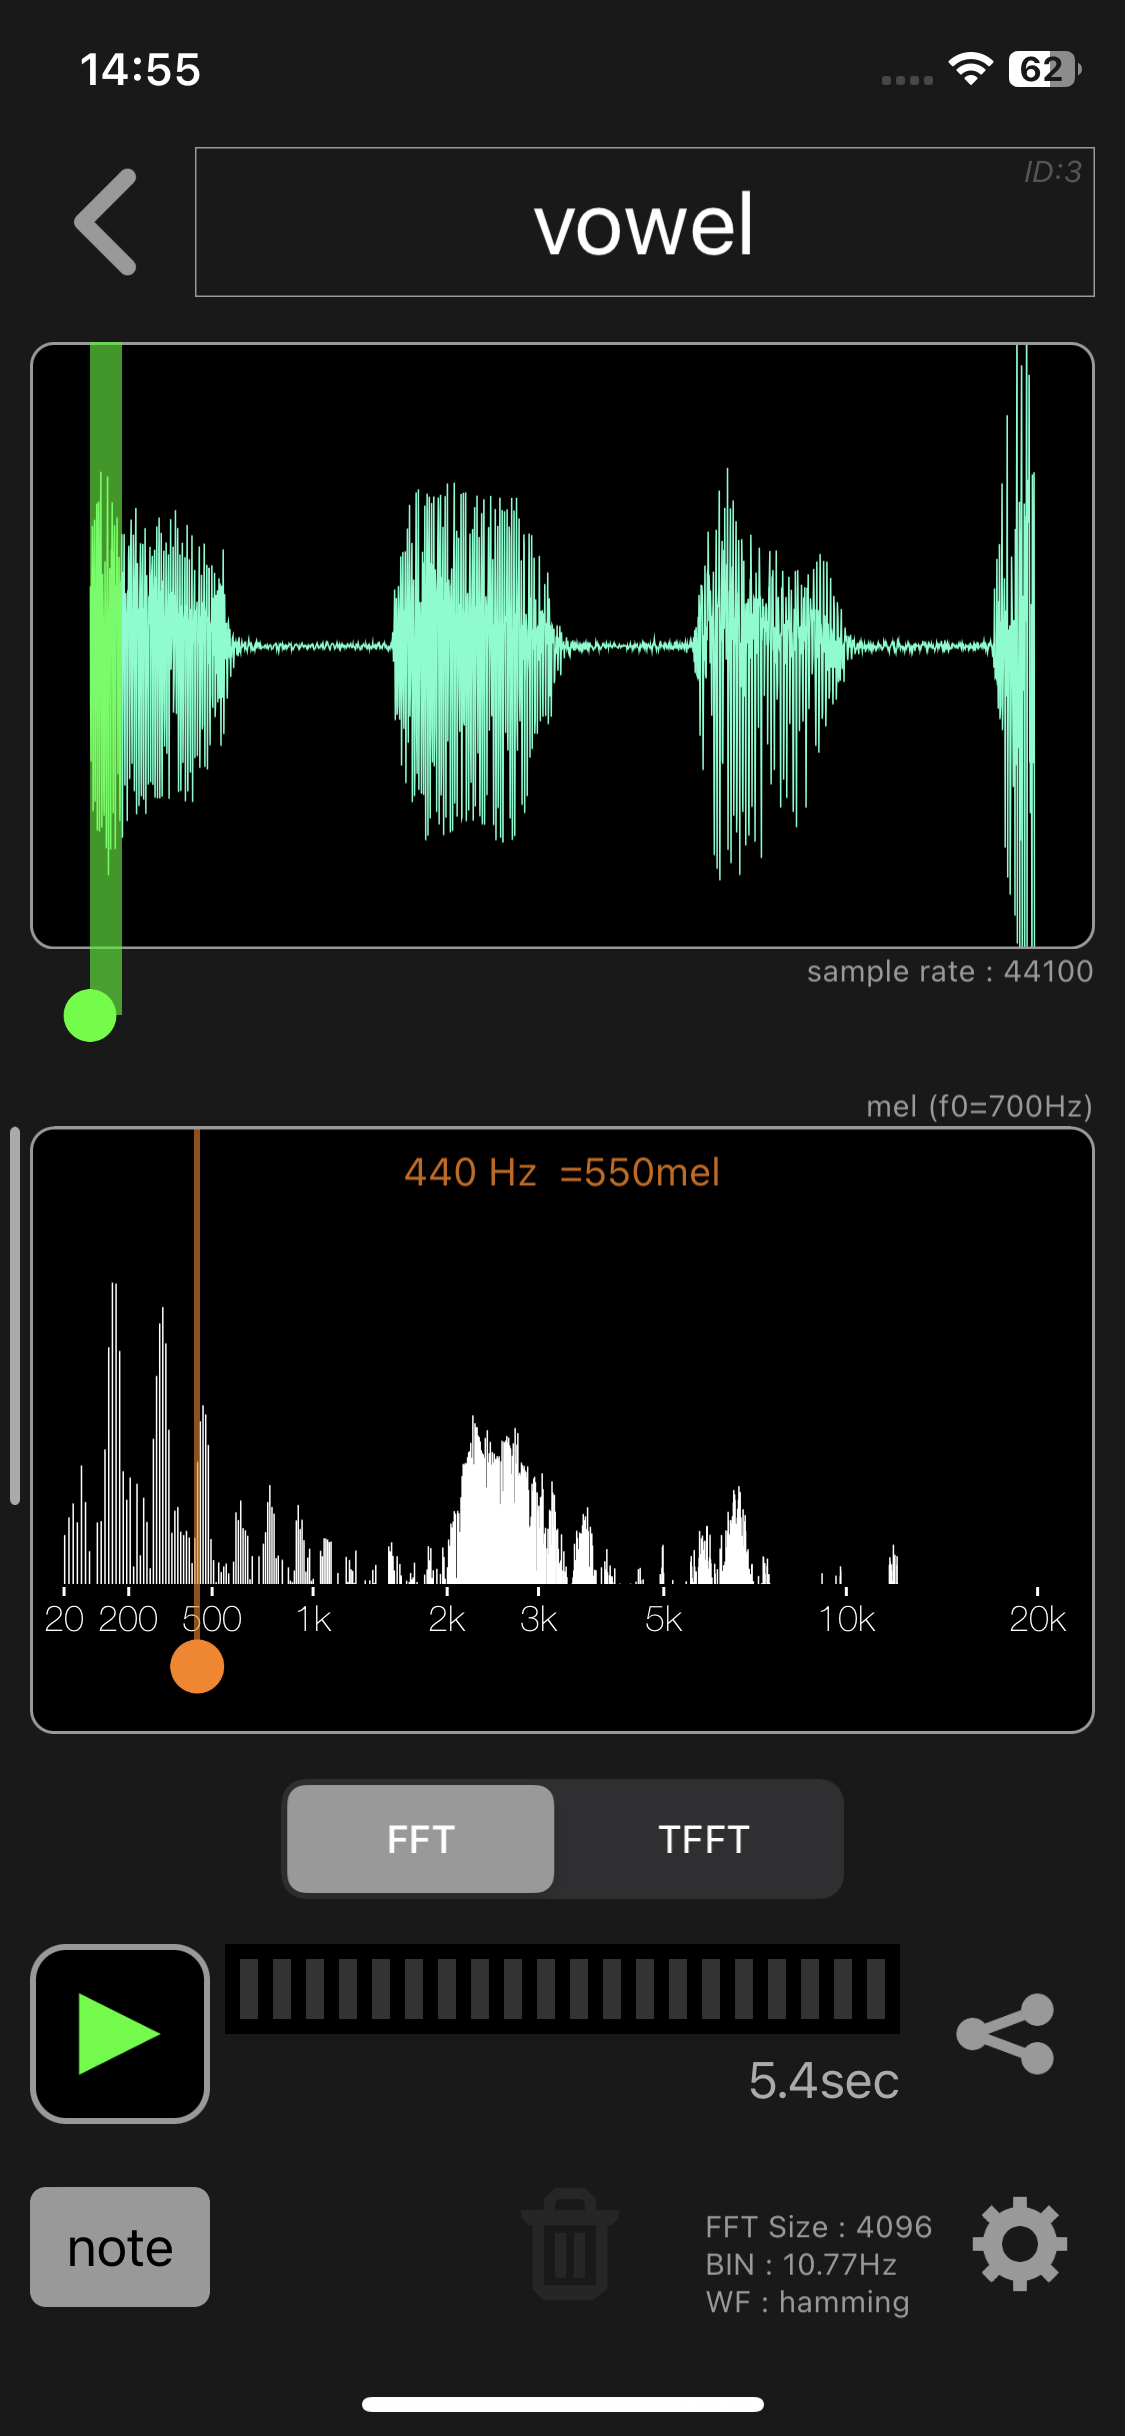
To run FFT, simply drag the FFT analysis range cursor (green circle) below the audio waveform horizontally to the part you want to analyze.
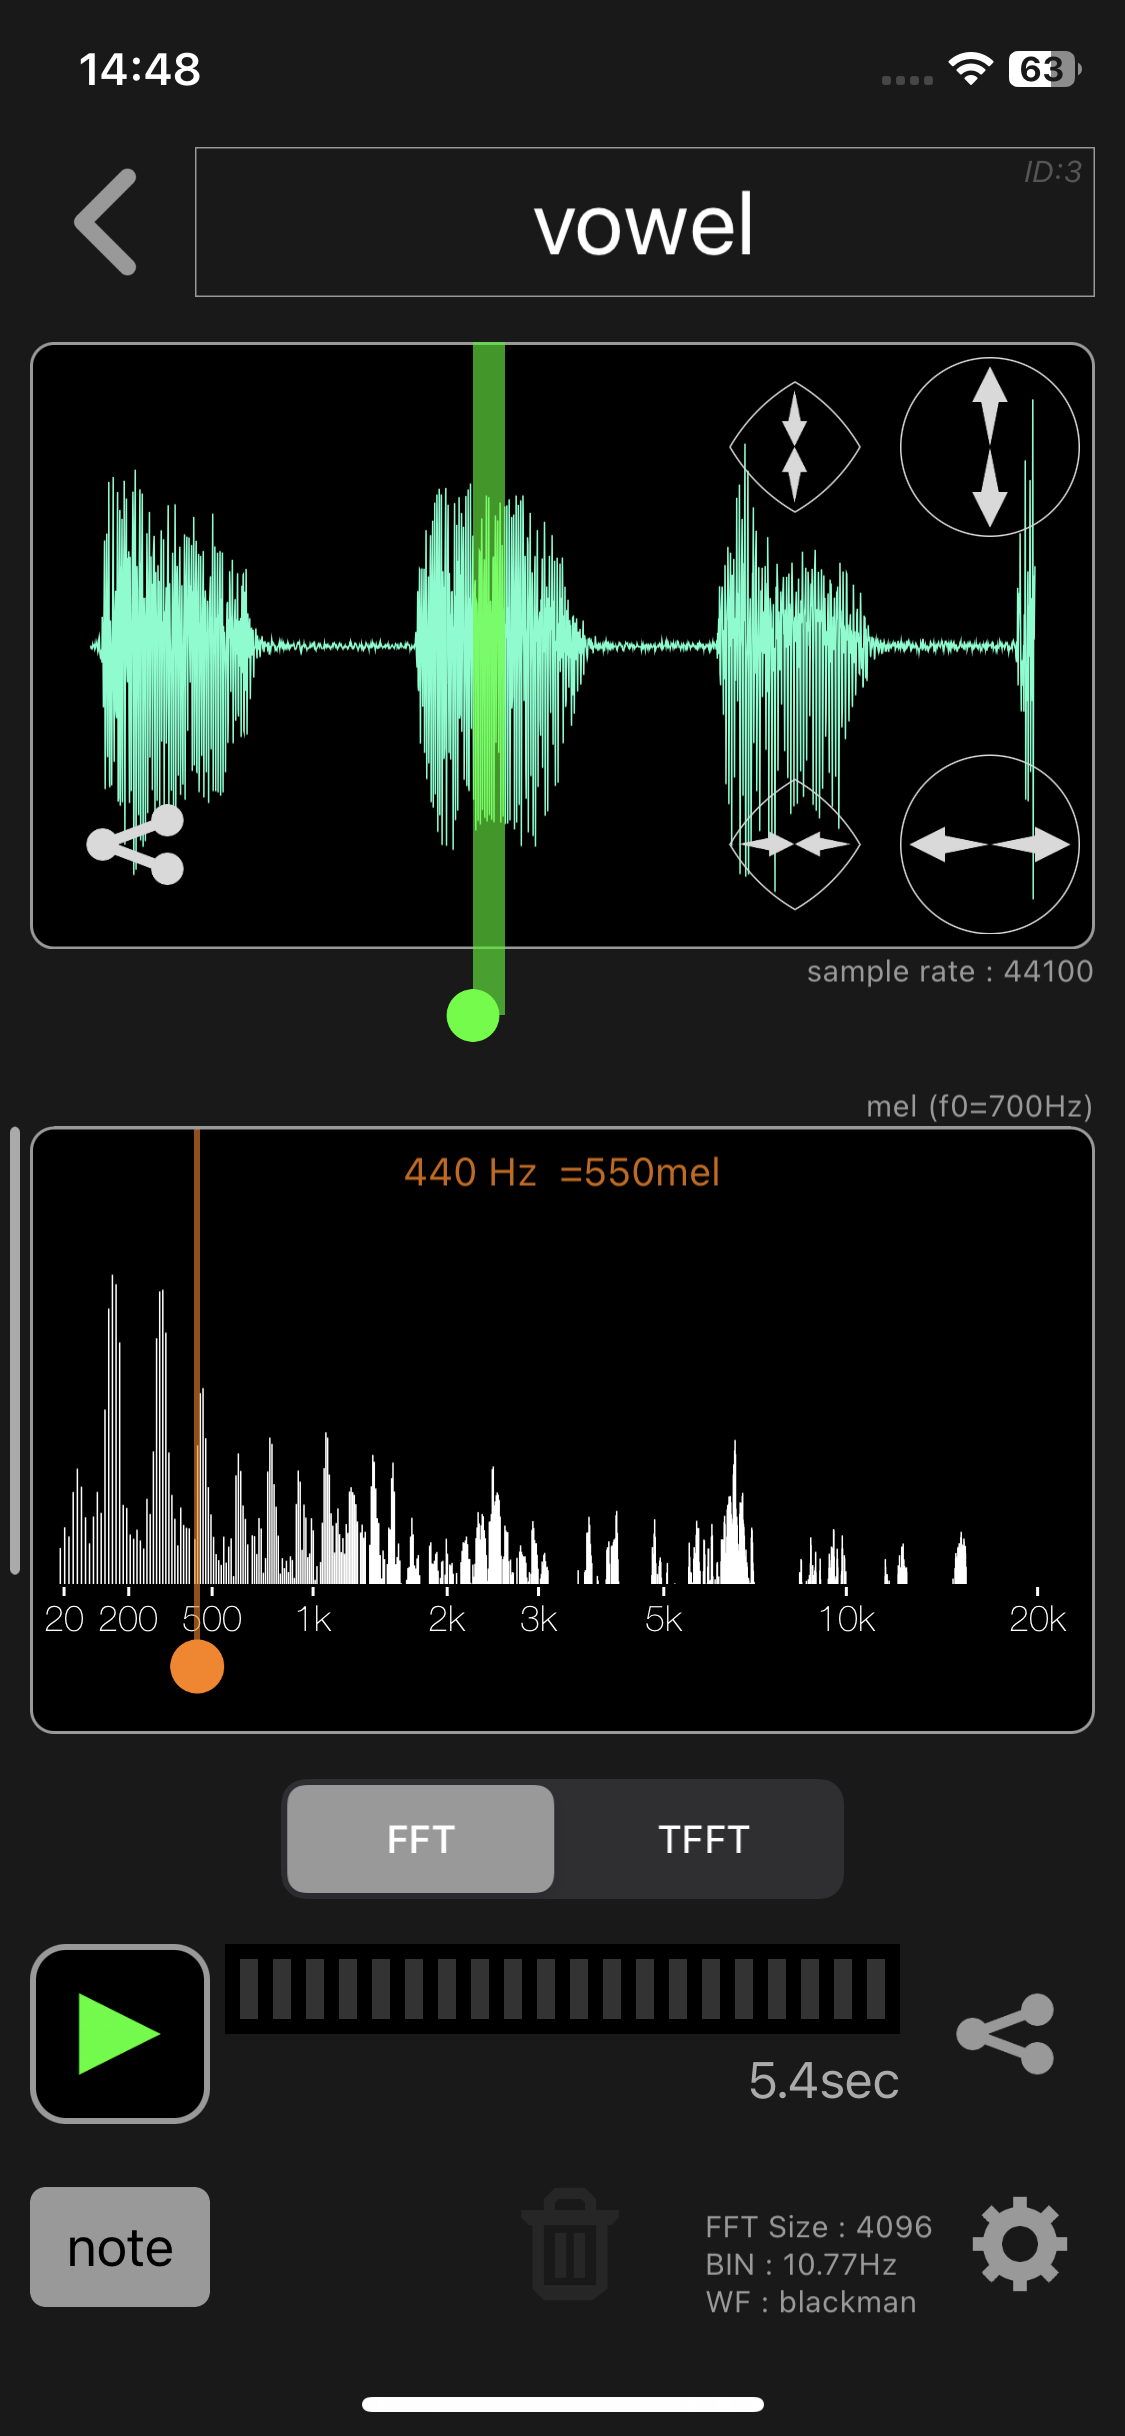
The green band extending above the green circle is the range for FFT analysis. The band width corresponds to the FFT size.
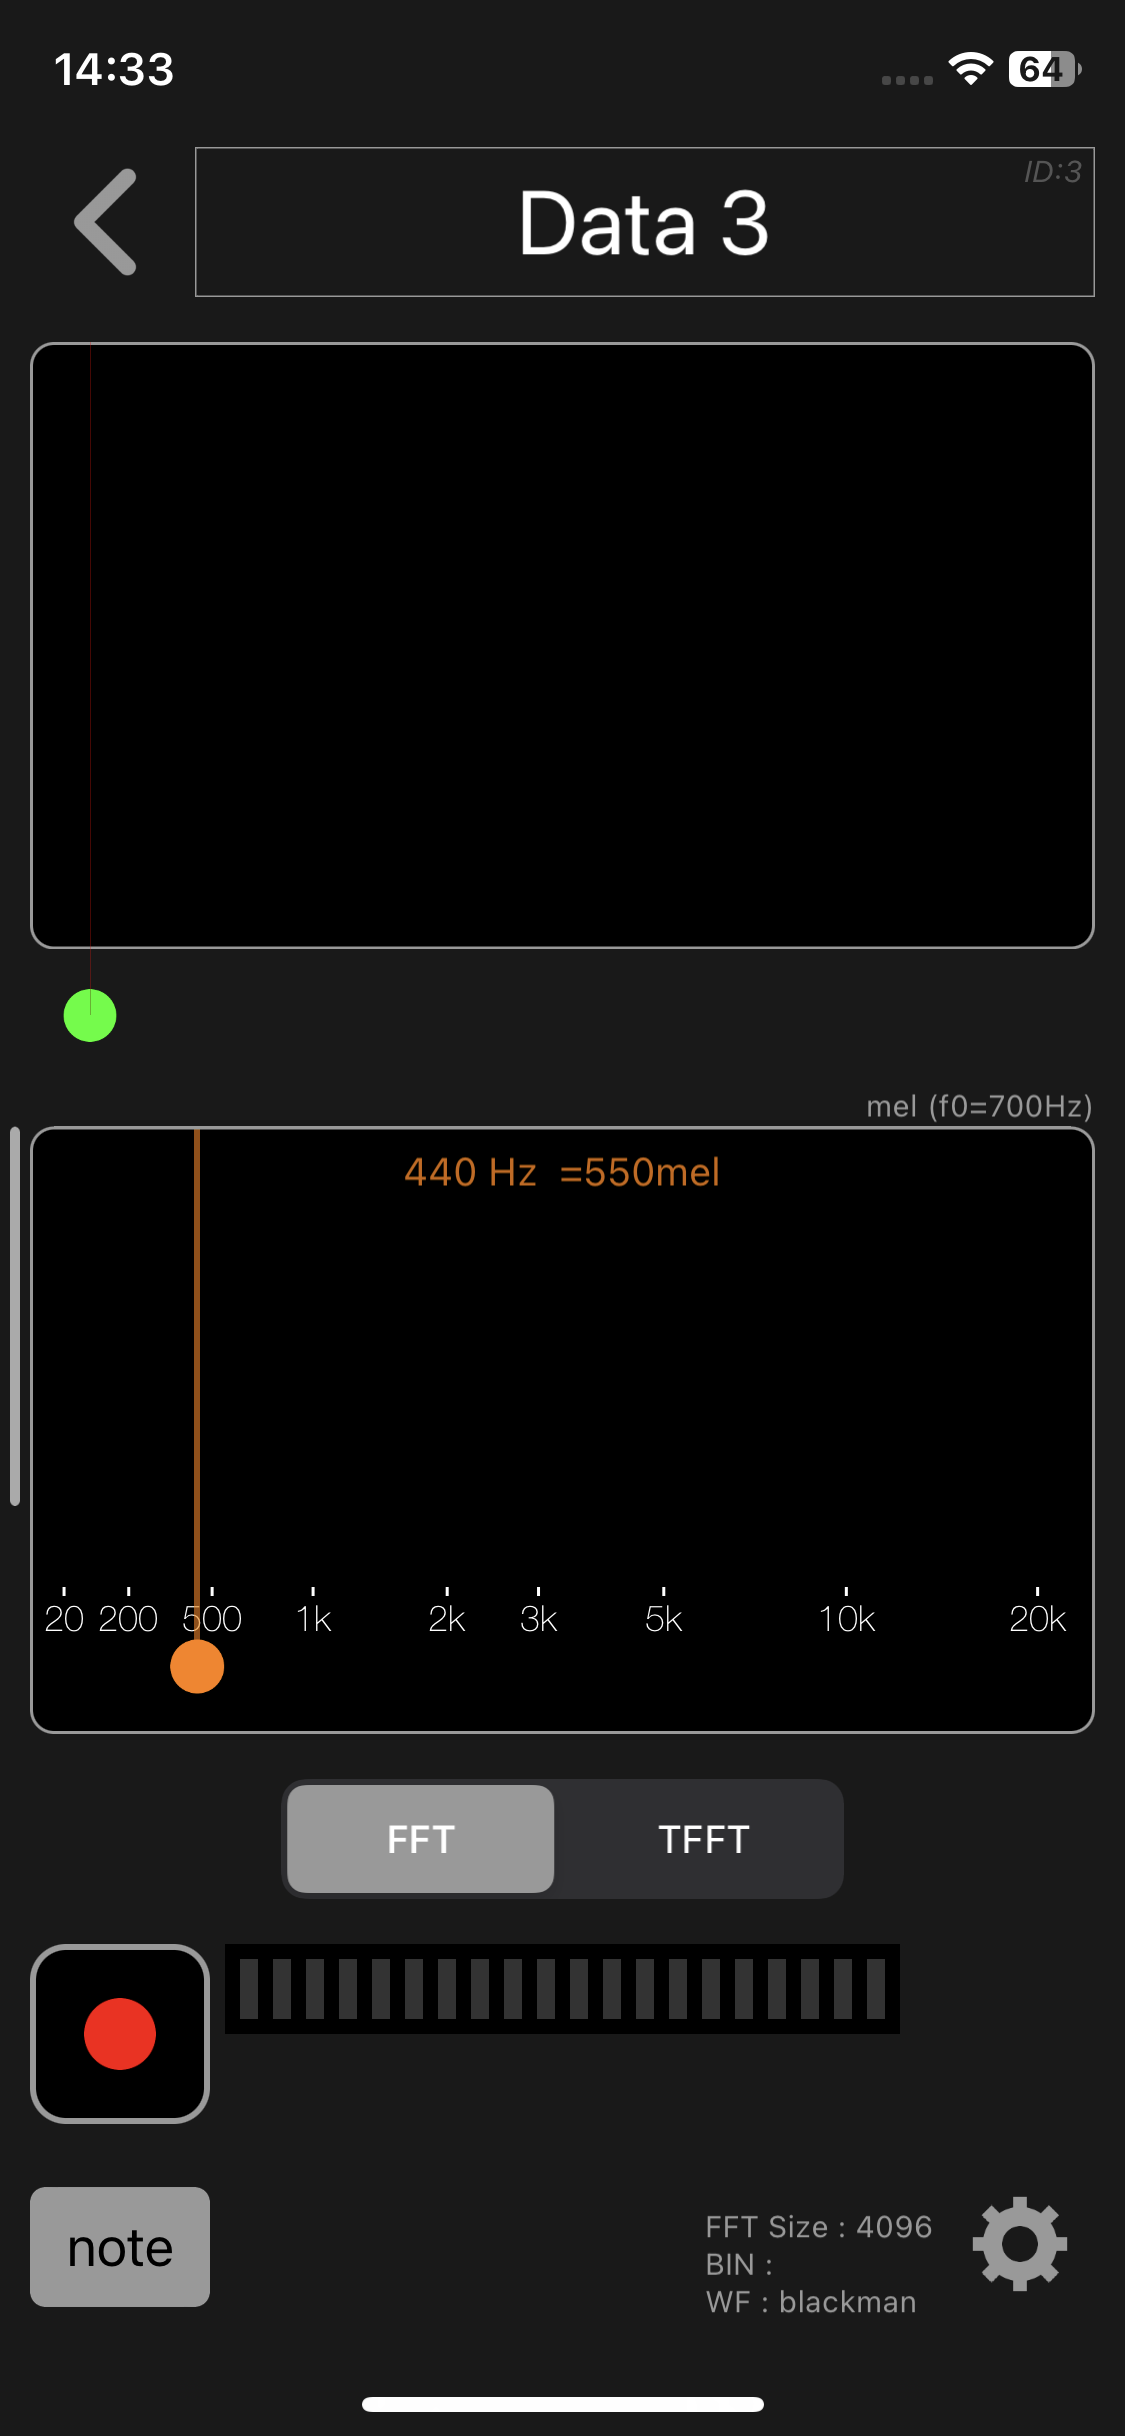
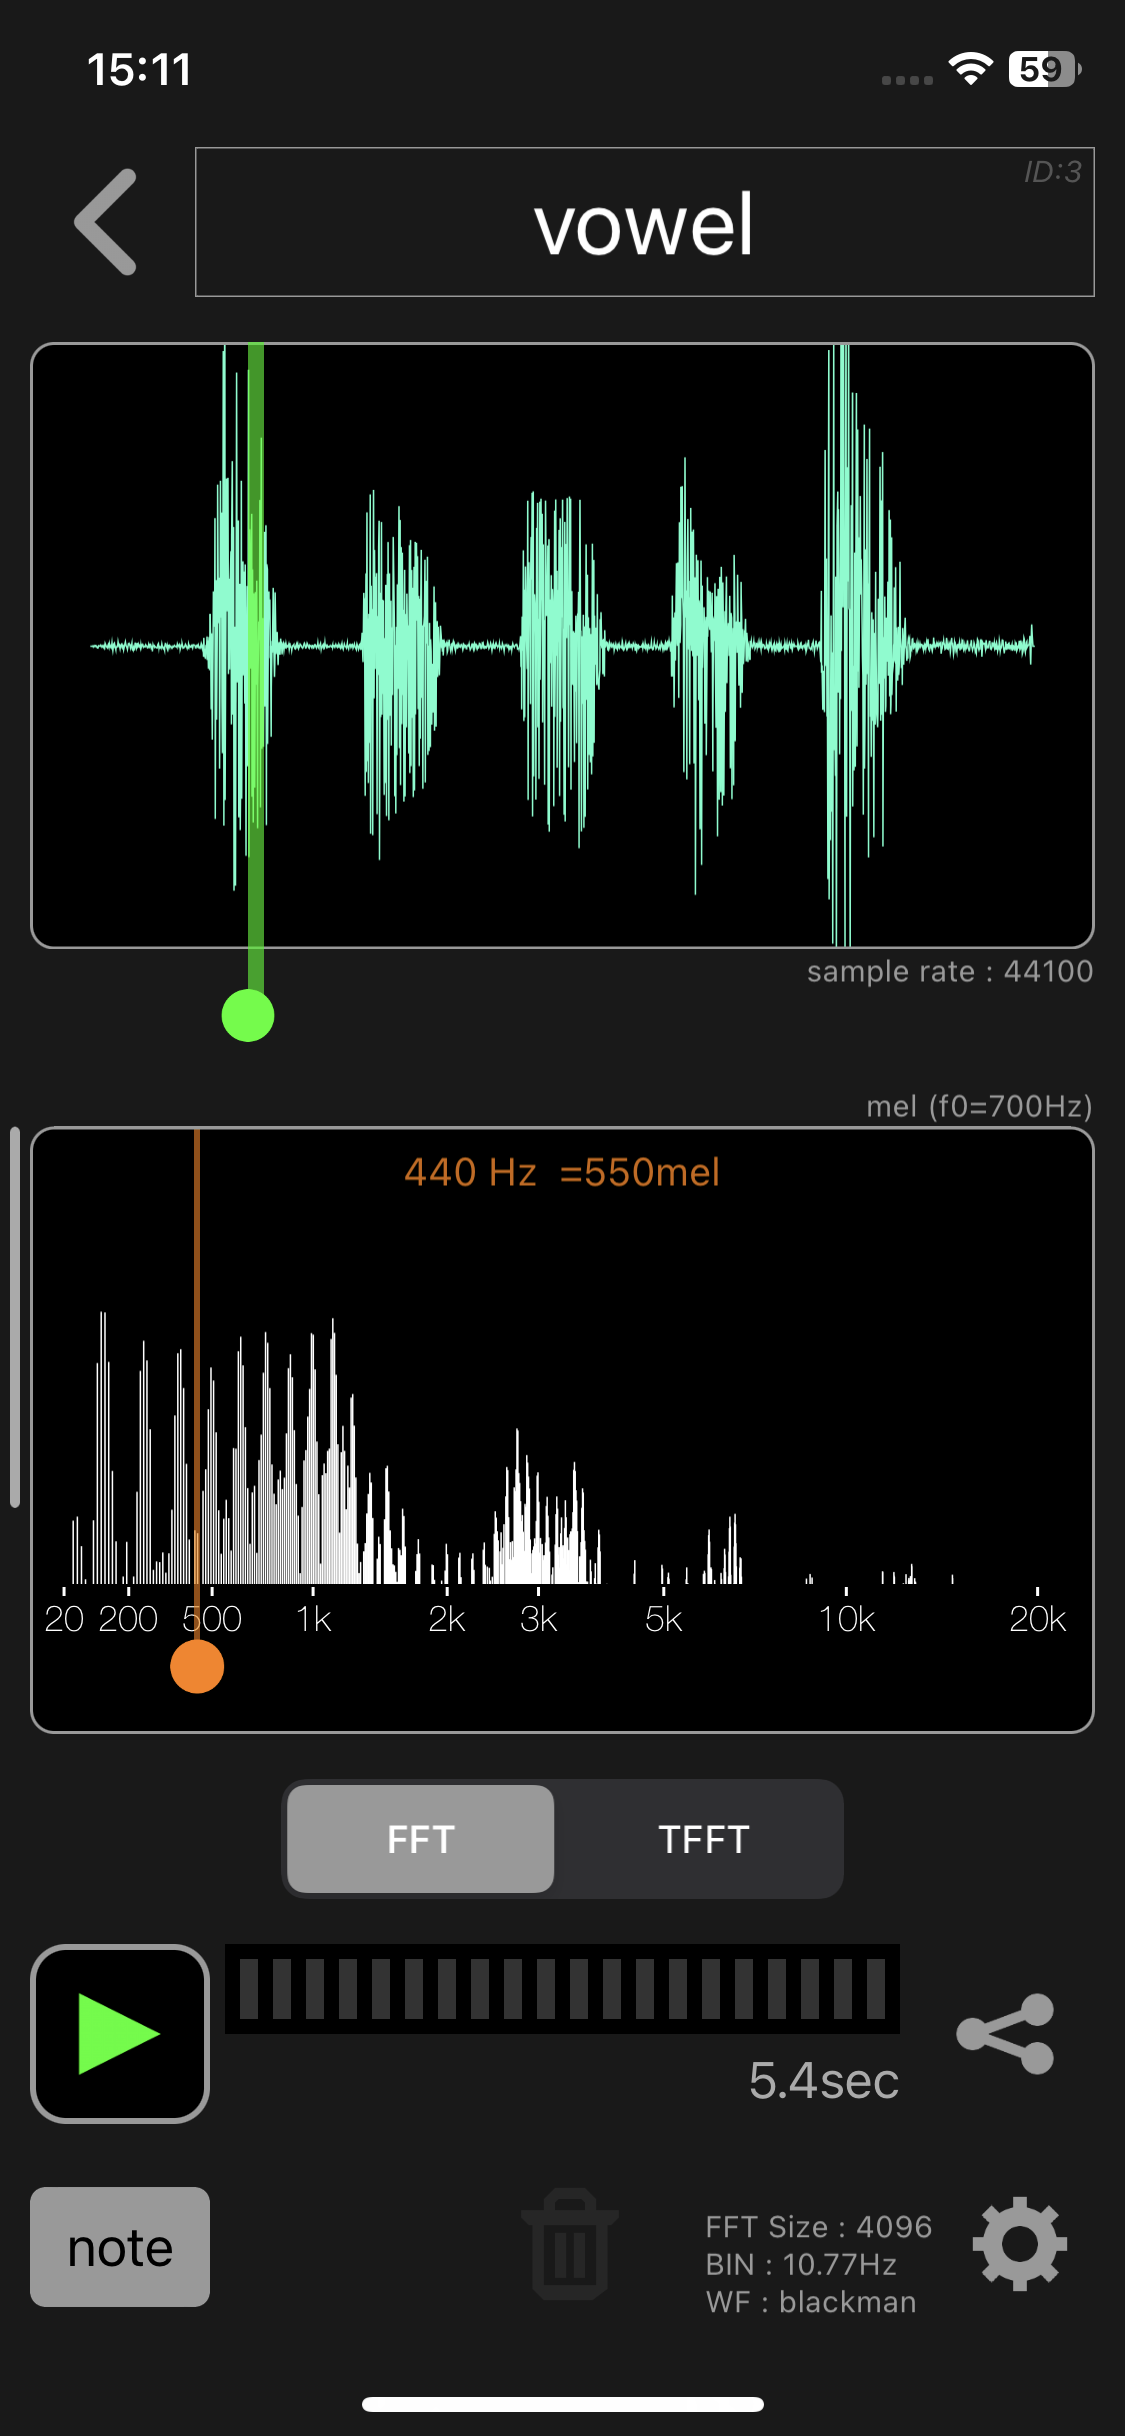
The FFT result is displayed in the center of the dataset screen as a relative power spectrum.
There is an orange cursor at the bottom of the relative power spectrum graph. By dragging this, you can know the frequency of the part you care about numerically.
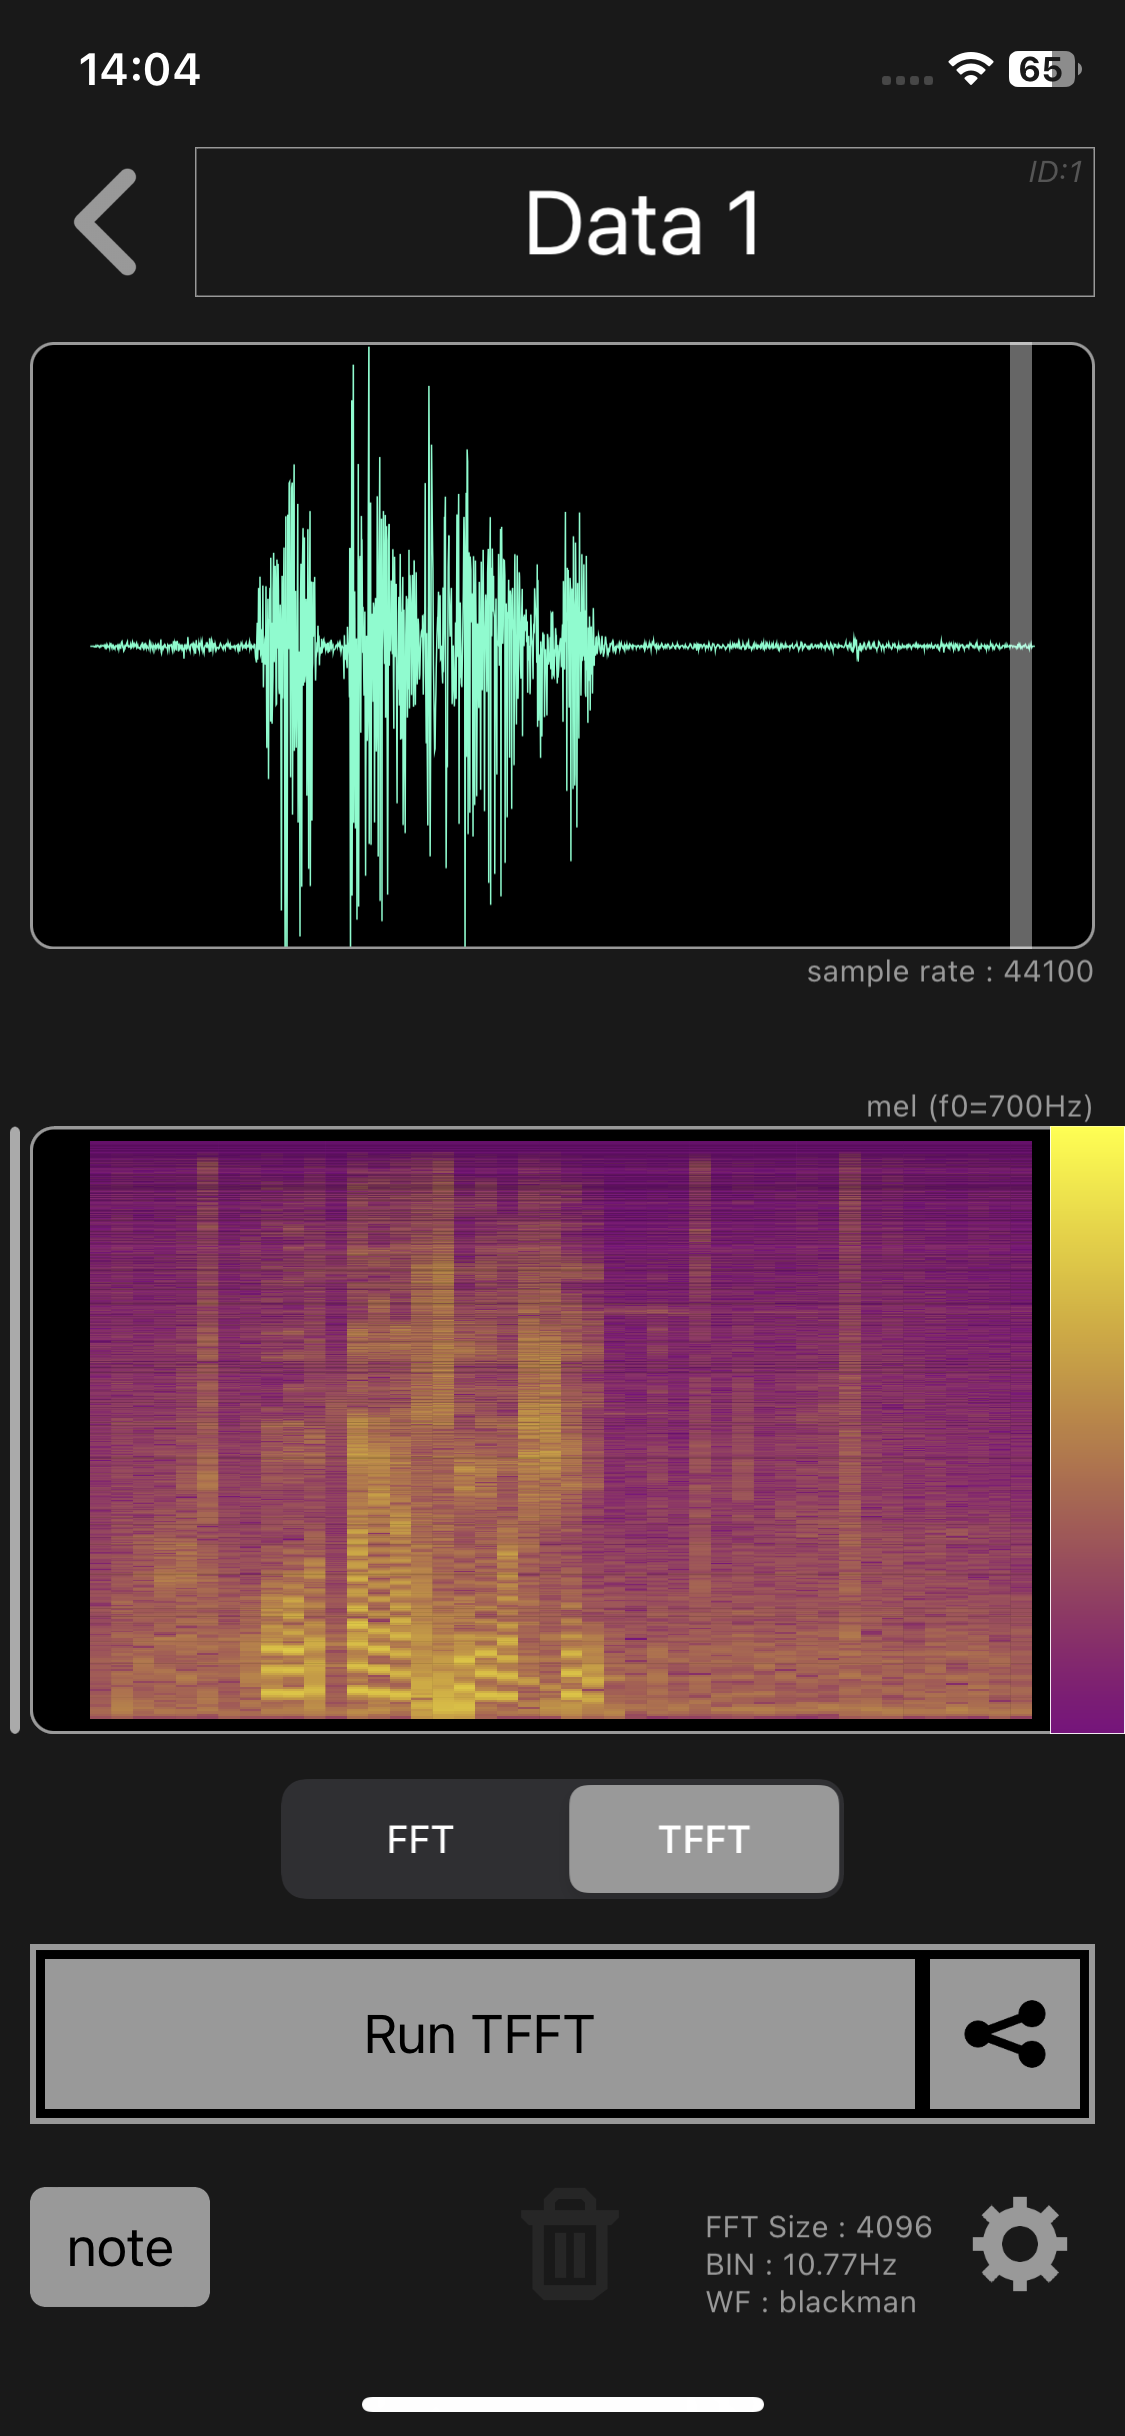
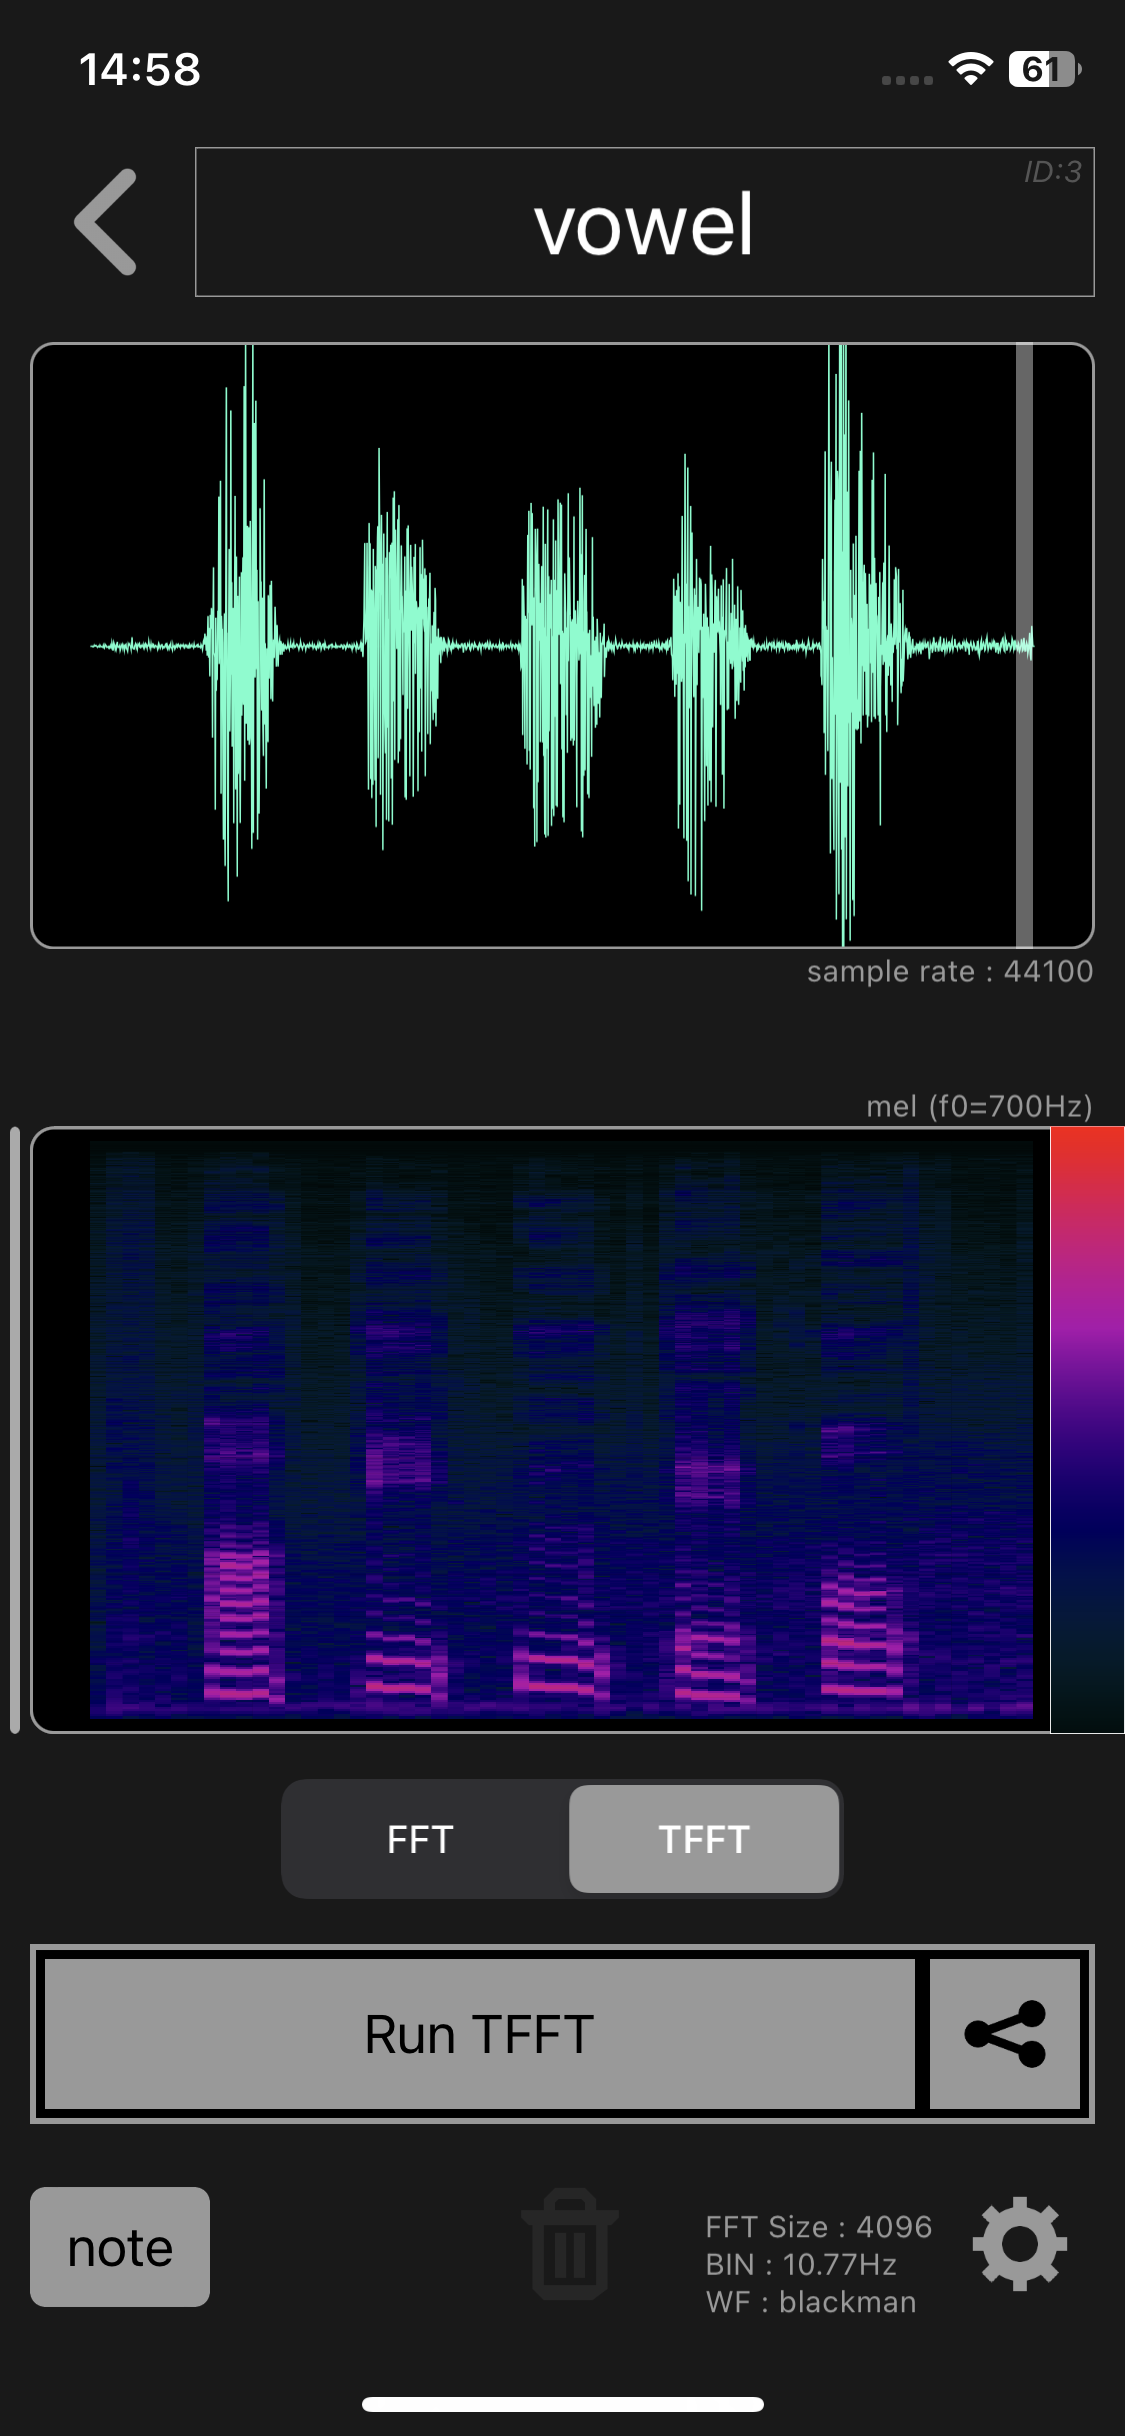
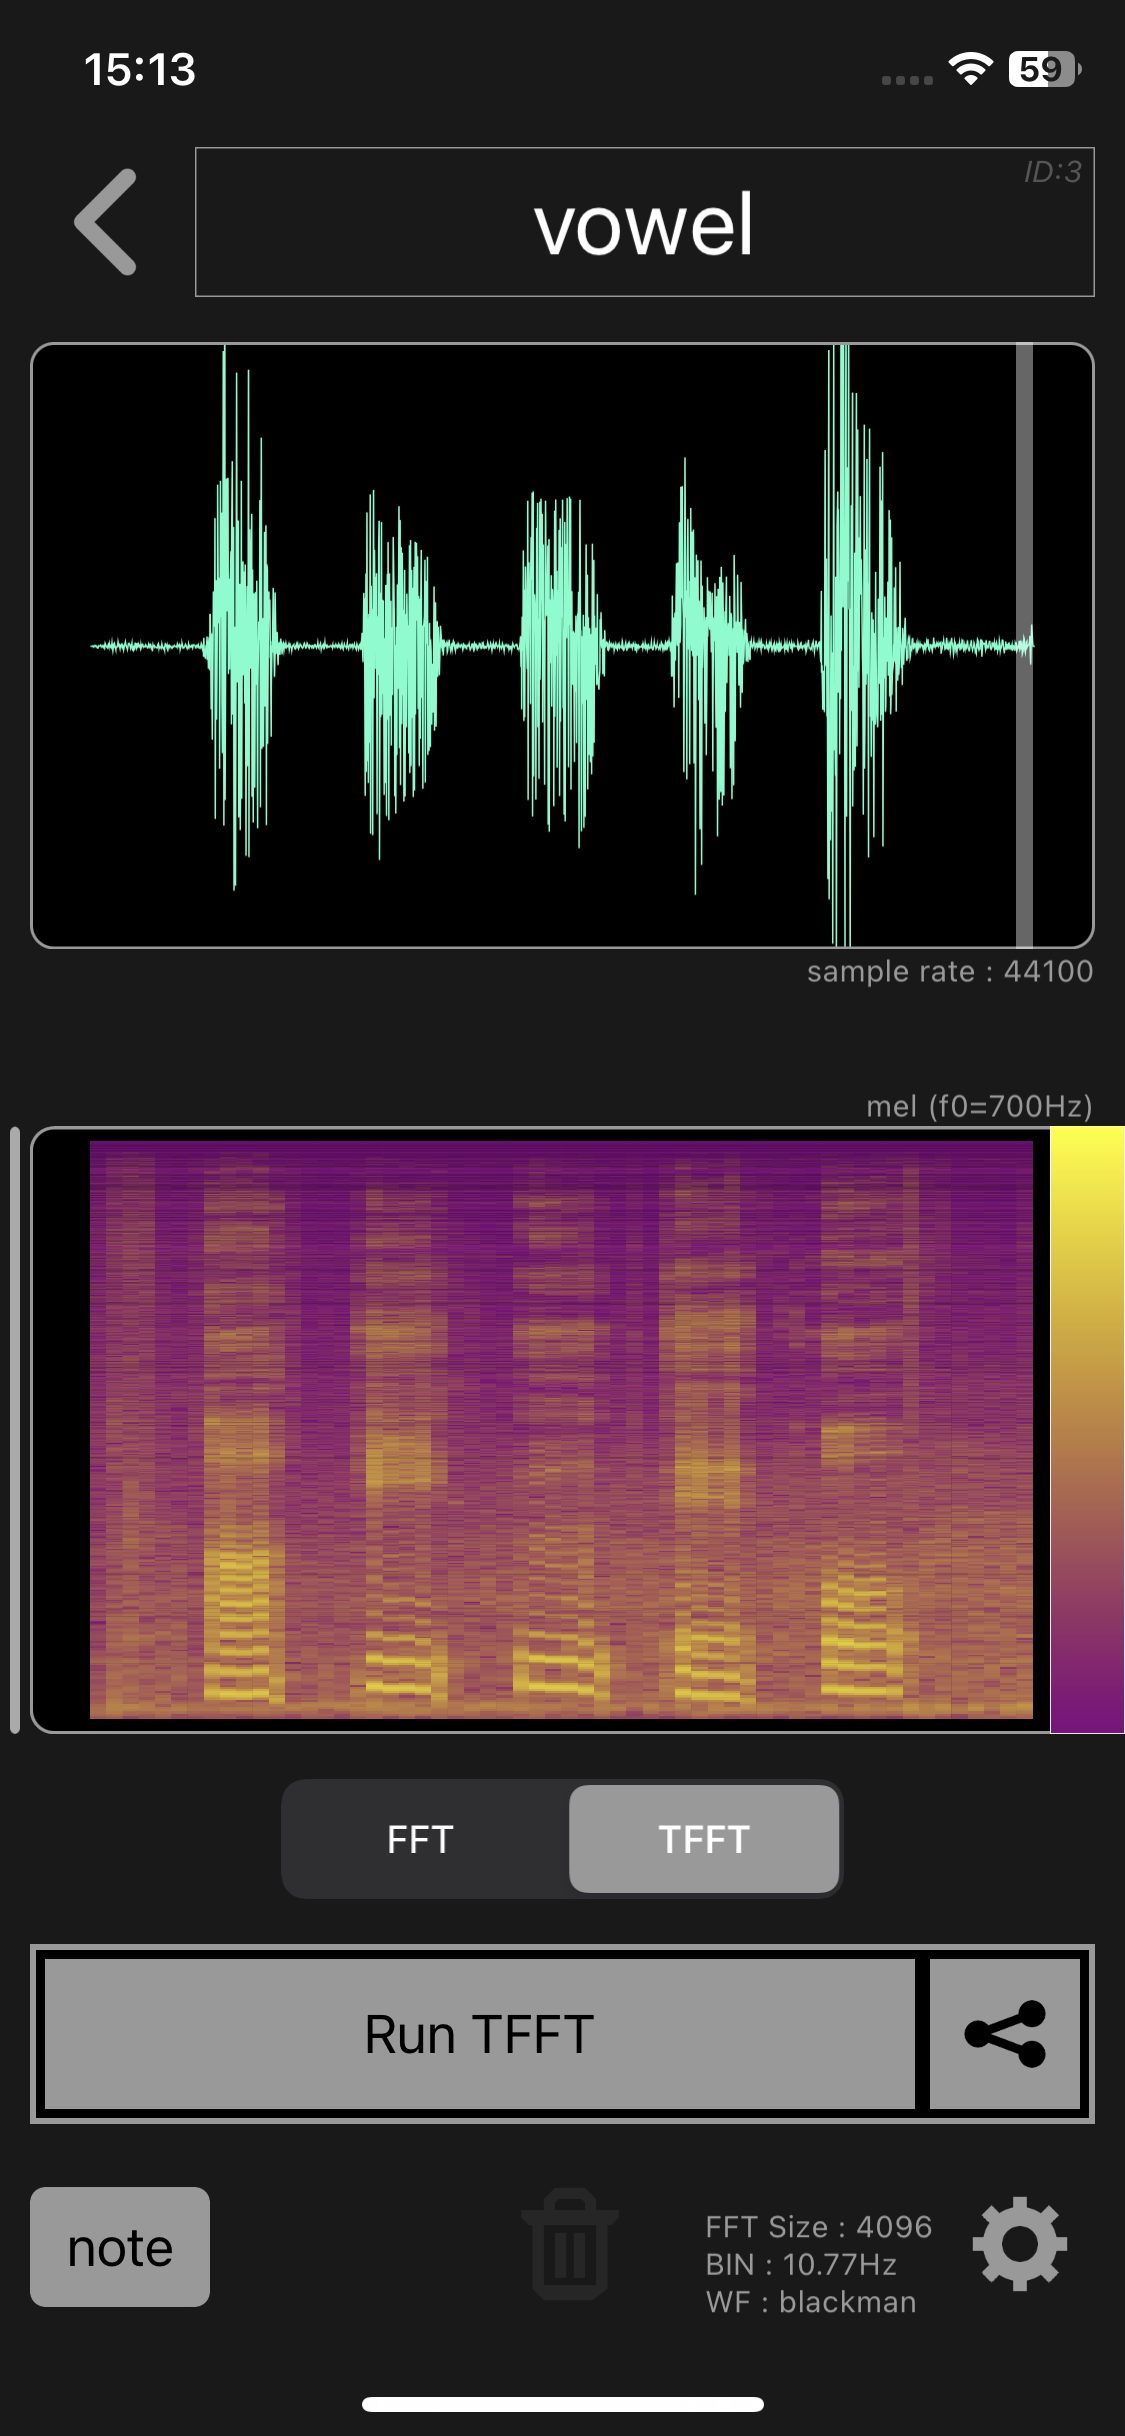
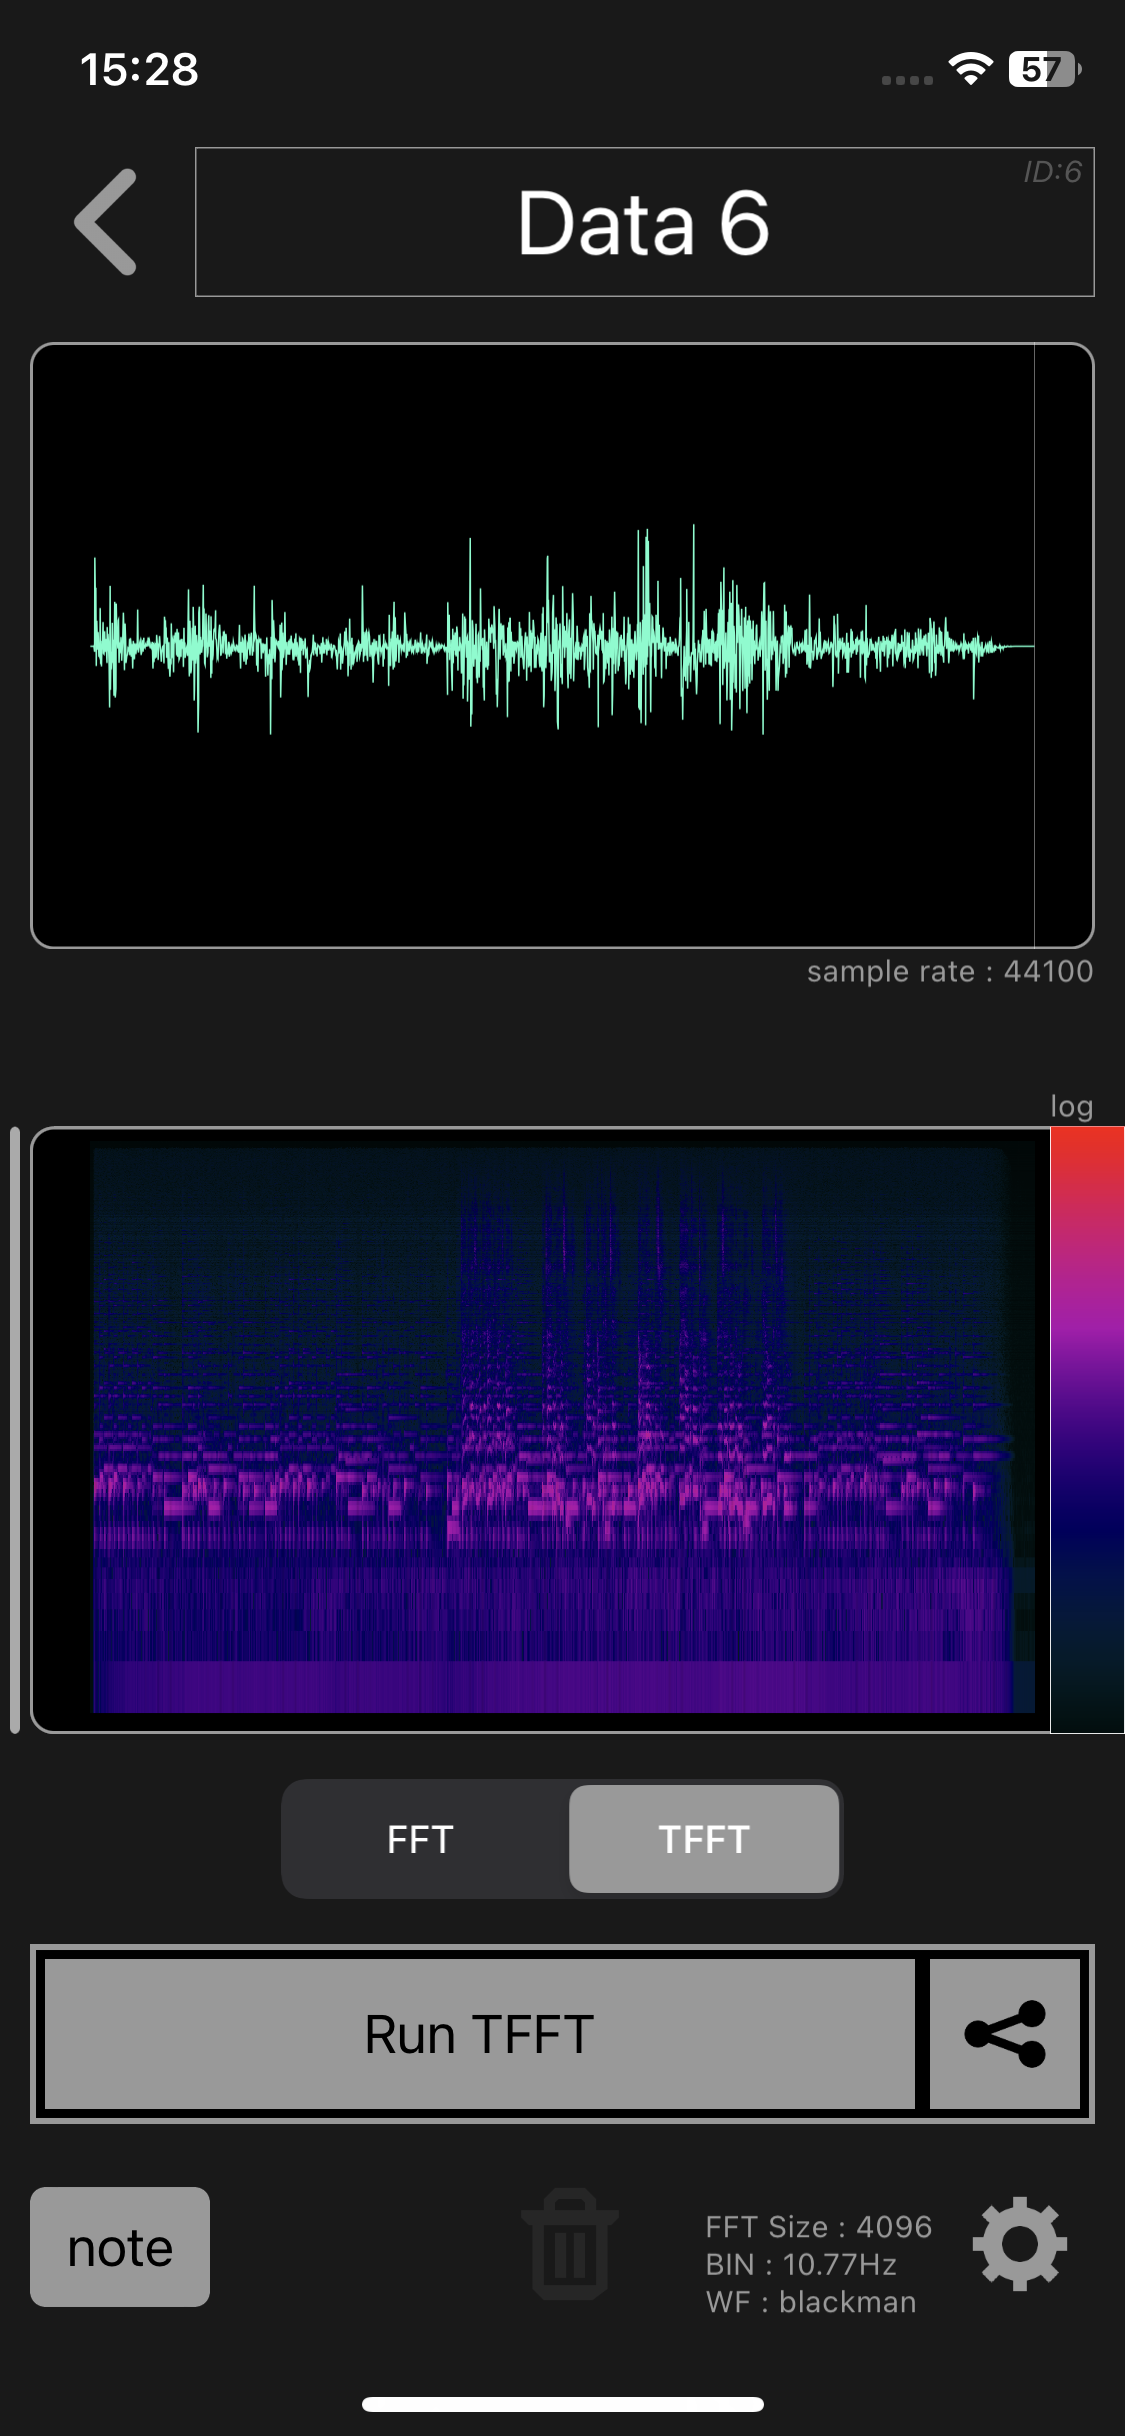
Run TFFT

Select “TFFT” from the FFT/TFFT options on the dataset screen and tap the “Run TFFT” button to display the TFFT image after calculation. (If the analysis range is short, it will be automatically executed, so there is no need to tap the “Run TFFT” button.)
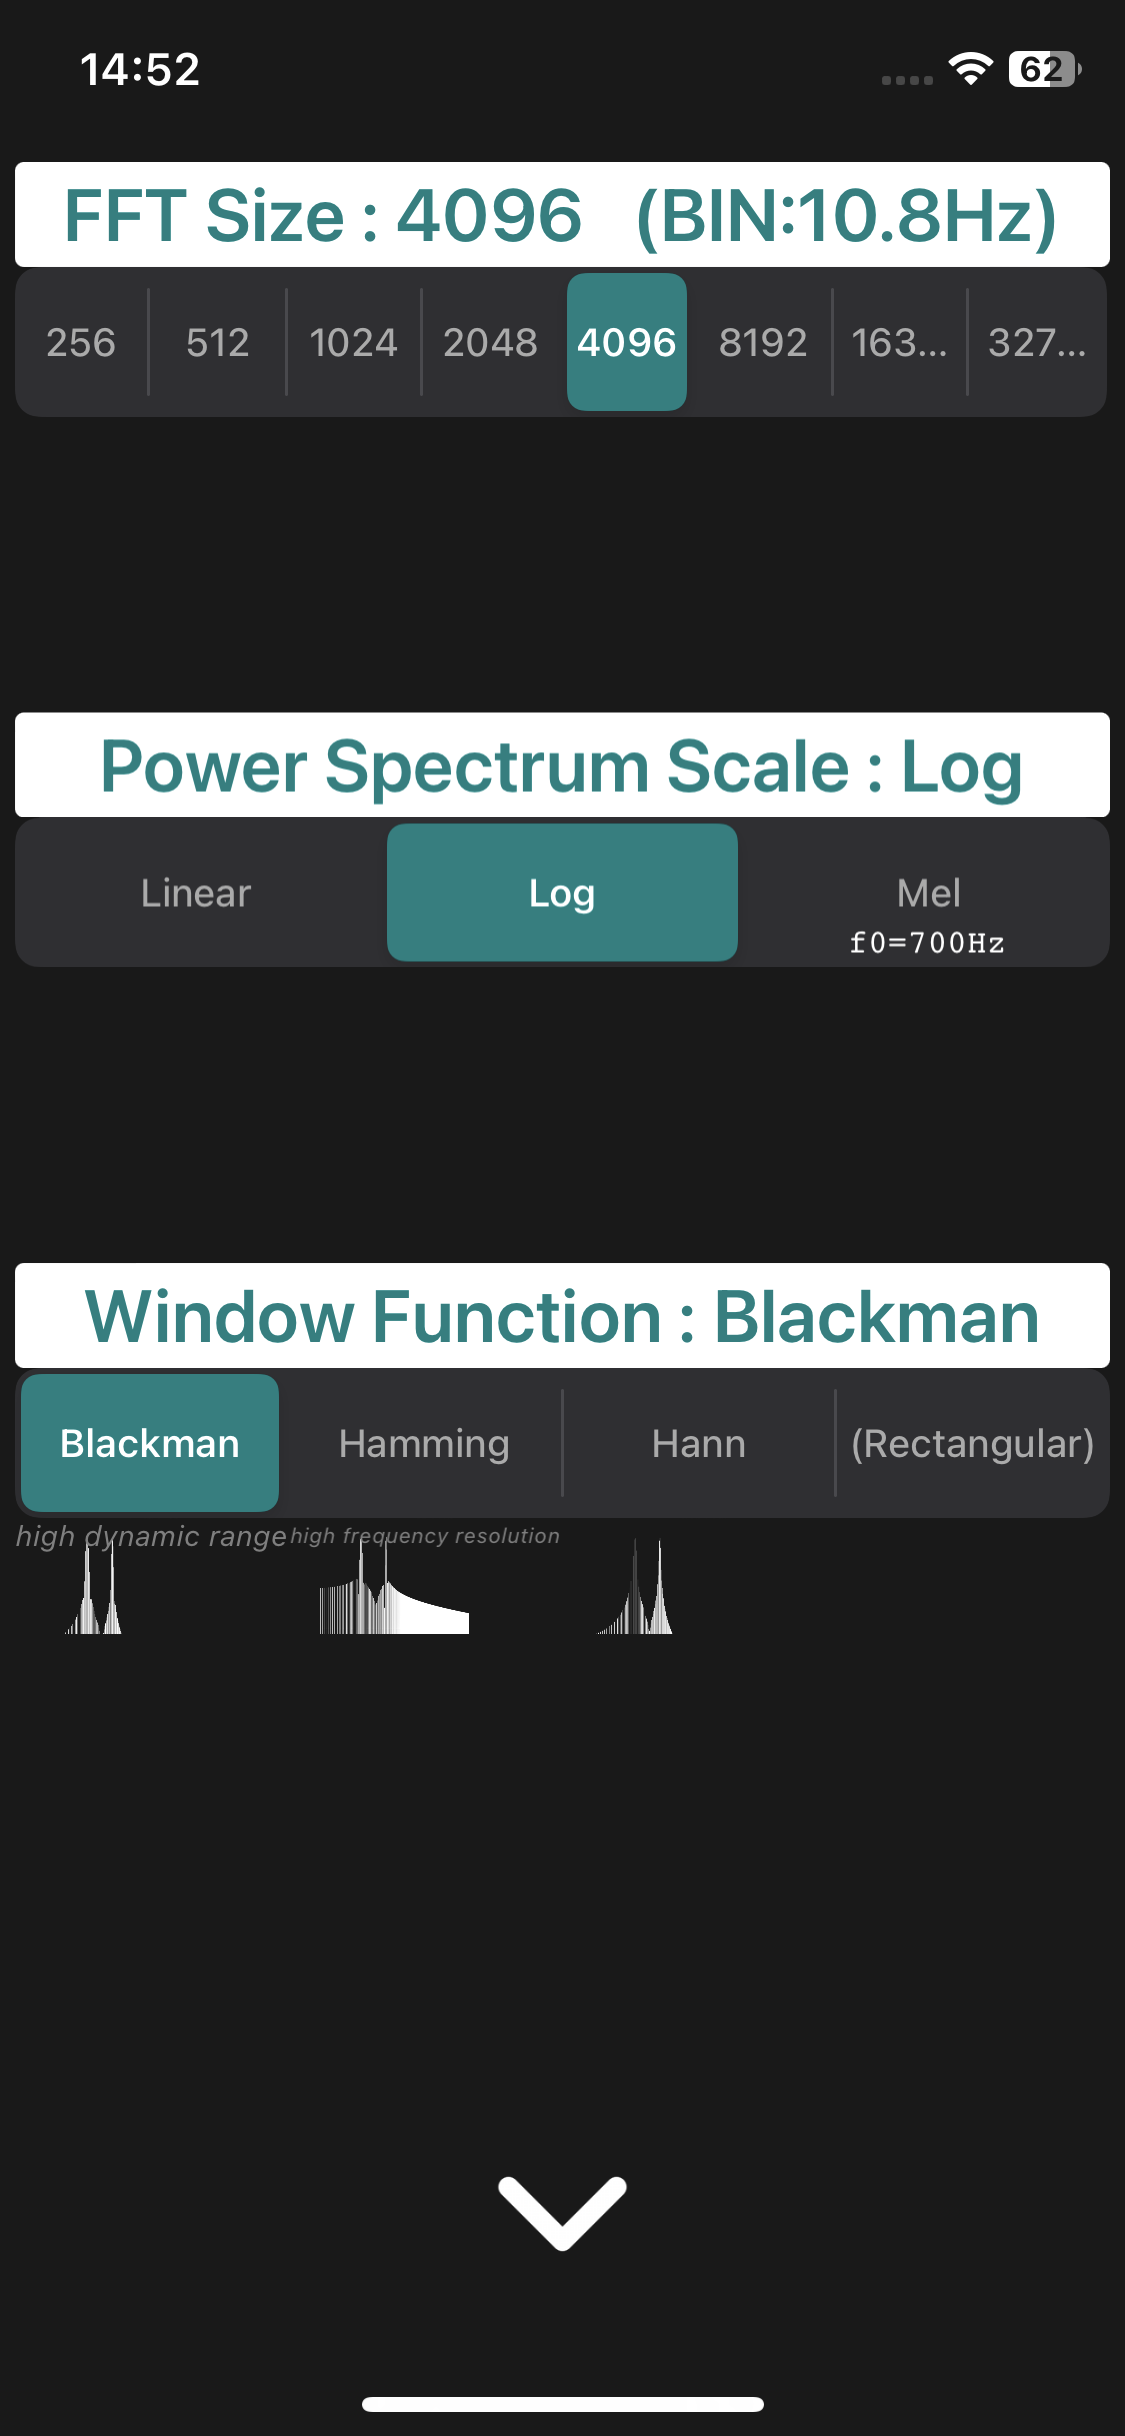
Settings: FFT Size

The FFT size is set on the setting screen. The setting screen appears when you tap the gear button at the bottom right of the dataset screen.

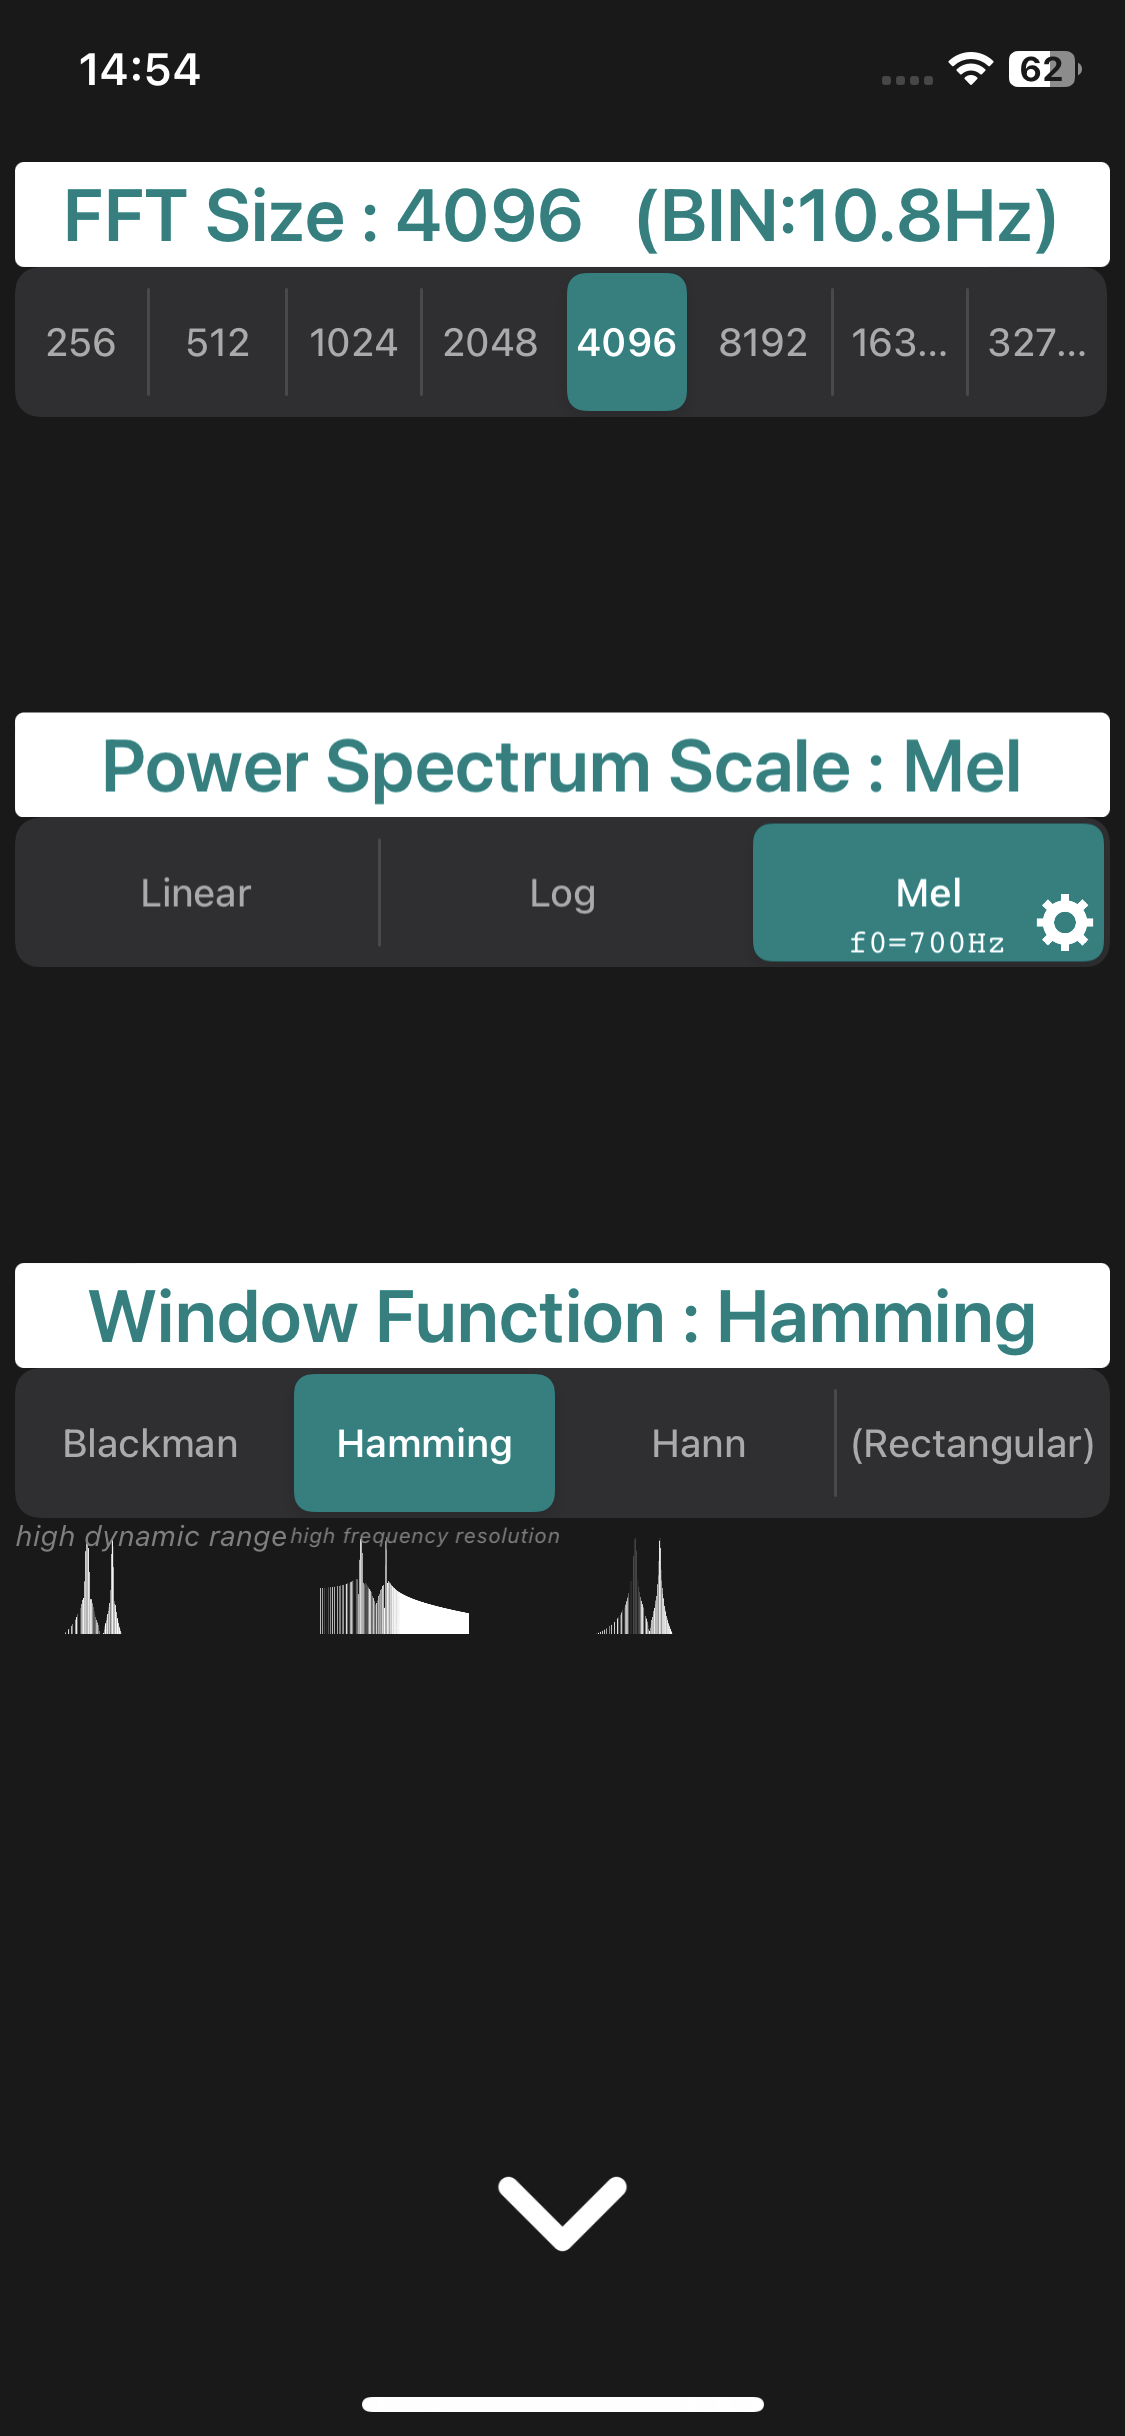
FFT size can be selected from 256 / 512 / 1024 / 2048 / 4096 / 8192 / 16384 / 32768.
When FFT size is selected, BIN is calculated and displayed from FFT size and sample rate. BIN corresponds to the FFT frequency interval (the interval between vertical bars in the FFT image, the height of the horizontal bars in the TFFT image).

The setting is per dataset and does not affect other datasets.
Settings: Power Spectrum Scale
The power spectrum scale is set on the setting screen. The setting screen appears when you tap the gear button at the bottom right of the dataset screen.
Power spectrum scale can be selected from Linear / Log / Mel.
For Mel, you can also change the Mel break frequency. To set the Mel break frequency, tap the little gear button in the bottom right of the Mel segment.
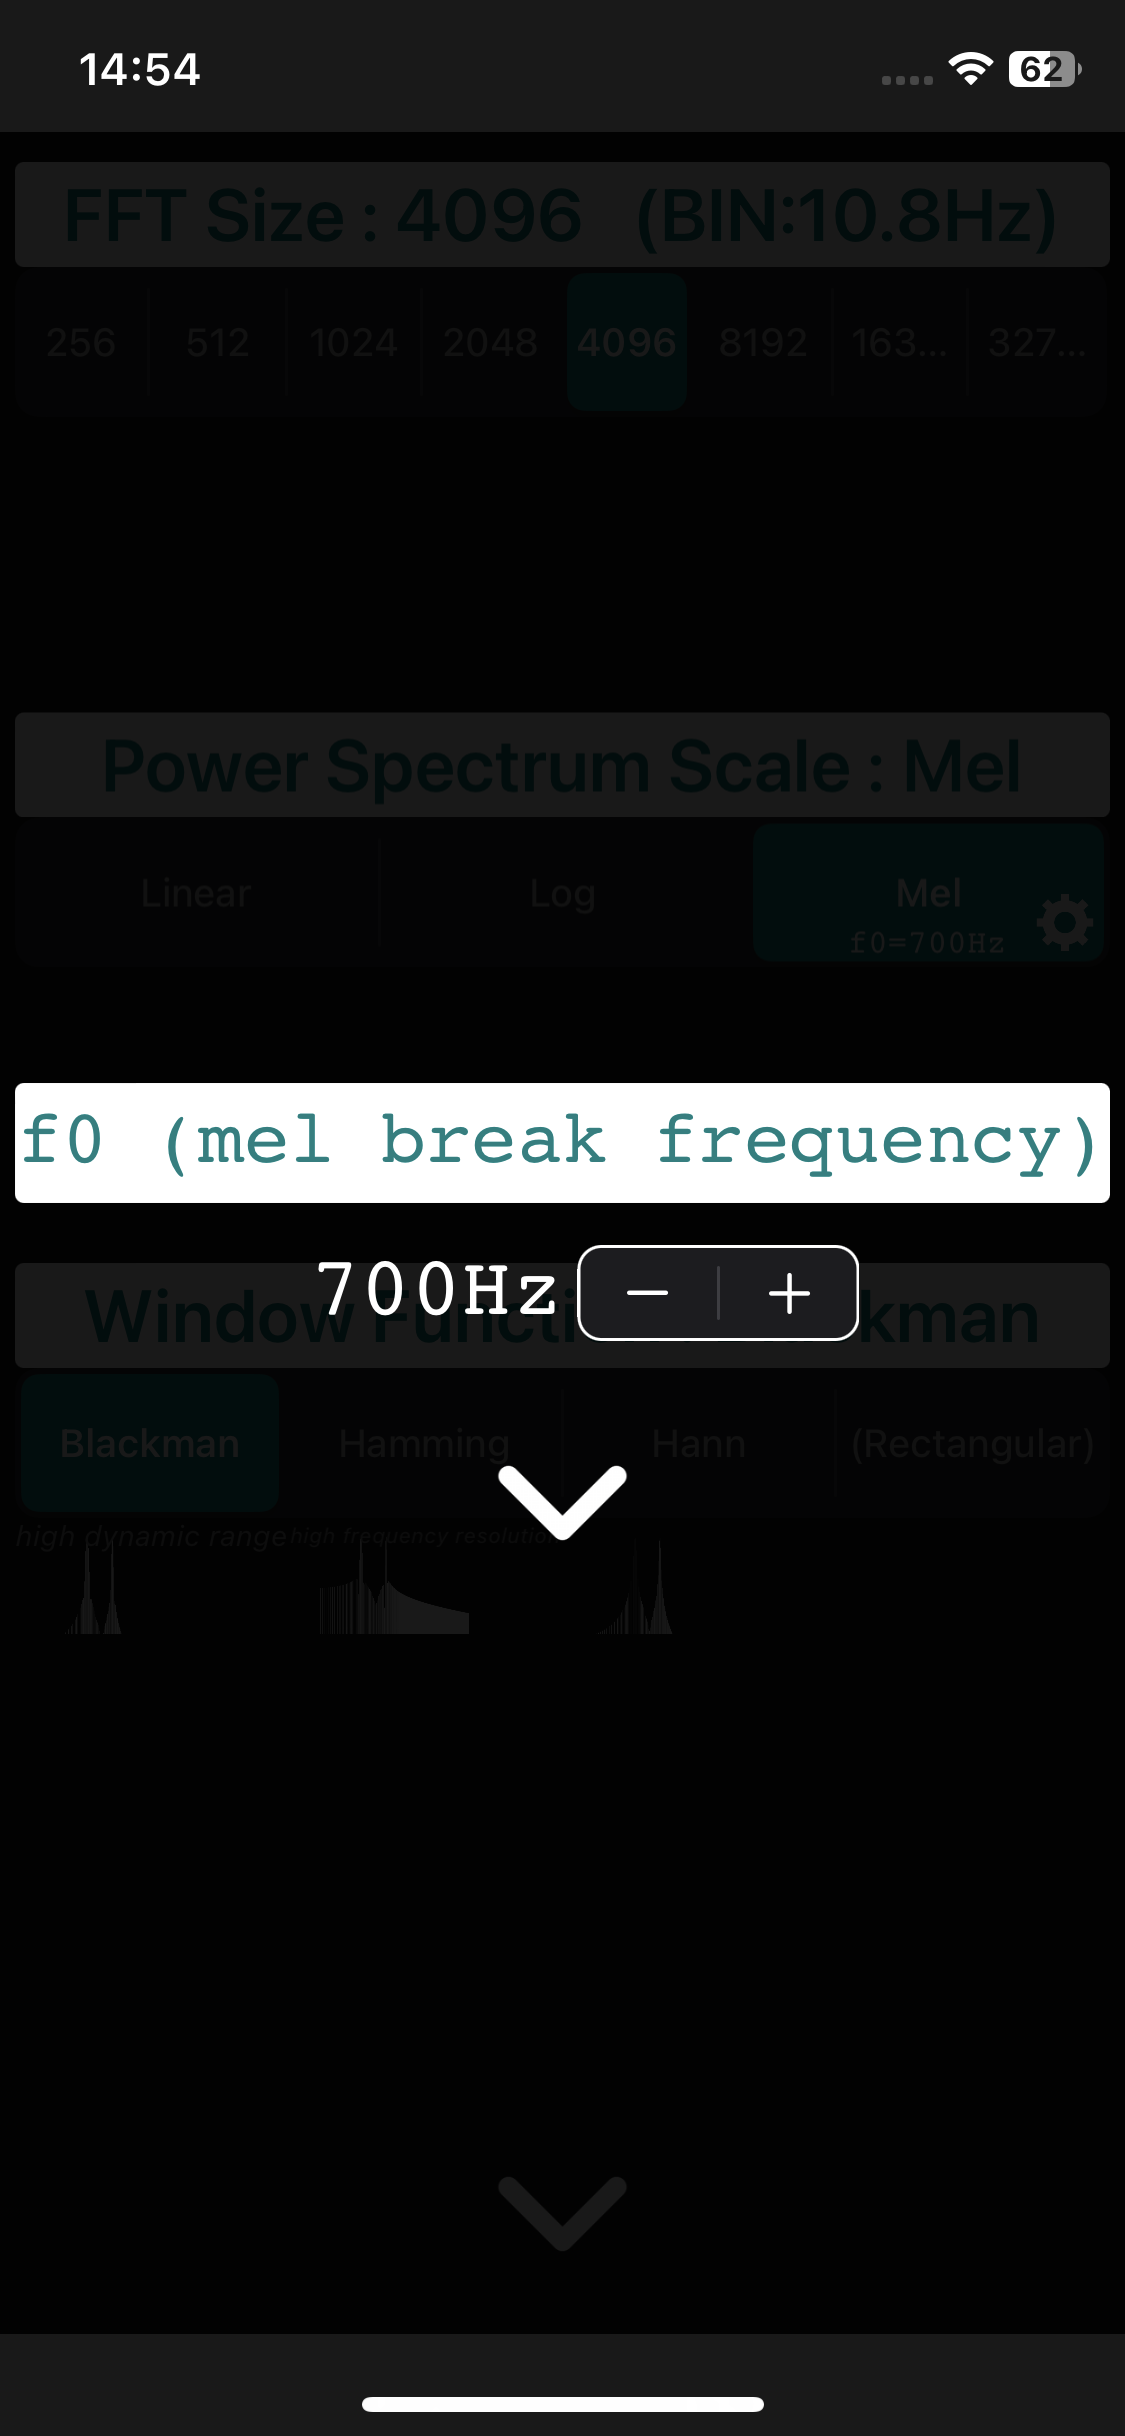
The setting is per dataset and does not affect other datasets.
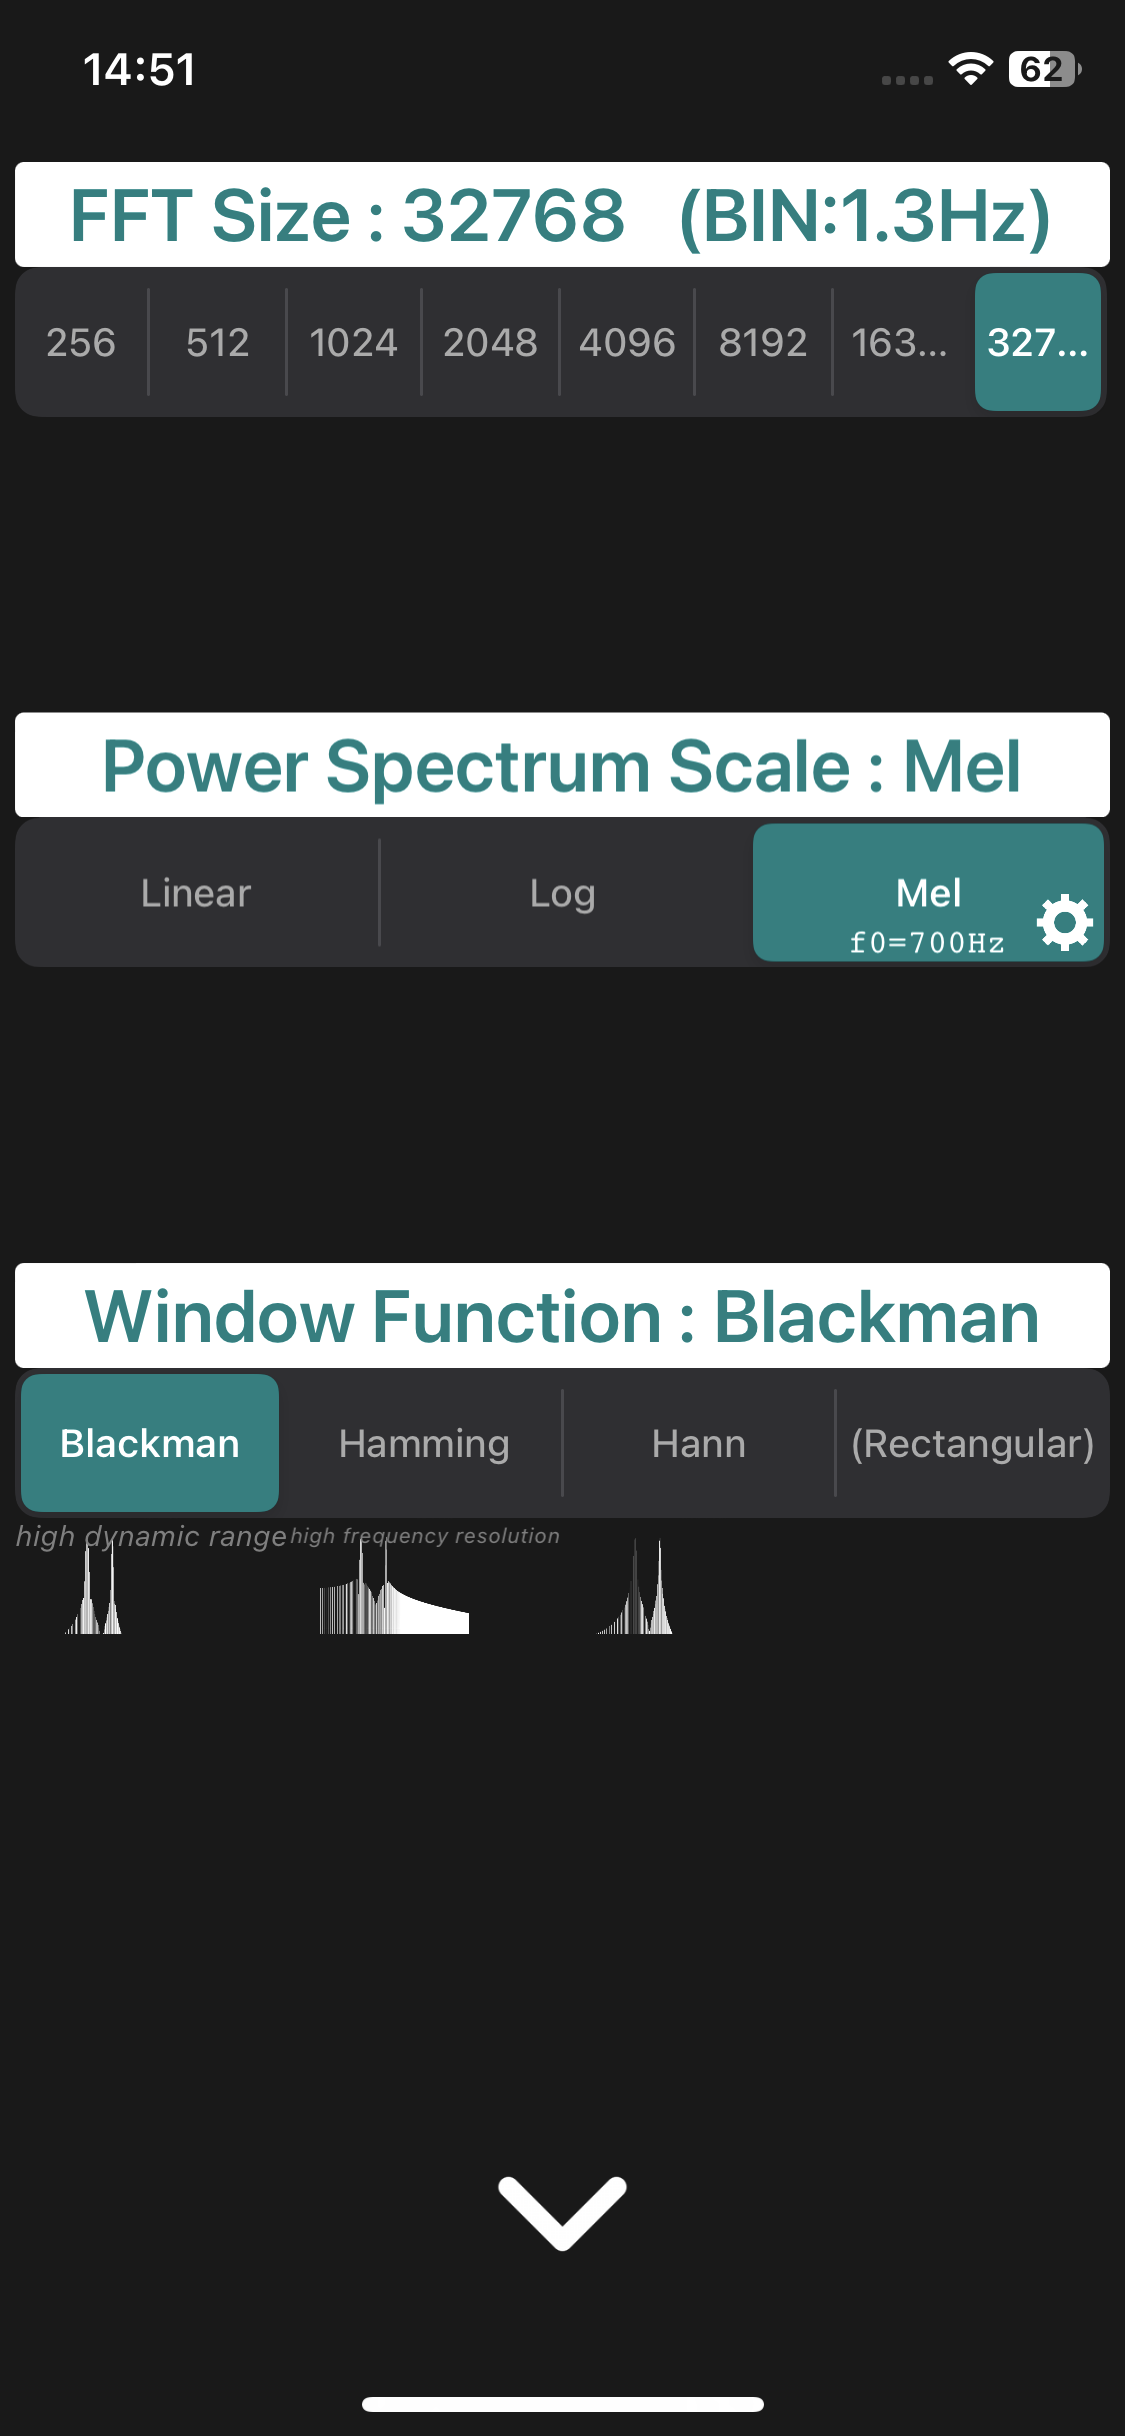
Settings: Window Function (WF)
The setting of the window function is performed on the setting screen. The setting screen appears when you tap the gear button at the bottom right of the dataset screen.
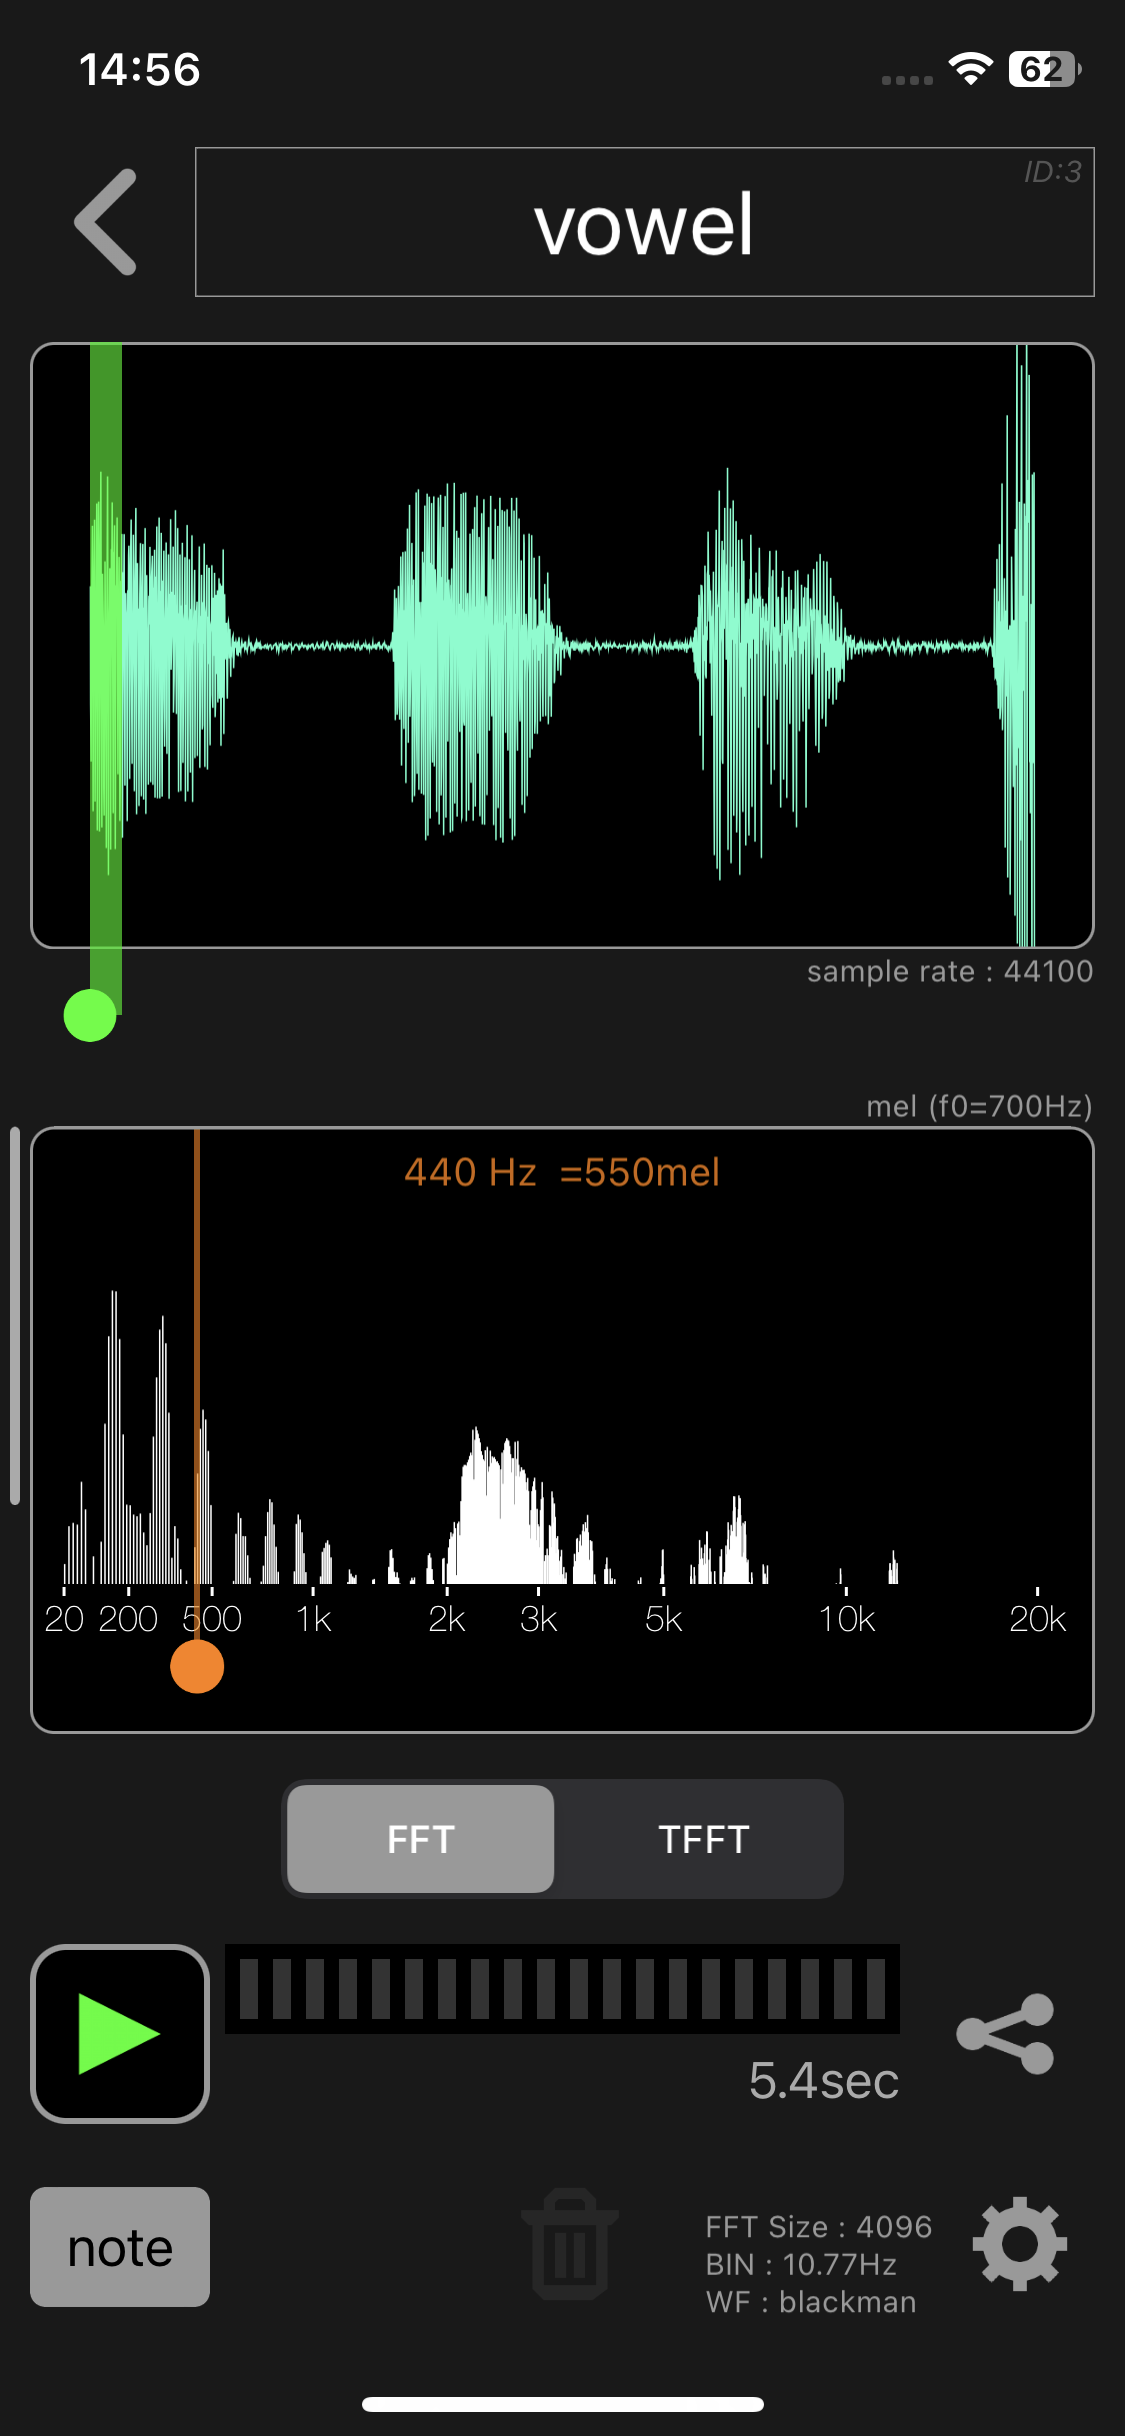
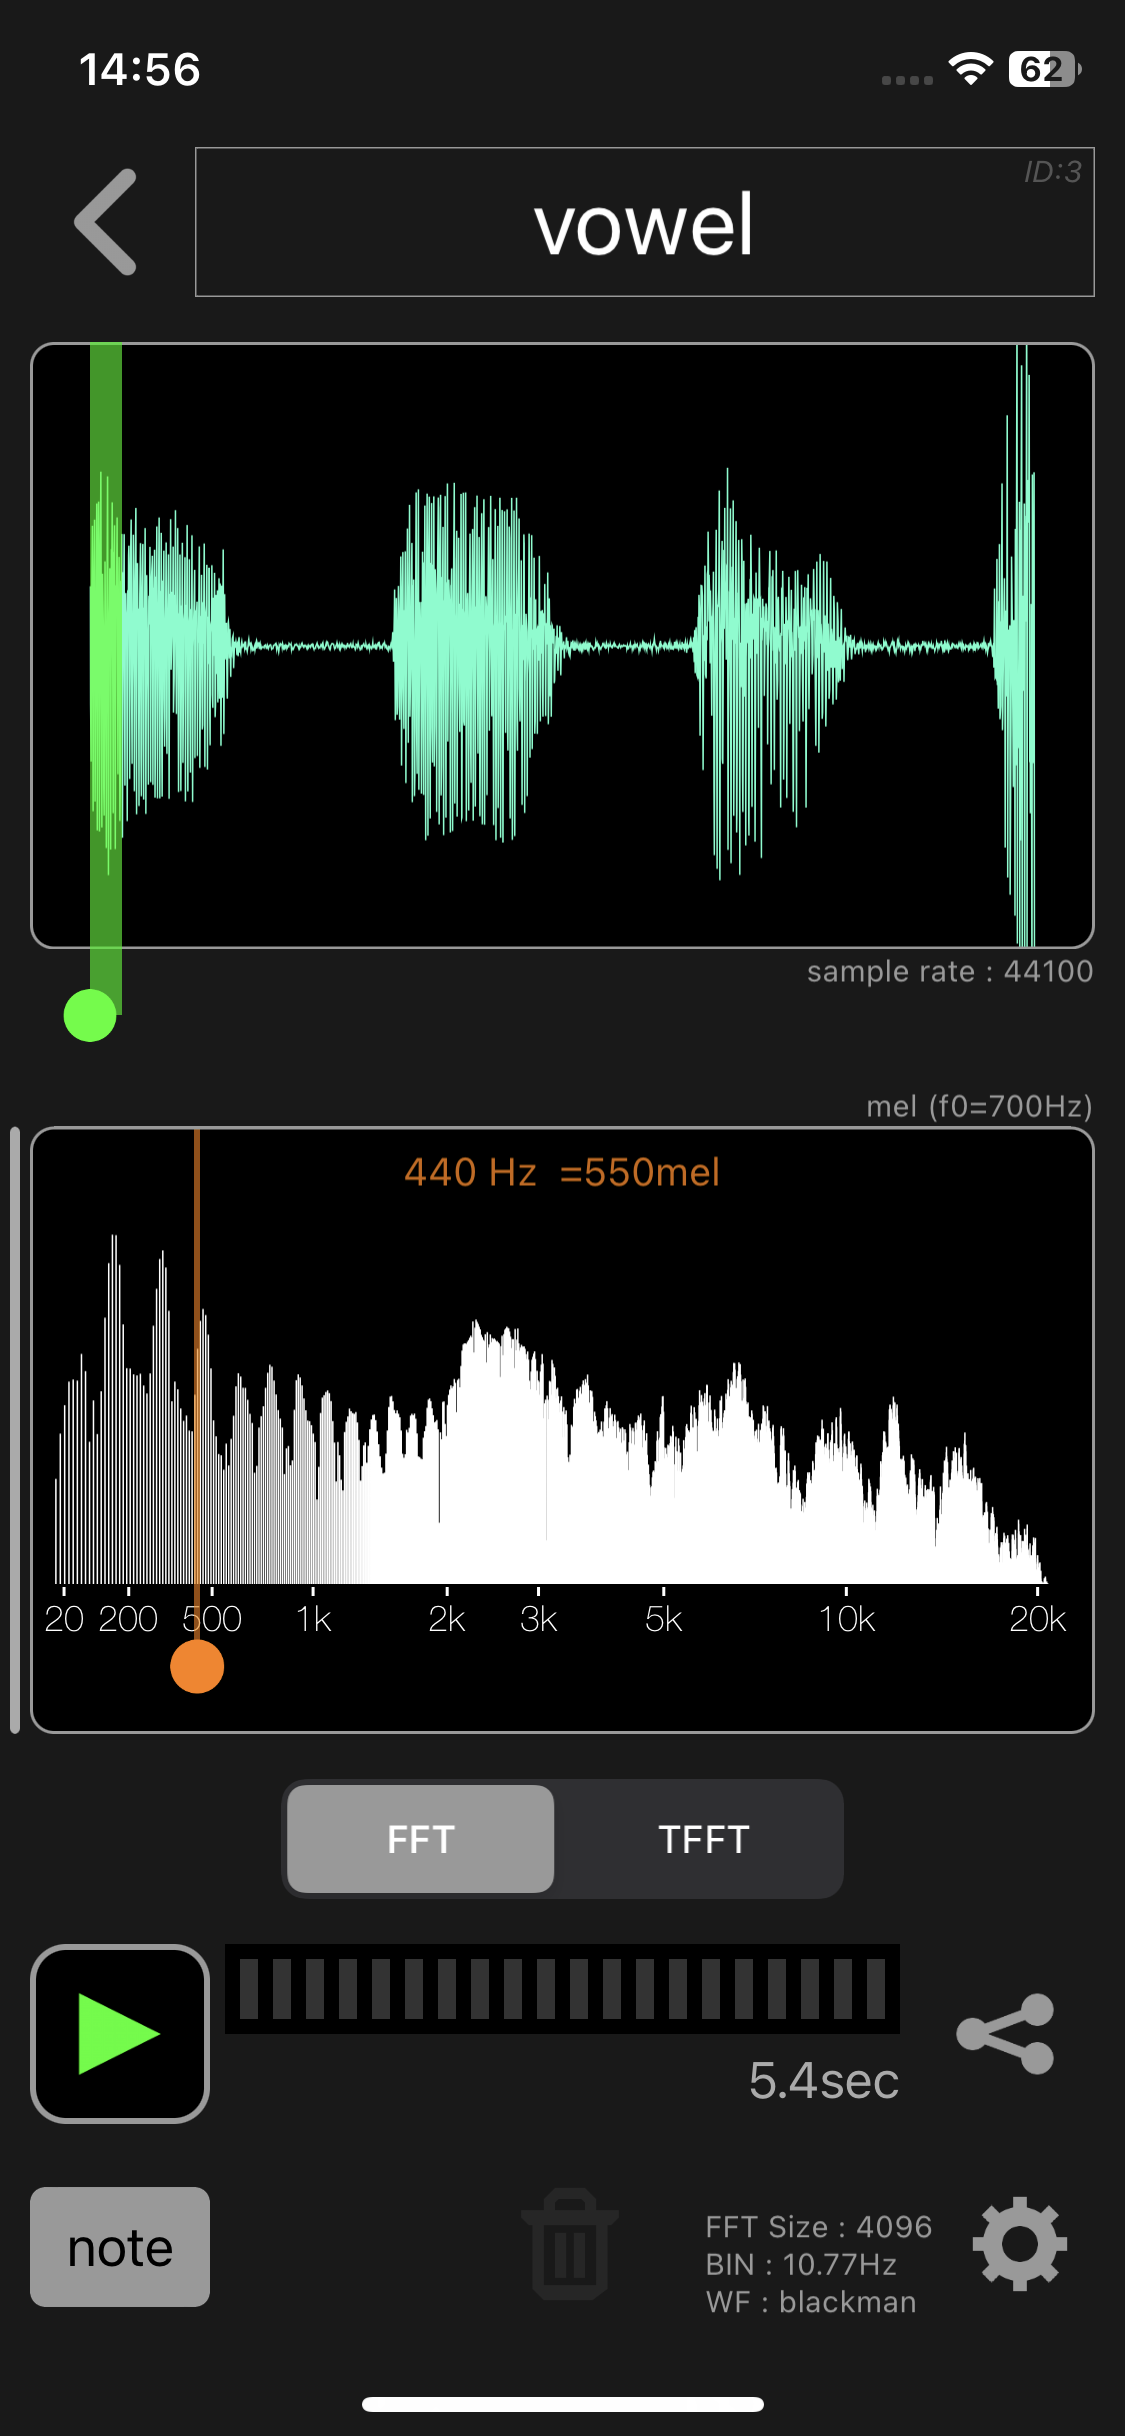
The window function can be selected from Blackman / Hamming / Hann / Rectangular. Rectangular does not multiply the window function and calculates with the extracted audio waveform.
The Blackman window function is a high dynamic range window function. Use when high dynamic range is required. The Blackman window function is the most commonly used window function.
The Hamming window function is a high frequency resolution window function. Used when high frequency resolution is required.
The Hann window function is a window function with properties between Blackman and Hamming.
The setting is per dataset and does not affect other datasets.
Settings: Relative Power Lower Limit
The relative power lower limit is set by dragging the relative power spectrum graph up and down.
While dragging (touching), the relative power lower limit value is displayed in yellow letters at the lower left of the relative power spectrum graph.
The setting is per dataset and does not affect other datasets.
Settings: TFFT Color Type
TFFT color type can be set when TFFT is selected on the dataset screen.
Long press or swipe left on the color gradation band displayed on the right side of the TFFT image to reveal the TFFT color type options.
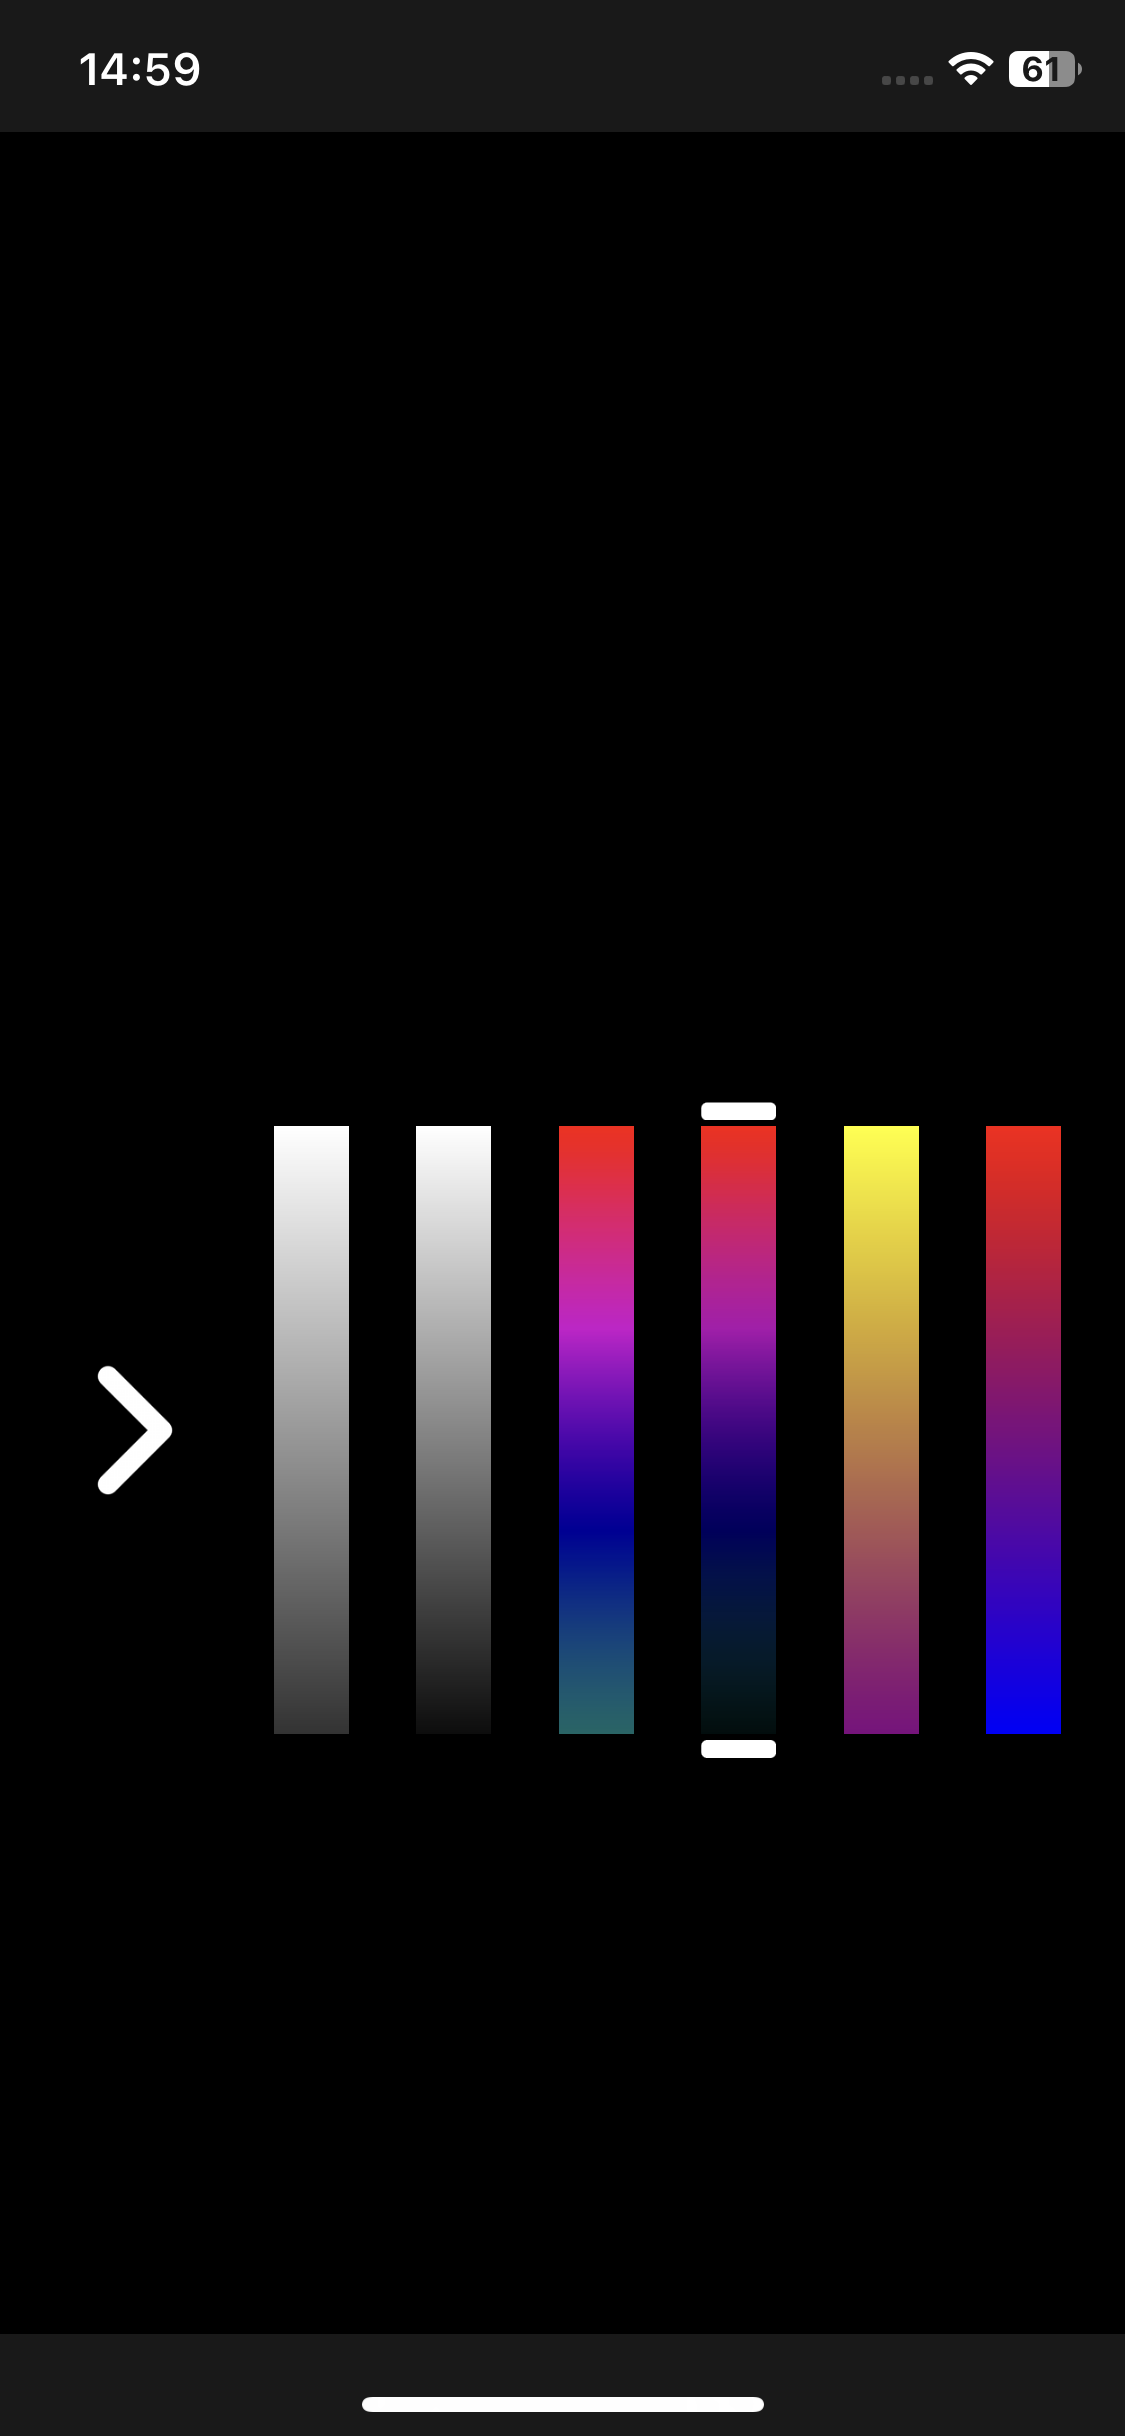
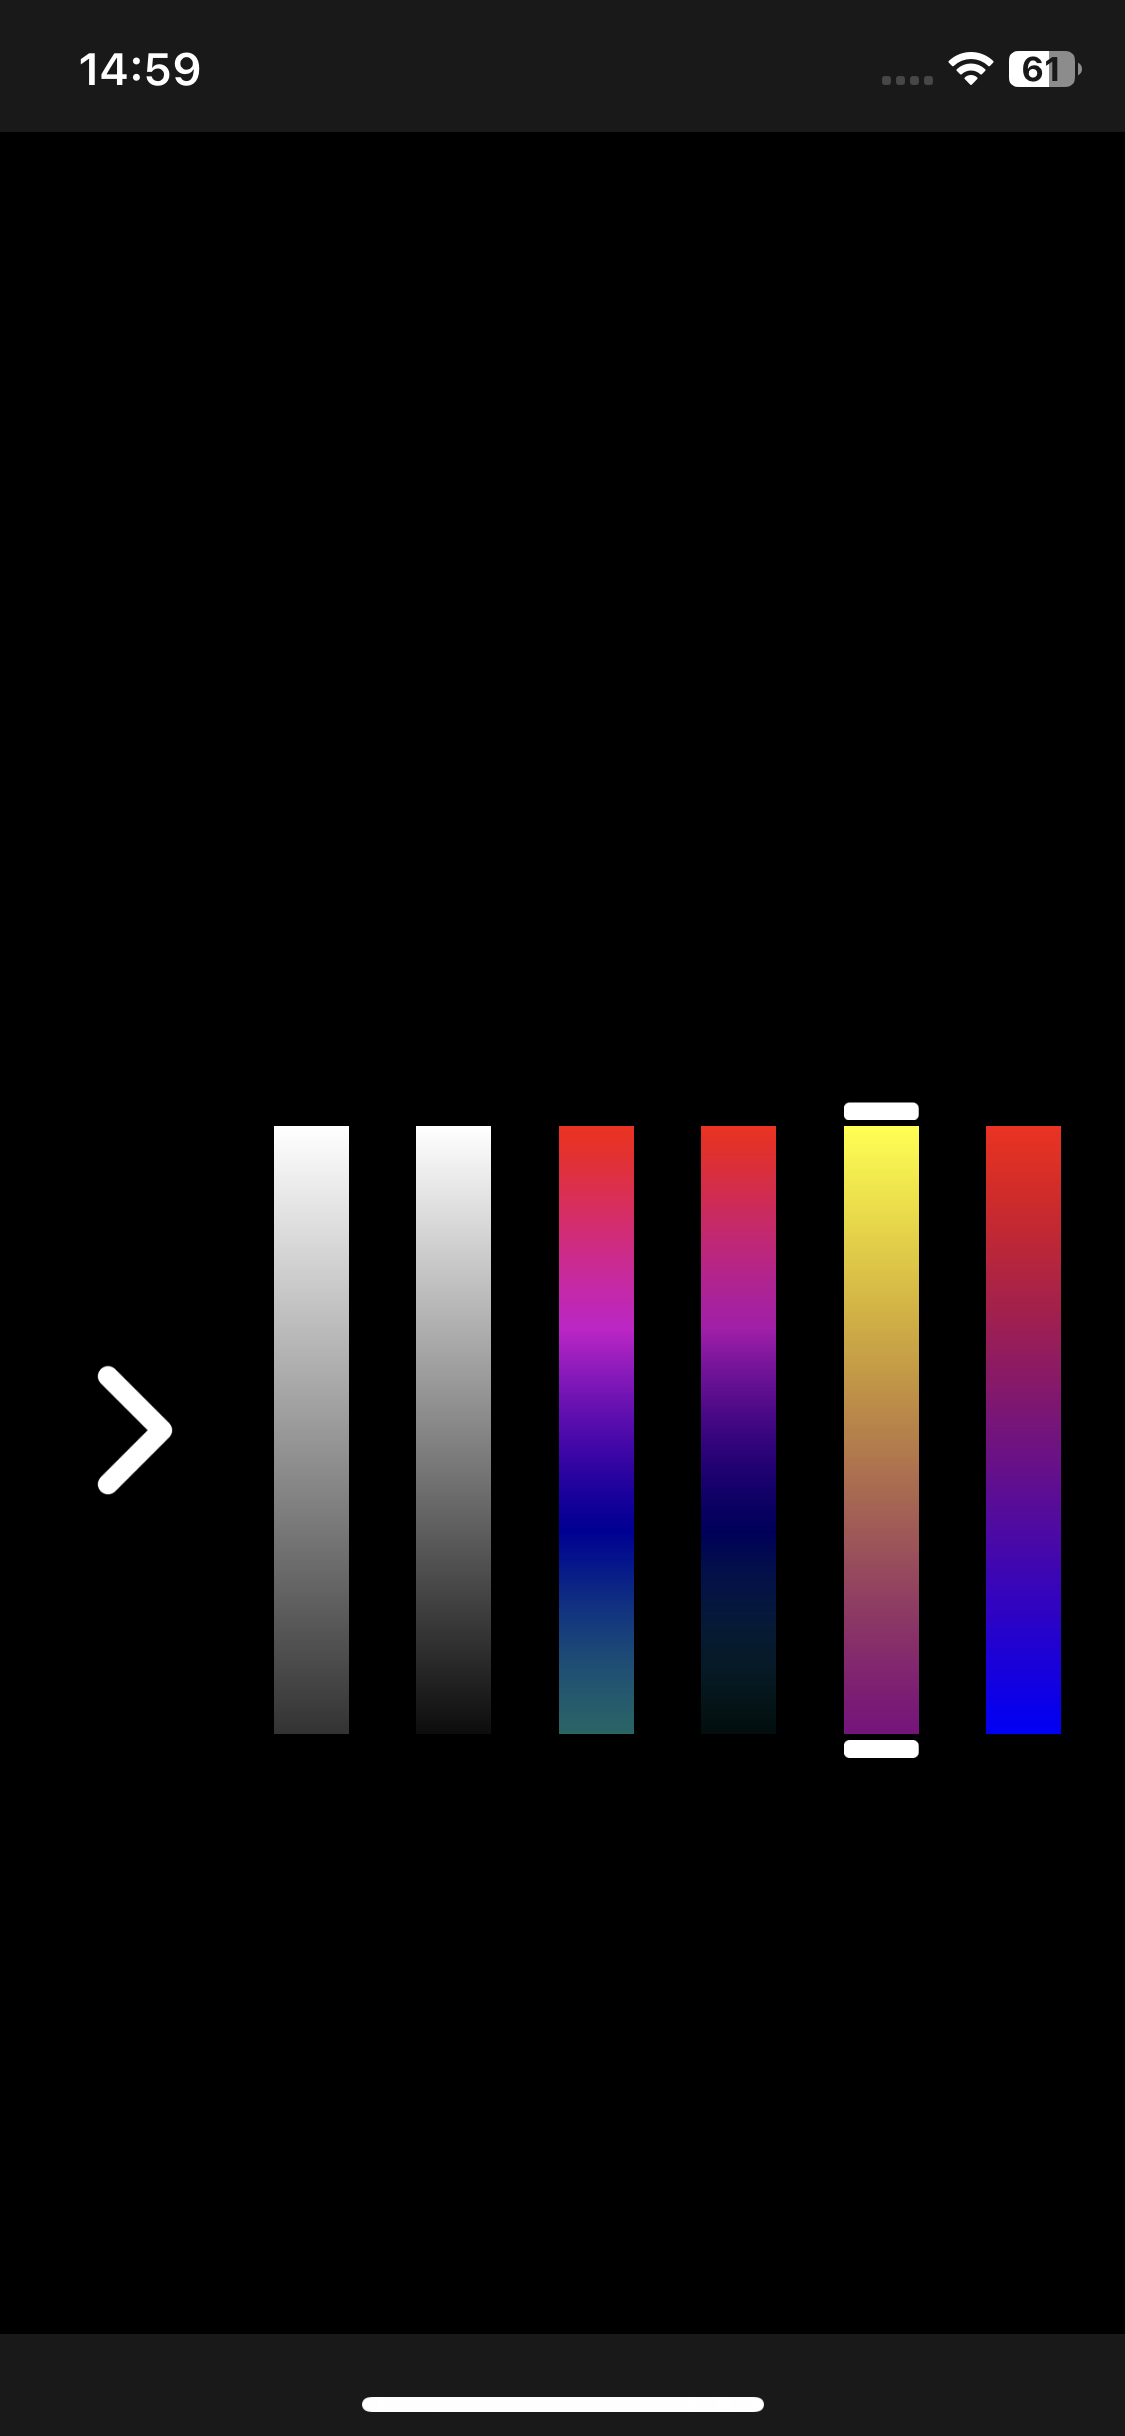
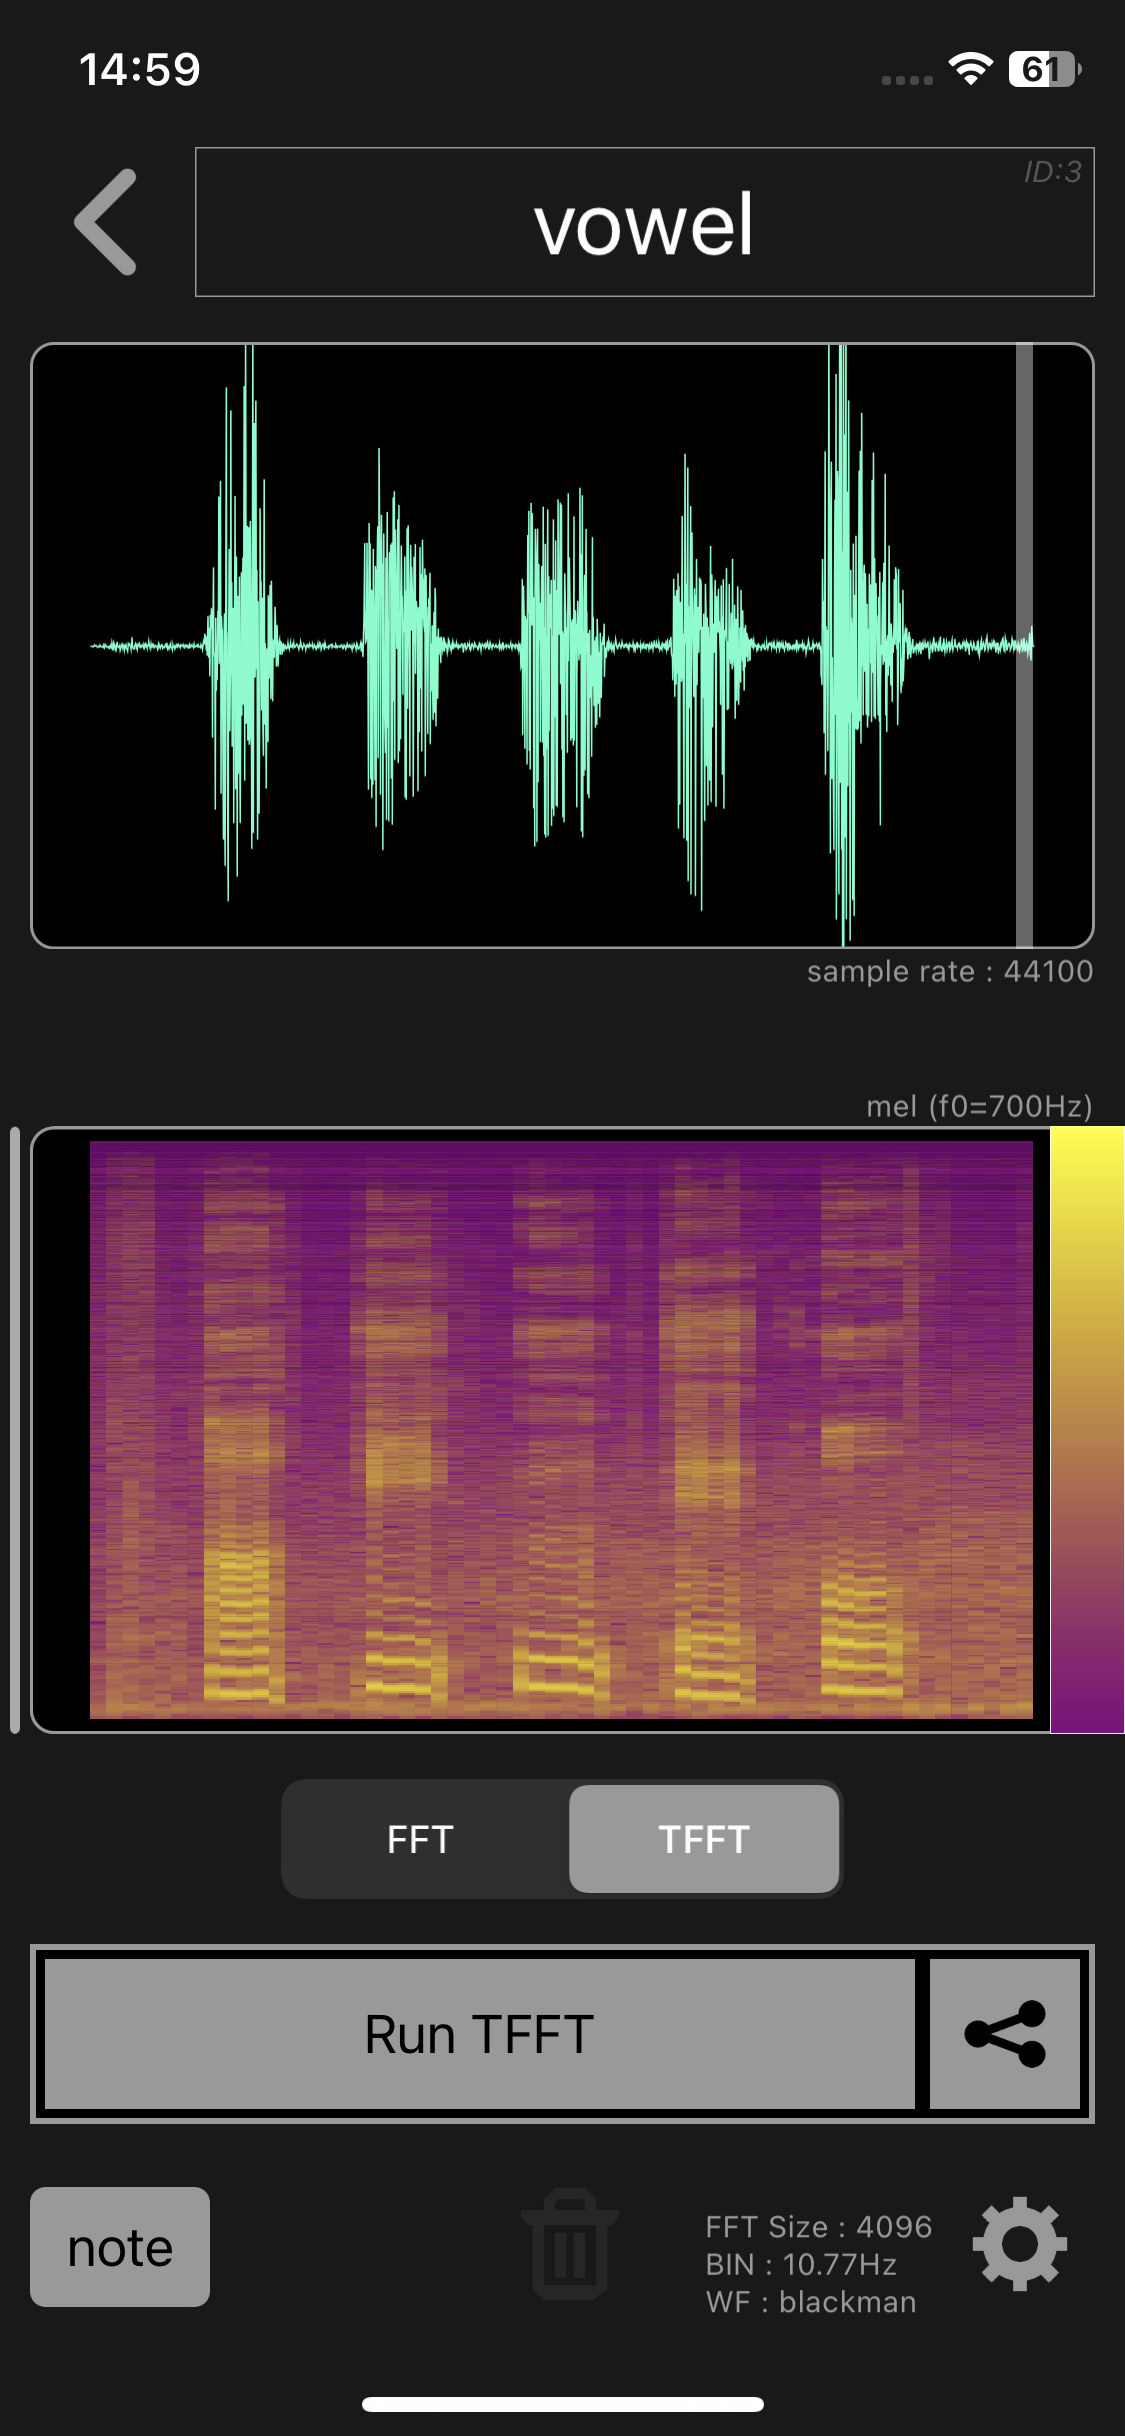
The setting is per dataset and does not affect other datasets.
Dataset list
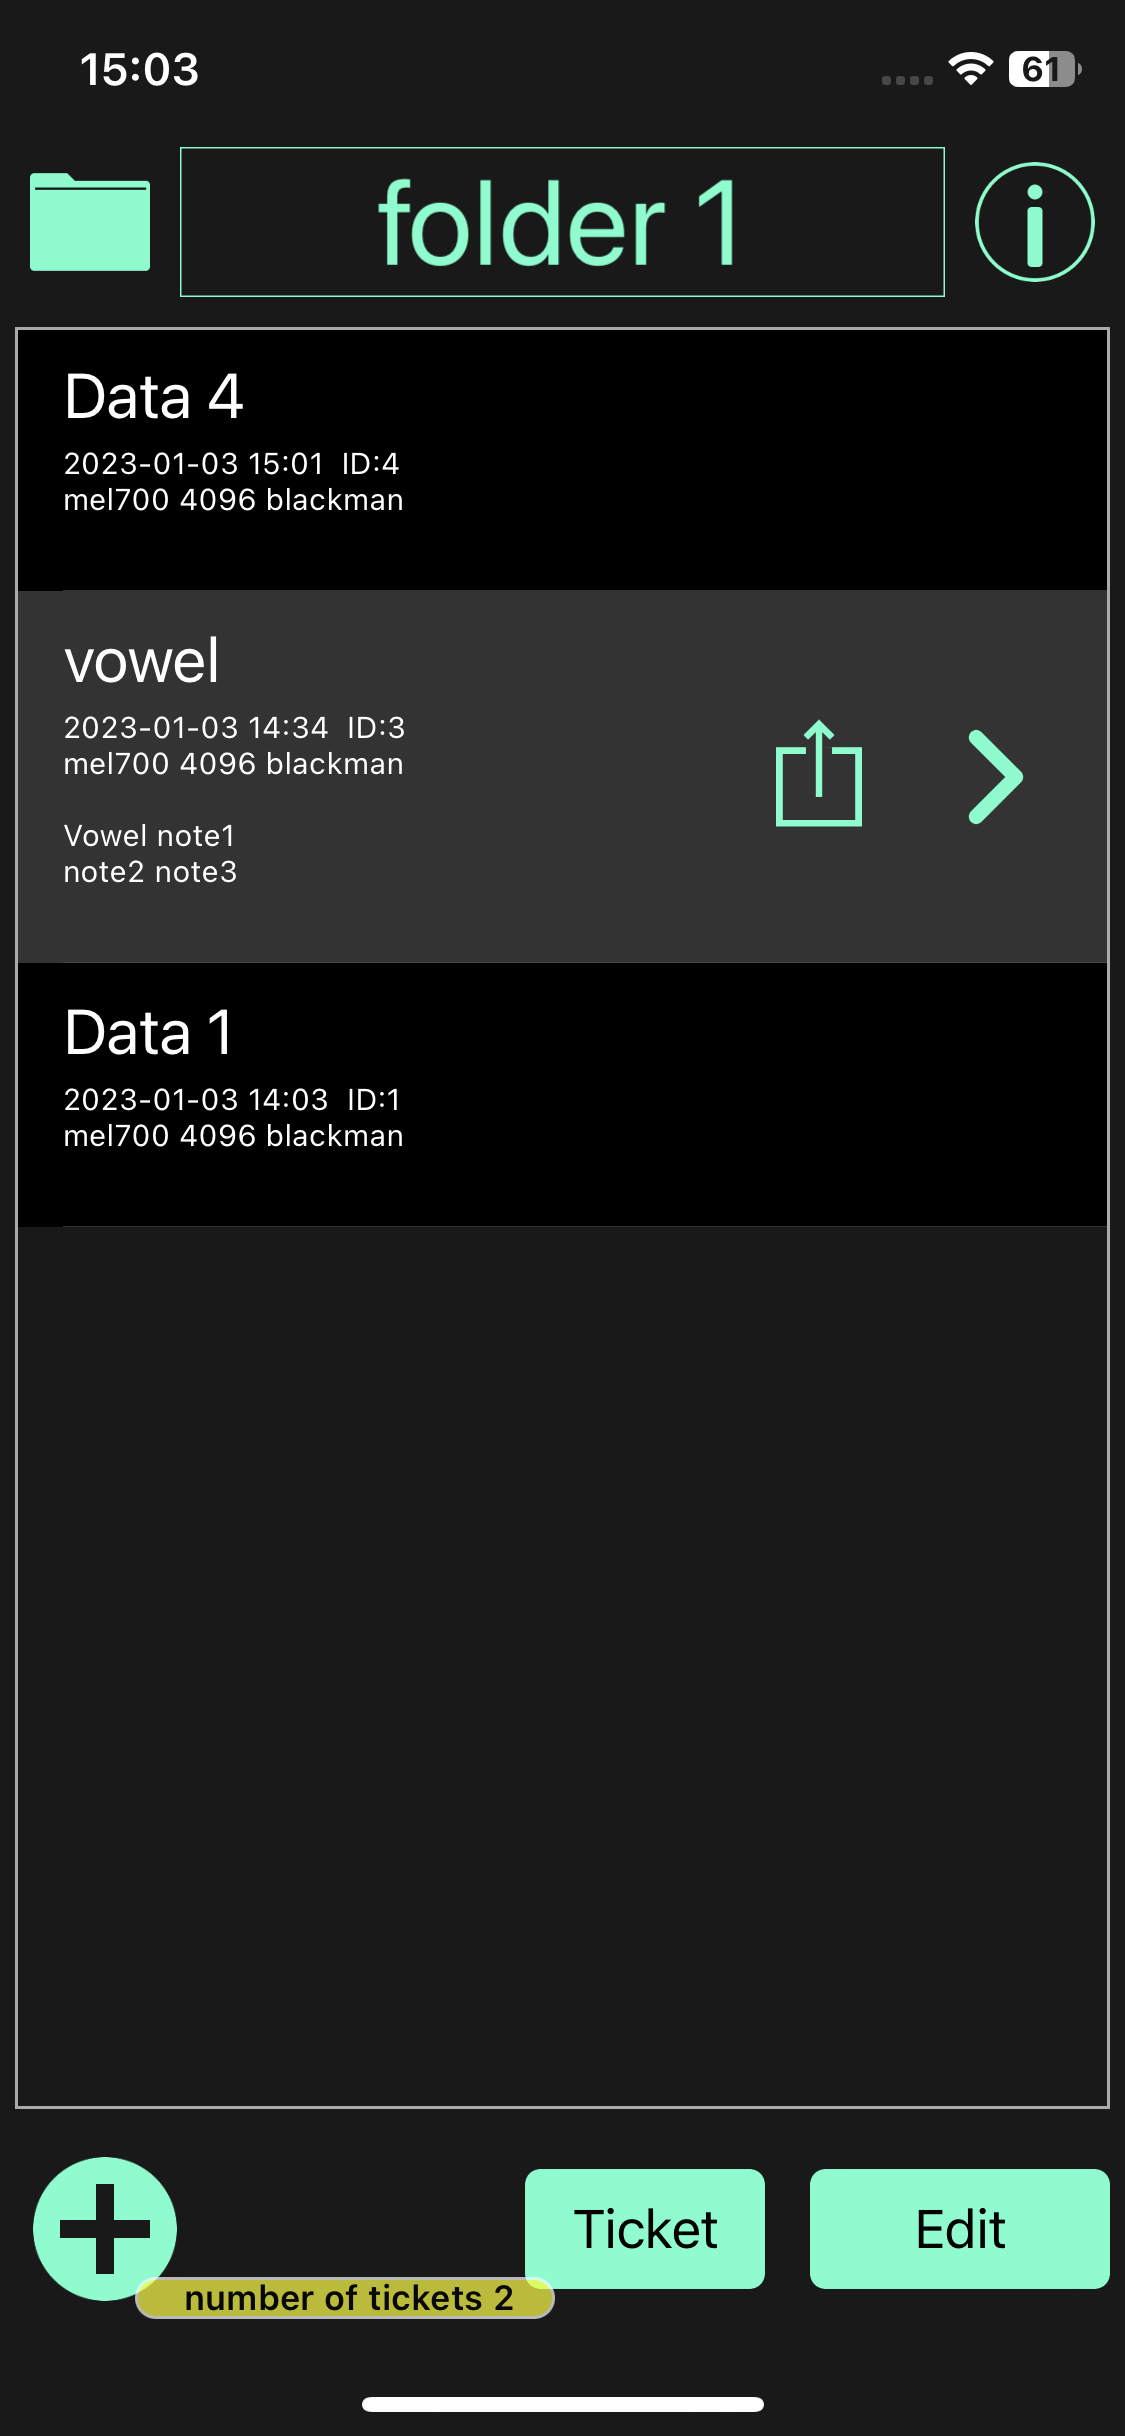
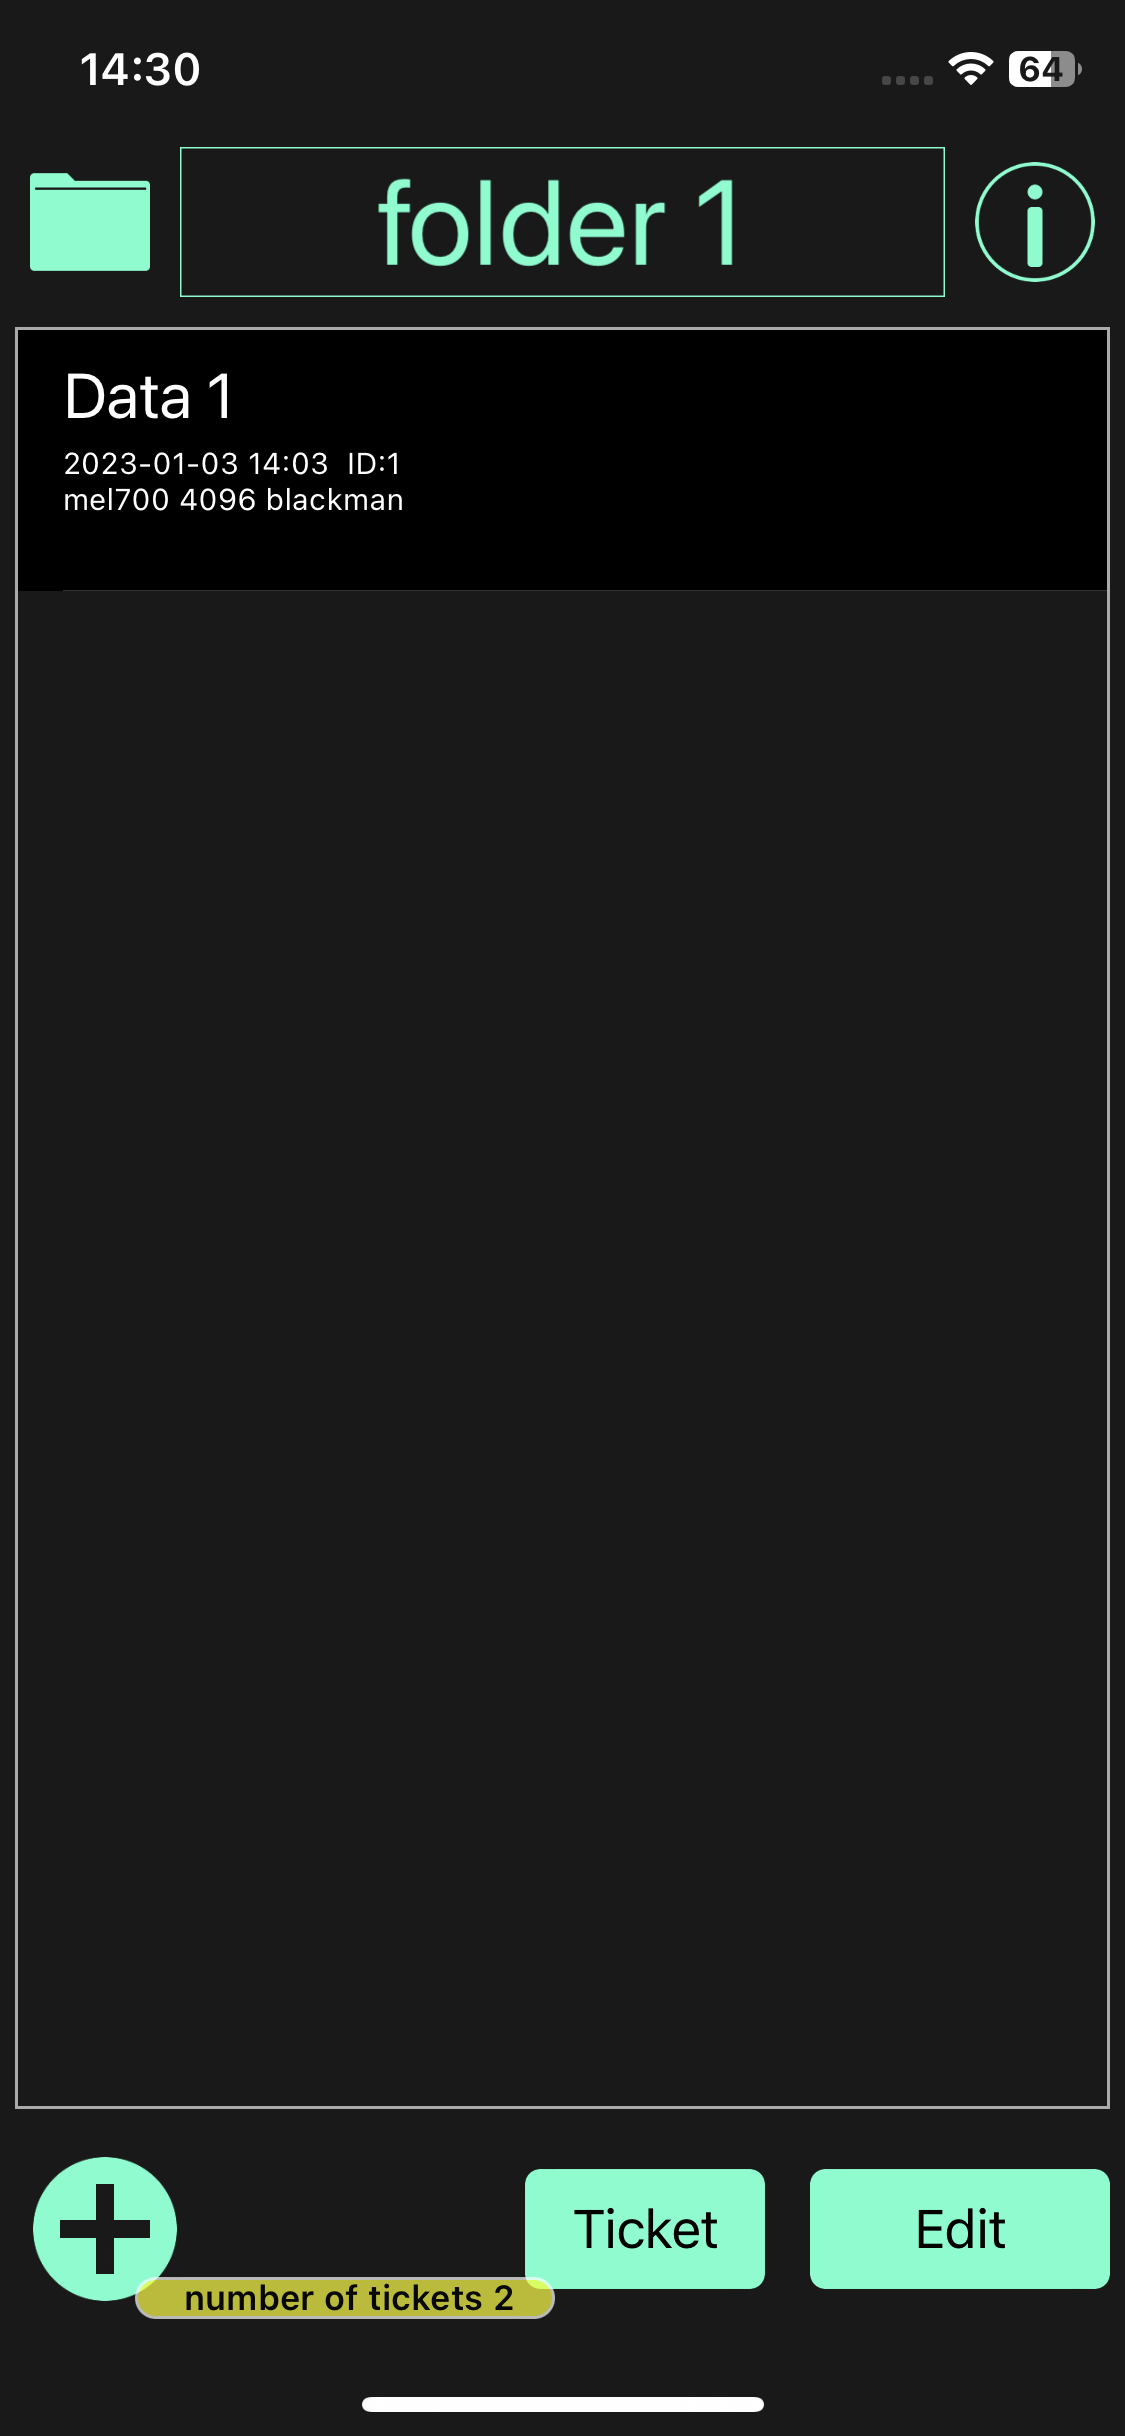
The dataset list is displayed on the startup screen (dataset list screen).
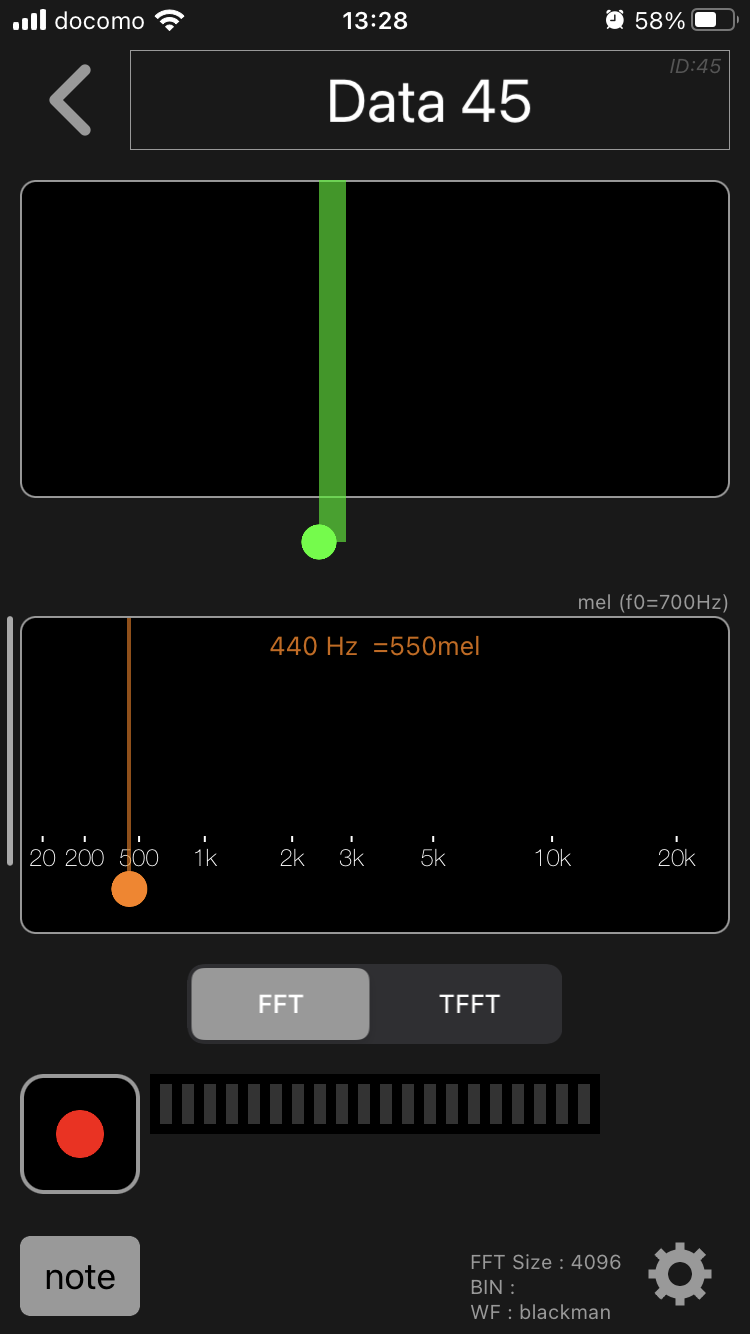
Delete audio data
To delete audio data, delete dataset.
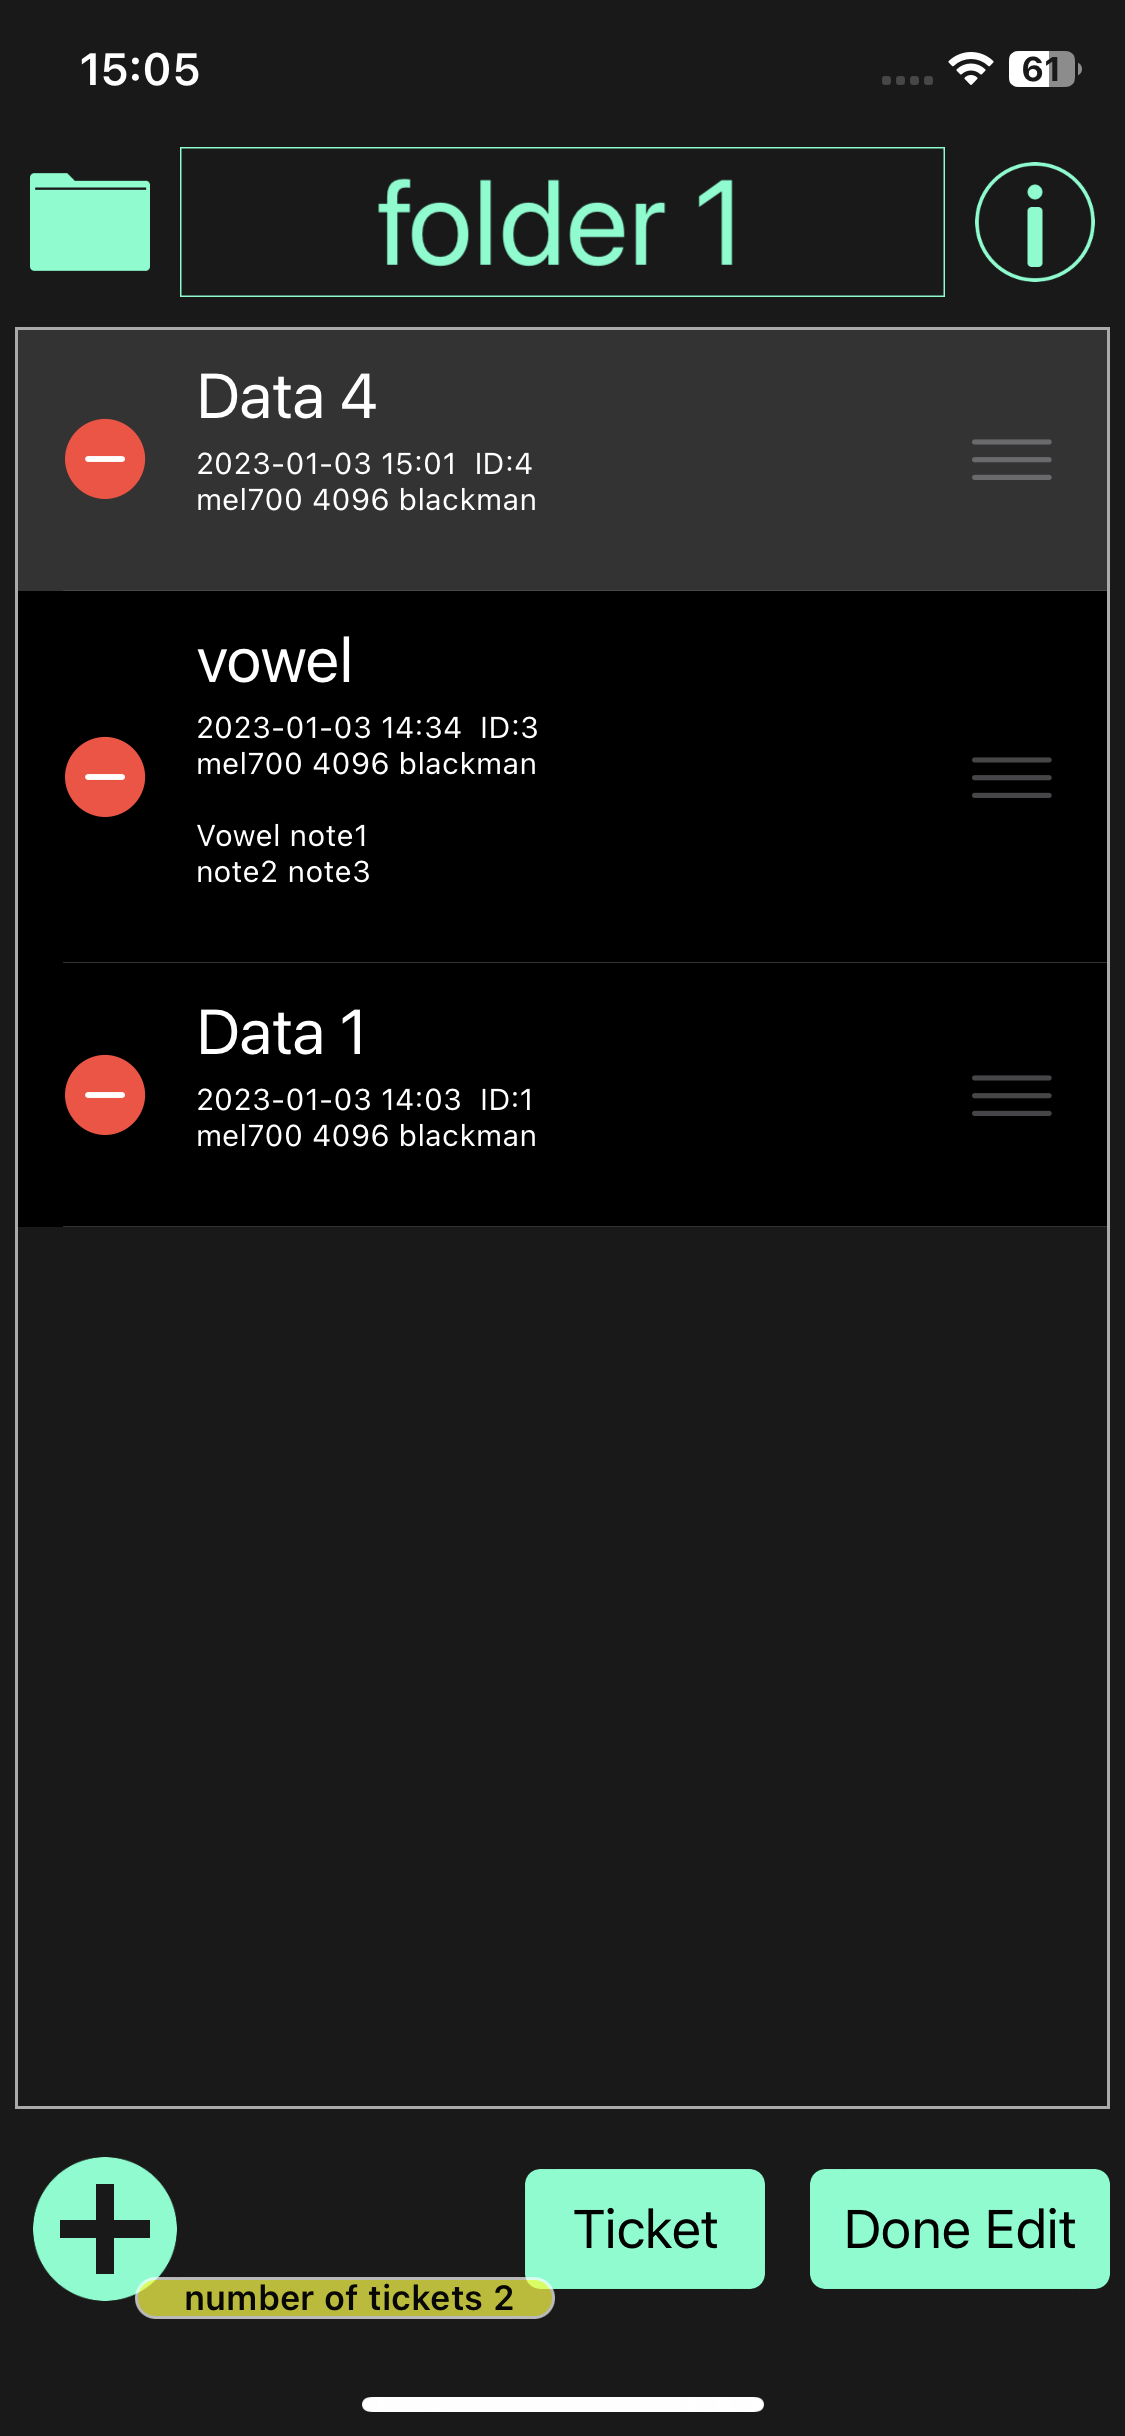
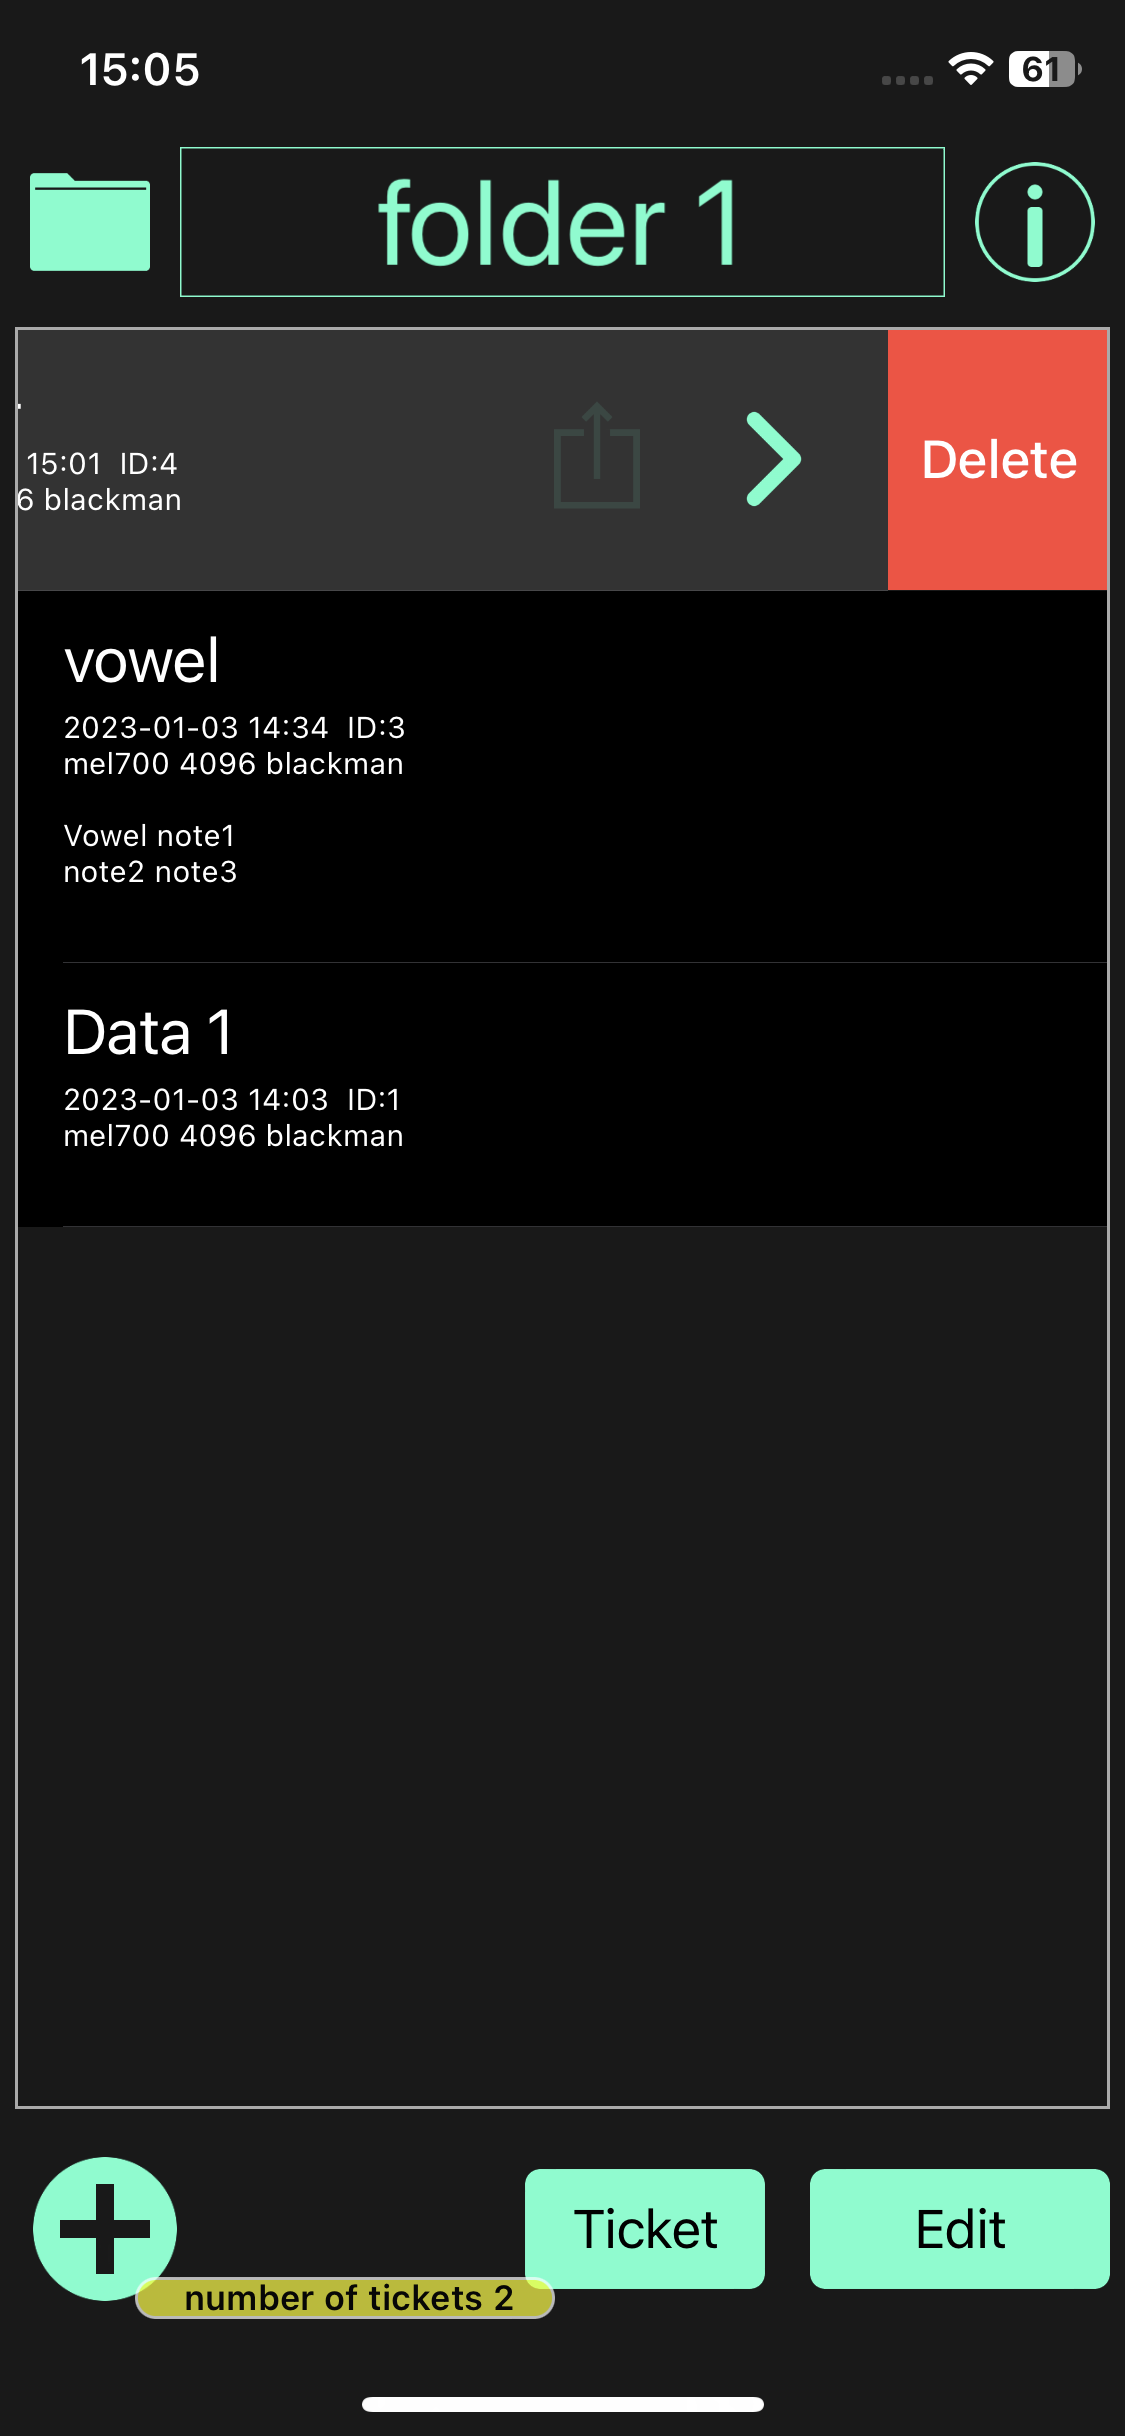
Delete dataset
To delete a dataset, tap the “Edit” button at the bottom right of the startup screen (dataset list screen) or swipe left on the dataset row.
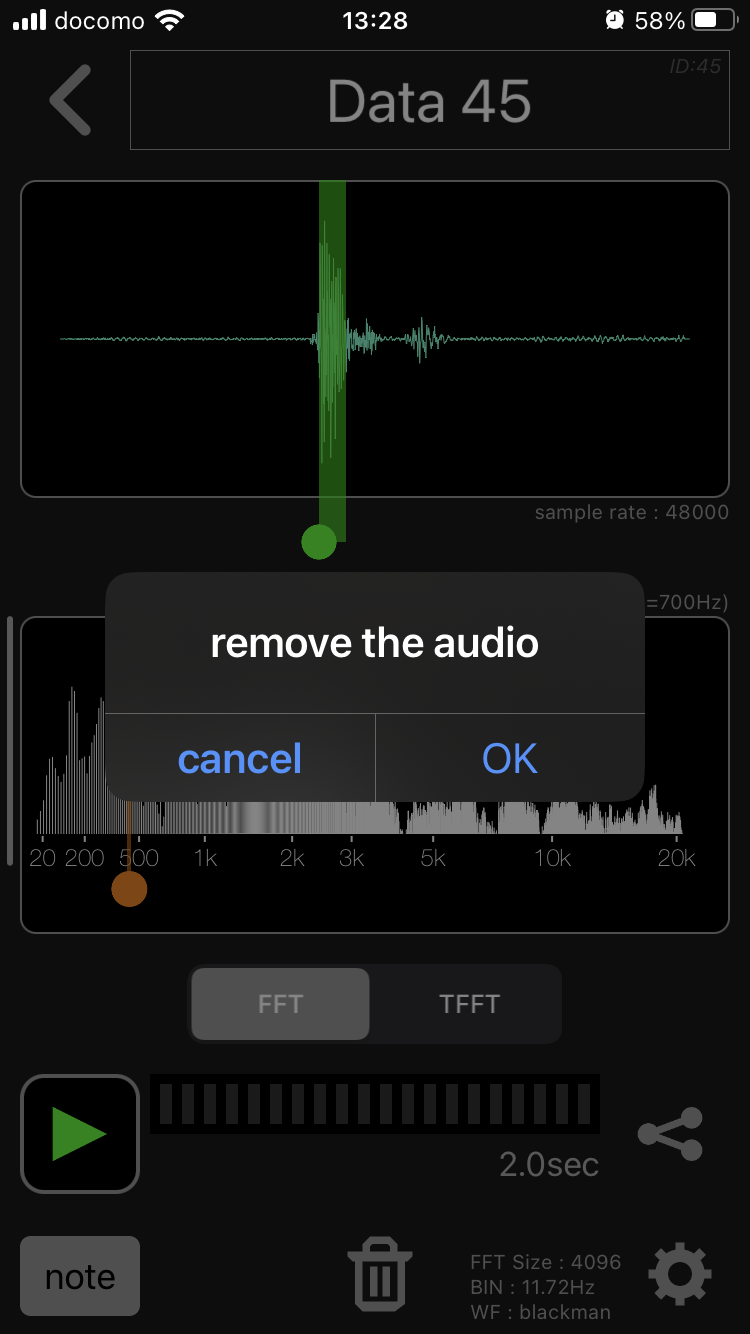
Delete recording (audio file)
If you purchased “Remove ads” in the in-app purchase and no longer need a ticket, you can delete only the recording (audio file) while leaving the dataset. To delete a recording (audio file), tap the delete button at the bottom of the dataset screen.
(Only when purchasing an in-app purchase)
Audio files, FFT results, etc. can be exported as images or files and used in other applications.
The displayed audio waveform image and audio file (caf) can be exported.
On the dataset screen, tap the audio waveform and a share button will appear along with the scaling buttons. (Tap the audio waveform again to make it disappear.)
Tap the share button and an audio share popup will appear.
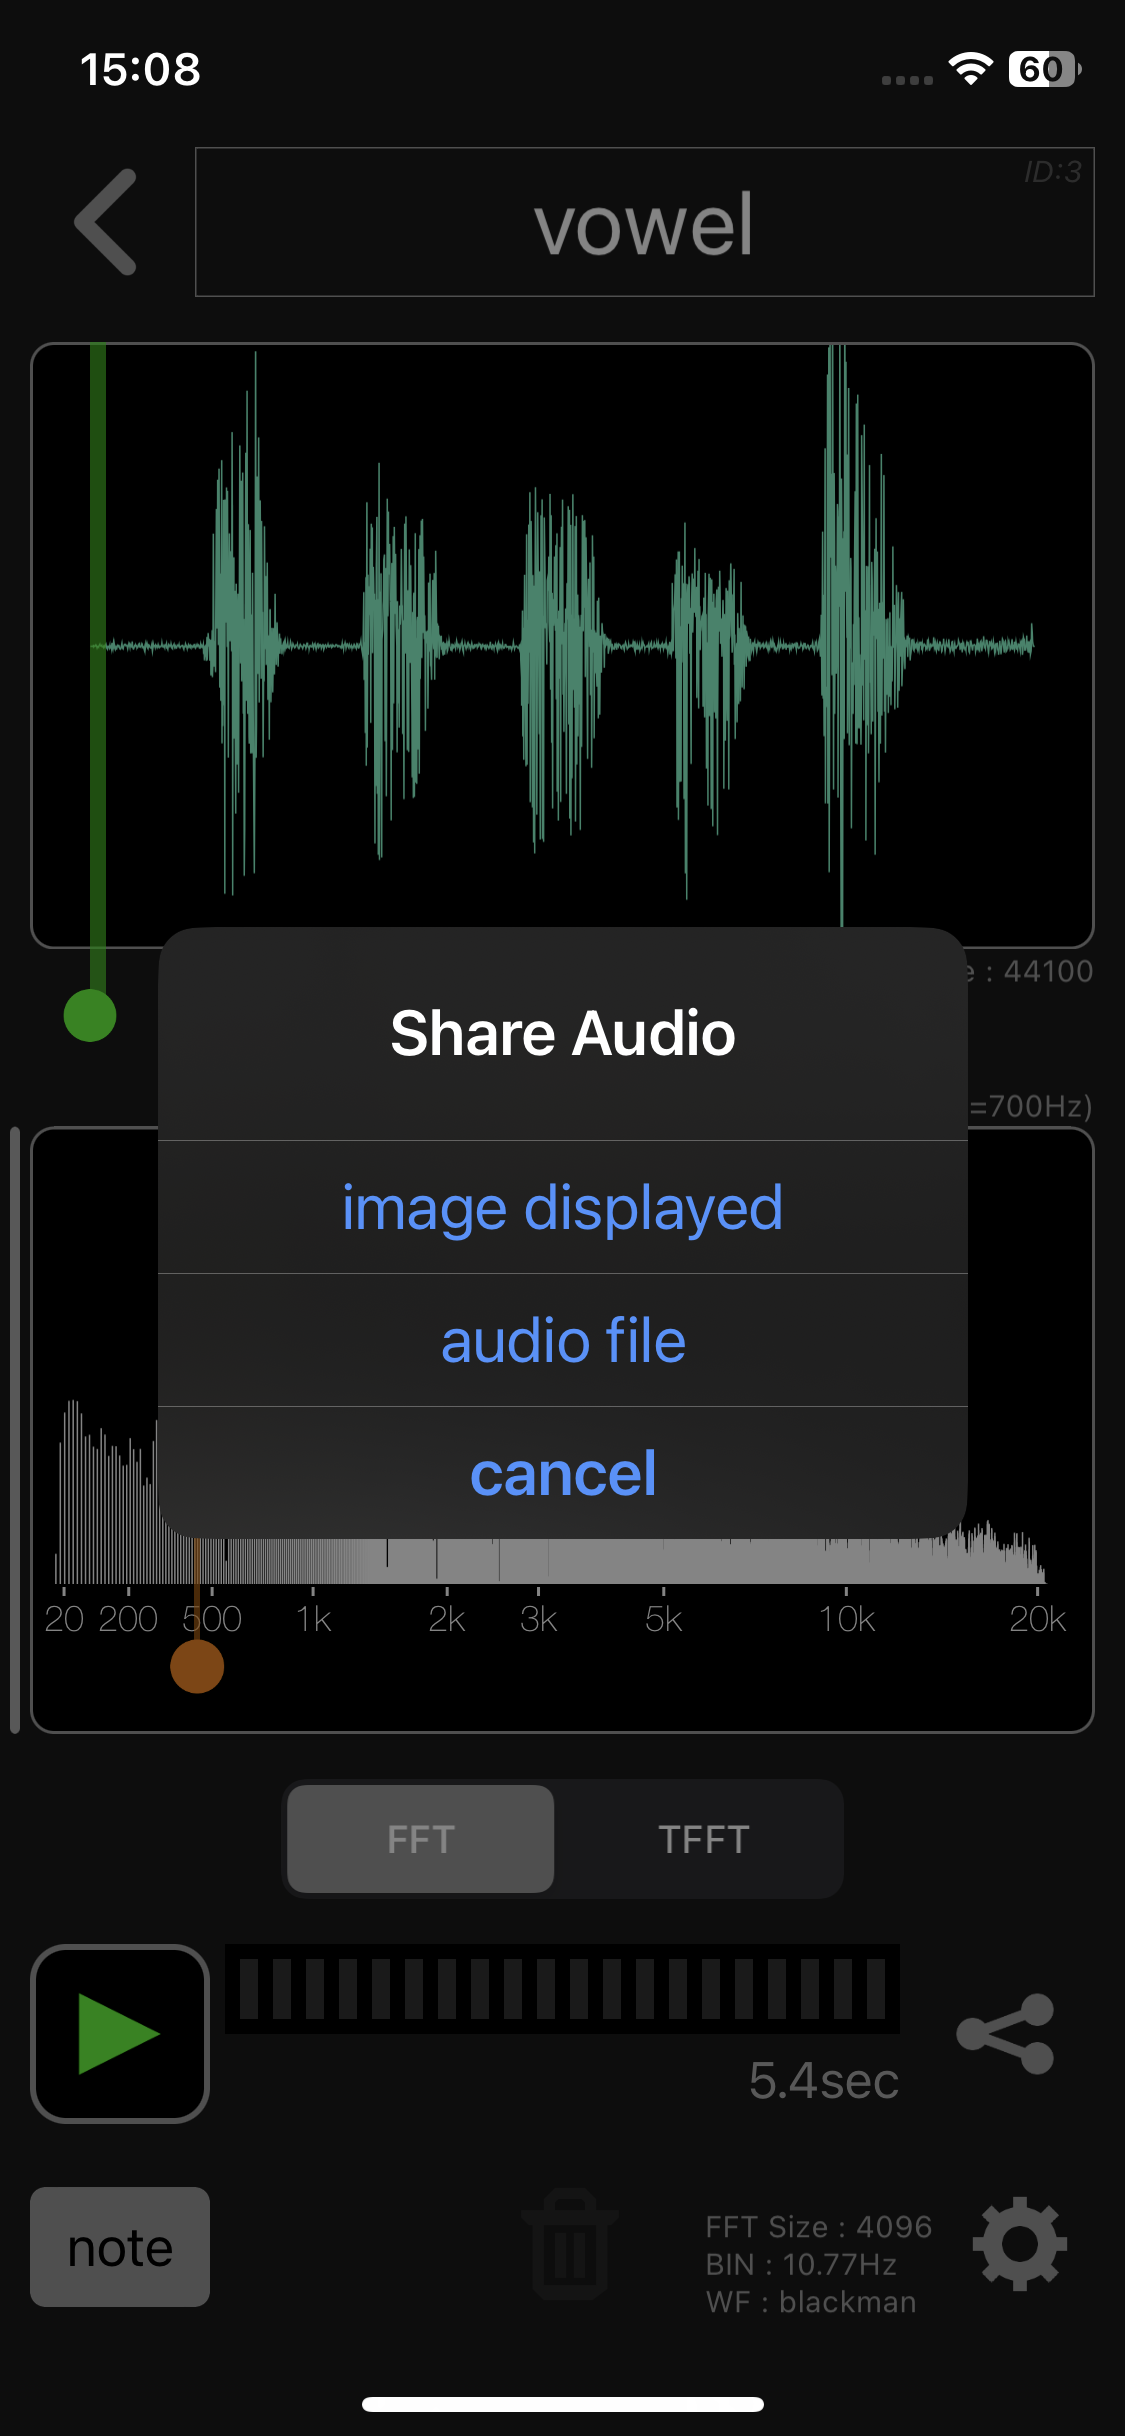
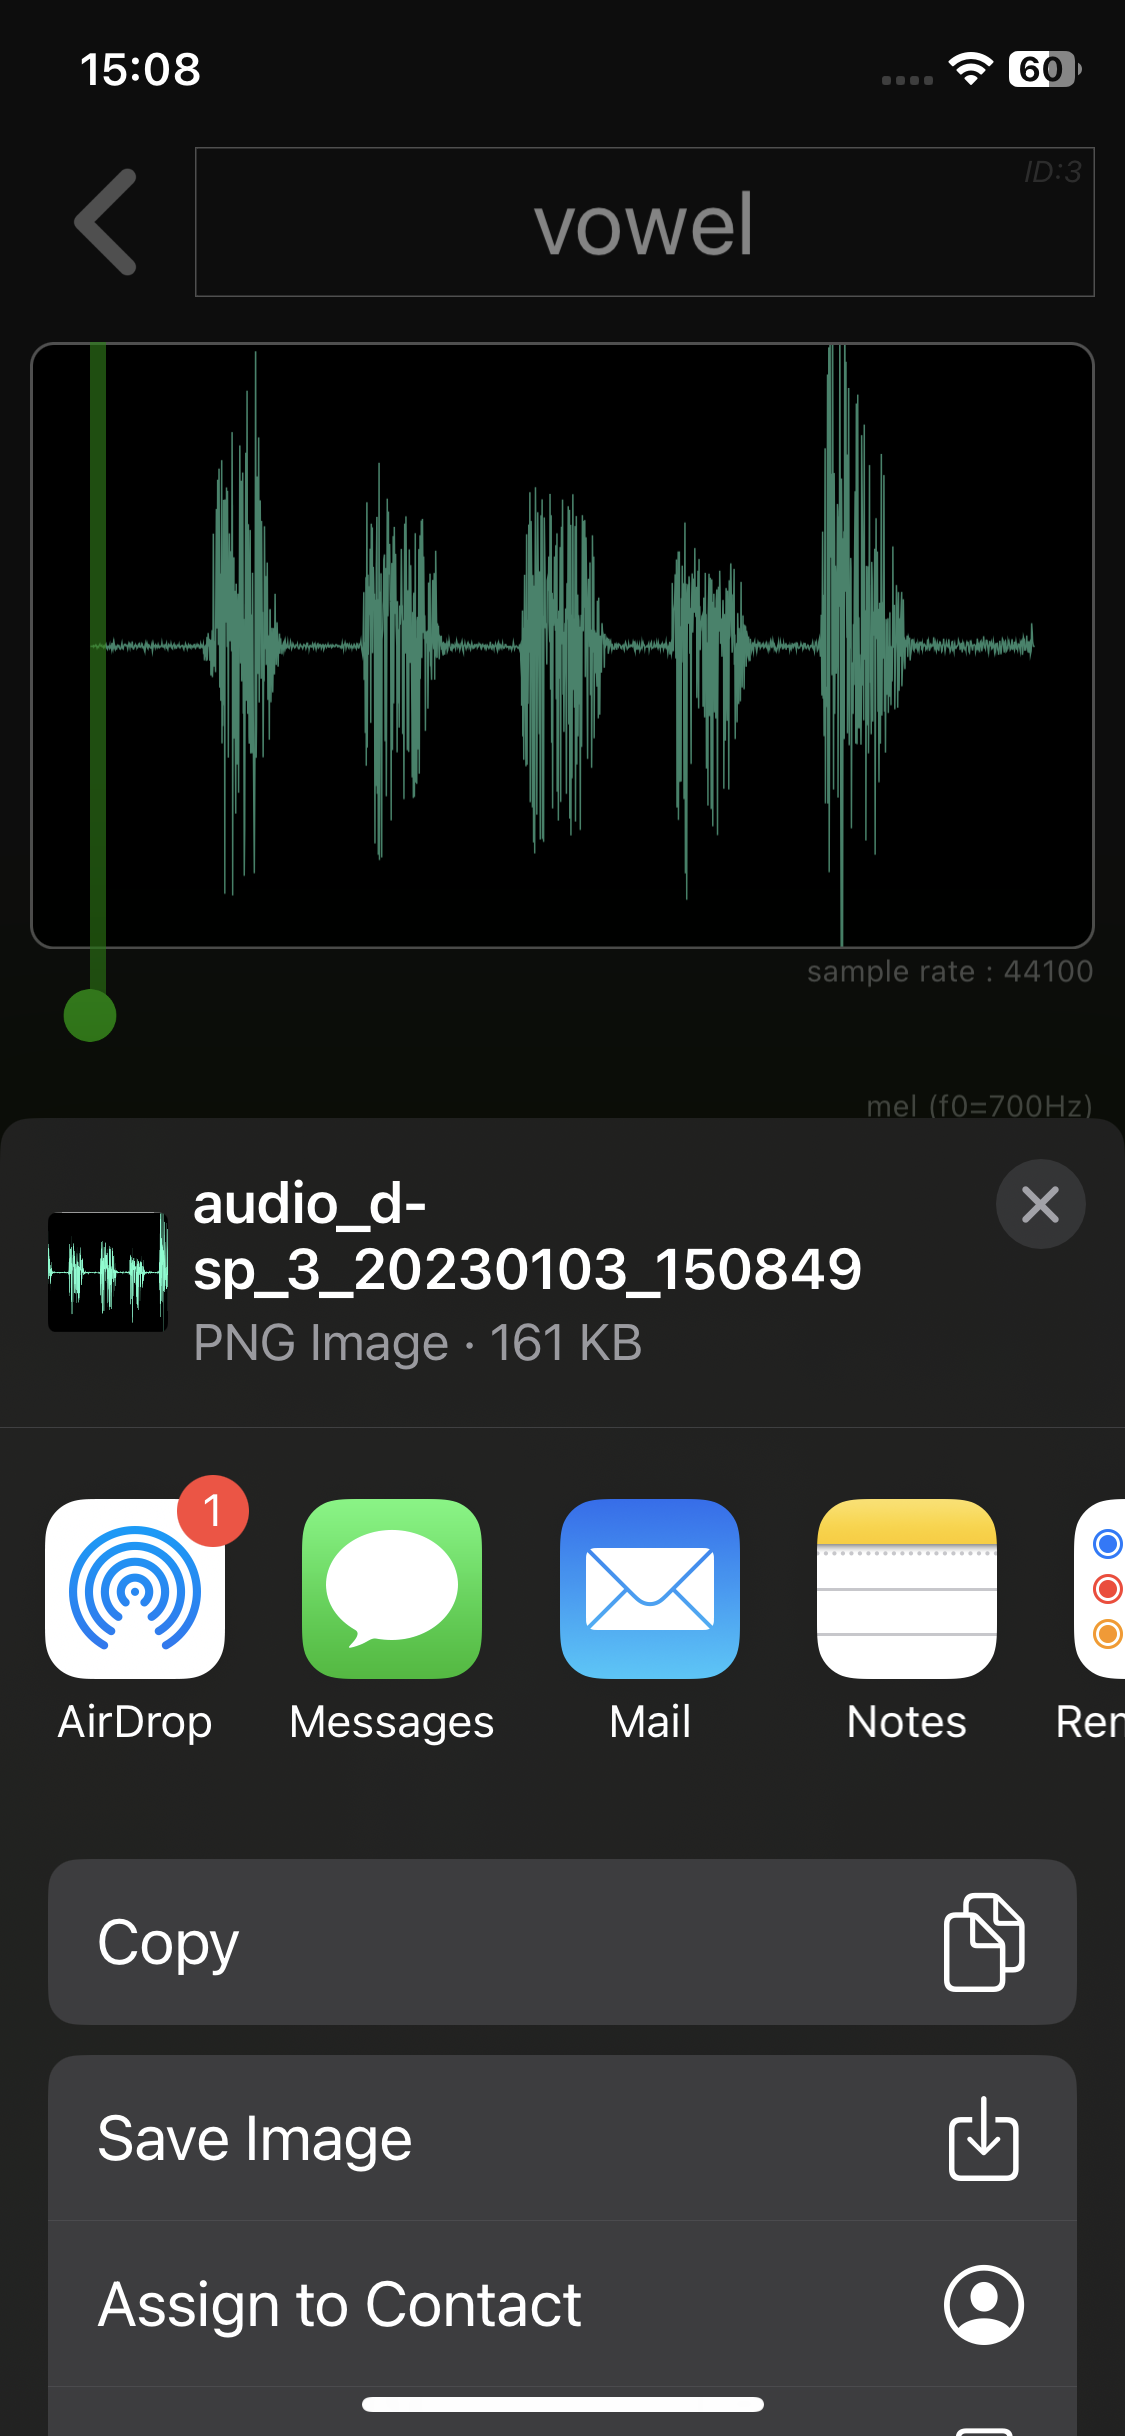
If you select “displayed image”, you can share the displayed image as a png file.
This operation can also be performed by long-pressing the share button. A long press on the share button does not display a popup, and you can directly share the displayed image.
If you select “audio file”, you can share the recorded audio as a caf file.

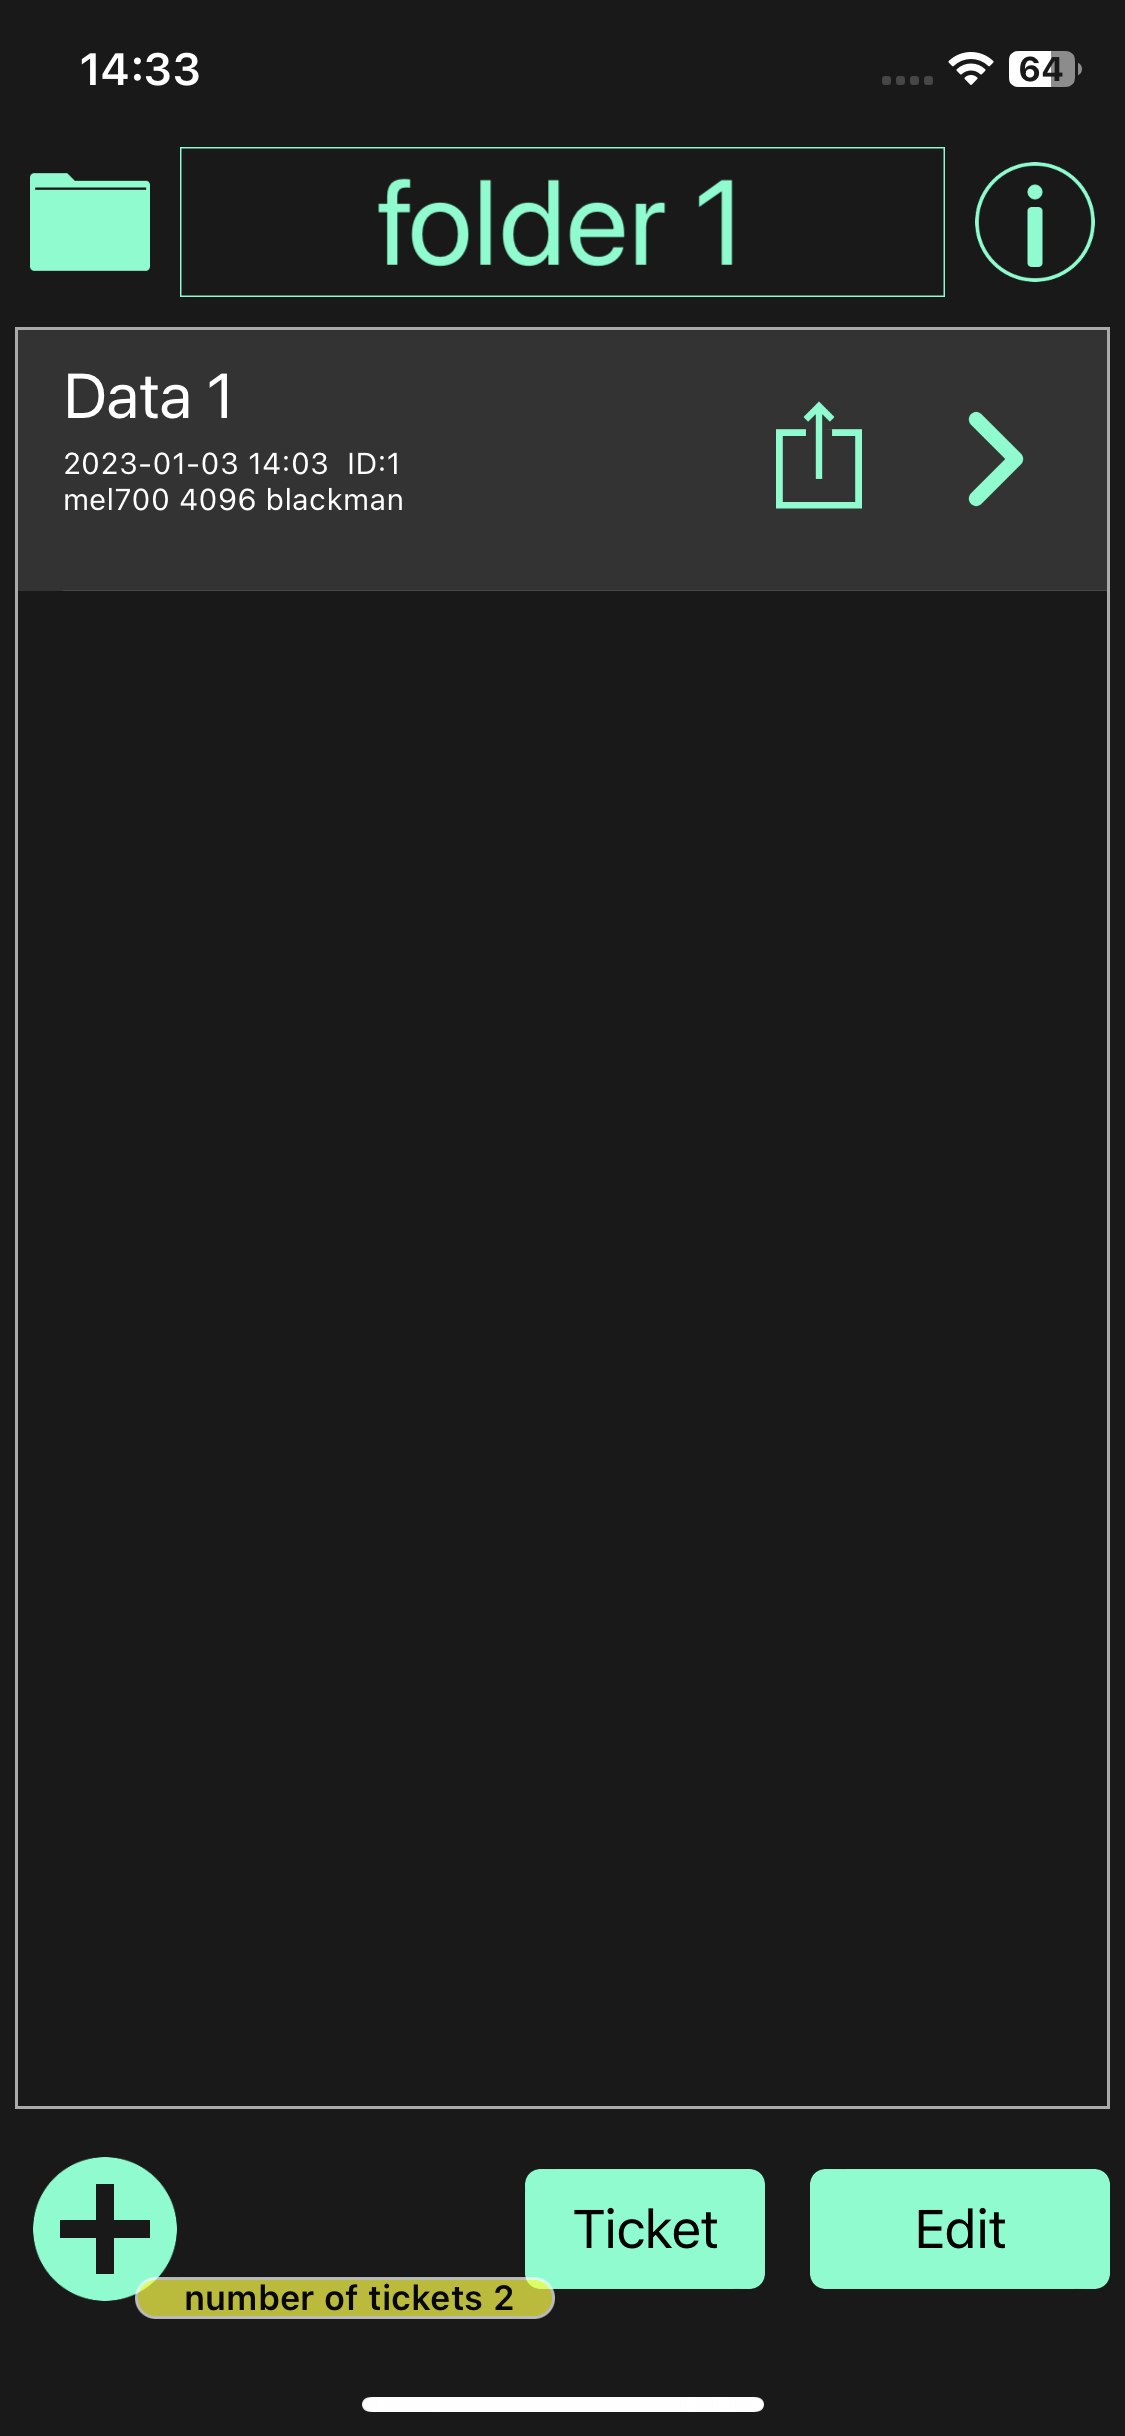
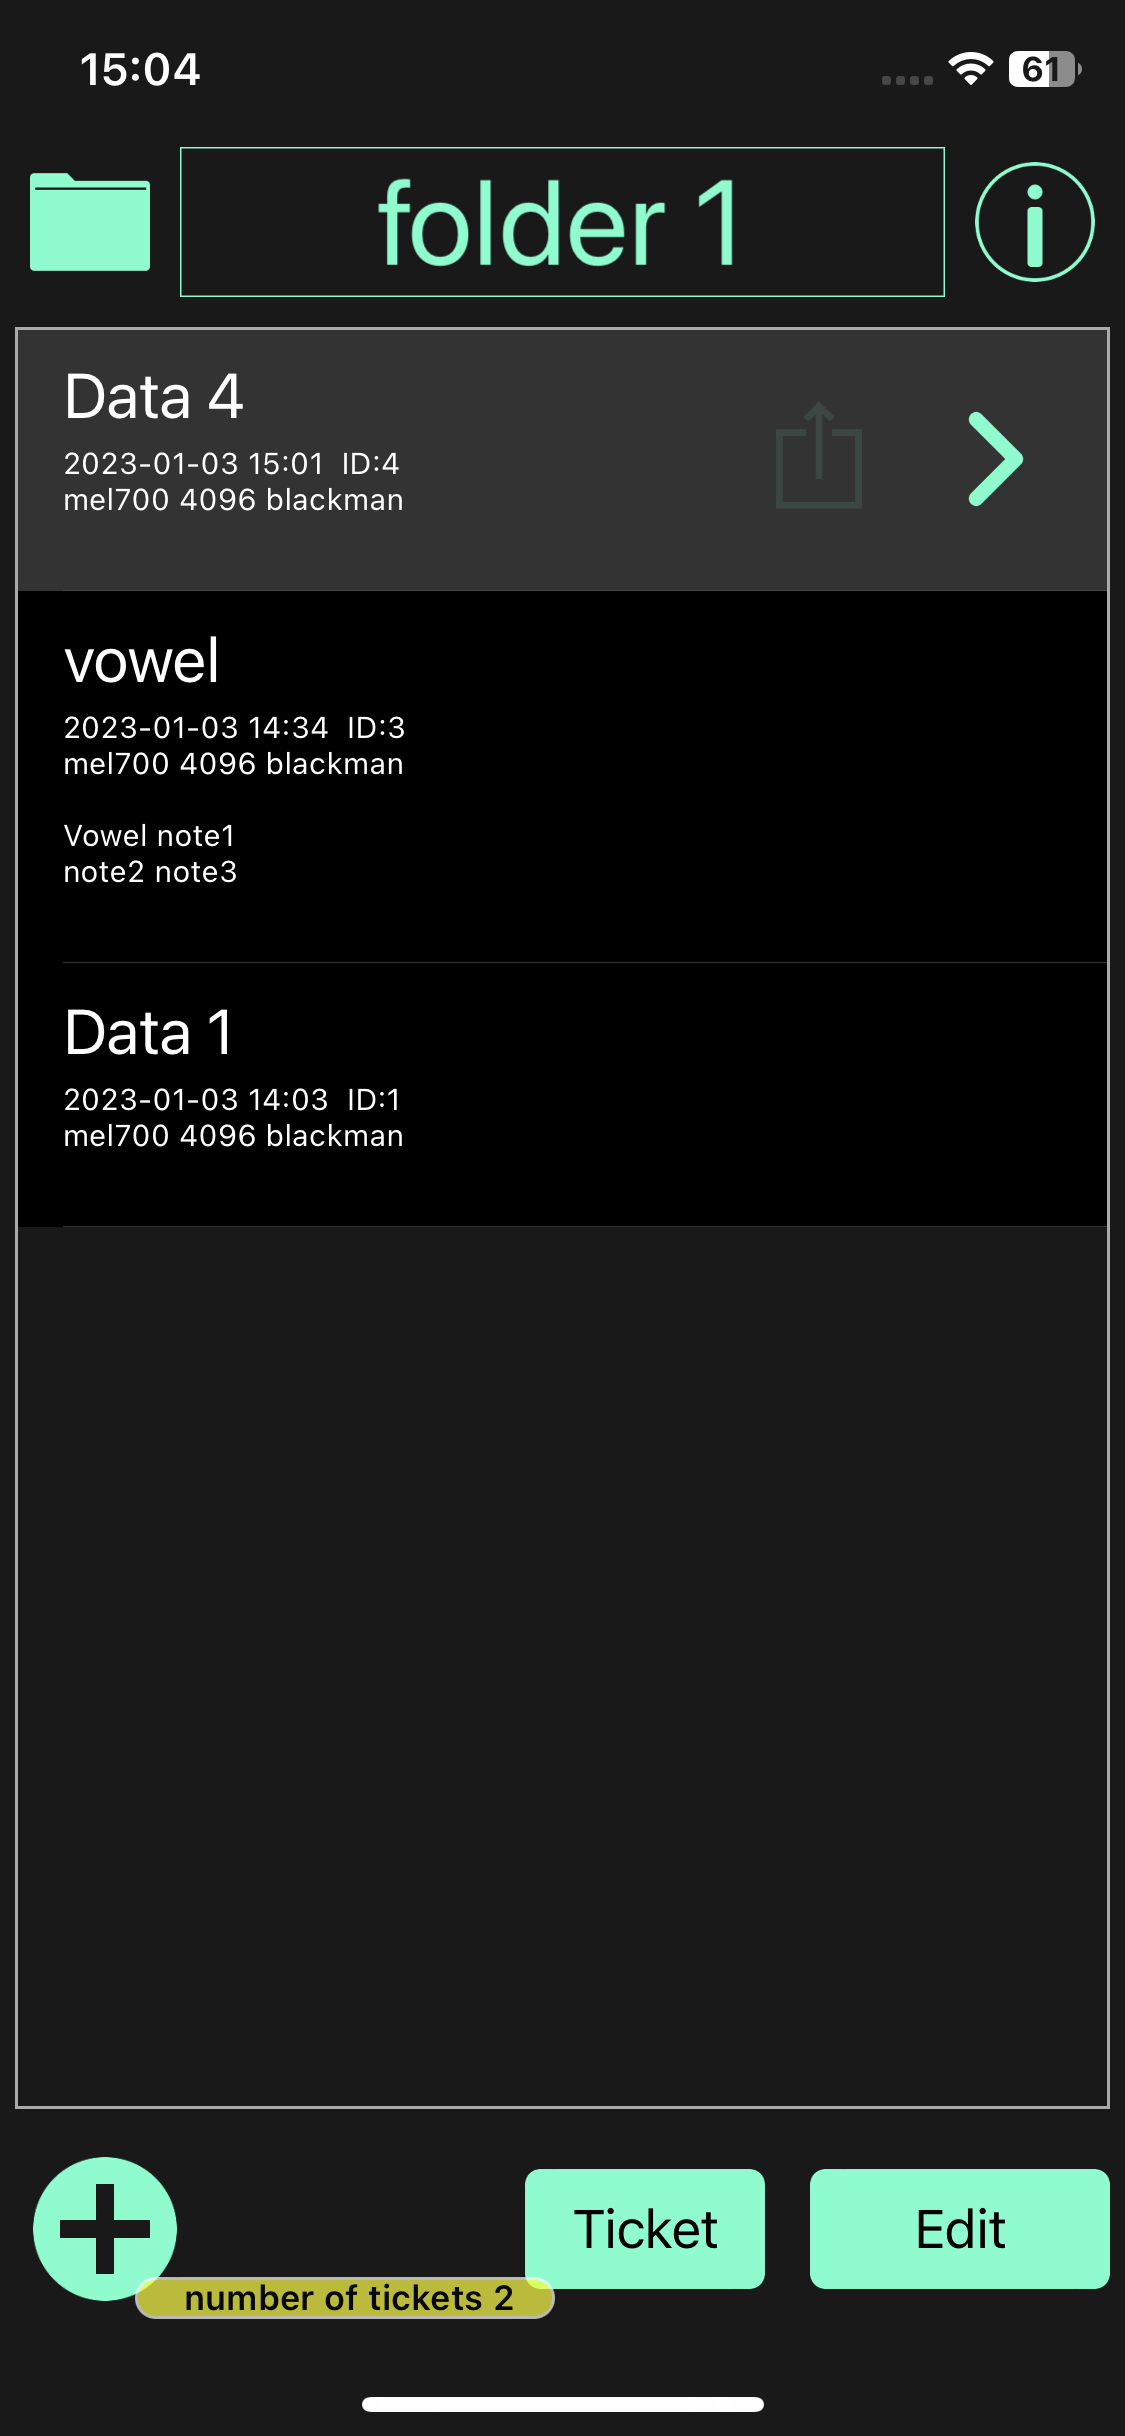
You can also share audio files (caf) on the dataset list screen.
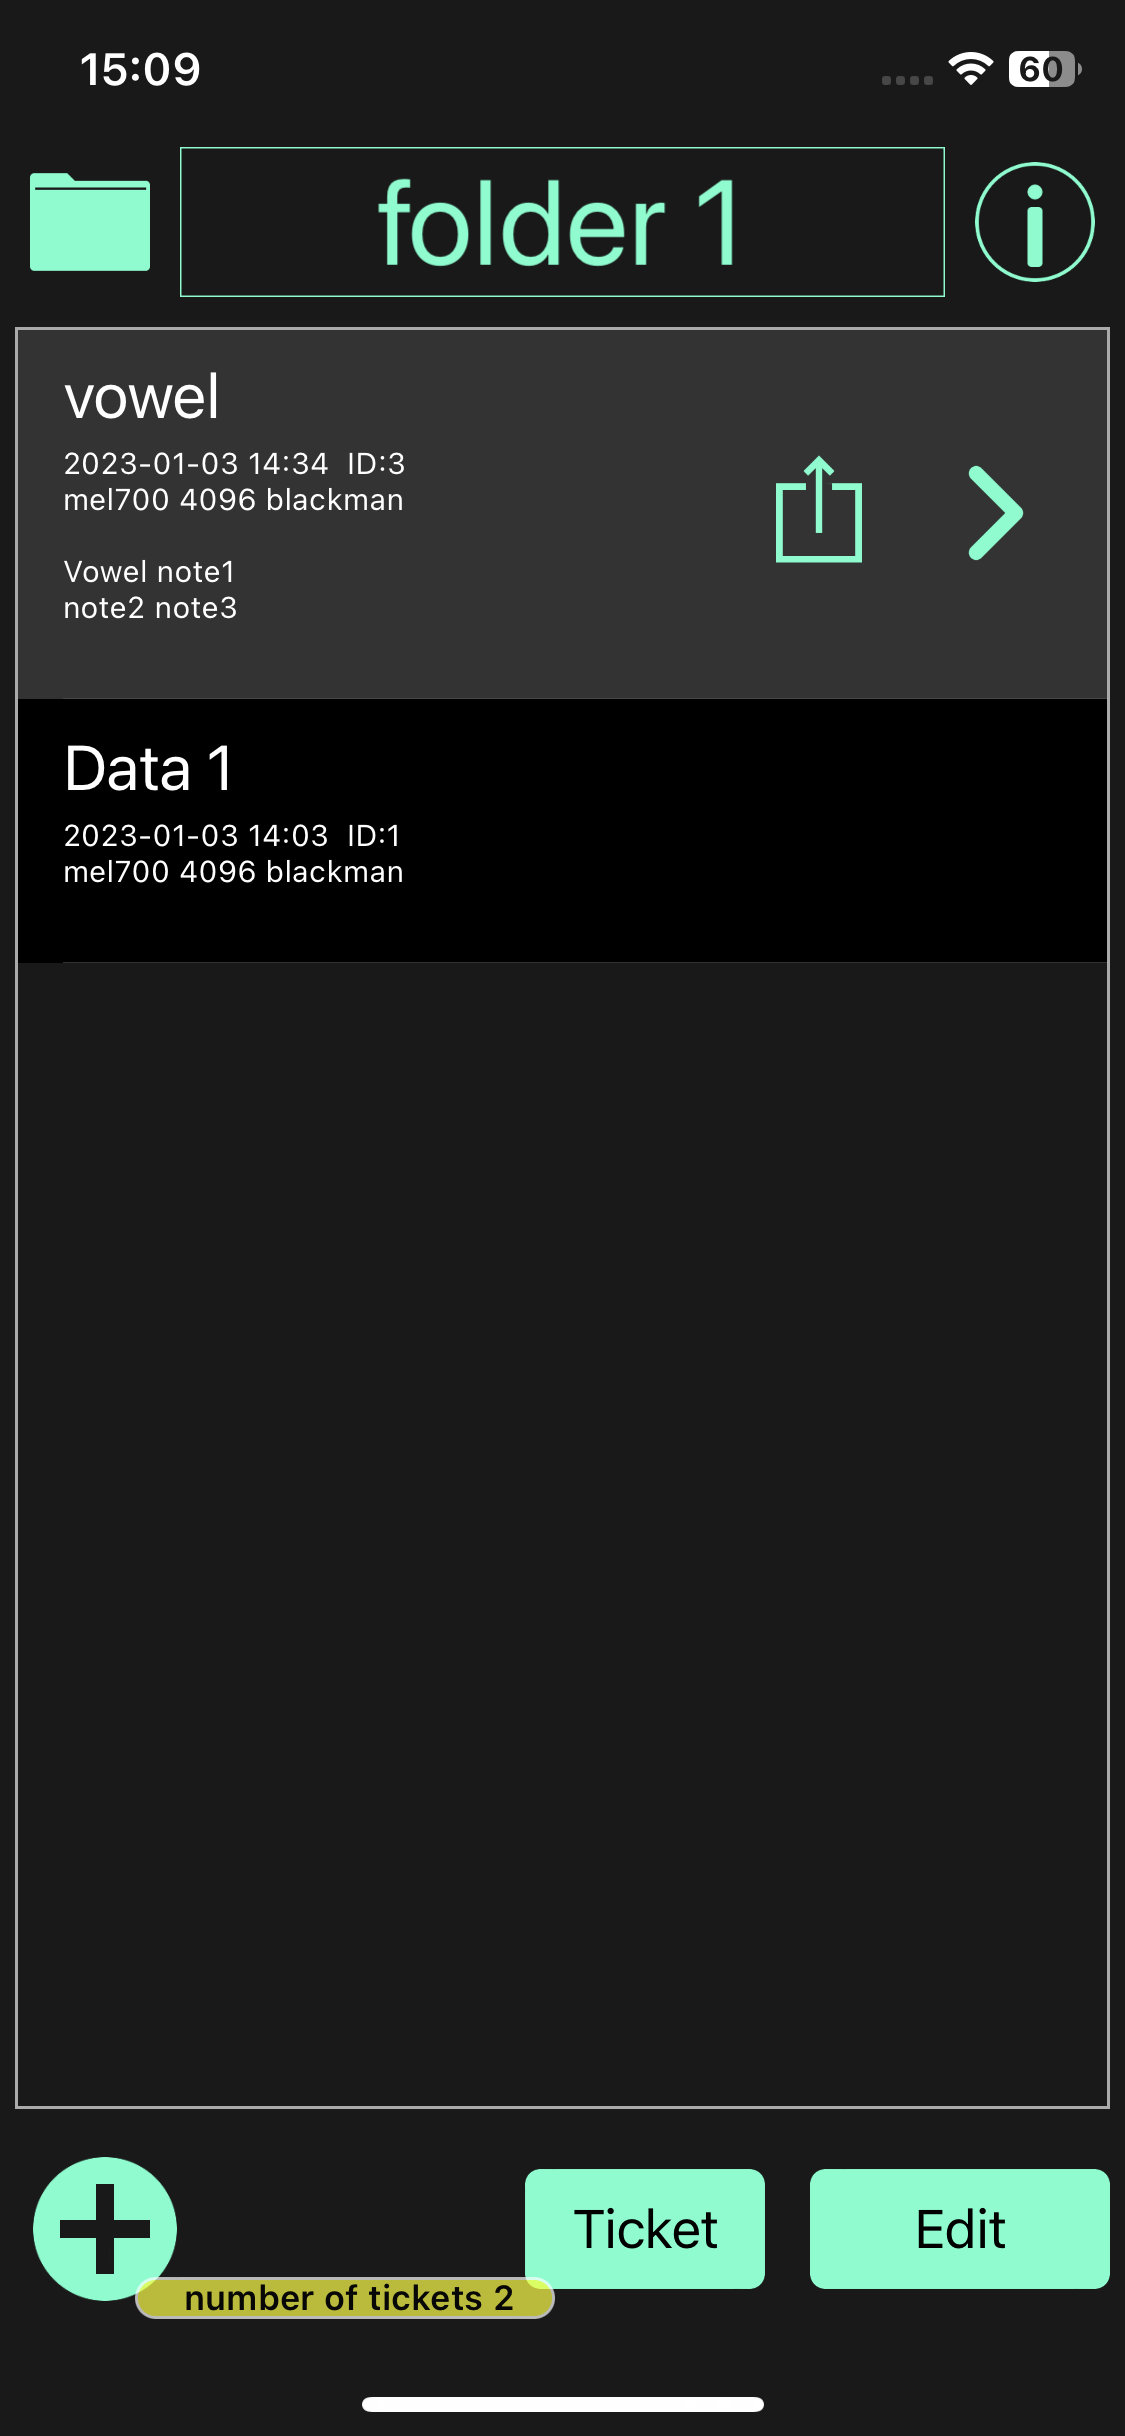
Audio file sharing
When you select a dataset row, an export button appears second from the right. Tap this to share an audio file (caf).
FFT results can be output externally as a displayed relative power spectrum image or as CSV text.
FFT results can be shared by tapping the share button on the bottom right while FFT is selected in the FFT/TFFT options. Tap to show the FFT result sharing popup.
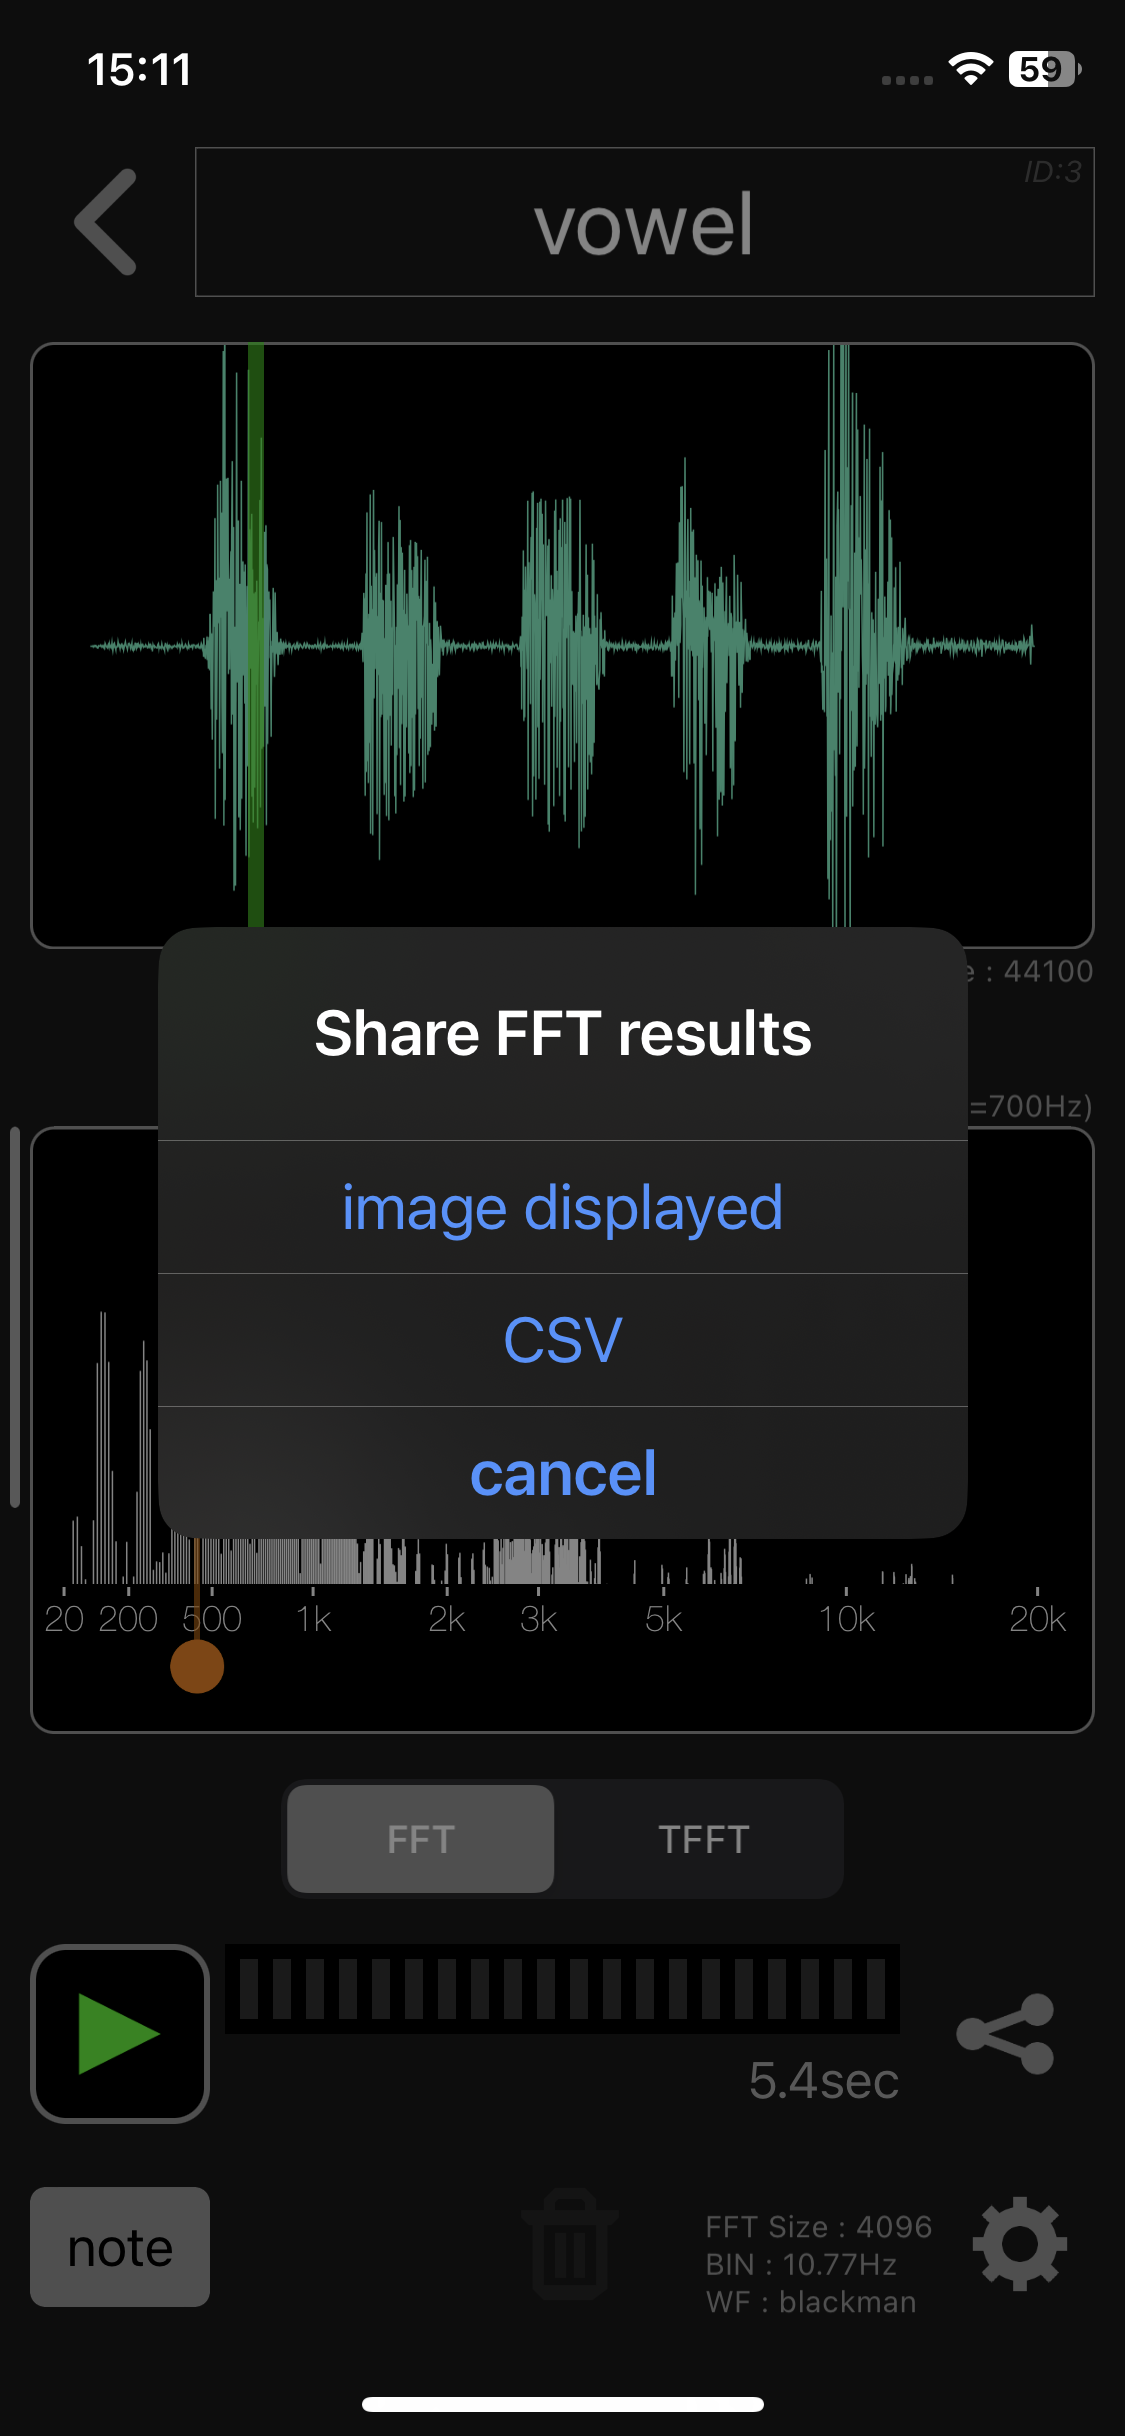
If you select “image displayed” in the FFT result sharing popup, the displayed relative power spectrum image can be shared as a png file.
This operation can also be performed by long-pressing the share button. A long press on the share button does not display a popup, and you can directly share the displayed relative power spectrum image.

FFT results can be shared as a CSV text file by selecting “CSV” in the FFT result sharing popup. The content of the CSV text is simple, with relative power values [dB] (from -128dB to 0dB) separated by commas. The total number of numeric values will be 1/2 of the FFT size, so for example if the FFT size is 4096, it will be 2048.
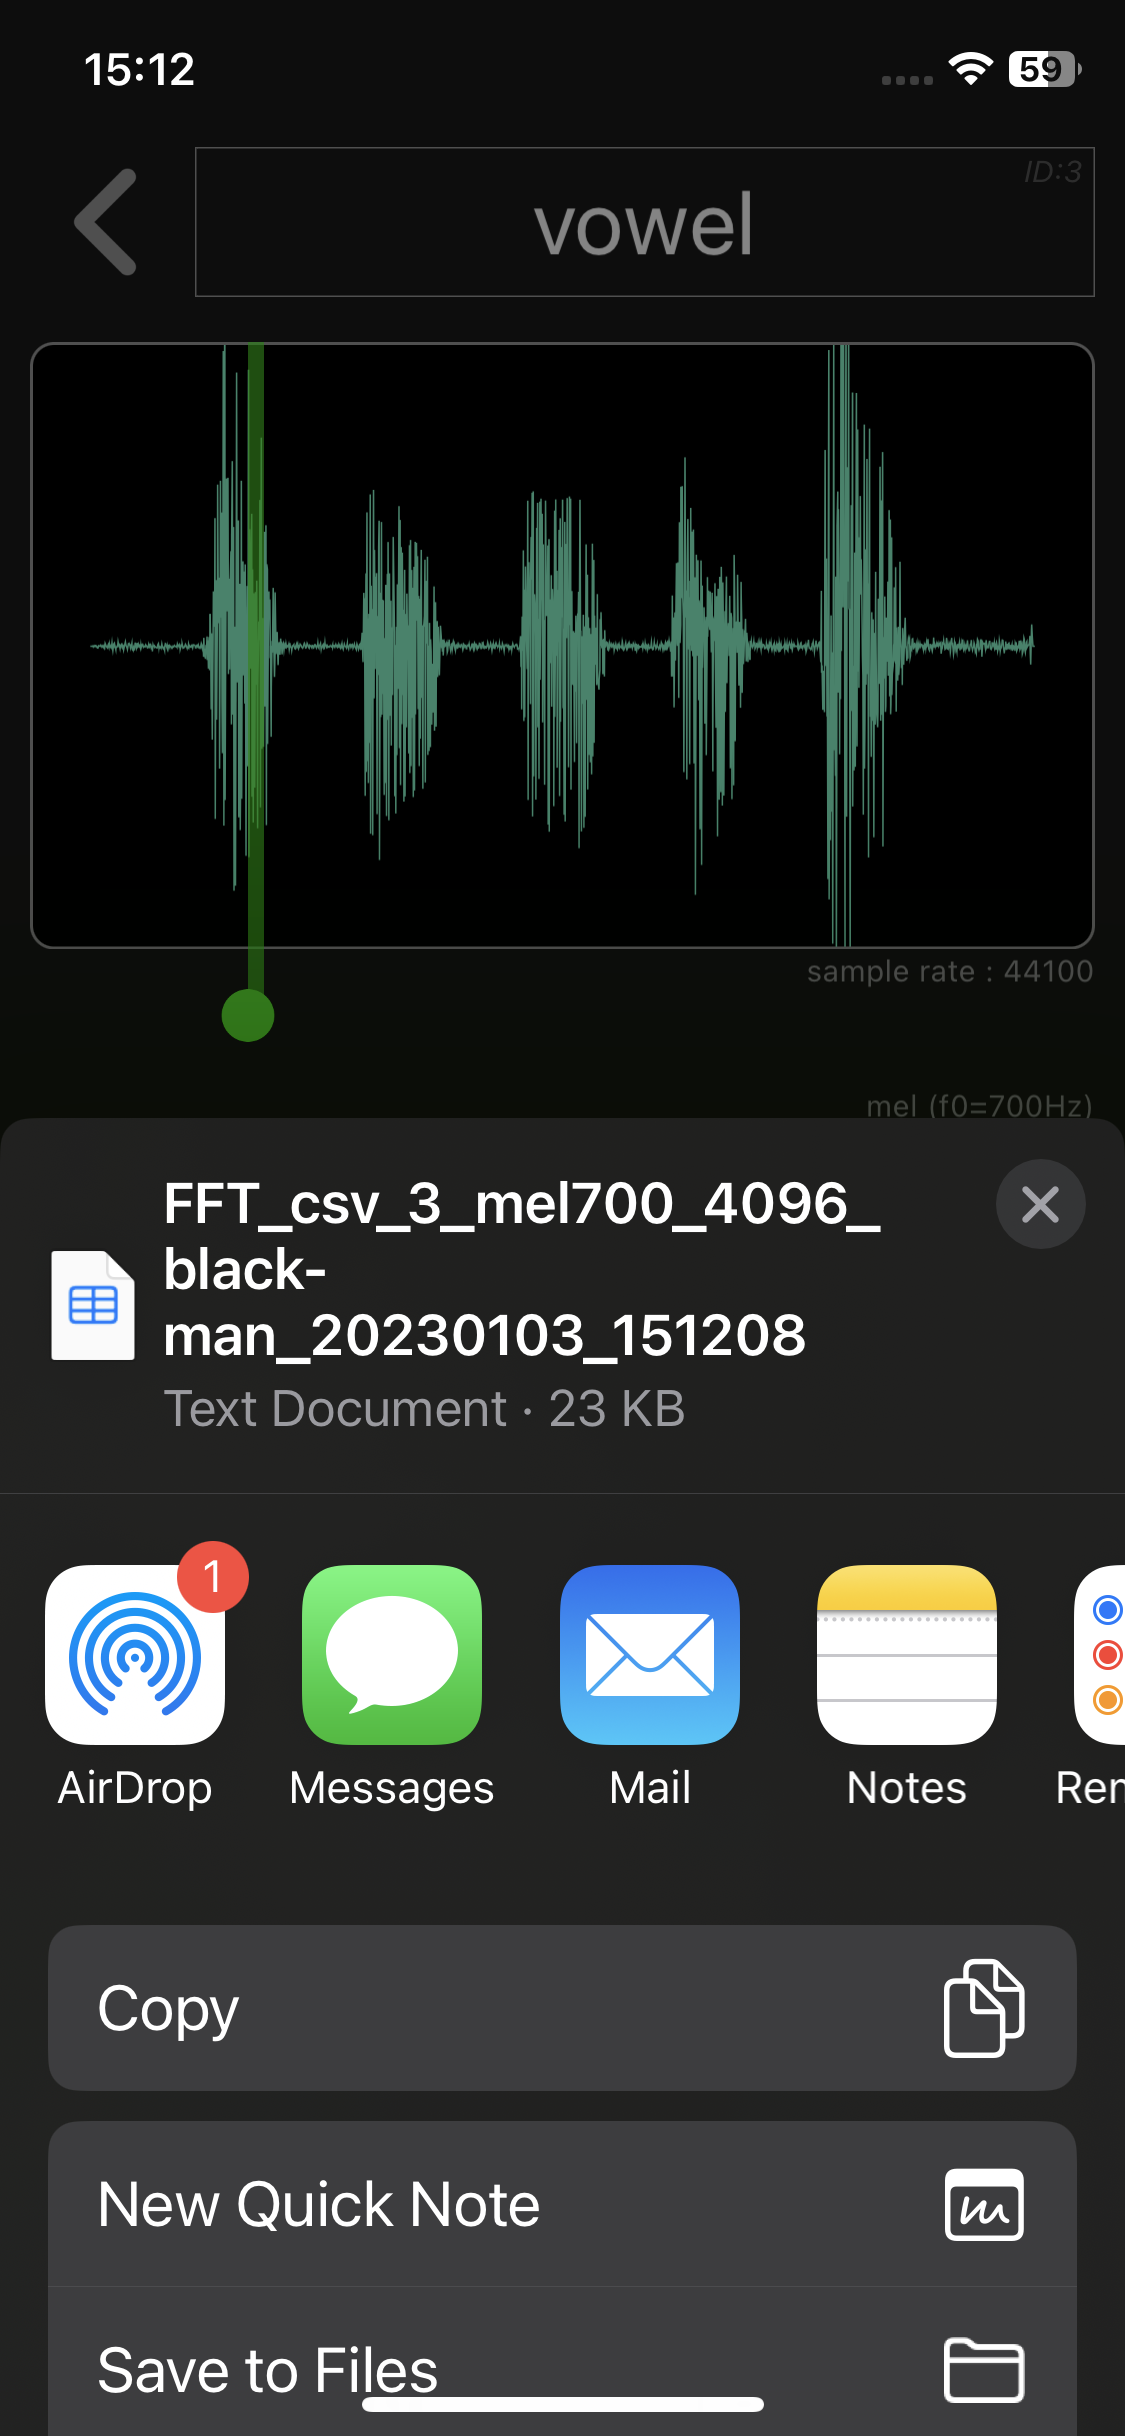
The name of the CSV file includes the type of power spectrum scale, such as mel700 or log, but this has nothing to do with the CSV contents. It just resembles the png file name of the relative power spectrum image.
The TFFT (Time-FFT) result can be output externally as a high resolution TFFT image or as a displayed TFFT image.
TFFT results can be shared by tapping the share button on the bottom right while TFFT is selected in the FFT/TFFT options. TFFT result sharing popup appears when you tap it.
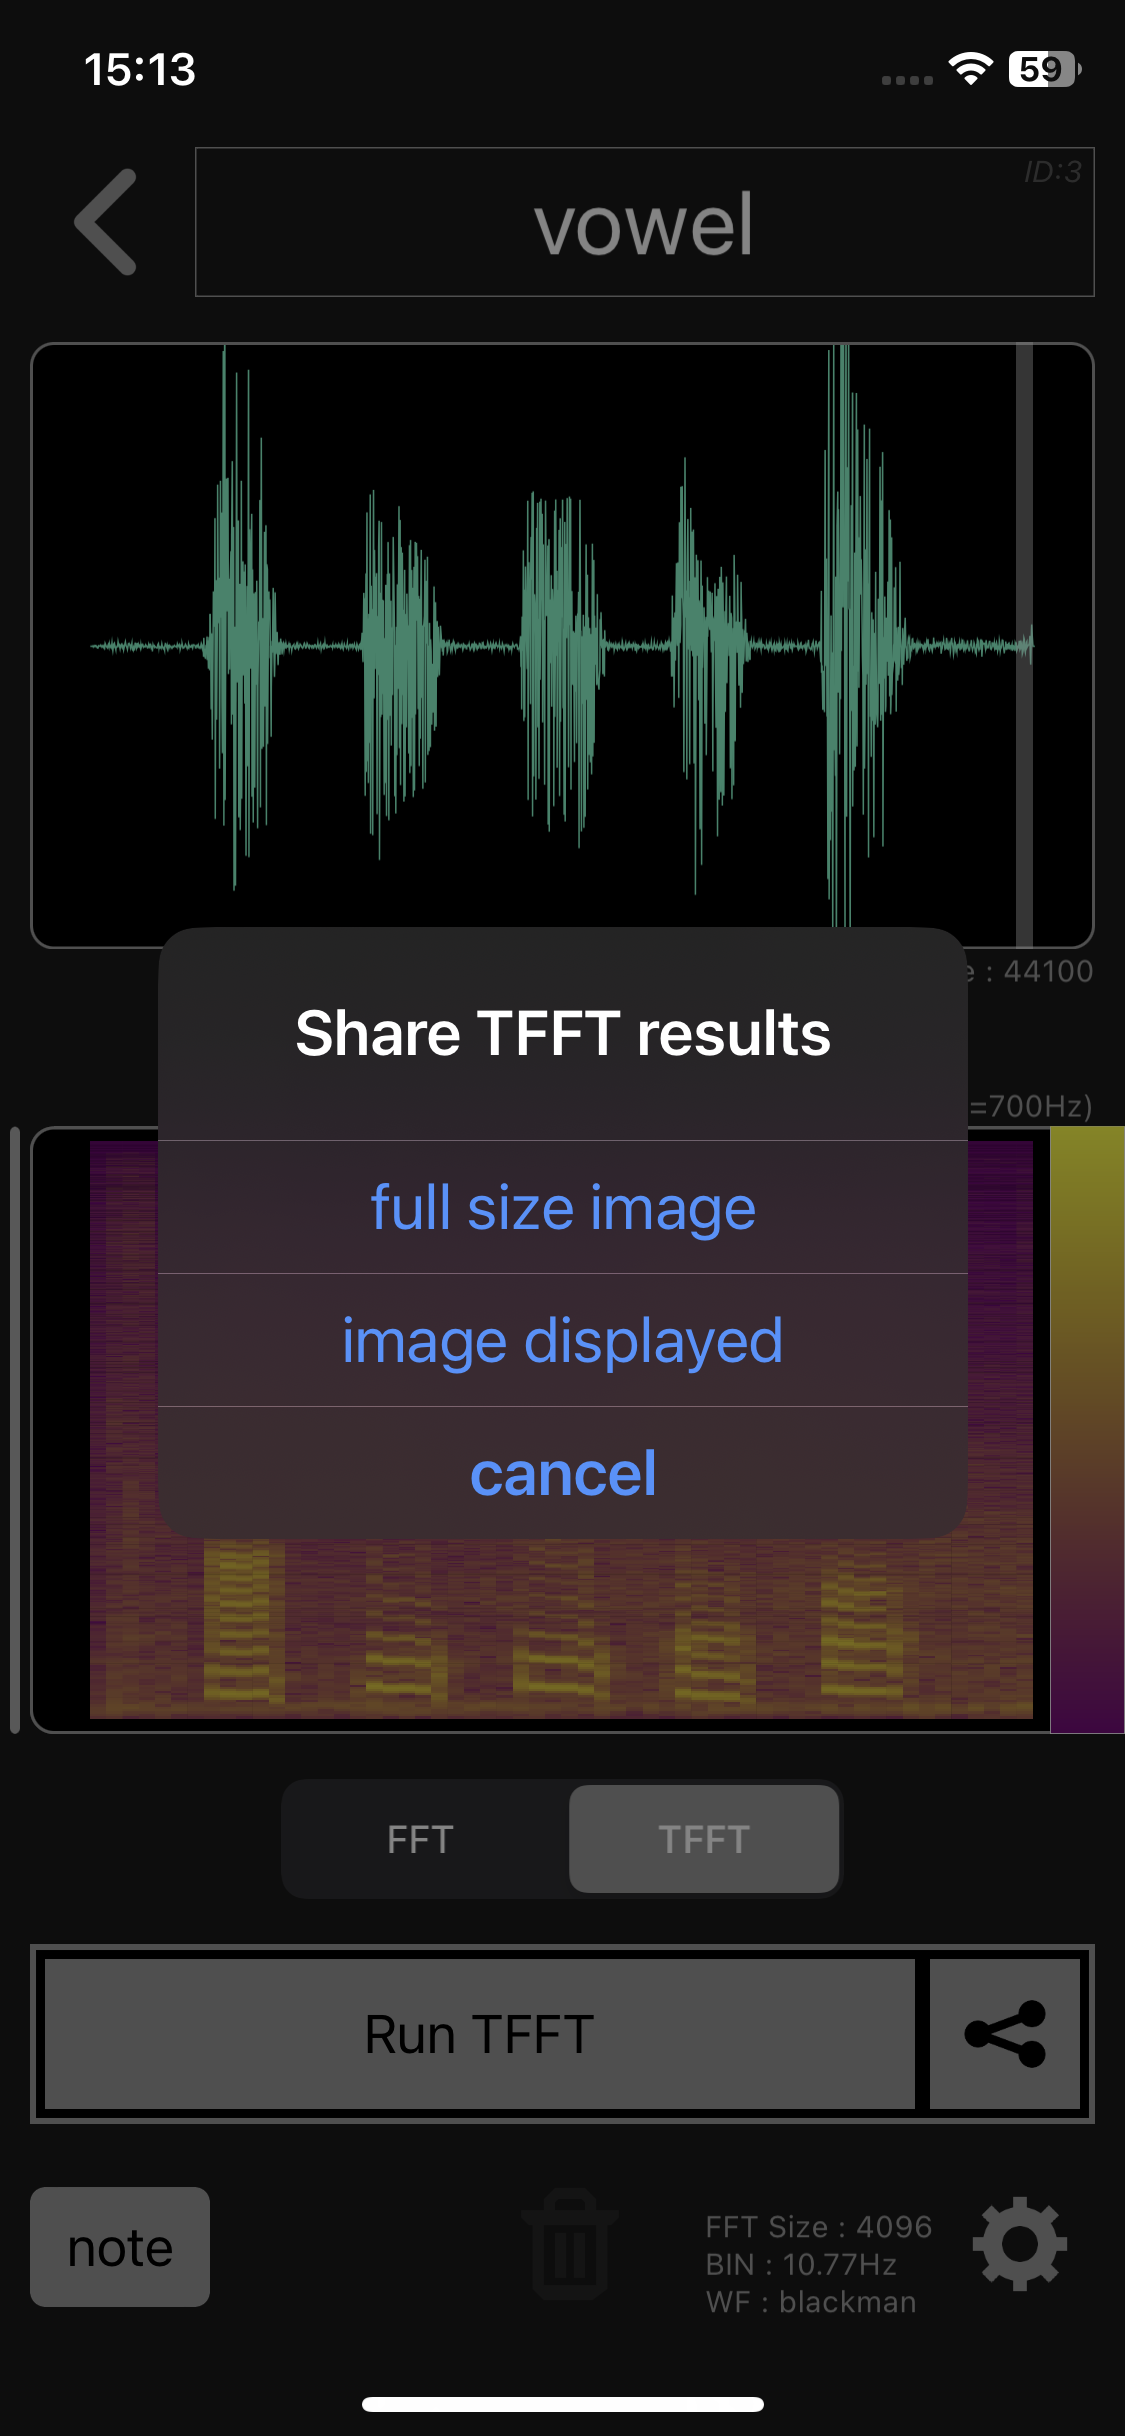
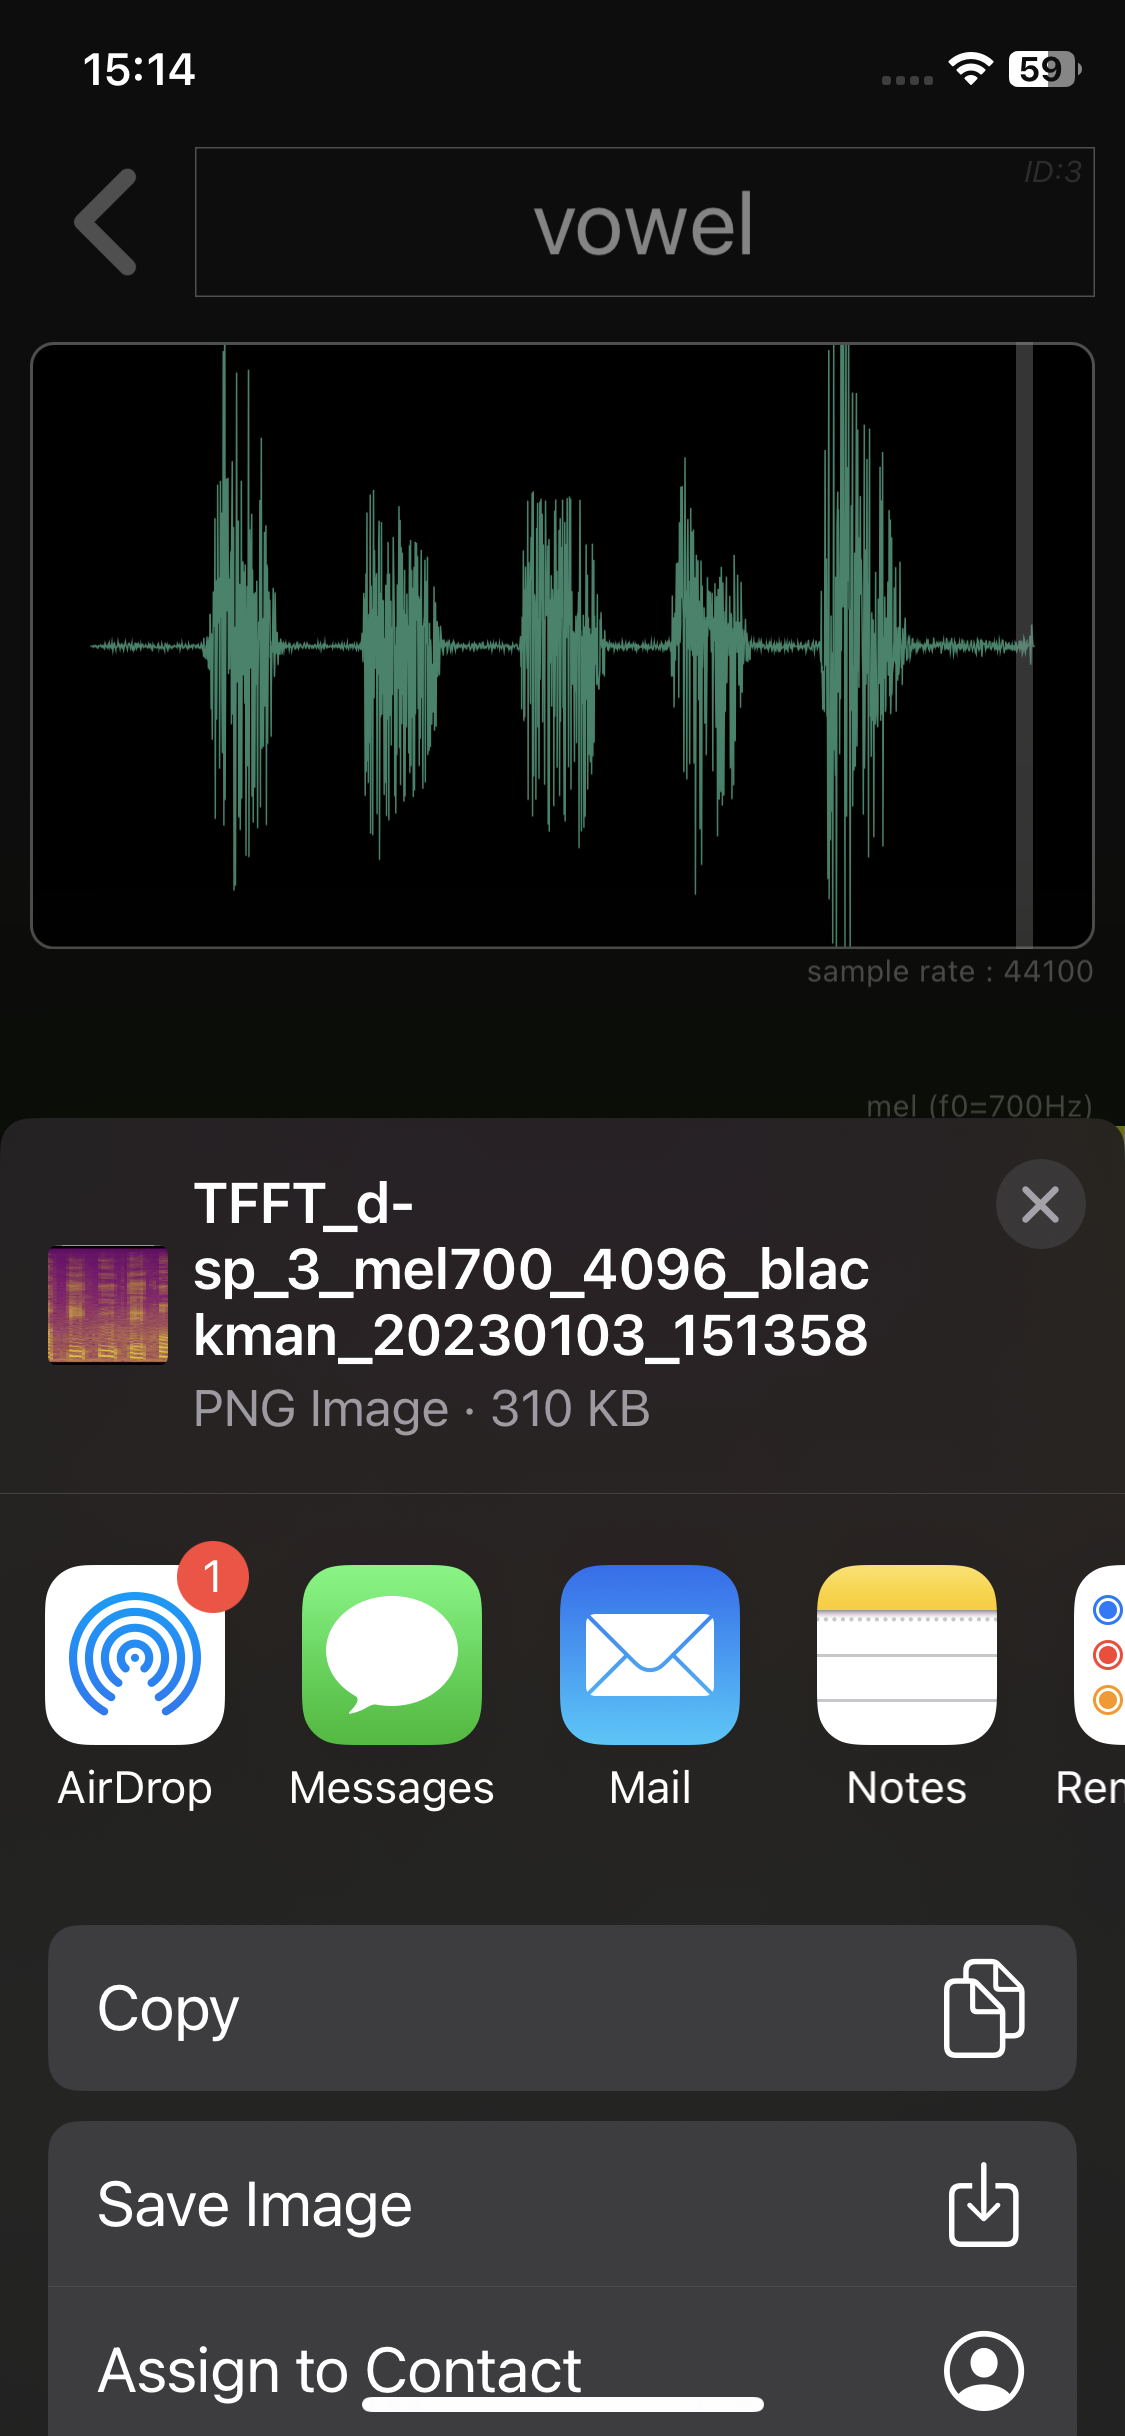
If you select “full size image” in the TFFT result sharing popup, you can share the high resolution TFFT image as a png file. The actual image size will vary depending on the device.
This operation can also be performed by long-pressing the share button. A long press on the share button does not display a popup, and you can directly share the high resolution TFFT image.

You can share the displayed TFFT image as a png file by selecting “display image” in the TFFT result sharing popup. In the TFFT image as it is displayed, the thin lines may be almost disappeared, so it is not suitable for use in machine learning.
Generator: generating audio waveforms
The generator is a simple audio waveform generation function, but it can be used effectively for hands-on learning of FFT. Generates simple sine waves, square waves, Gaussian white noise and their combinations. For example, the characteristics of window functions and differences in FFT sizes can be easily understood by trying them on a simple audio waveform.

To start the generator, long press the record button (red circle) on the unrecorded dataset screen.
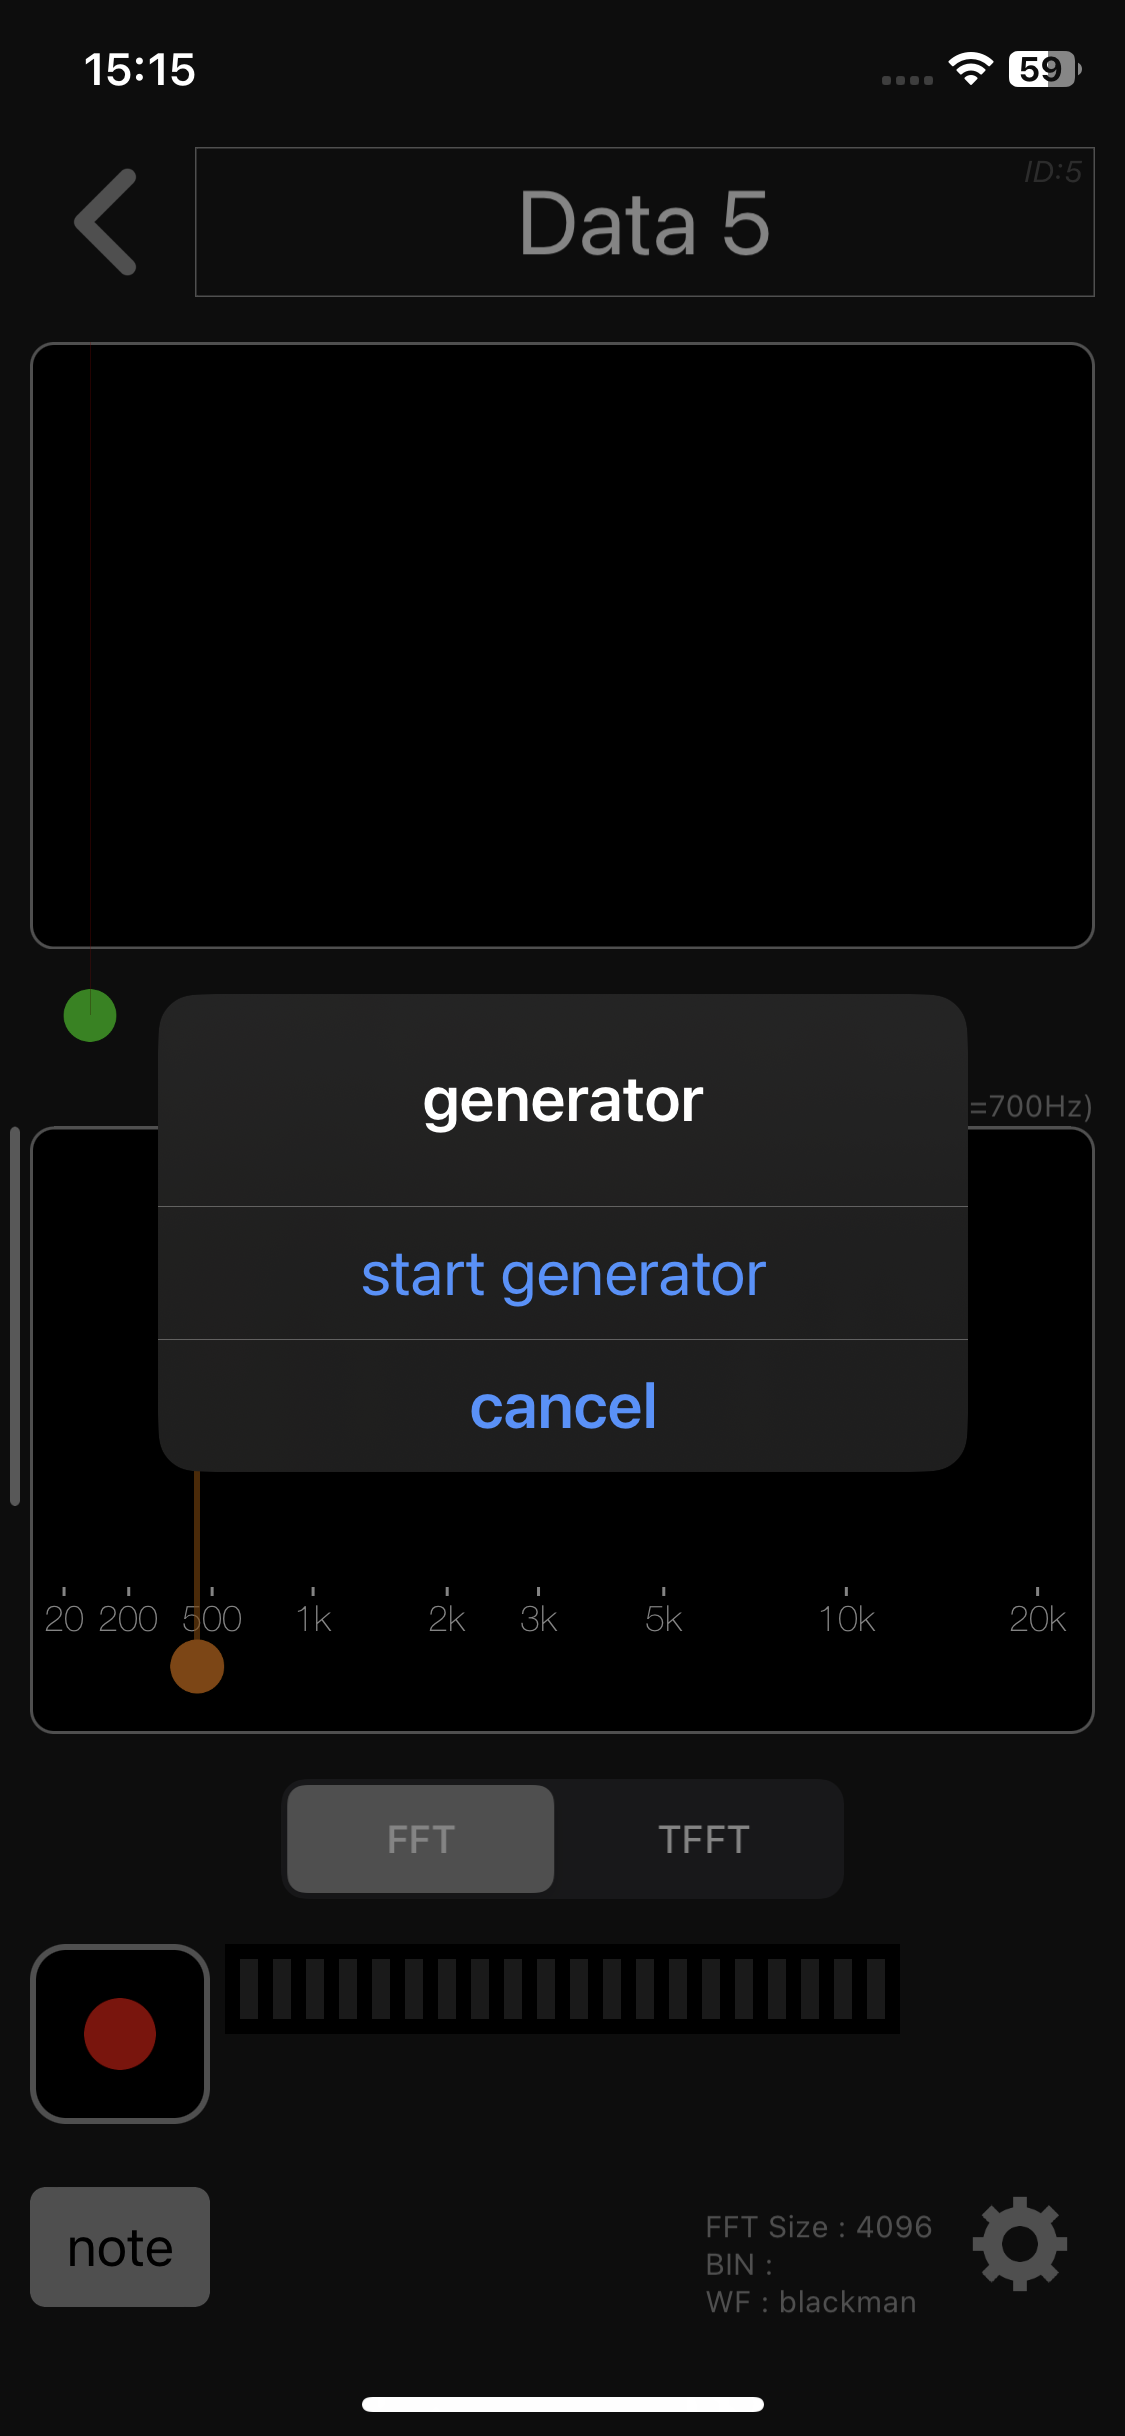
If you select “start generator” in the popup, the generator screen will appear.
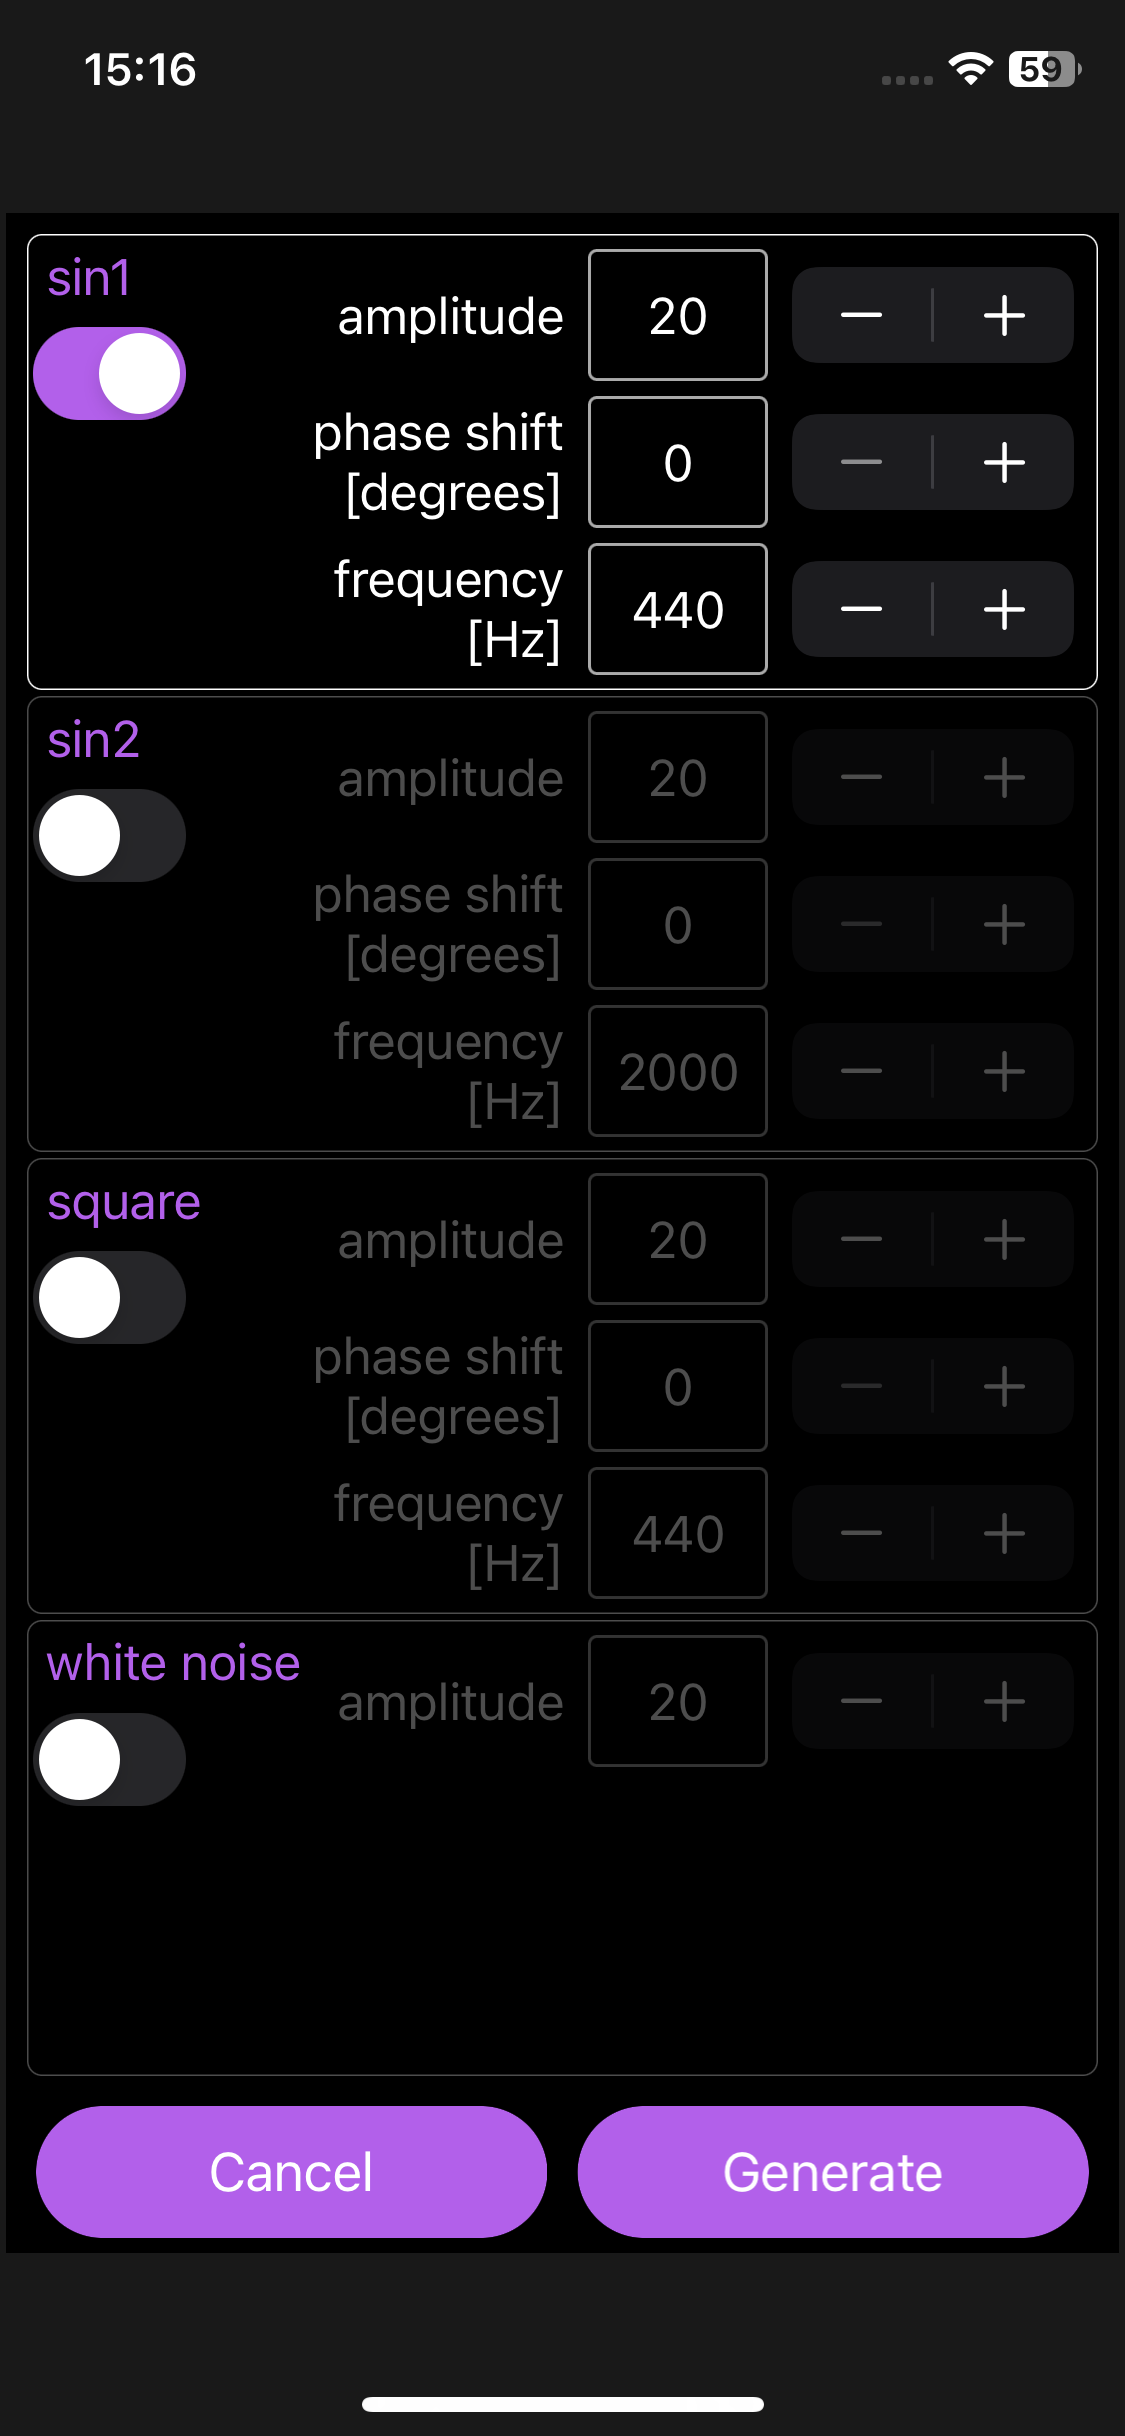
There are three types of waveforms that can be generated by the generator: sine wave (sin1, sine2), square wave, and white noise. Use the switch on the left to turn on/off generation. If two or more switches are turned on, their composite waveform is generated.
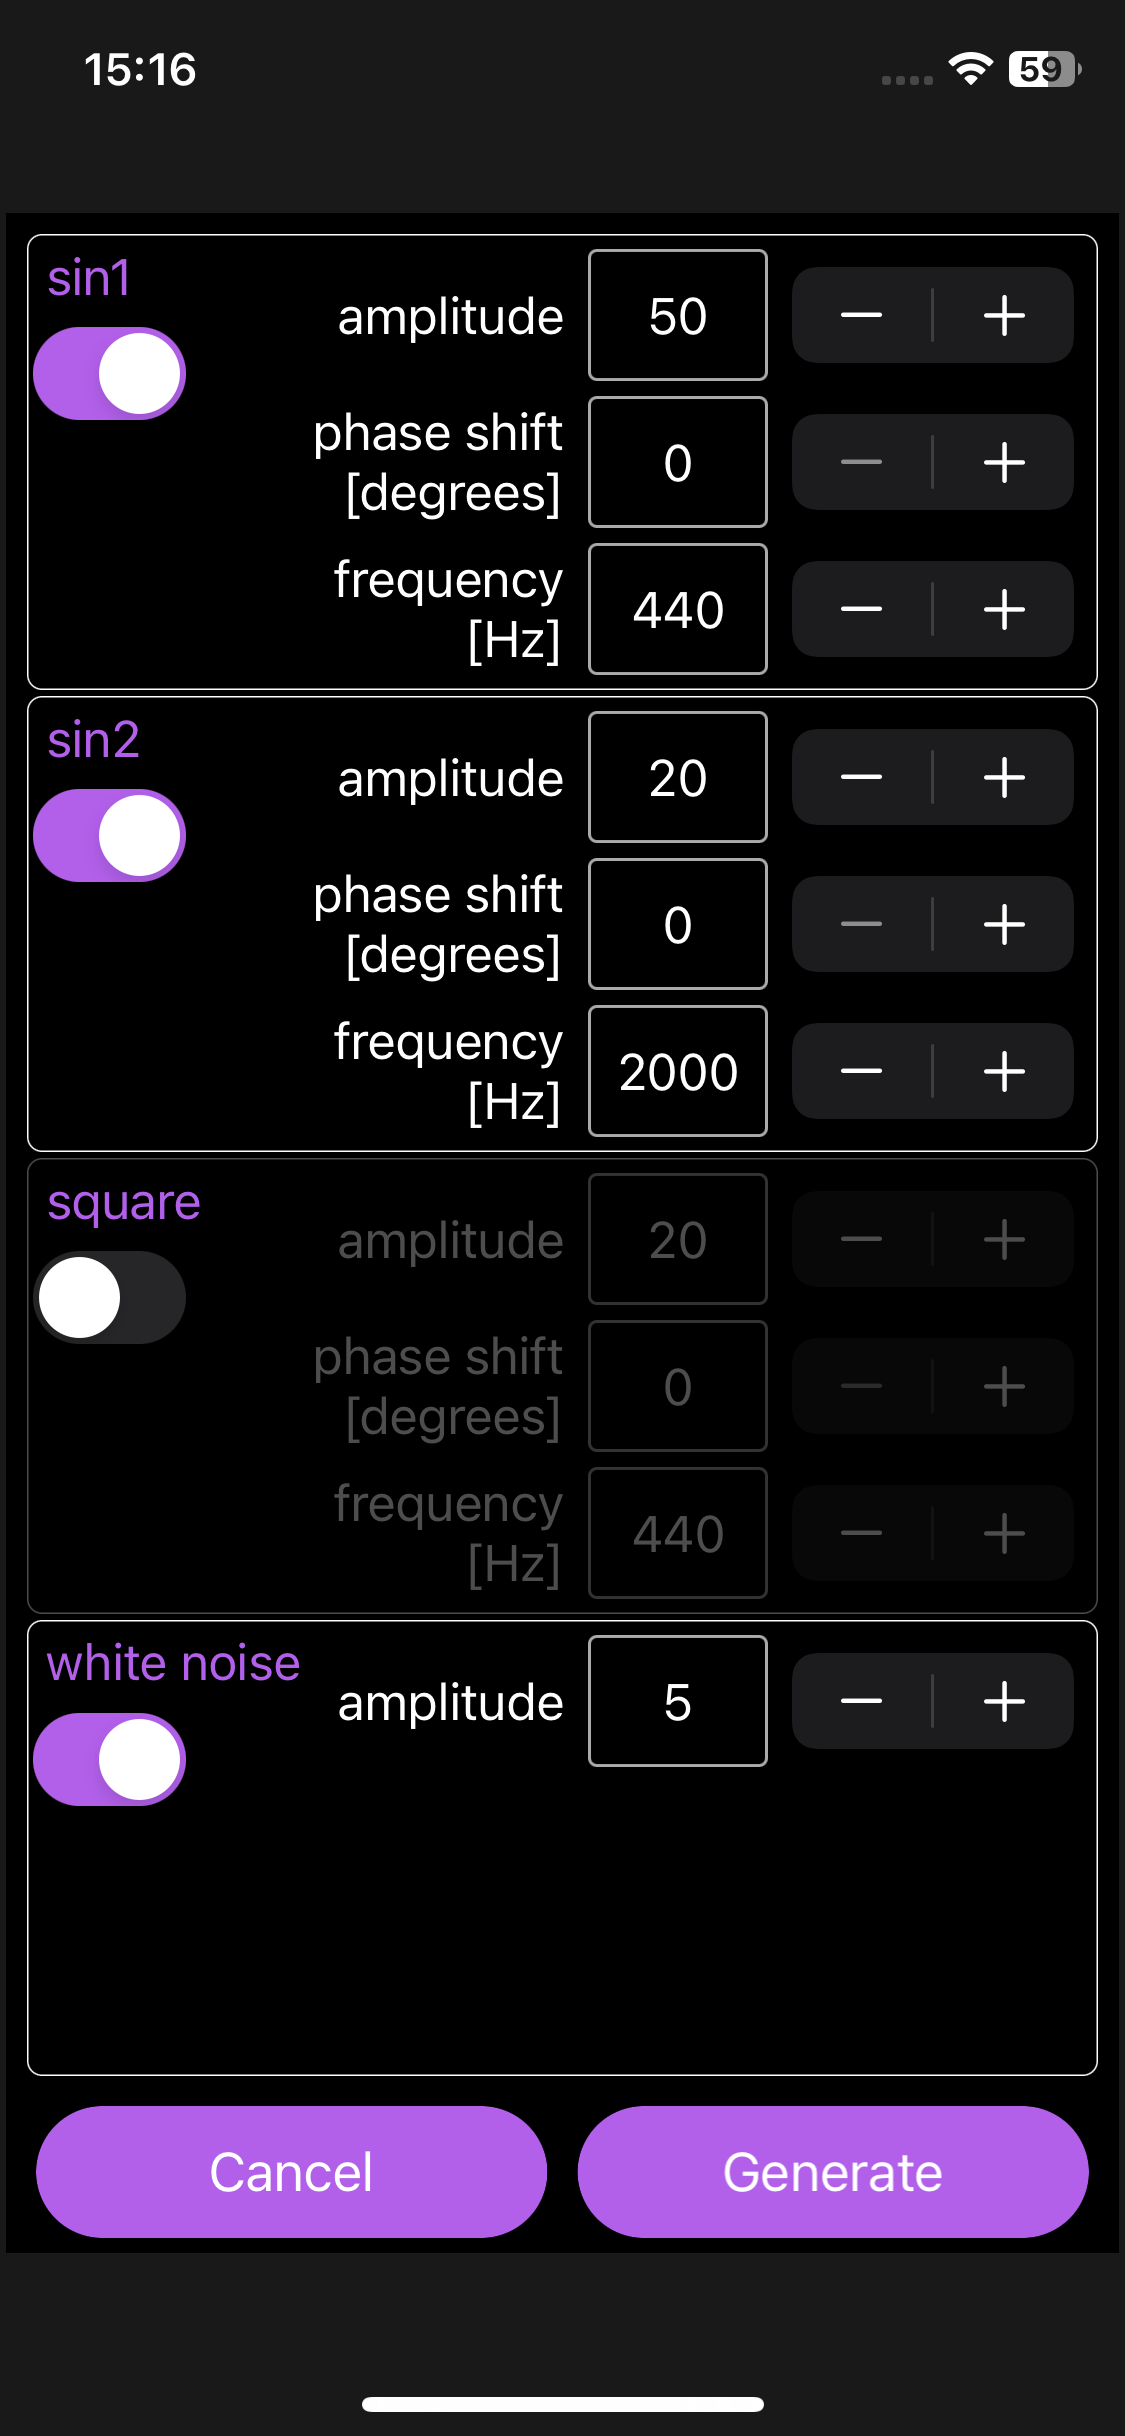
For each, set the amplitude, phase and frequency and tap the “generate” button to generate the expected audio waveform.
Tip | Import audio file
Importing external audio files is possible, but it requires a troublesome operation. Also, for stereo recordings, only the L channel is analyzed and the R channel is ignored.
Only CAF format audio files (.caf) can be imported. If you want to import audio files in other formats such as mp3 or m4a, you need to convert them to caf in advance.

To import an external CAF format audio file, long press the record button (red circle) to start the generator.

Long press the “Generate” button to return to the dataset screen. (Now you can see the document folder of this app from the “Files” app)
Here, once close this app and start the “Files” app.
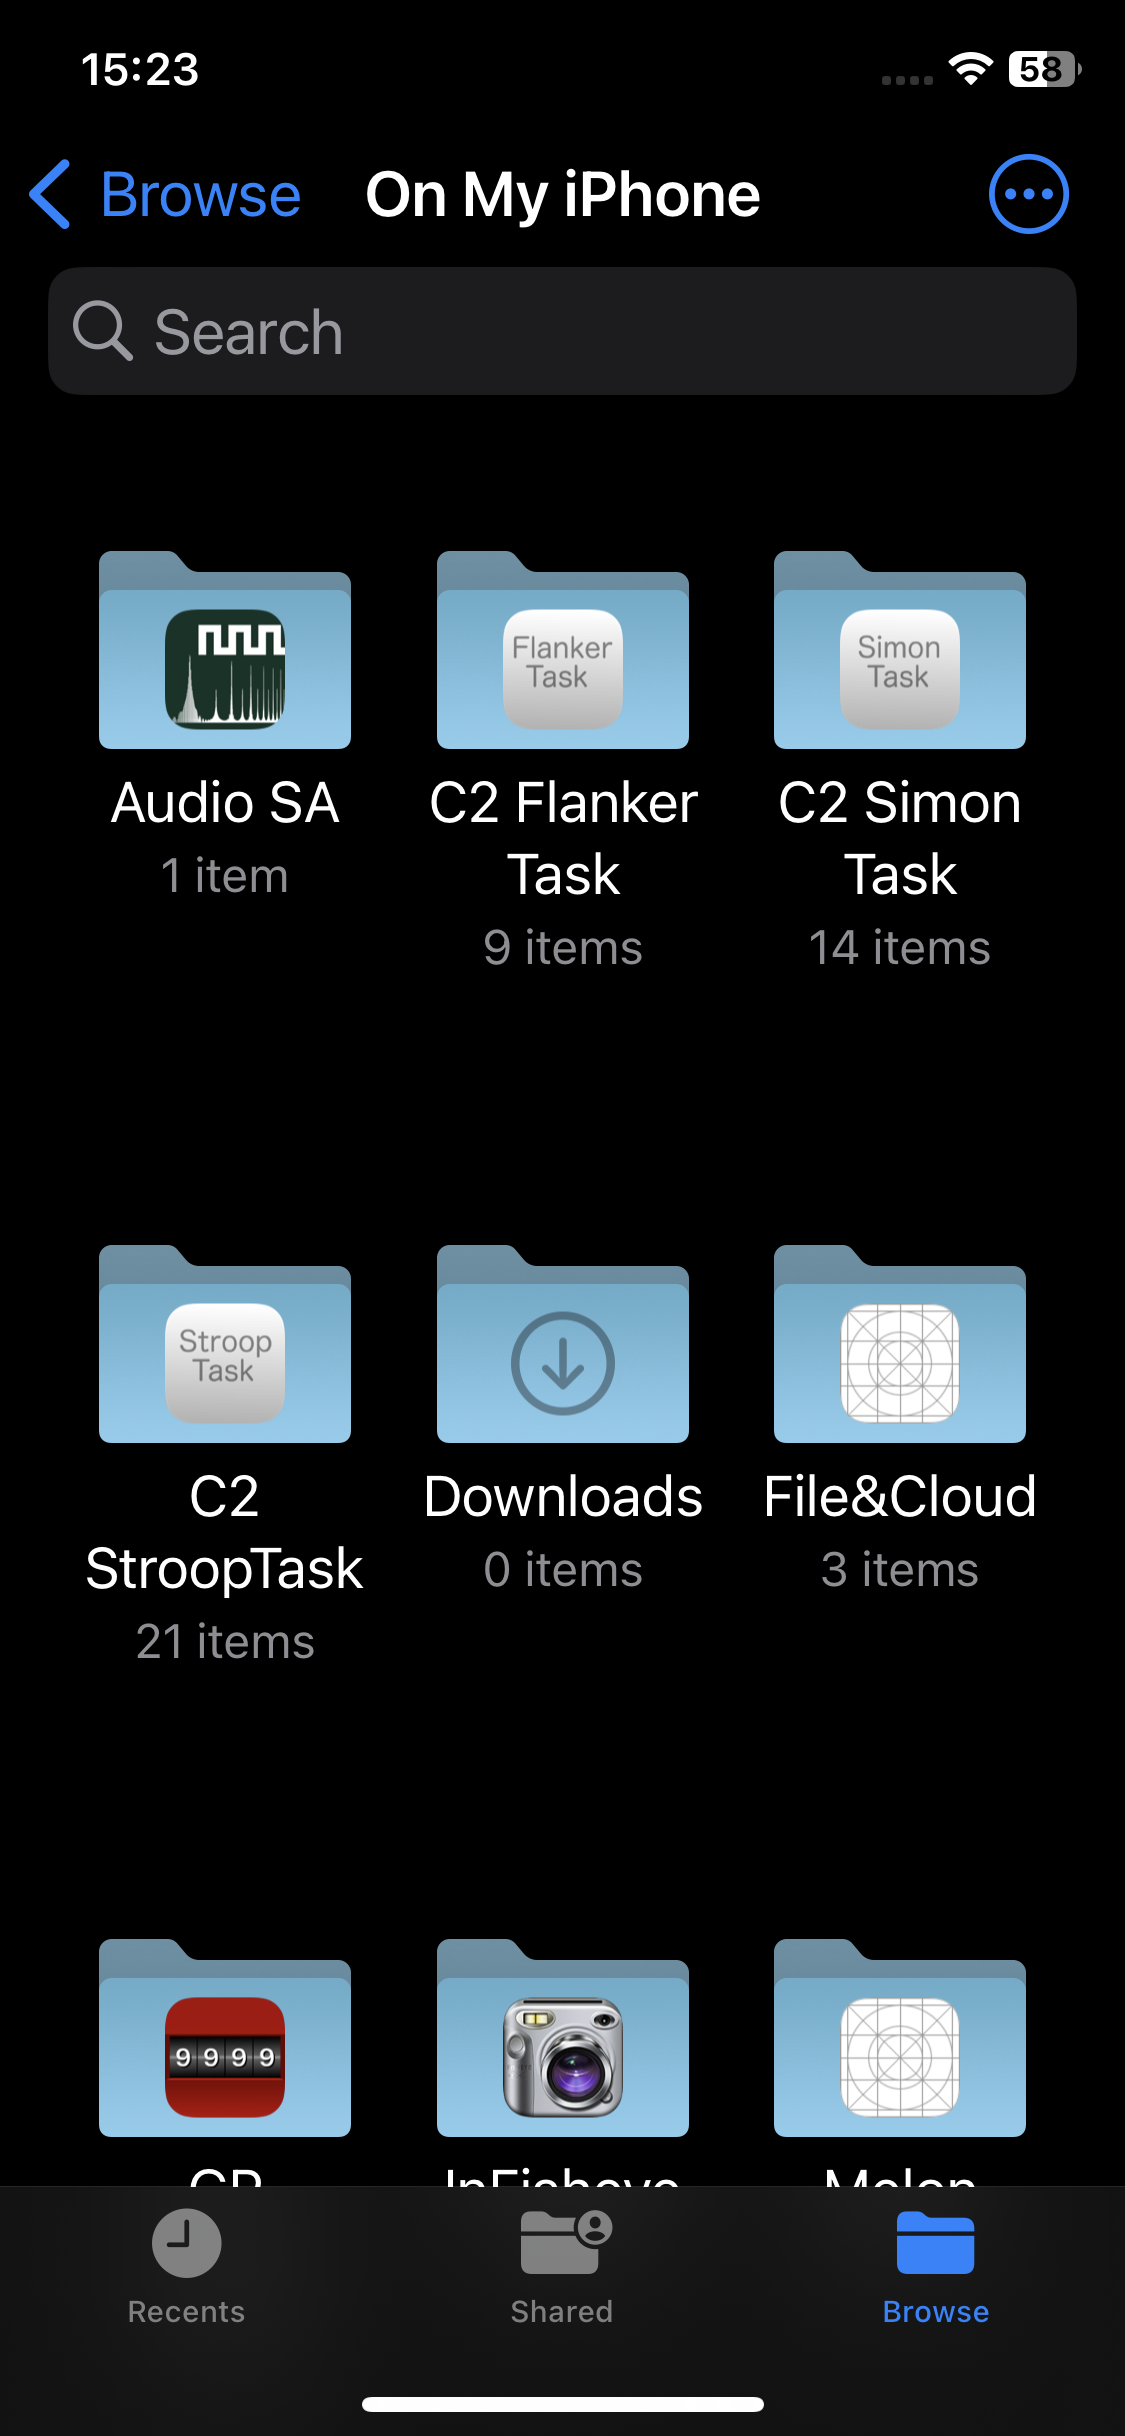
Open the “Audio SA” folder in “On My iPhone” in the “Files” app.
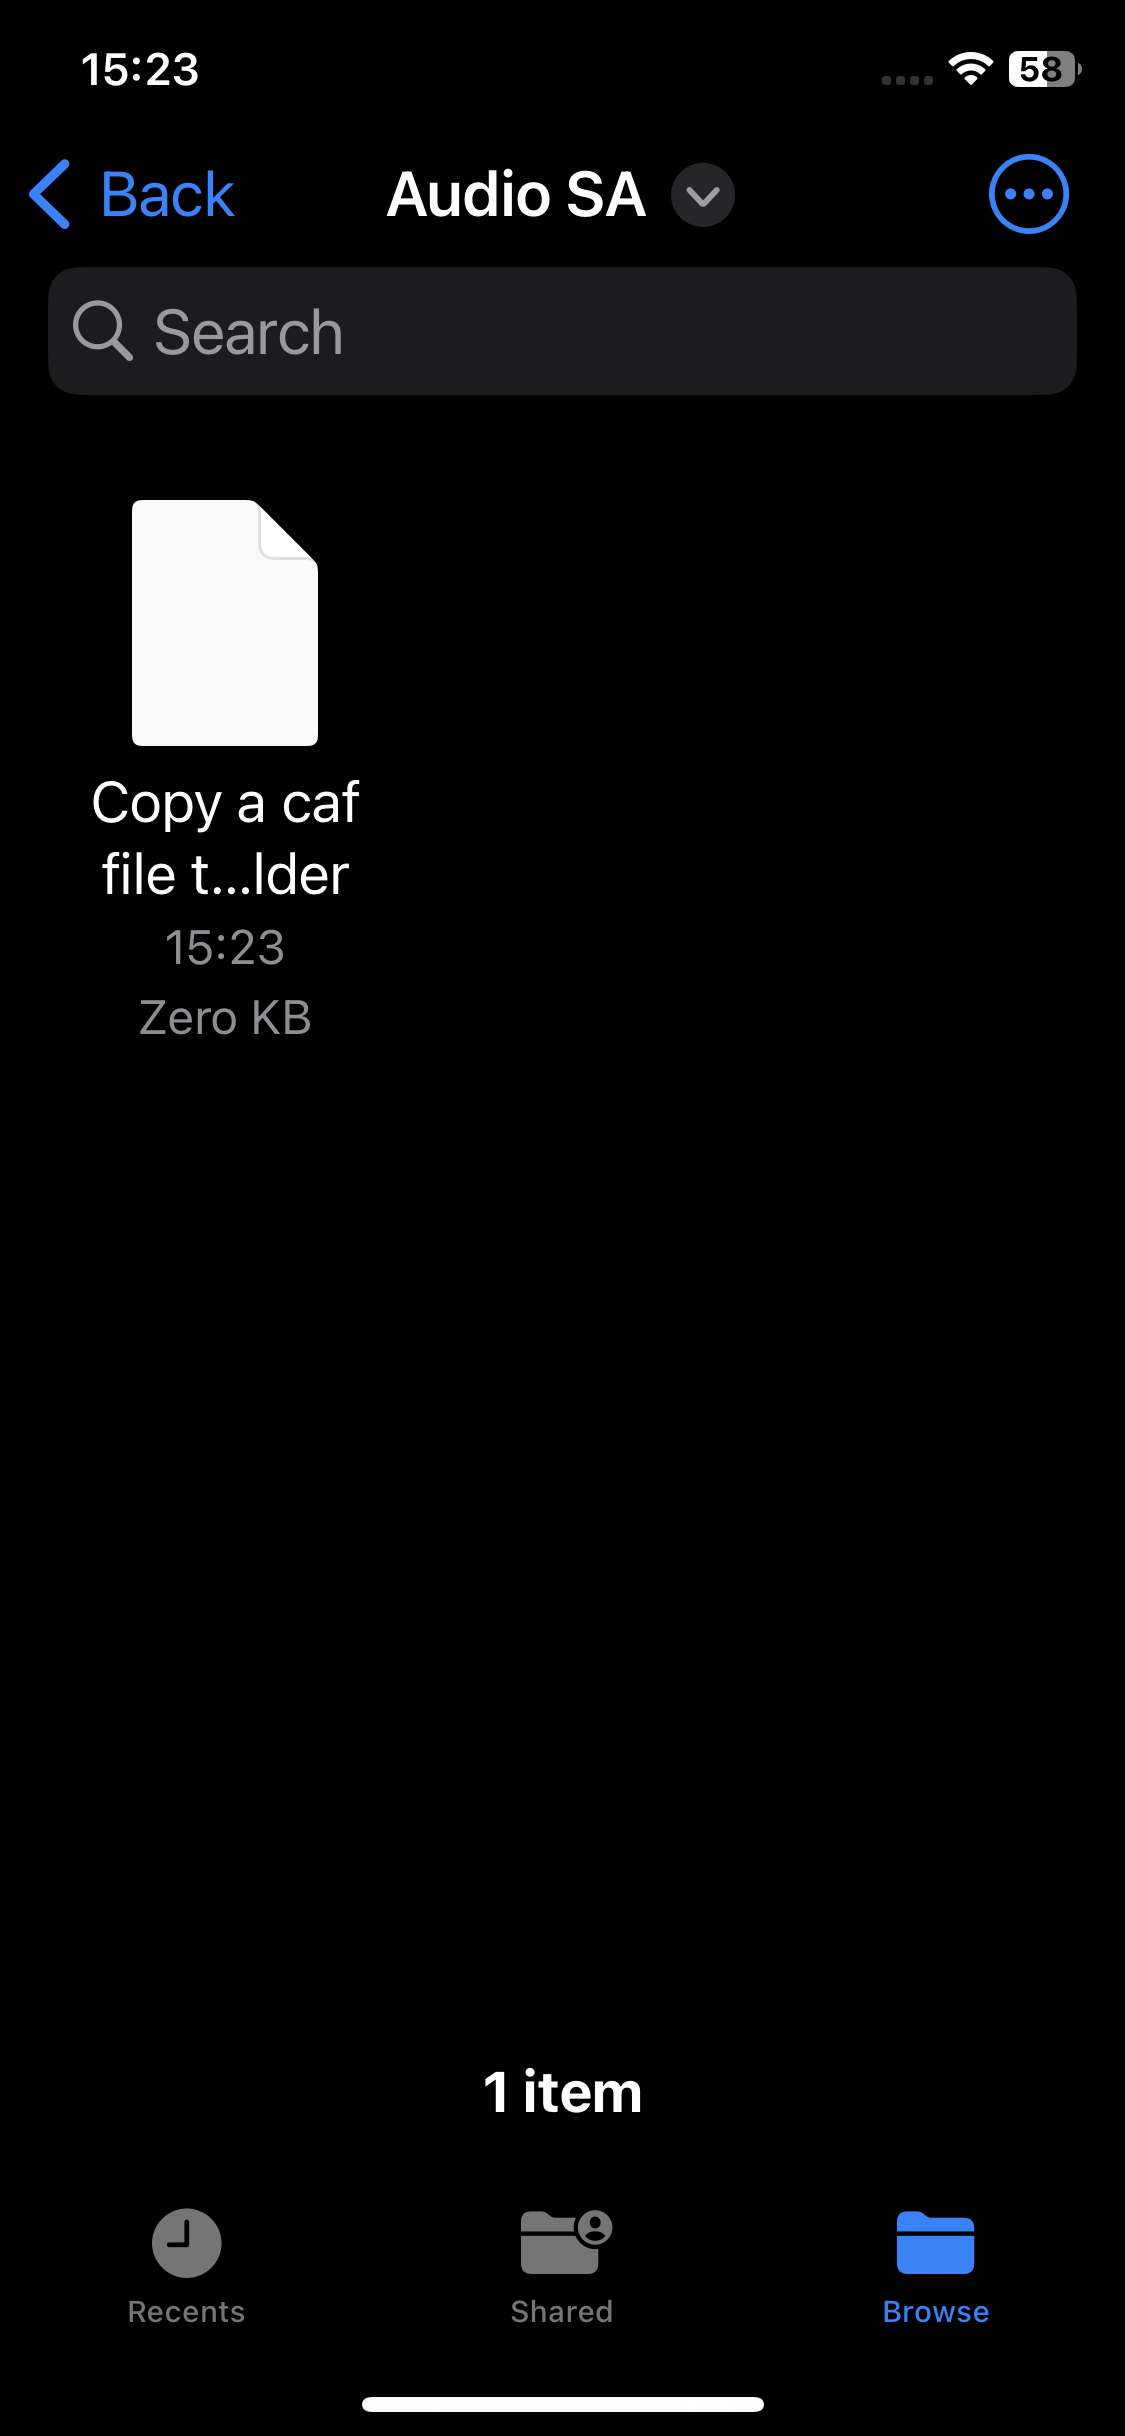
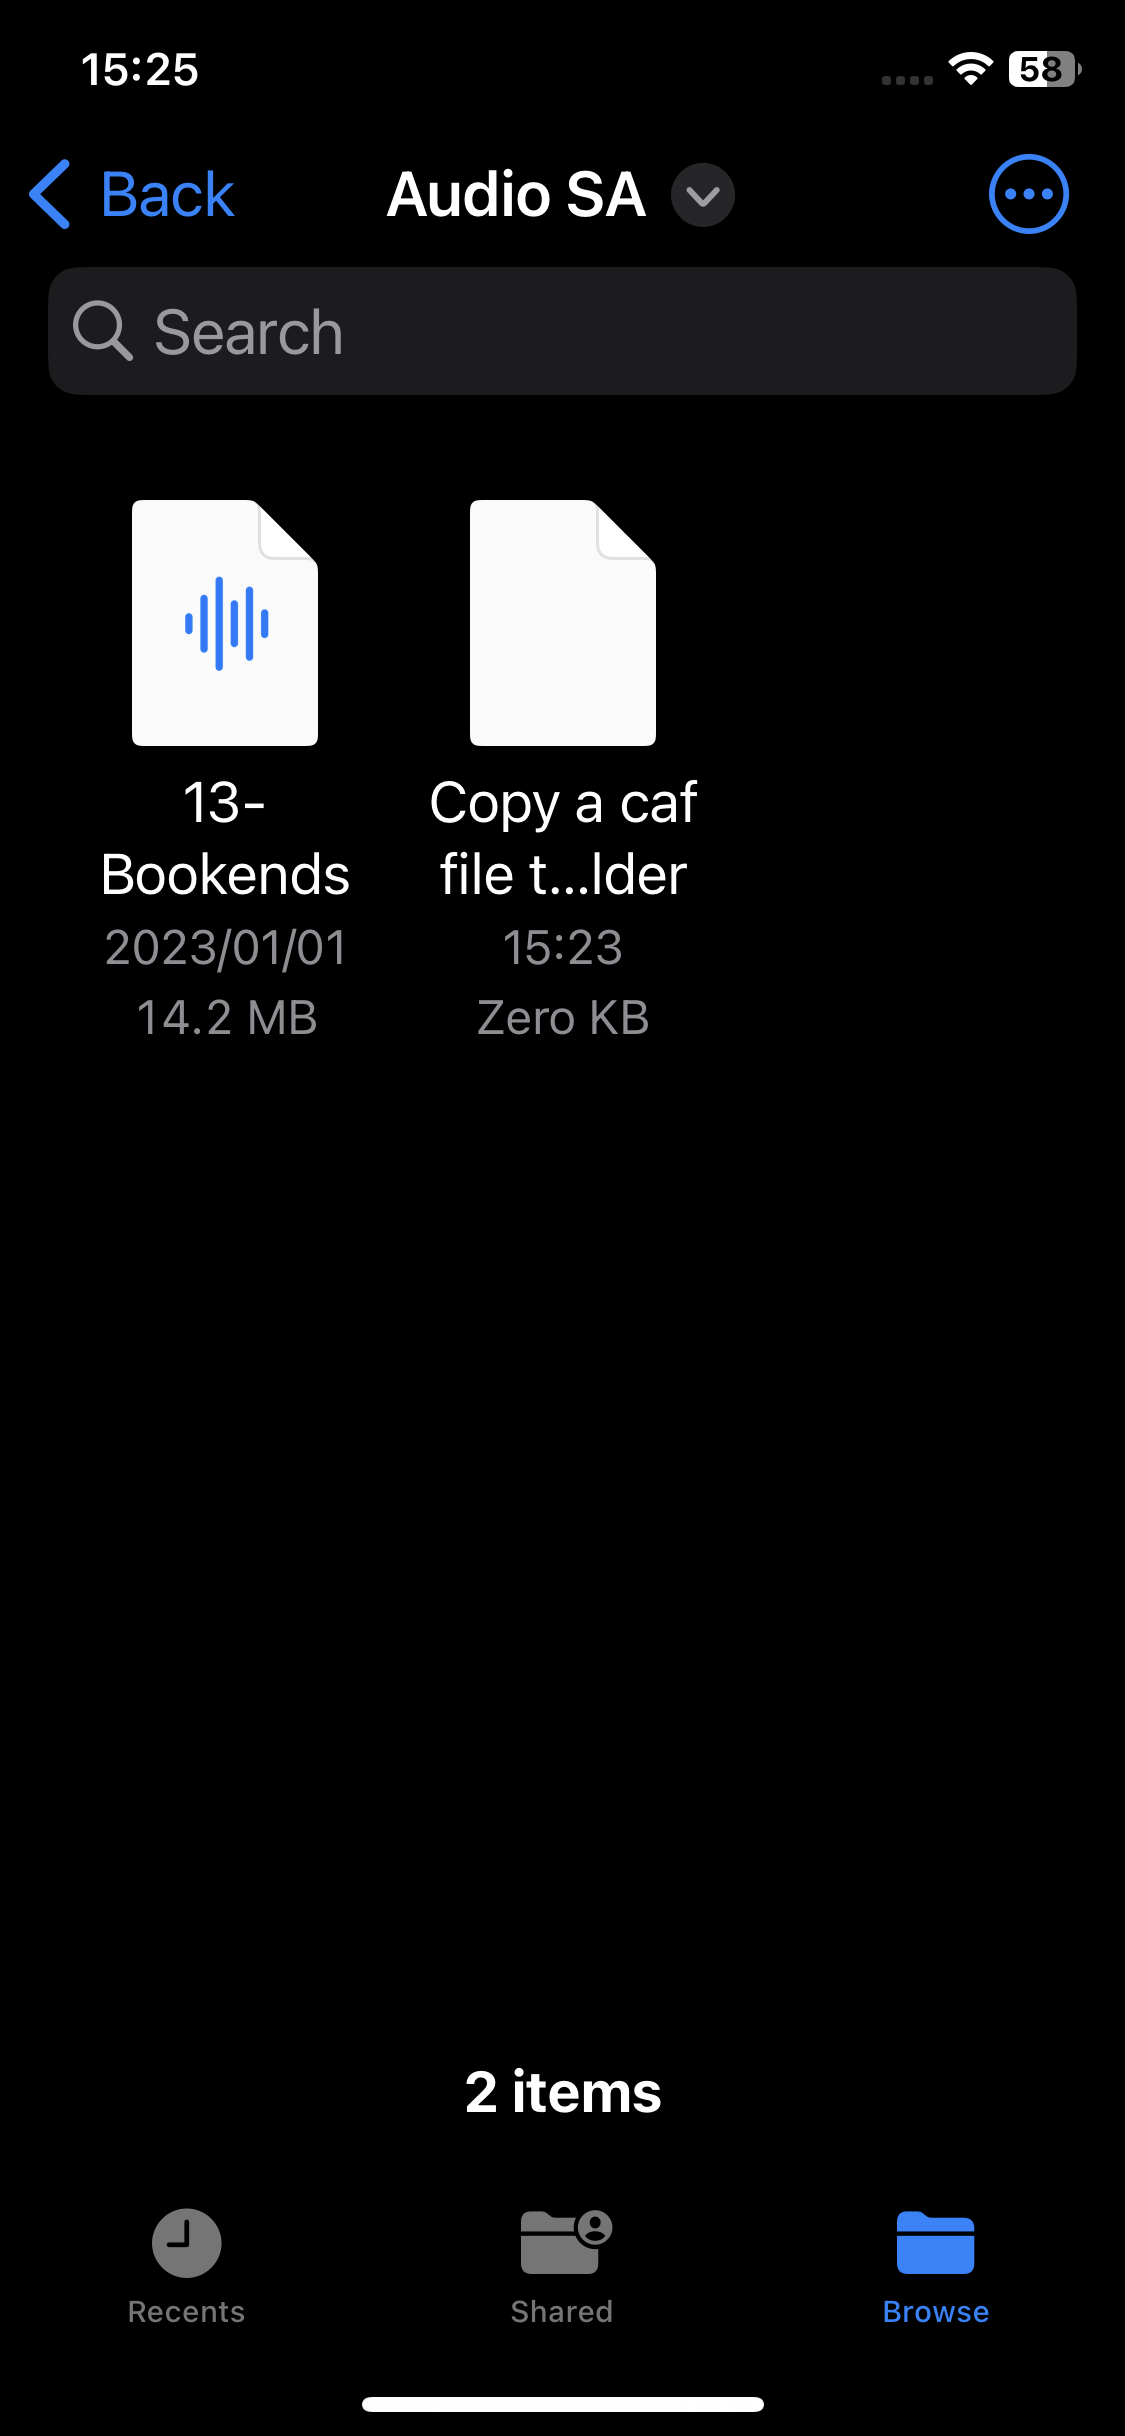
Save the CAF format audio file (.caf) in this folder where there is an empty file named “Copy a caf file to this folder”.
(It’s possible to save multiple caf files in this folder, but in that case you don’t know which caf file will be imported. To ensure that the target file is imported, do not save caf files other than the target caf file. )
After saving the caf file, close the “Files” app and open “Audio SA”.
Long press the record button to start the generator again.
Long press the “Generate” button again to close the generator screen and return to the dataset list screen.

You can confirm that the caf file has been imported by reopening the target dataset on the dataset list screen. (If multiple caf files are saved, one of them will be imported. There is no function to specify the file to be imported.)
Download “Audio SA”
Other apps
N’Back 10
n-back app up to 10’back
N’Back 10 Dual
Dual task version of “N’Back 10”
GP Counter
A general purpose counter that records the timestamp of the count
2 Digit Multiplication
Learning 2-digit x 2-digit multiplication method that can be used for mental arithmetic
Fractal Catalog
A collection of images with fractal properties
Jigsaw Puzzle Maker 2, Jigsaw Puzzle Maker for iPad
Create a jigsaw puzzle from your favorite photos