iPhone app that handles location info separately from photos
CameraGPS Chunk & CameraGPS3 Chunk is currently unavailable.
※ CameraGPS Chunk is only available in Thailand.
The iPhone app “Camera GPS Chunk” deletes the location information of the photo when it was taken. (The photo does not have a geotag)
“Camera GPS Chunk” saves location information, text memos, voice memos, and addresses in the app by associating them with photos.
/*************************************
※ What to do if you fail to connect to Dropbox (For example, when “Searching for Backup Files” is displayed for a long time)
===>> Close the screen with the “Unlink & Done” button instead of the “Done” button.
**************************************/
- 1 How to use “Camera GPS Chunk”
- 2 “CameraGPS Chunk” Free and Paid versions
How to use “Camera GPS Chunk”

The information linked to the photo is managed by dividing it into “All(Overview)”, “Photo”, “Map”, “Address” and “Memo”.
Take a photo
To take a photo, tap the camera button at the bottom center of the main screen (startup screen).
When you take a photo, the location information and address are acquired and reflected in the “Address” and “Map”.
If you cancel a photo shoot, location information and address will be retrieved without a photo. In this case, the “Load from the Photo Albums” button will appear where the photo should appear. You can import photo from iPhone’s photo album by tapping the “Load from the Photo Albums” button.
Text memo
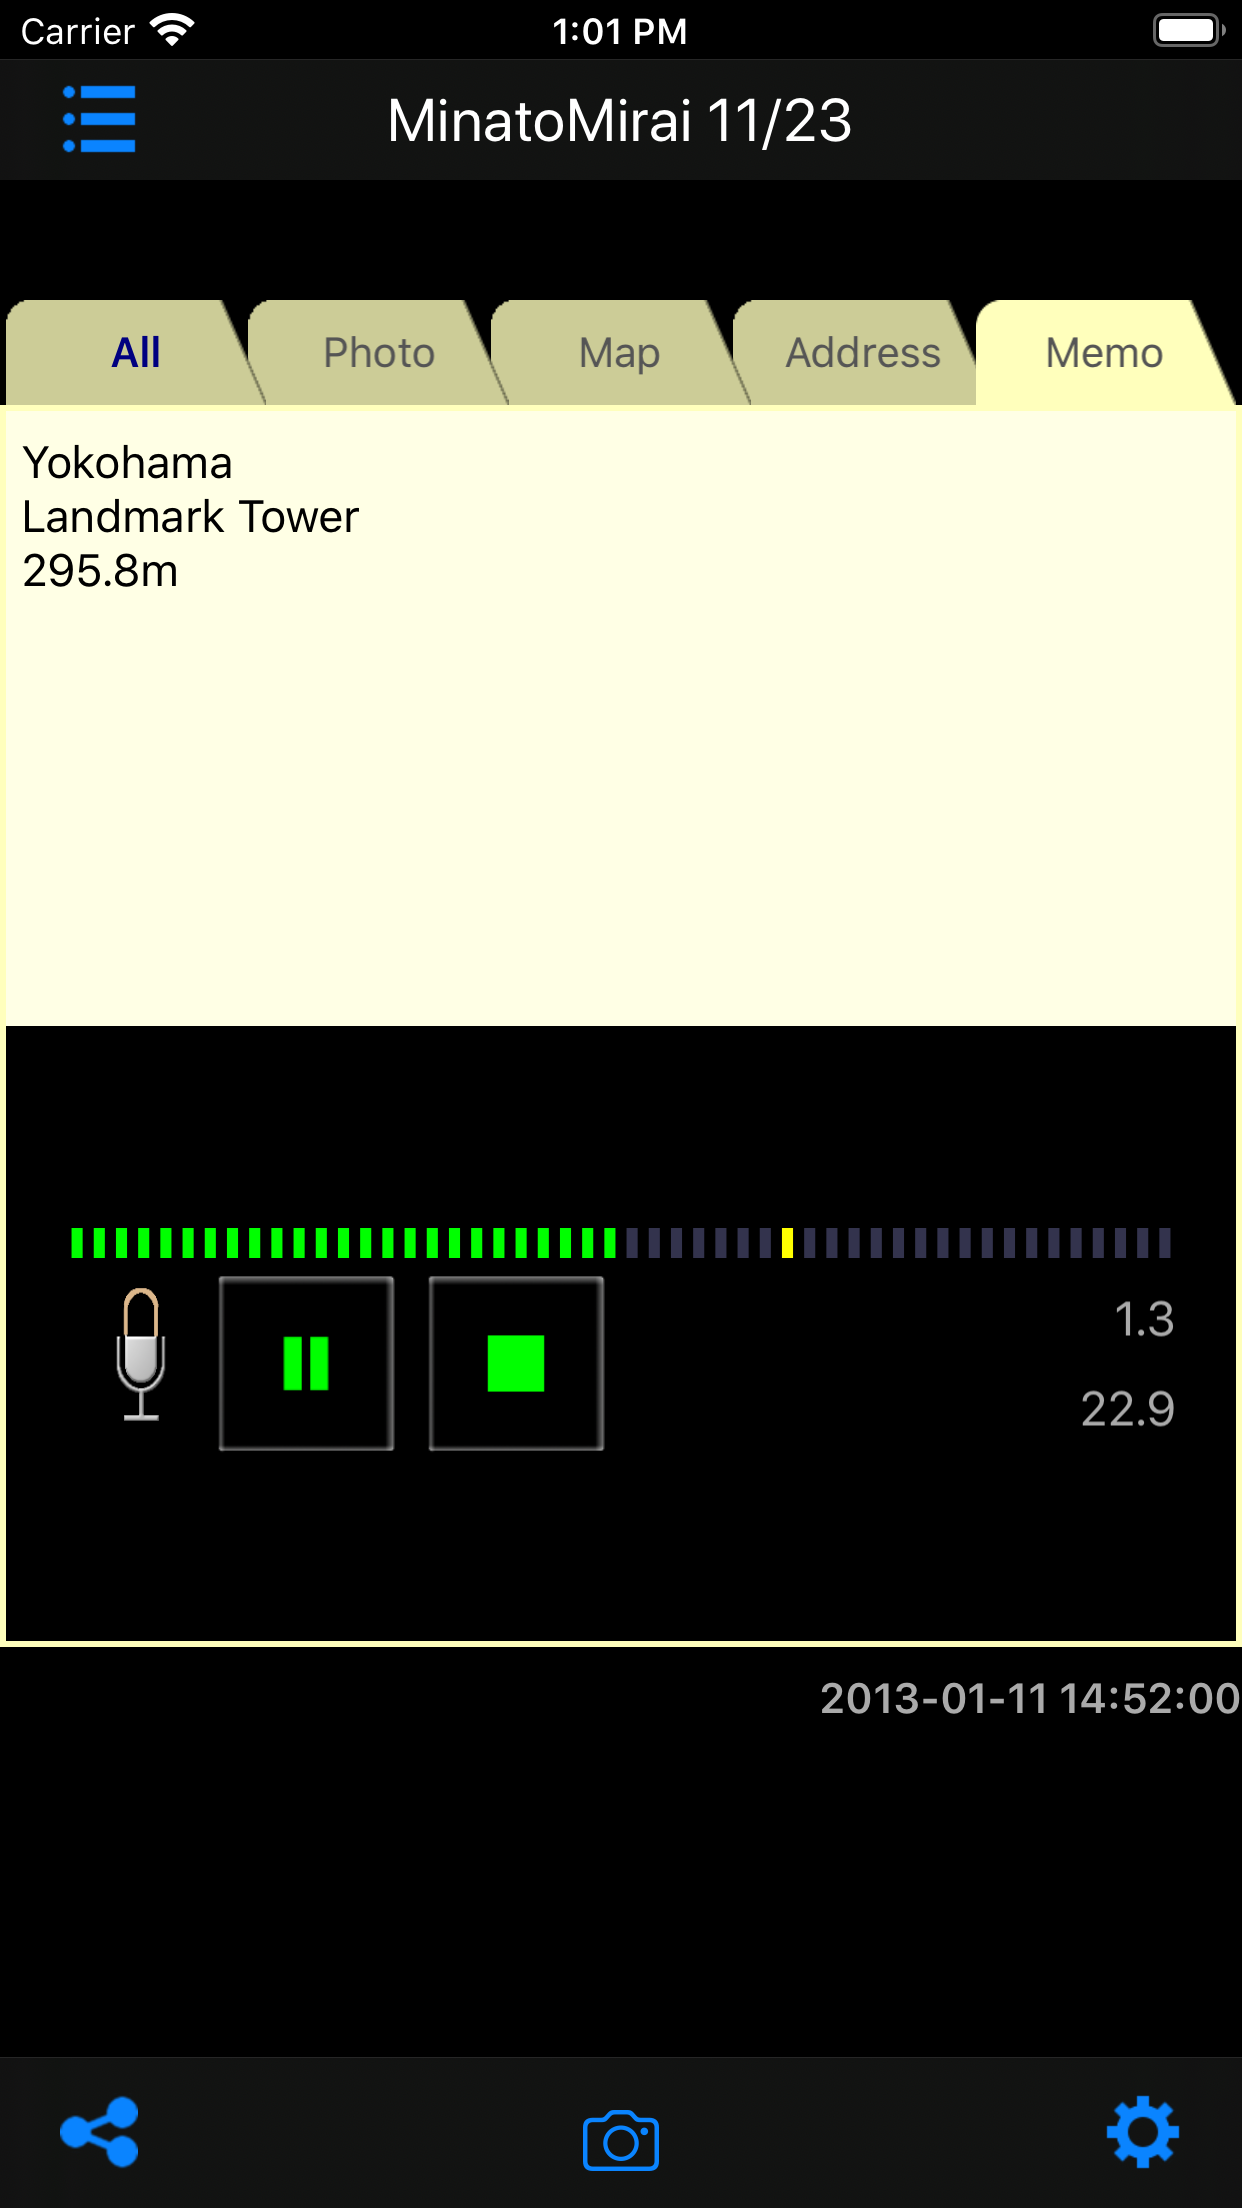
On the main screen, tap the “Memo” tab to switch to the “Memo” view (text memo and voice memo edit view). When you tap the text display area, the keyboard and “Done” button are displayed.
You can also edit text memos in the “All” view.
Voice memo
On the main screen, tap the “Memo” tab to switch to the “Memo” view (text memo and voice memo edit view).
Tap the red circle button to start recording.
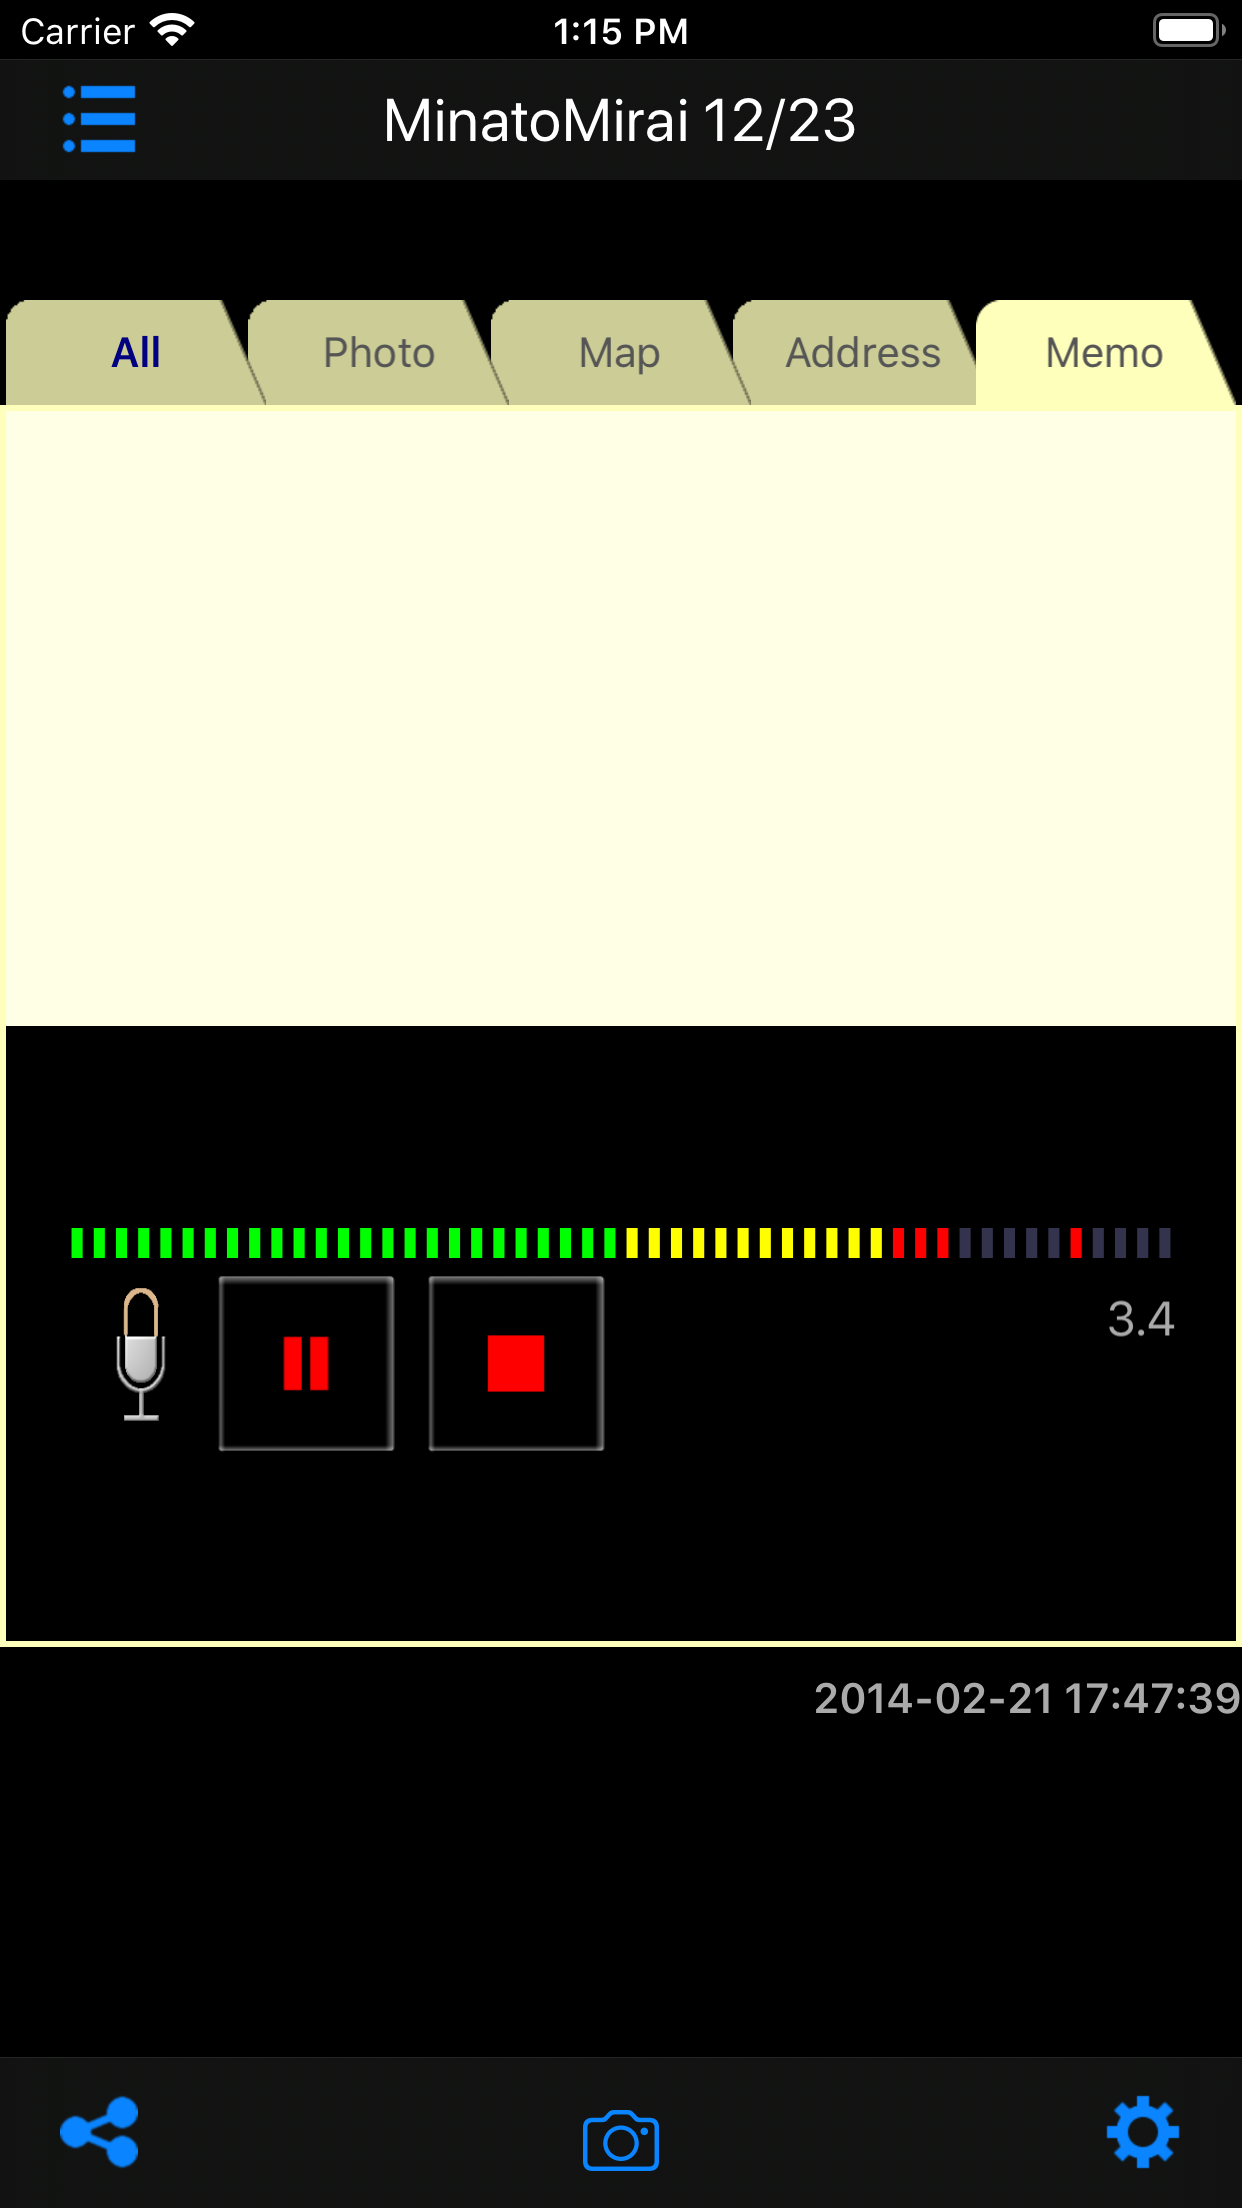
Tap the red square button to end recording.
When you tap the red pause button, the recording will stop, and the red circle button and the red square button will be displayed. In this case, the red circle button will restart the recording, and the red square button will end it.
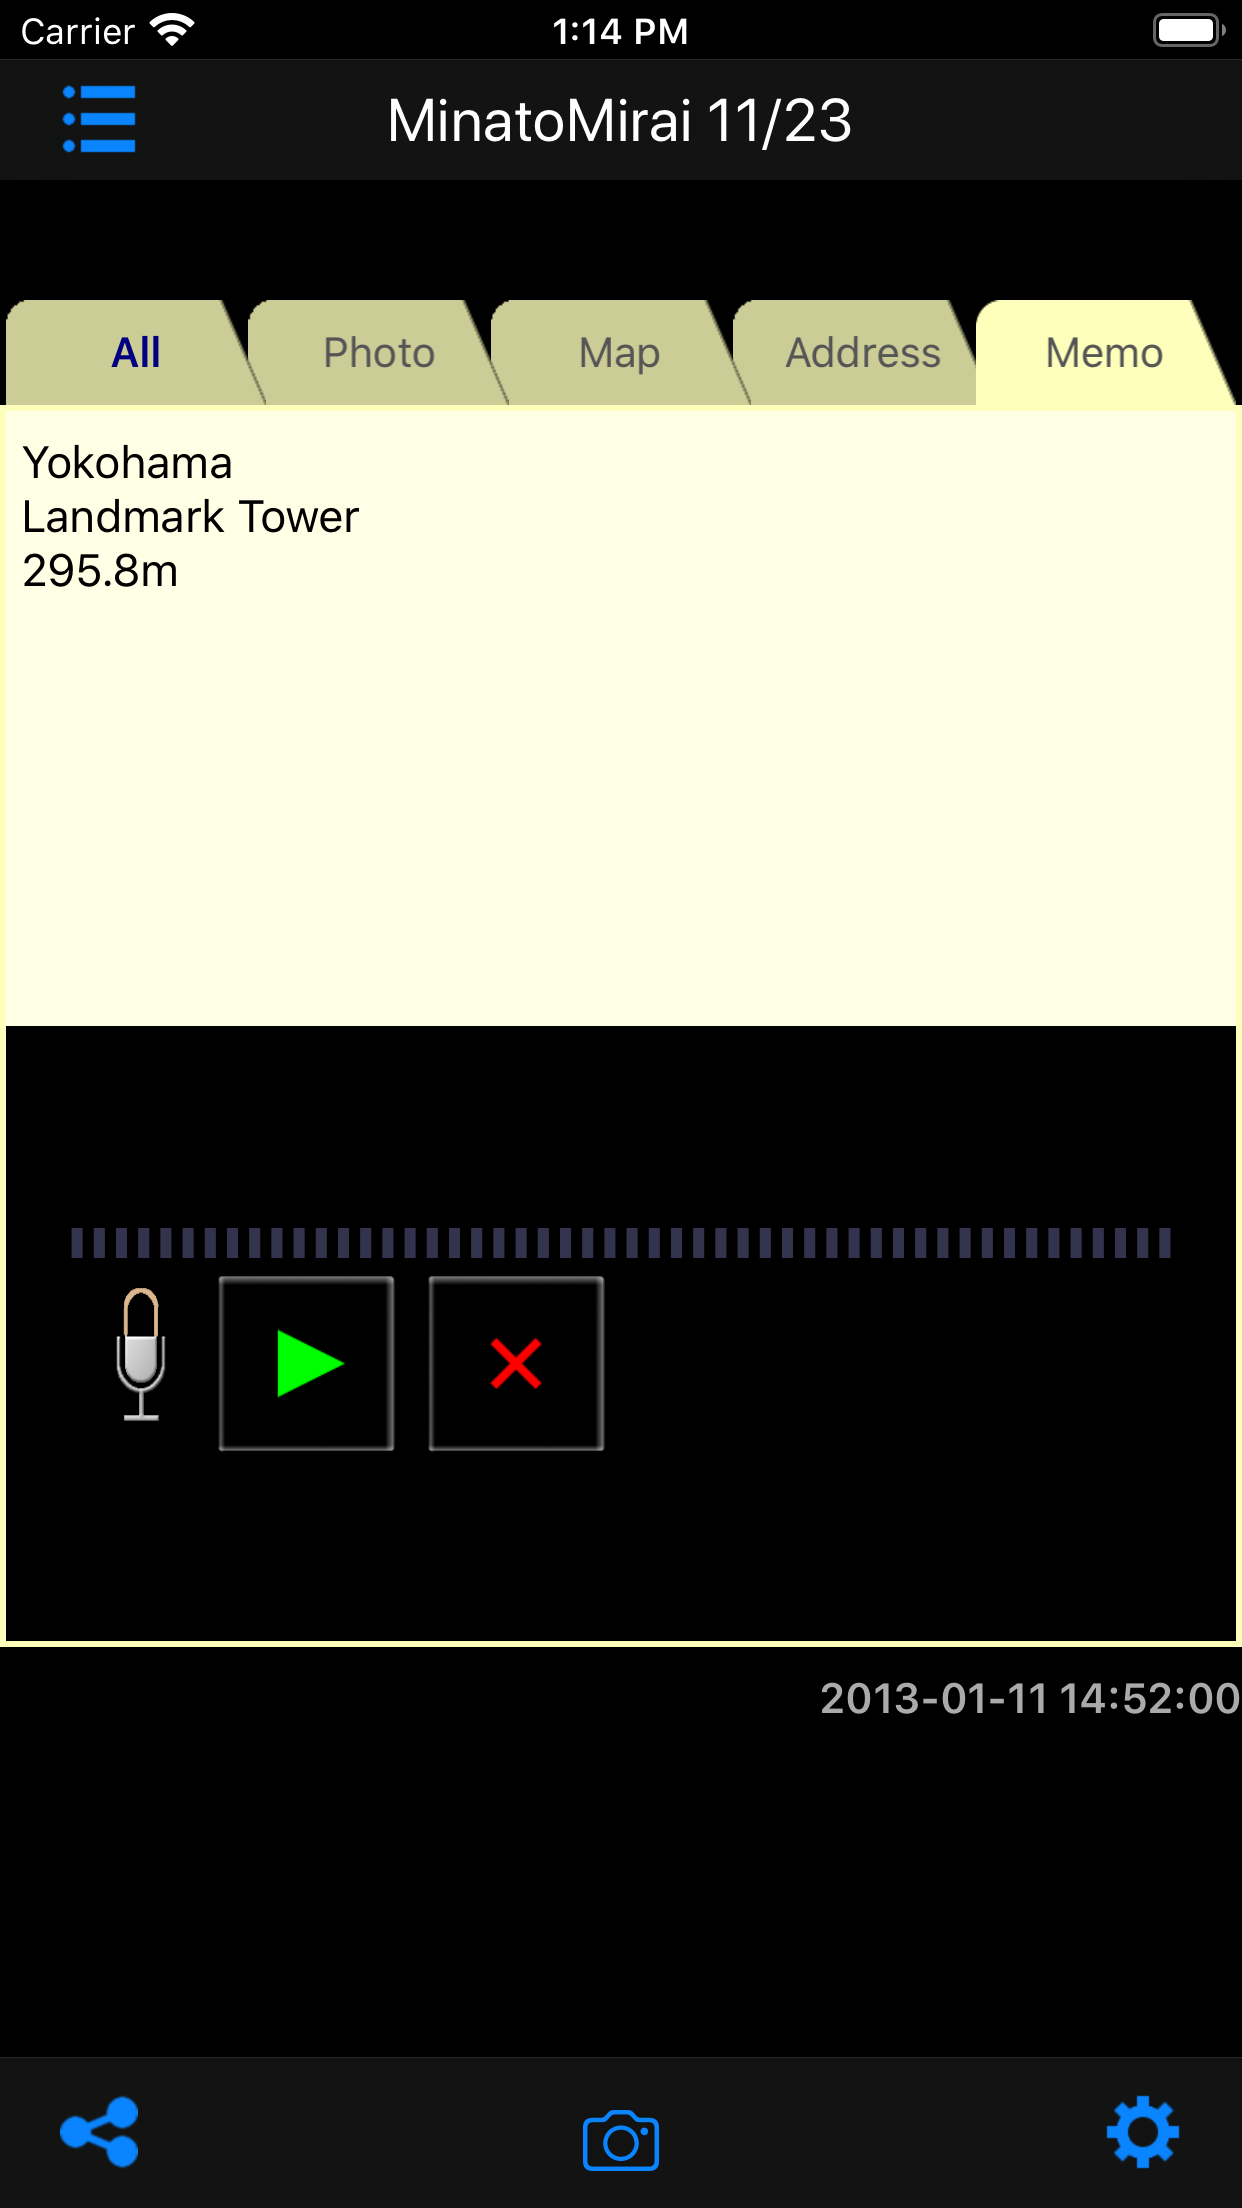
To play the voice memo, tap the green play button.
To delete the voice memo, tap the red X button.
You can also edit a voice memo in the “All” view.
Correction of location information
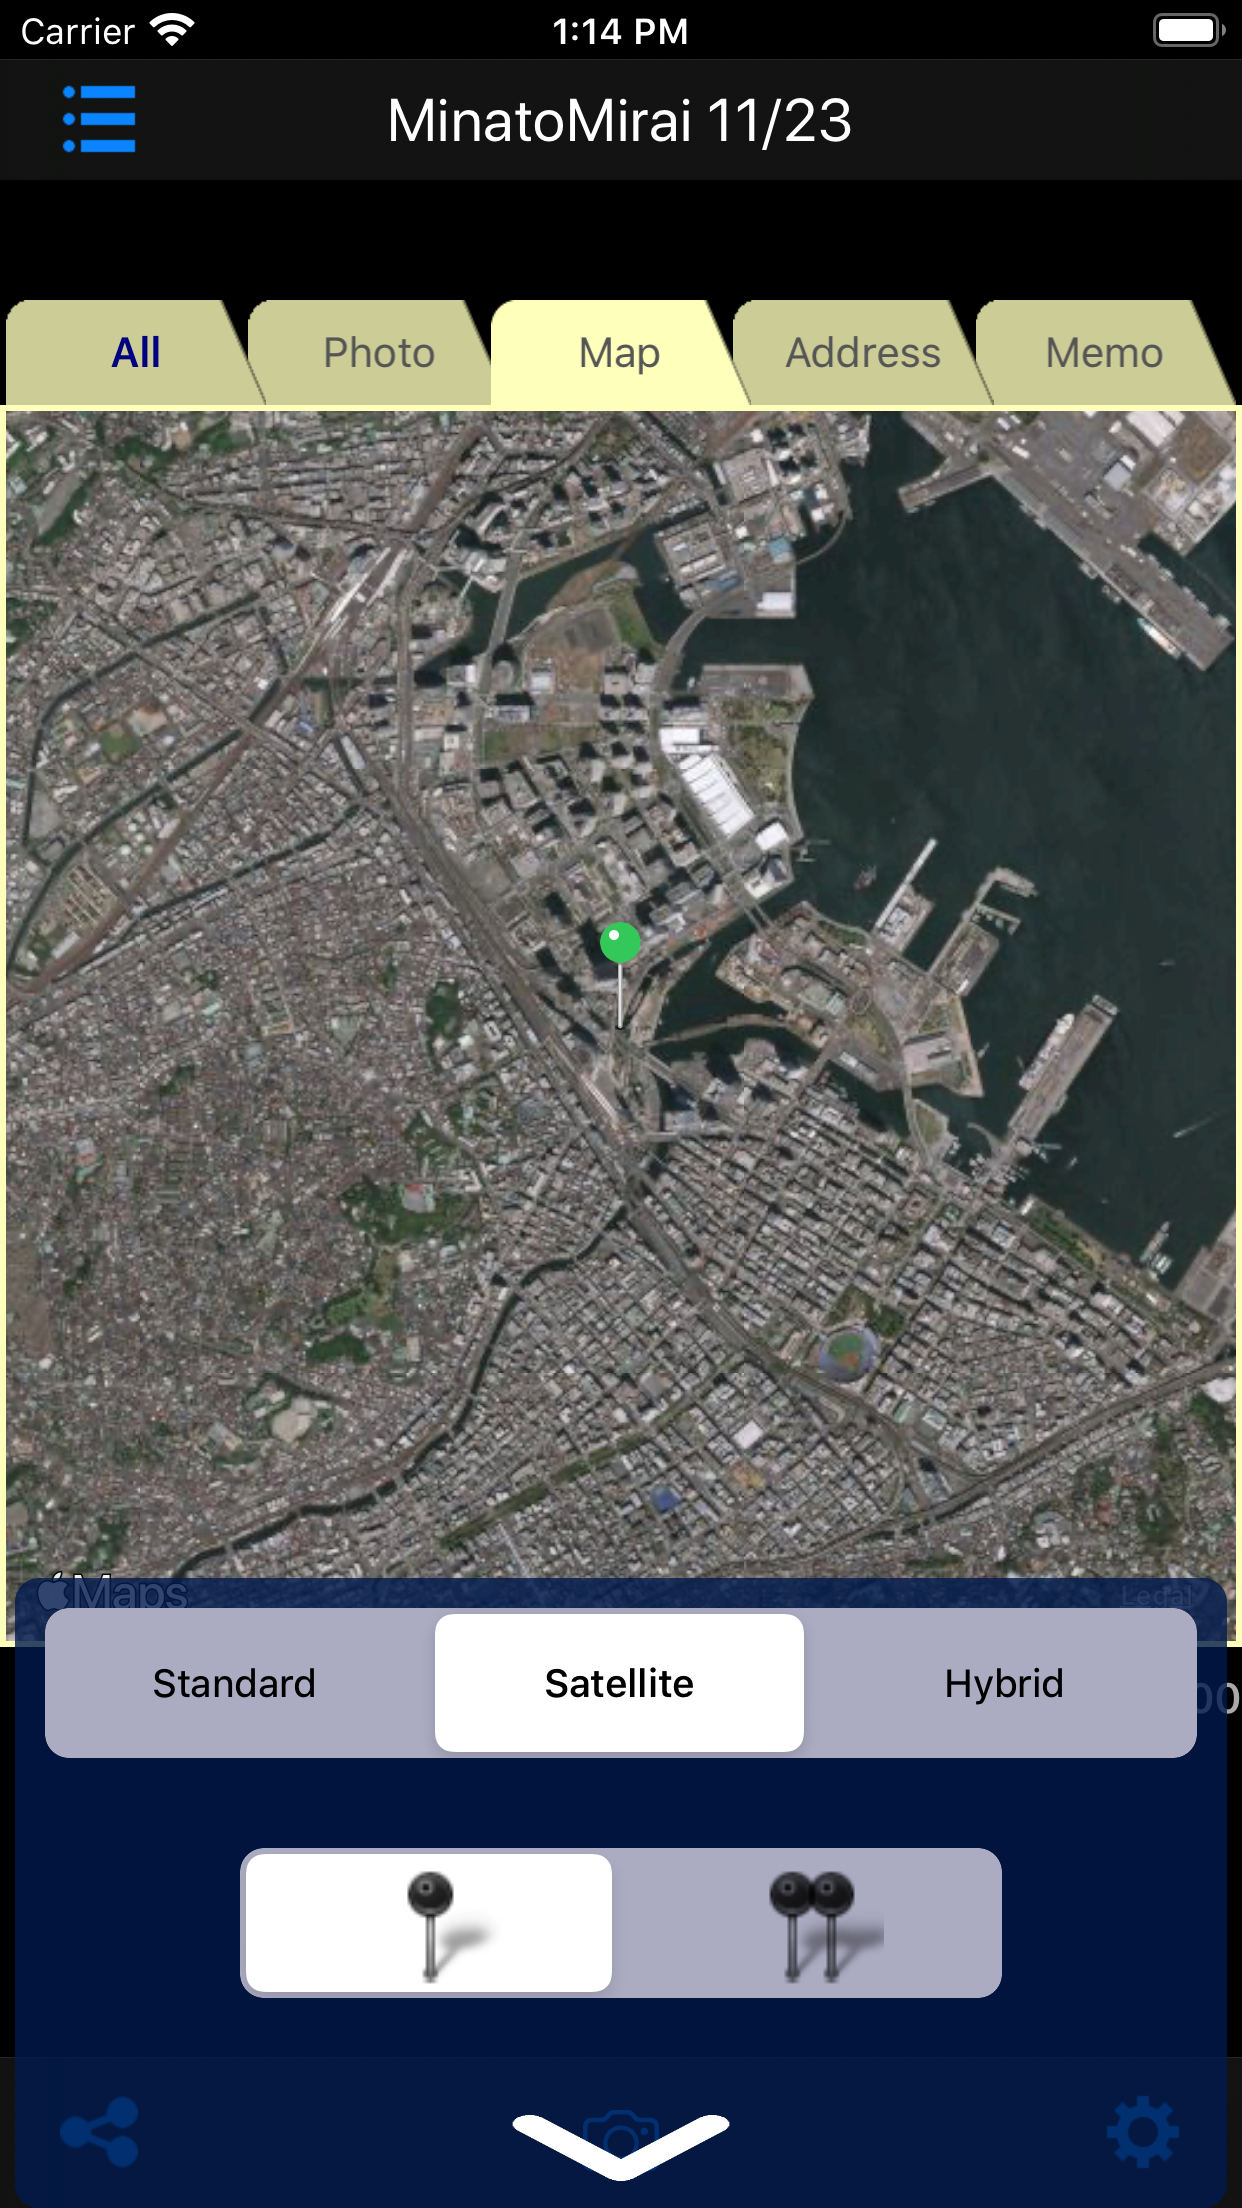
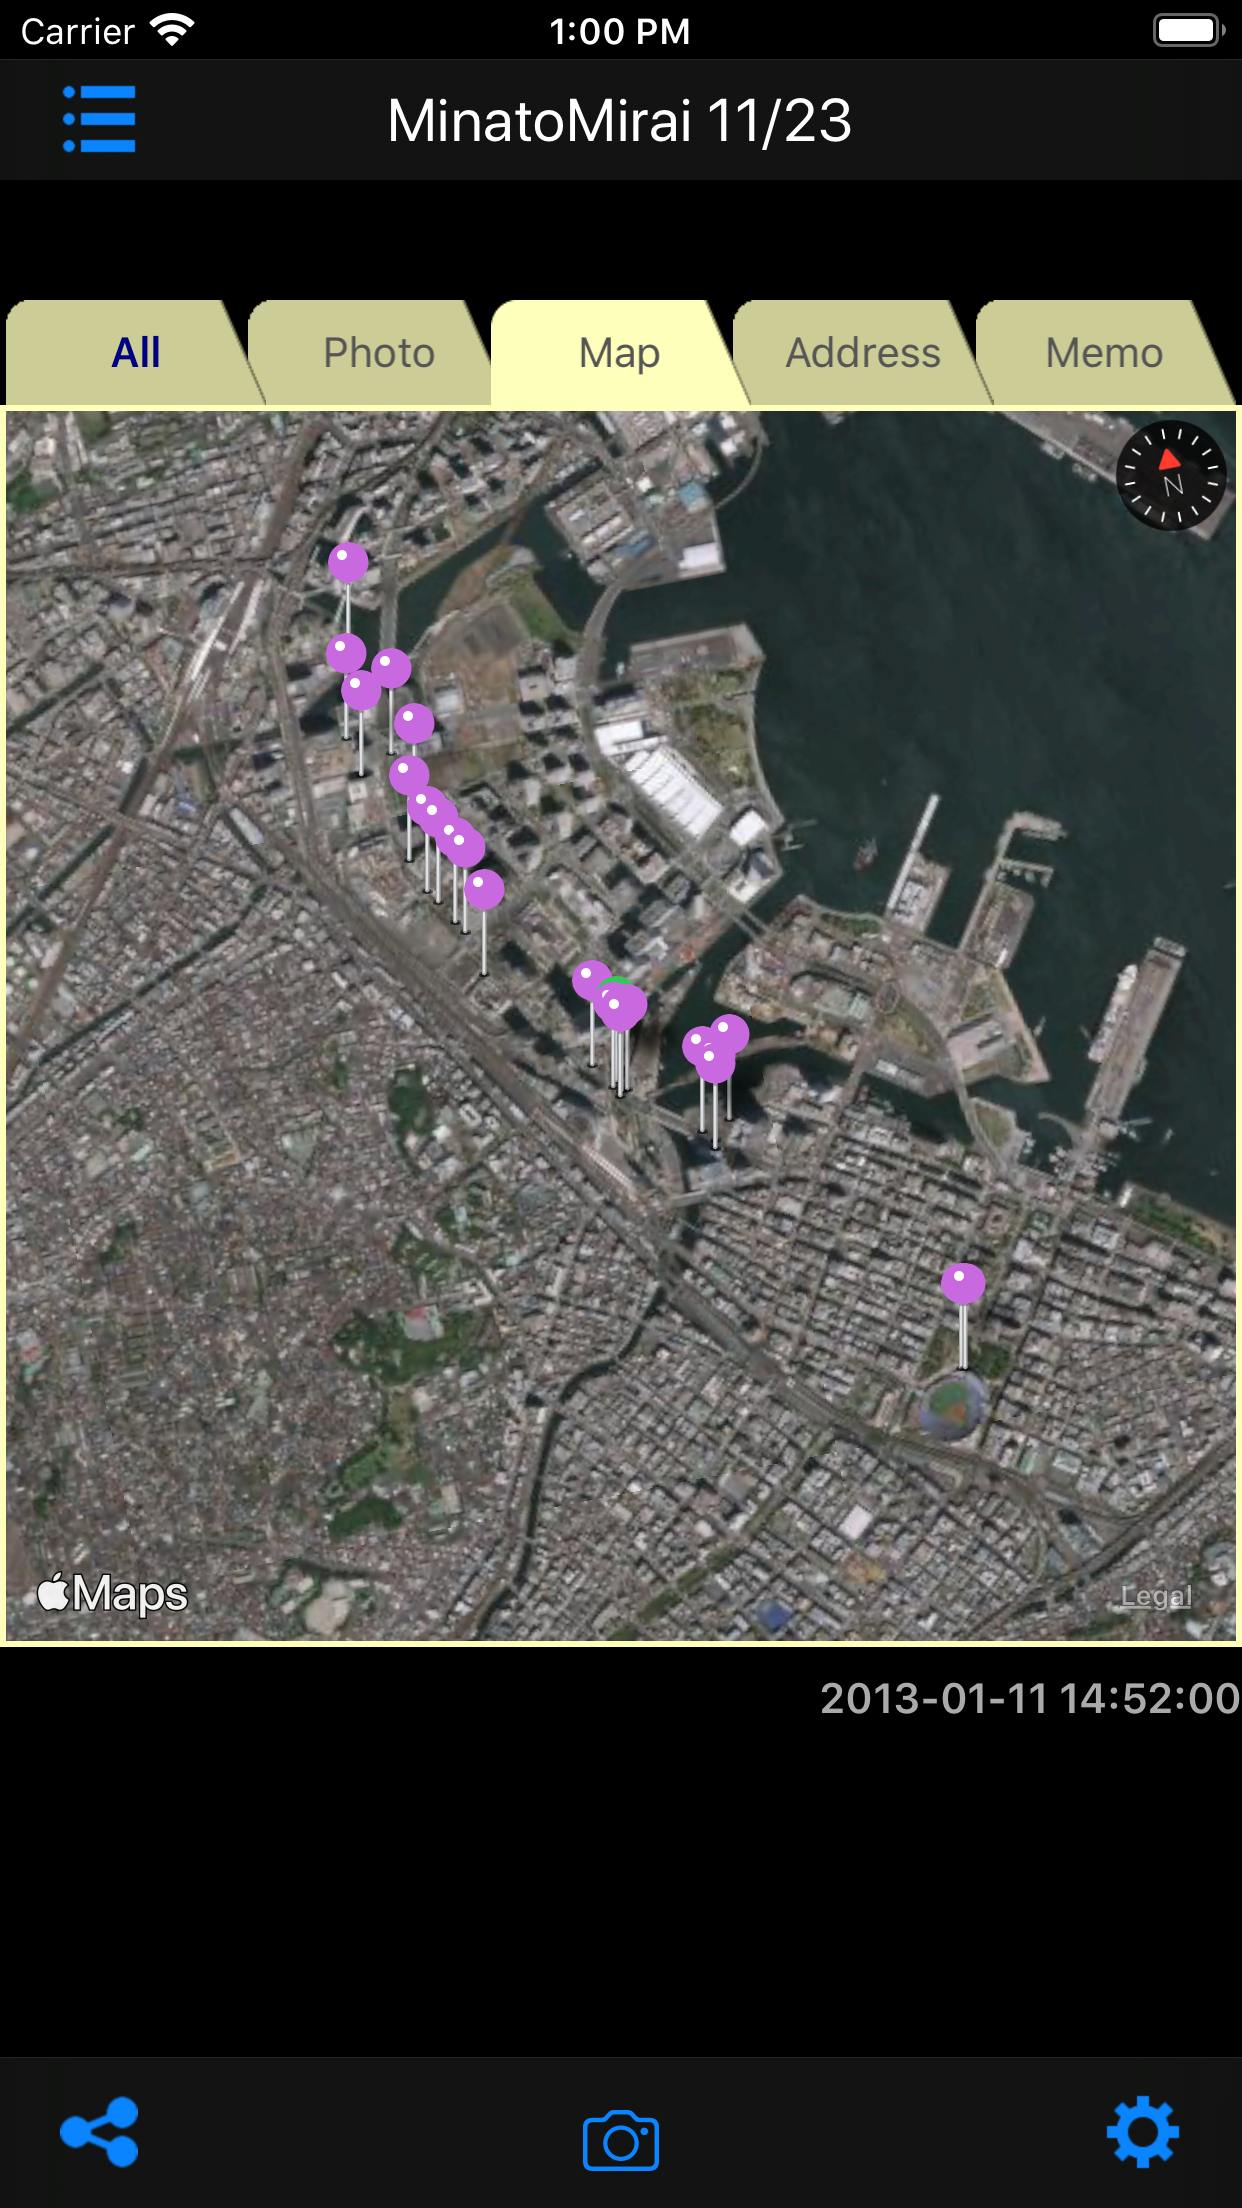
On the main screen, tap the “Map” tab to switch to the “Map” view.
You can correct the location information by dragging the green pin.
You can also correct location information in the “All” view.
Correction of Address
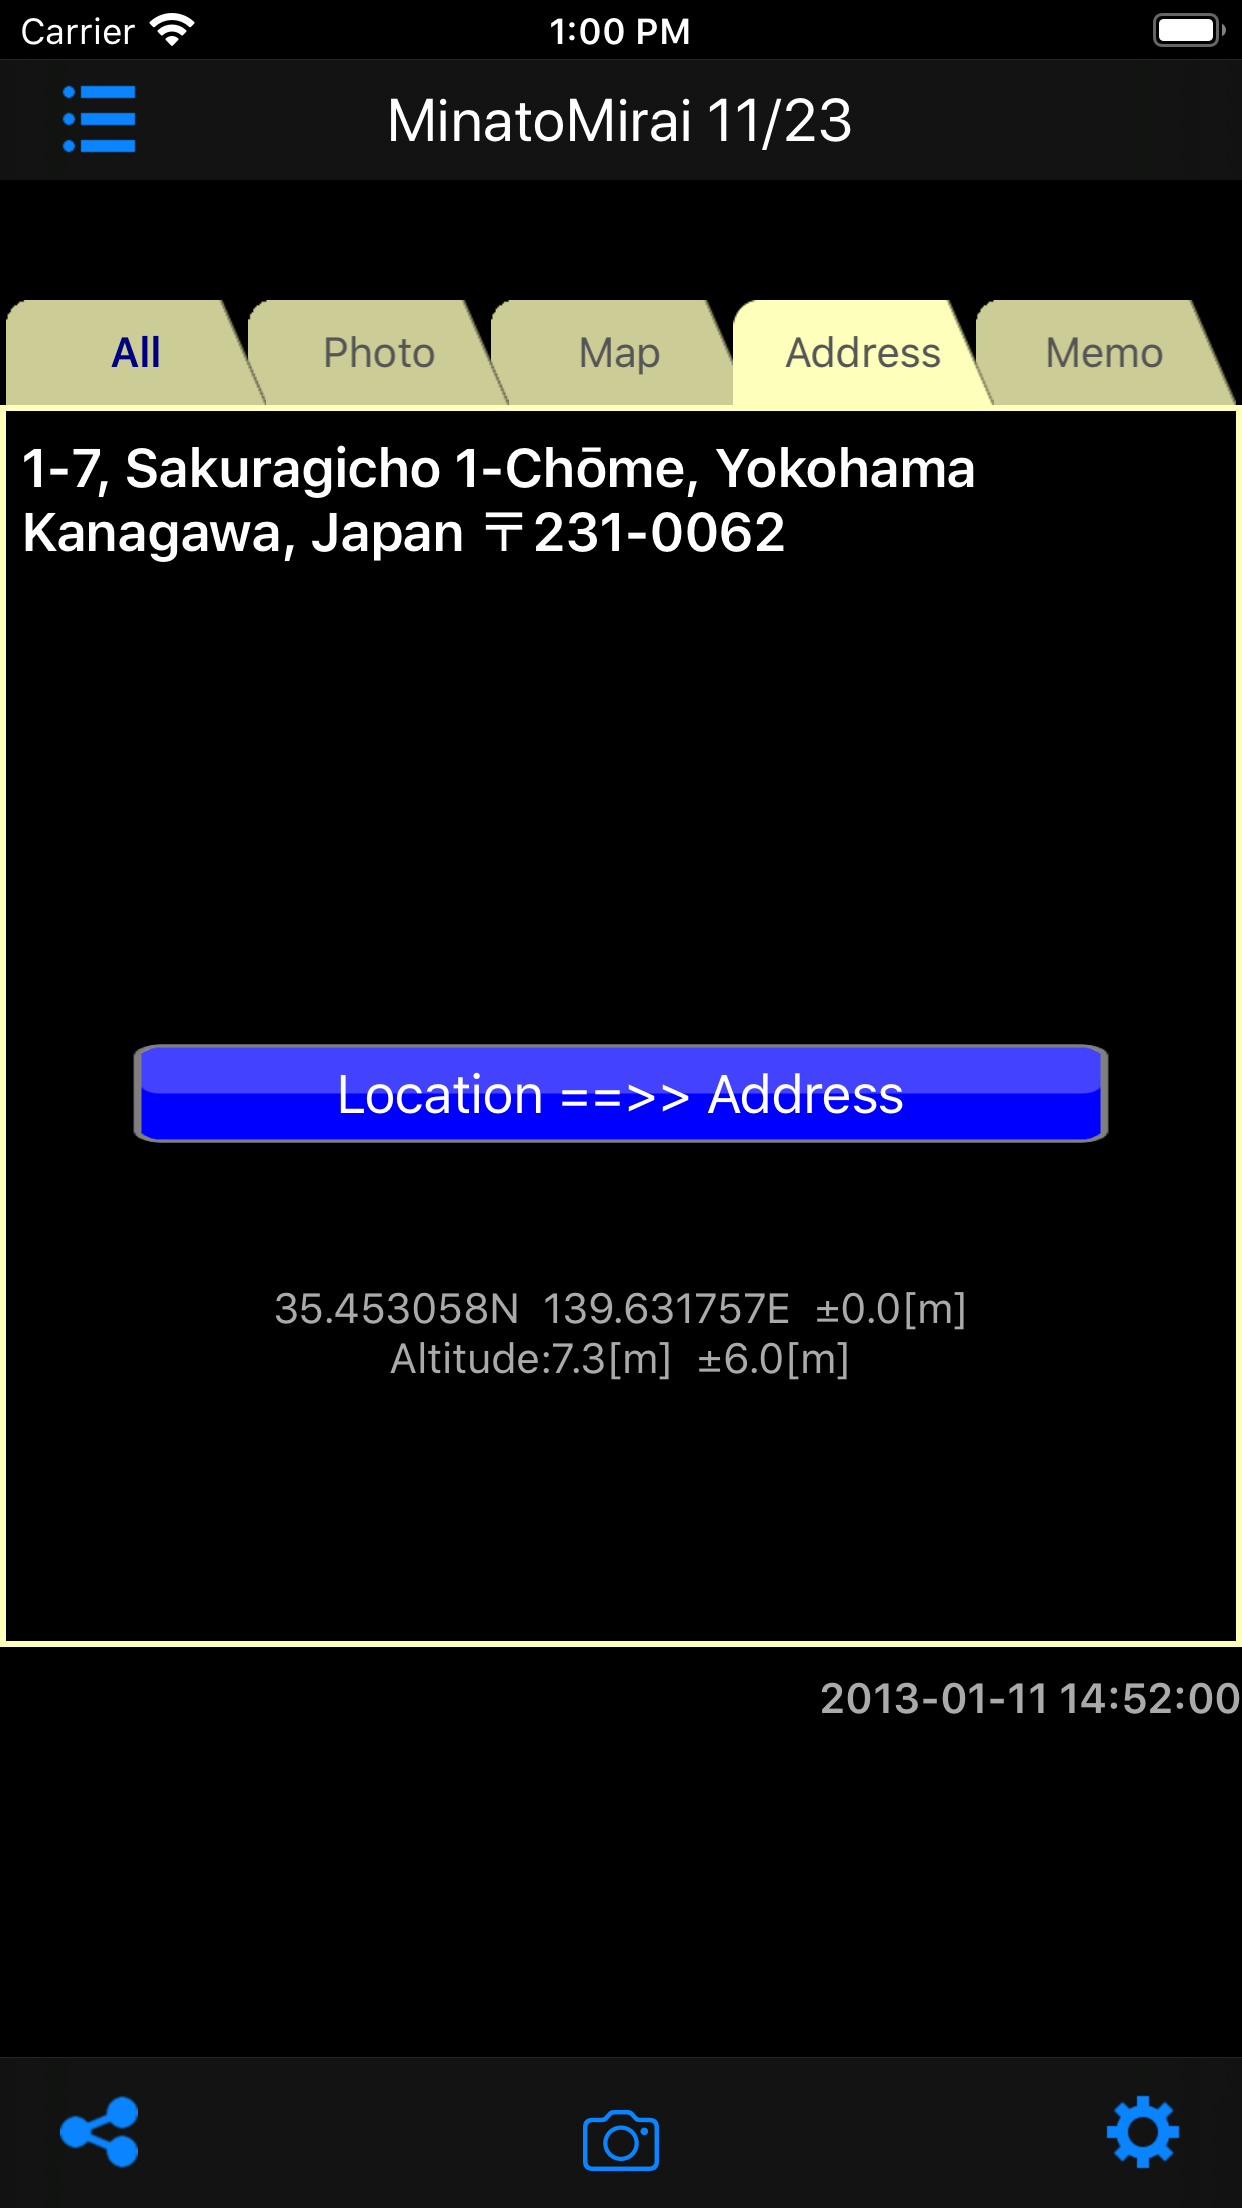
On the main screen, tap the “Address” tab to switch to the “Address” view.
When you tap the address display area, the keyboard and “Done” button are displayed.
After correcting the location information, you can search the address from the new location information. To search for an address, tap the “Location == >> Address” button.
Photo scaling
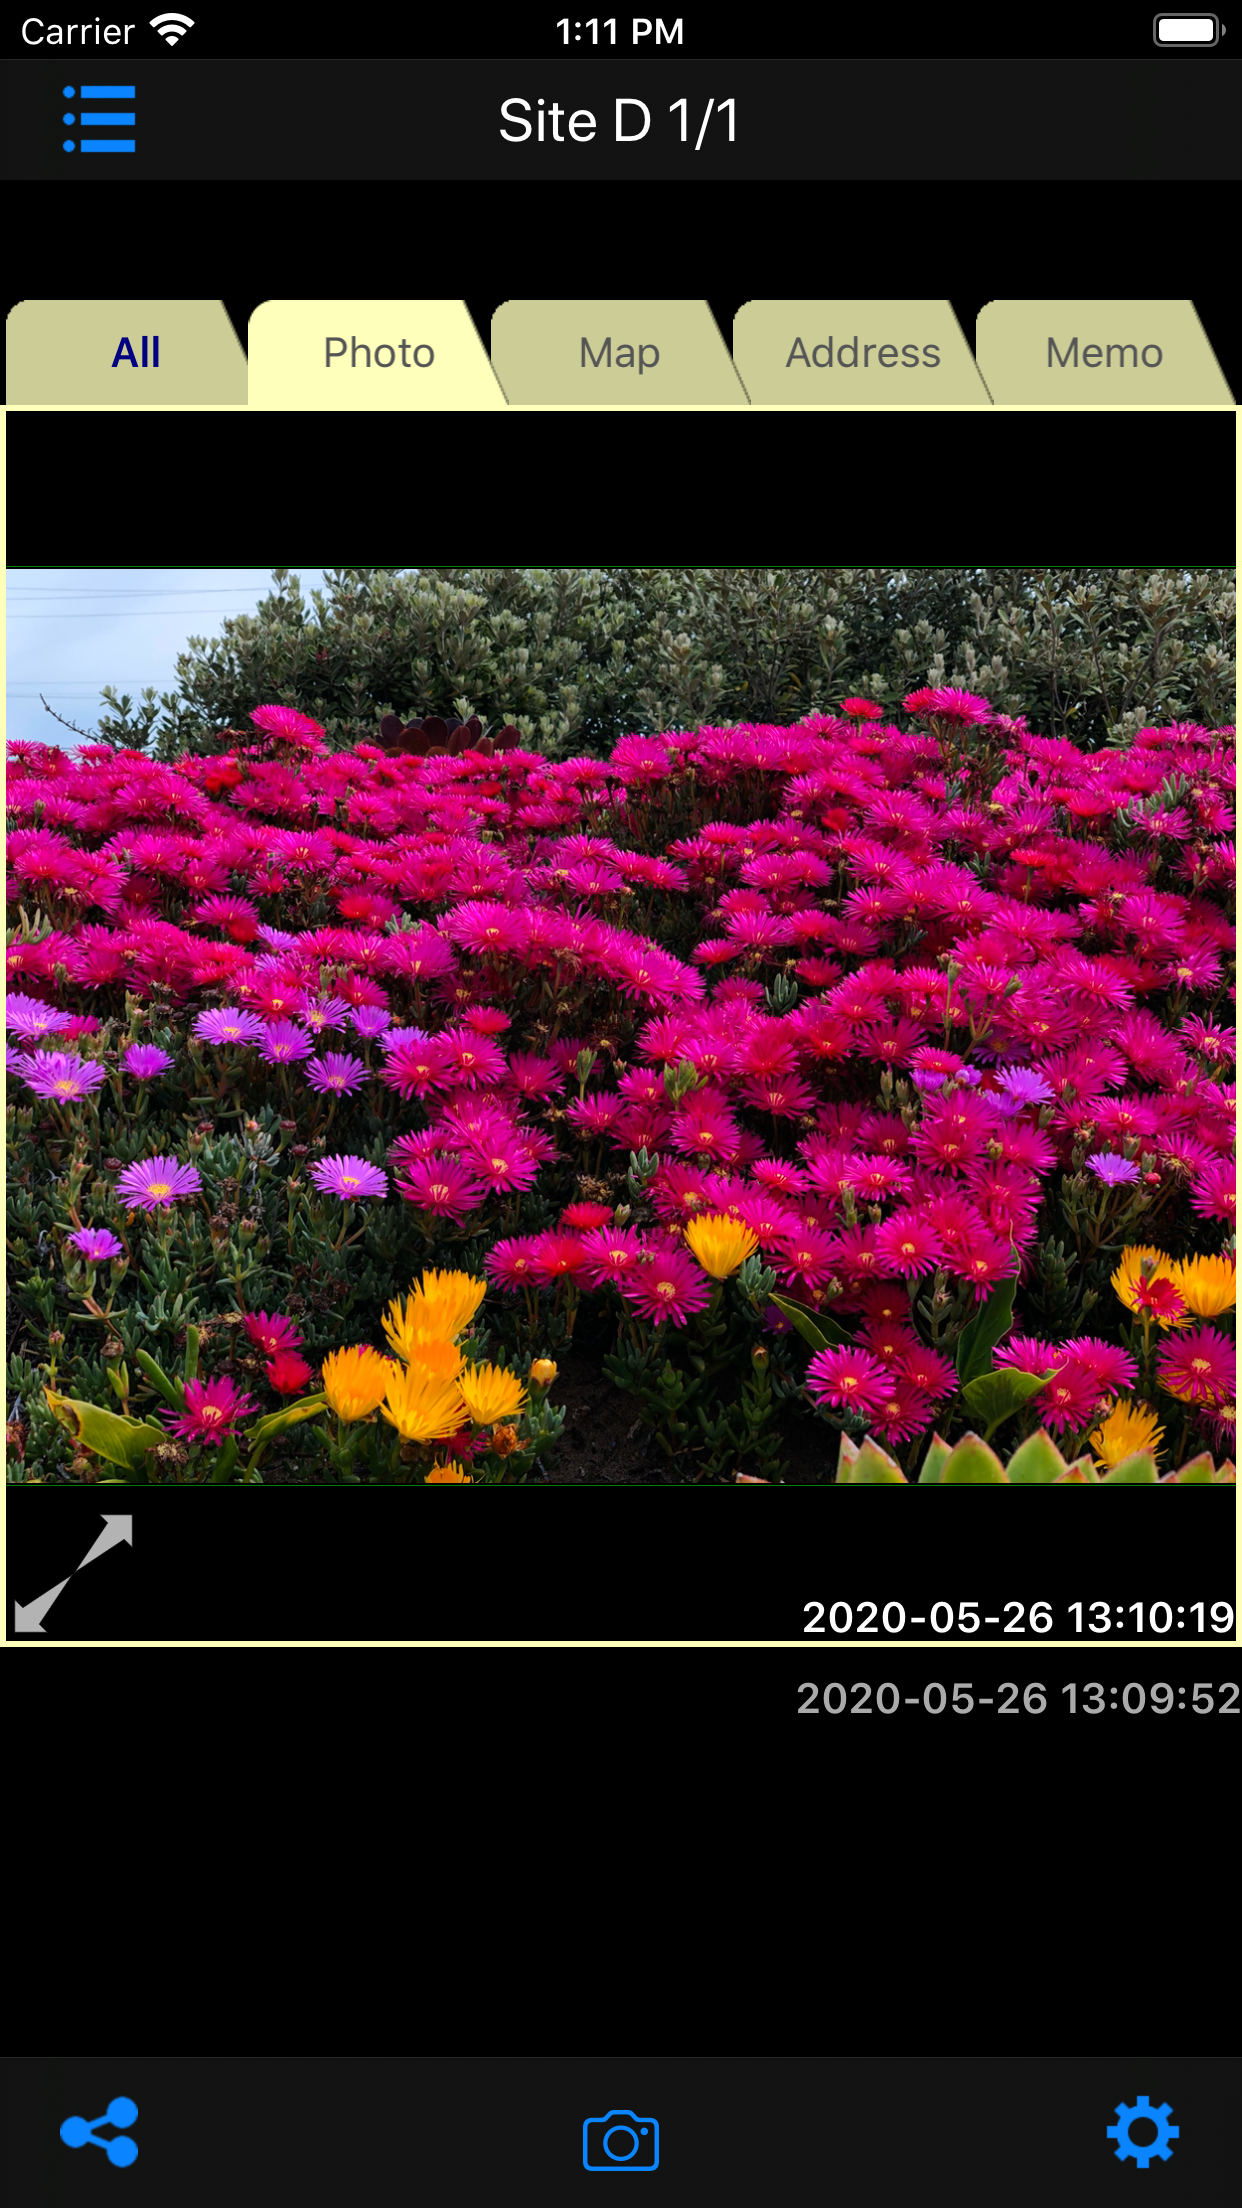
On the main screen, tap the “Photo” tab to switch to “Photo” view.
When you tap the photo, the magnifying button will appear or disappear at the bottom left.
If you tap the magnifying button, the display area of the photo will expand and you can pinch in and pinch out to zoom in and out.
To go back, tap the zoom out button at the bottom left.
You can also scale a photo in the “All” view.
Map settings
Tap the gear button at the bottom right of the main screen to switch to the “Map” view and display the map setting view.
If you select “a single pin”, only green pins (locations that link to the currently selected photo) will be displayed on the map.
If you select “two pins”, a purple pin will appear on the map in addition to the green pin. Purple pins indicate the location of the currently unselected photos in the current folder.
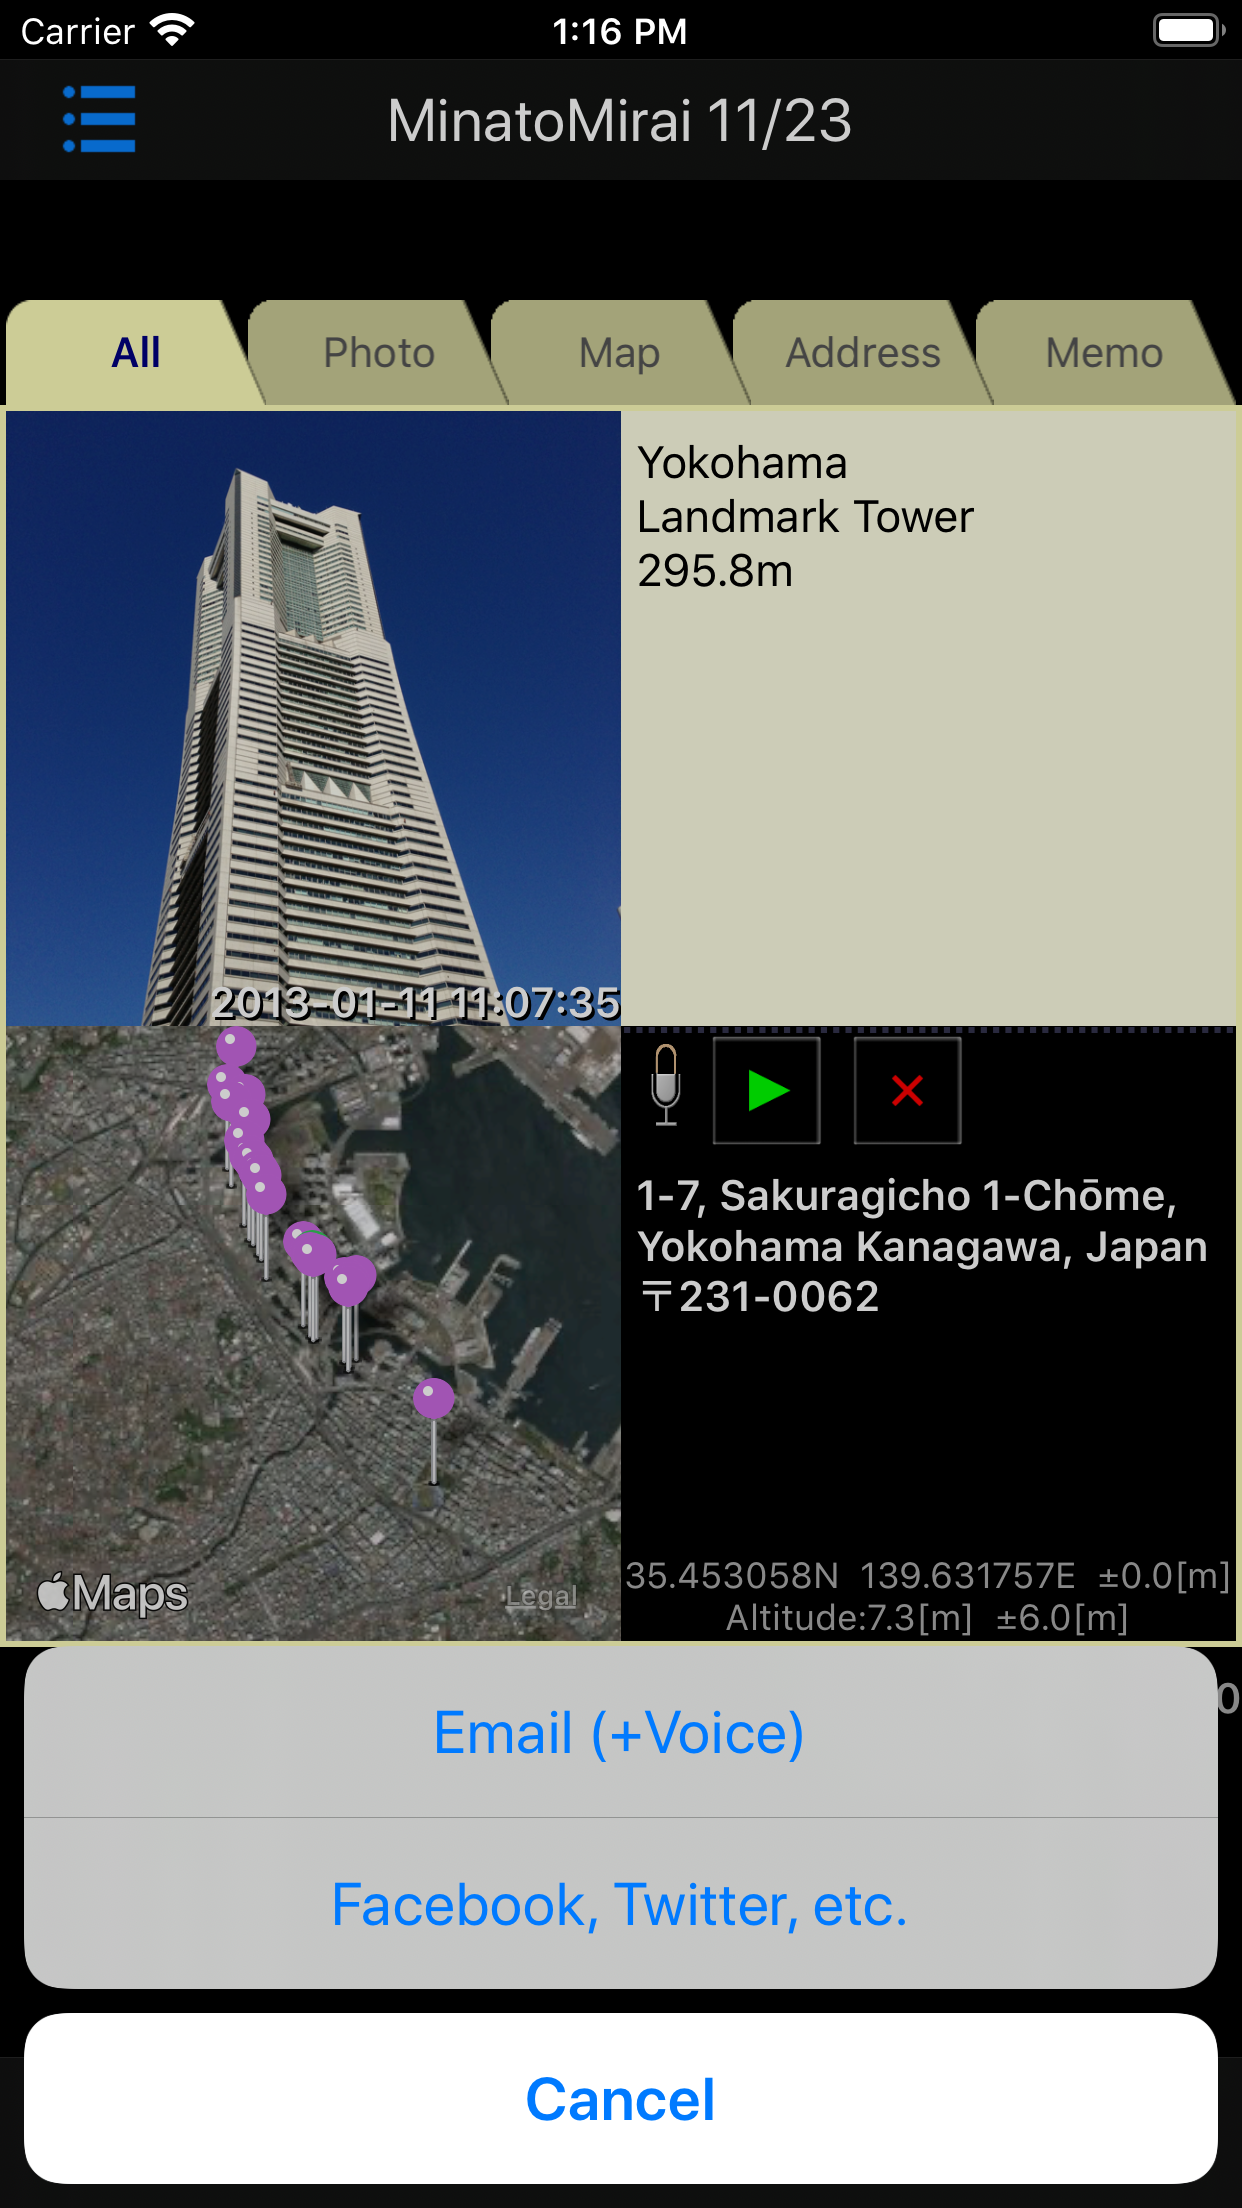
Tap the share button at the bottom left of the main screen to display the action sheet for sharing.
Email(+Voice)
You can send an email by selecting the “Email (+ Voice)” action from the action sheet. In addition to photo, map, address, location information, time stamp, if a voice memo is recorded, a caf format audio file will be attached to the email.
Facebook, Twitter, etc.
You can send a photo and related information to various apps by selecting “Facebook, Twitter, etc” action from the action sheet.
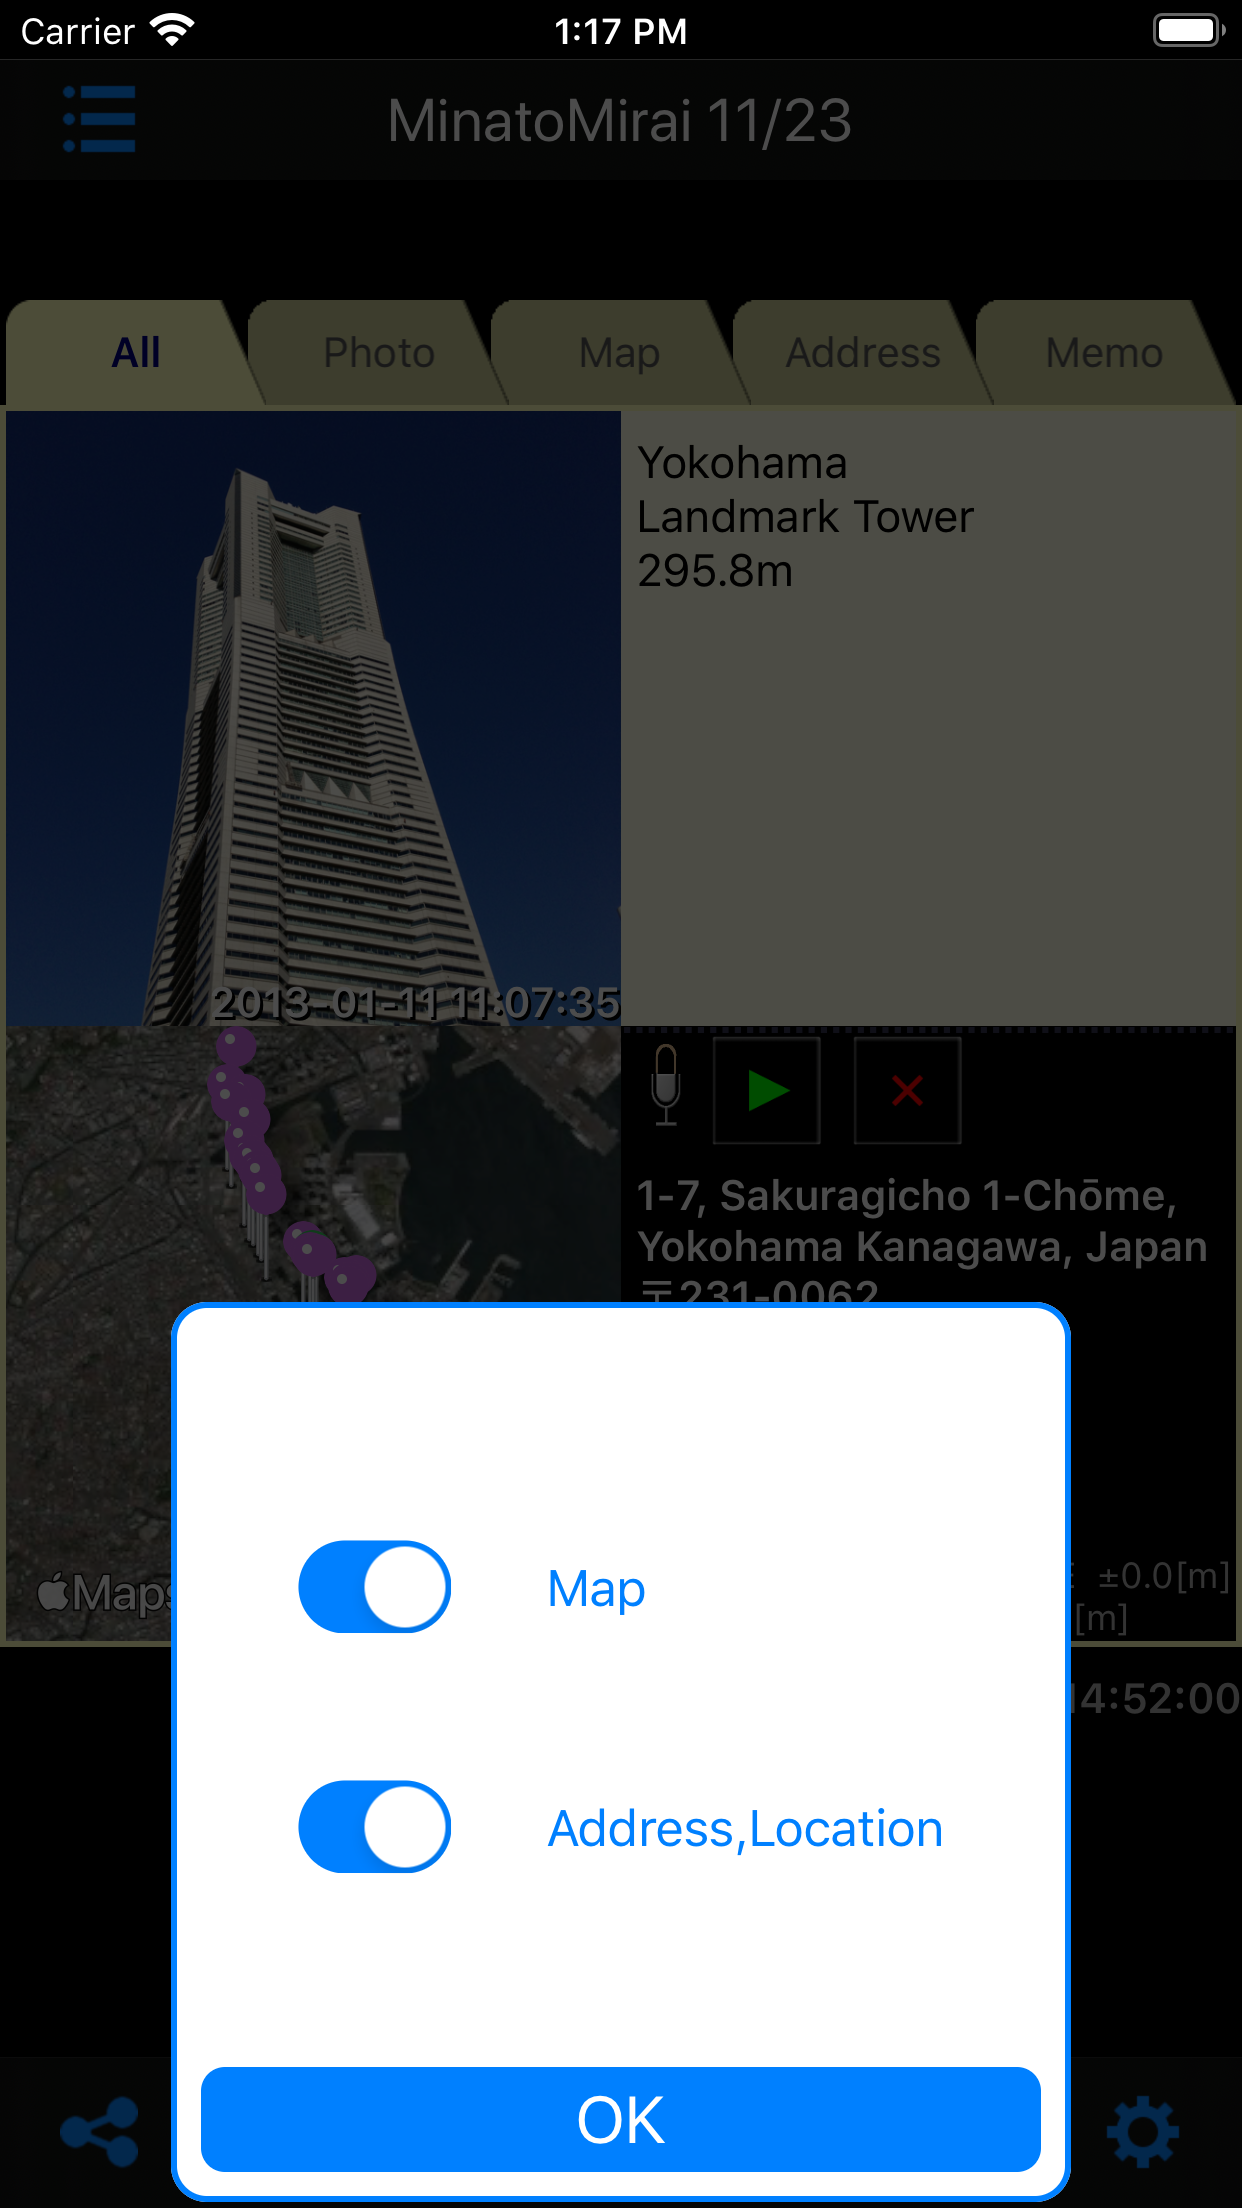
From the view displayed when “Facebook, Twitter, etc” action is selected, you can set whether or not to attach “map” and “address, location information”.
List of photos
Tap the list button on the upper left of the main screen to display a list of photos in the current folder.
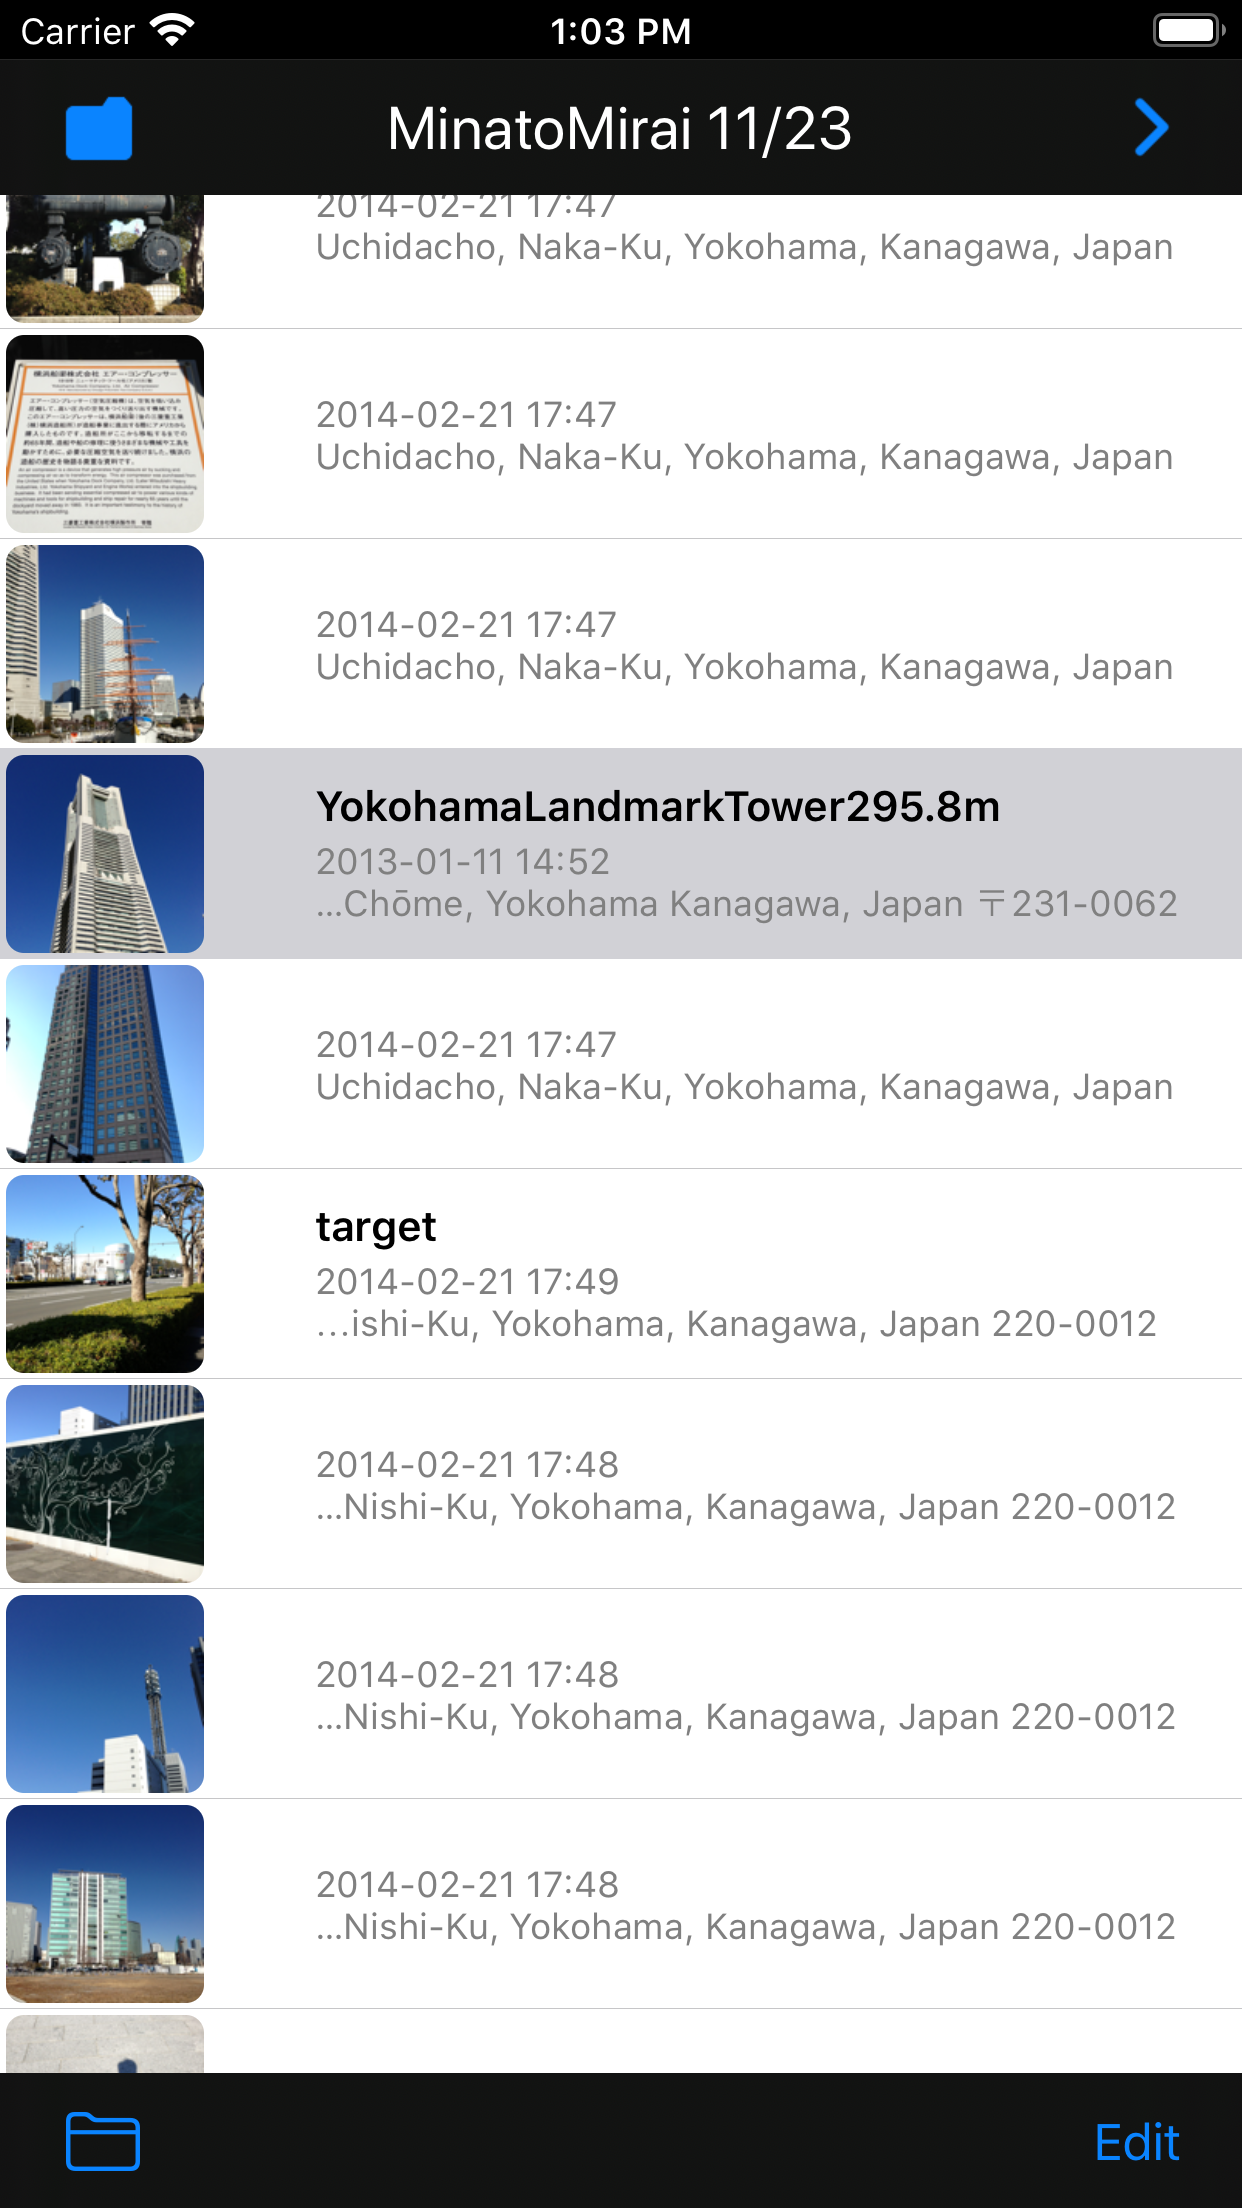
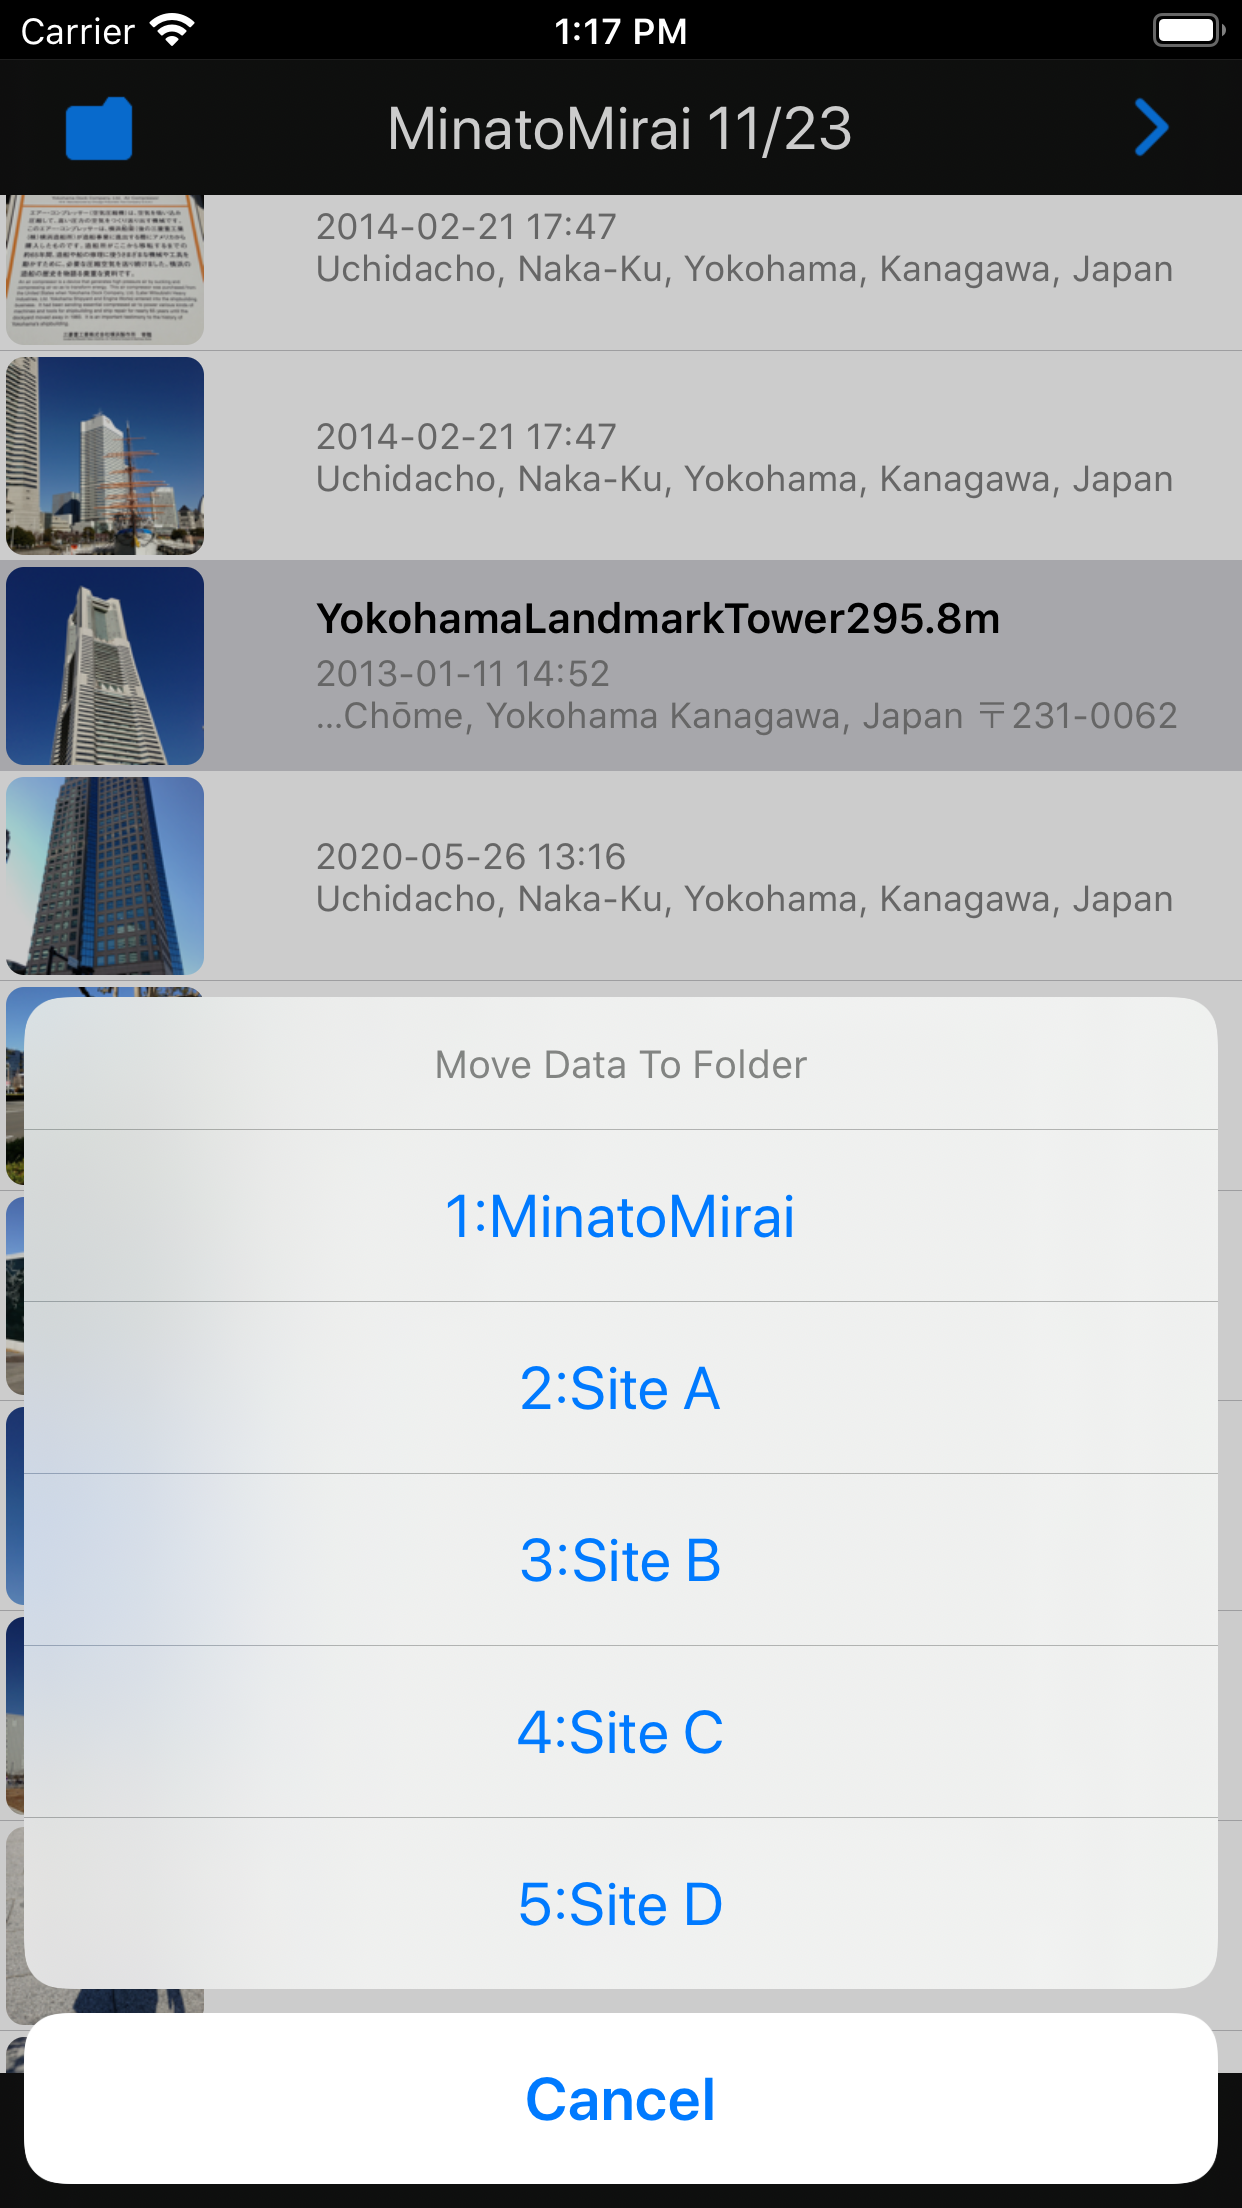
Move photos between folders
You can move the photo to another folder by tapping the file move button at the bottom left of the list of photos screen.
List of folders
Tap the folder button at the top left of the list of photos screen to display the list of folders.
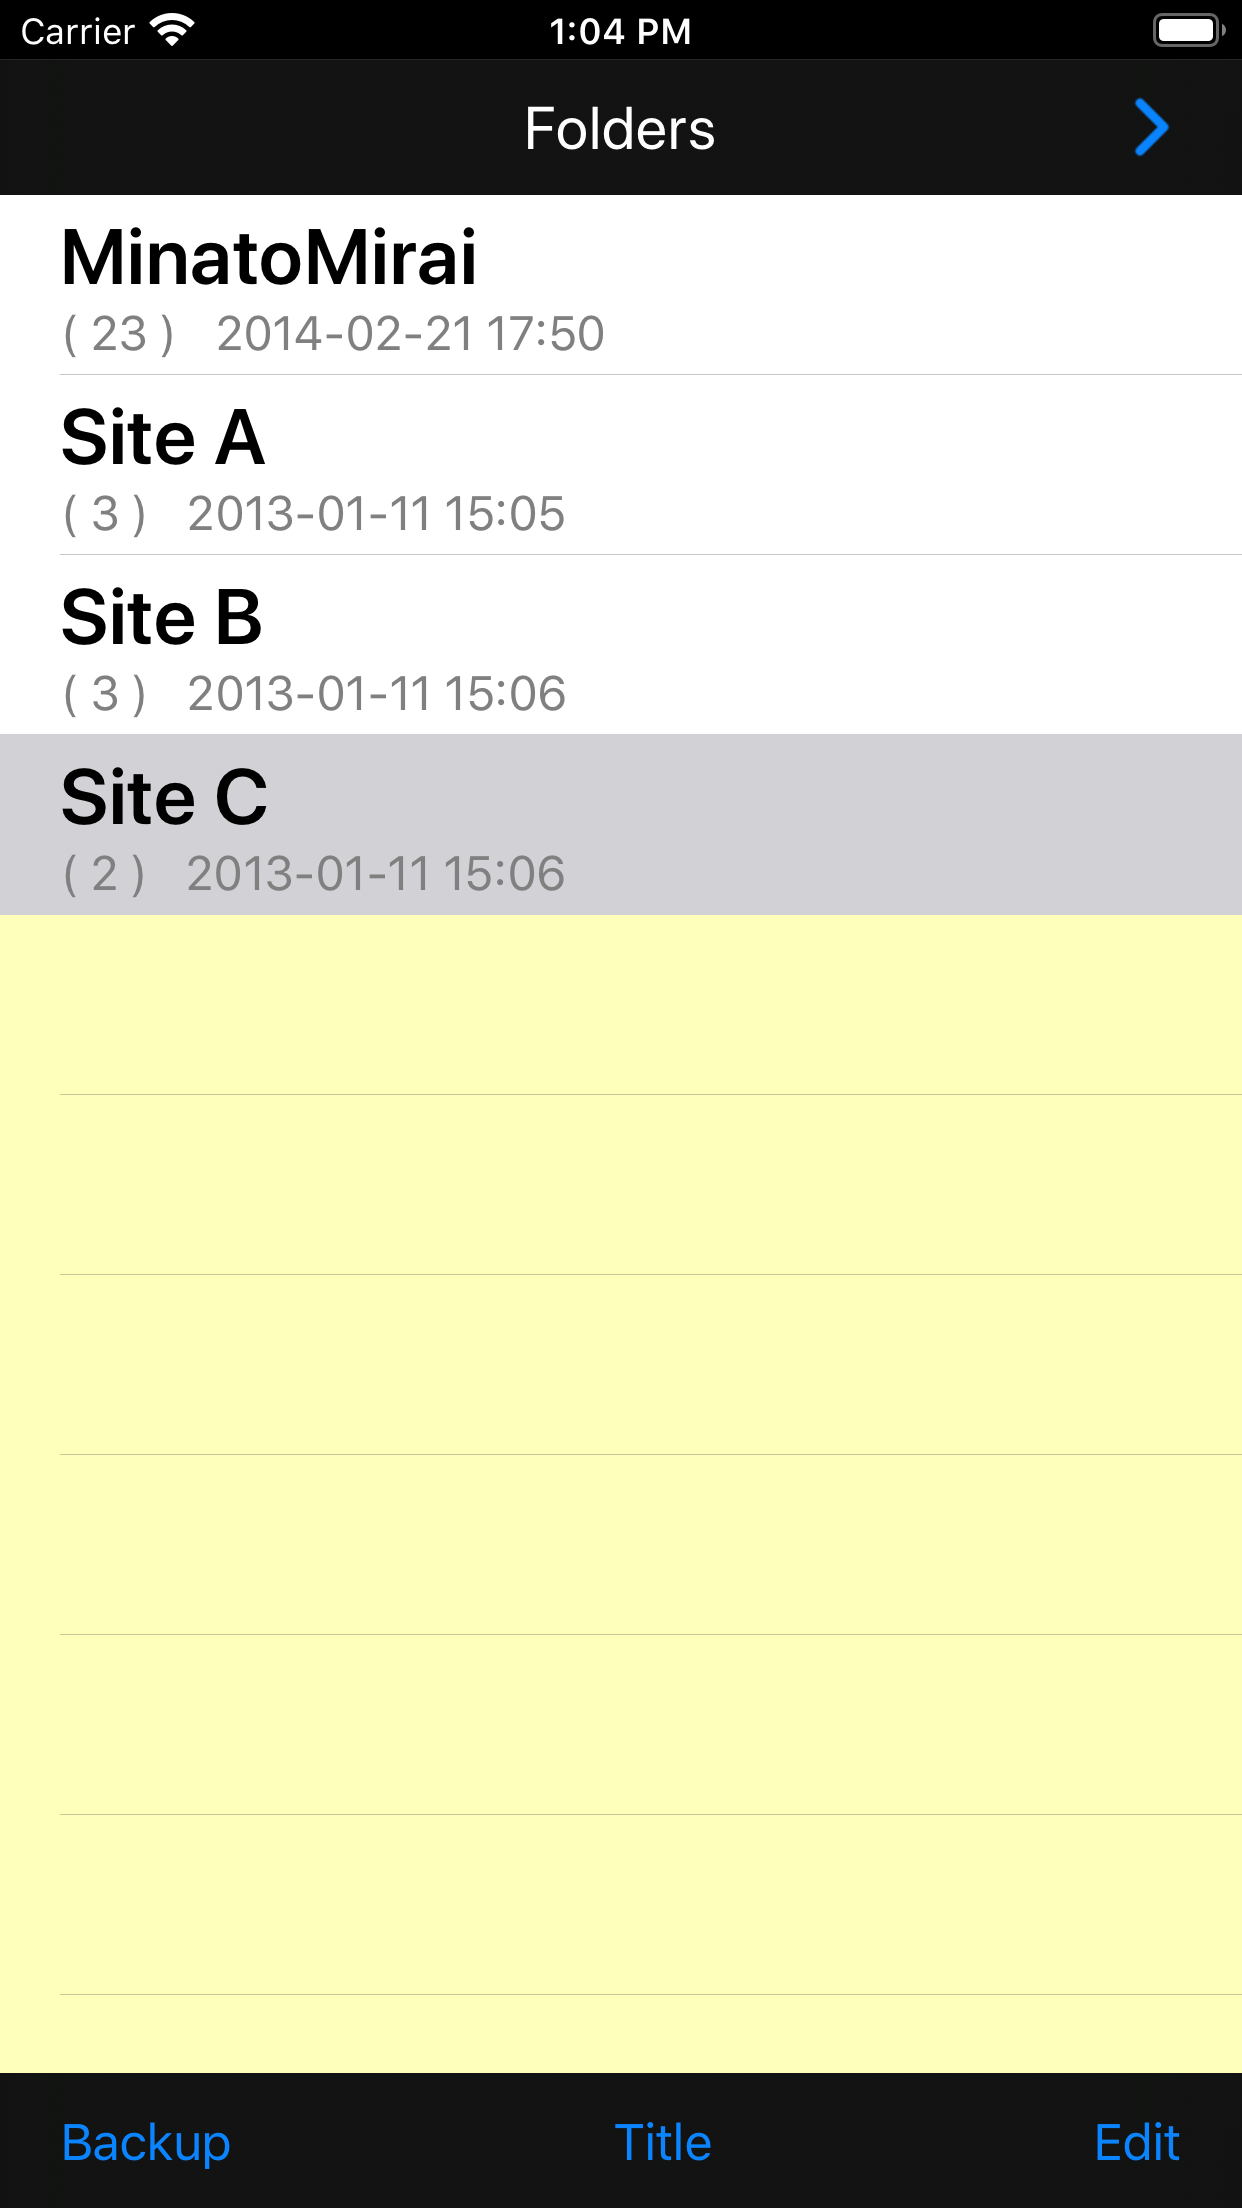
To edit the folder name, tap the “Title” button at the bottom center.
To add a folder or change the order of the folders, tap the “Edit” button at the bottom right.
To delete a folder, swipe left on the folder row. (Only empty folders can be deleted)
Backup and photo export (Dropbox)
“Camera GPS Chunk” uses Dropbox for backup and photo export. To use the backup function, please get a Dropbox account. (A free account is OK)
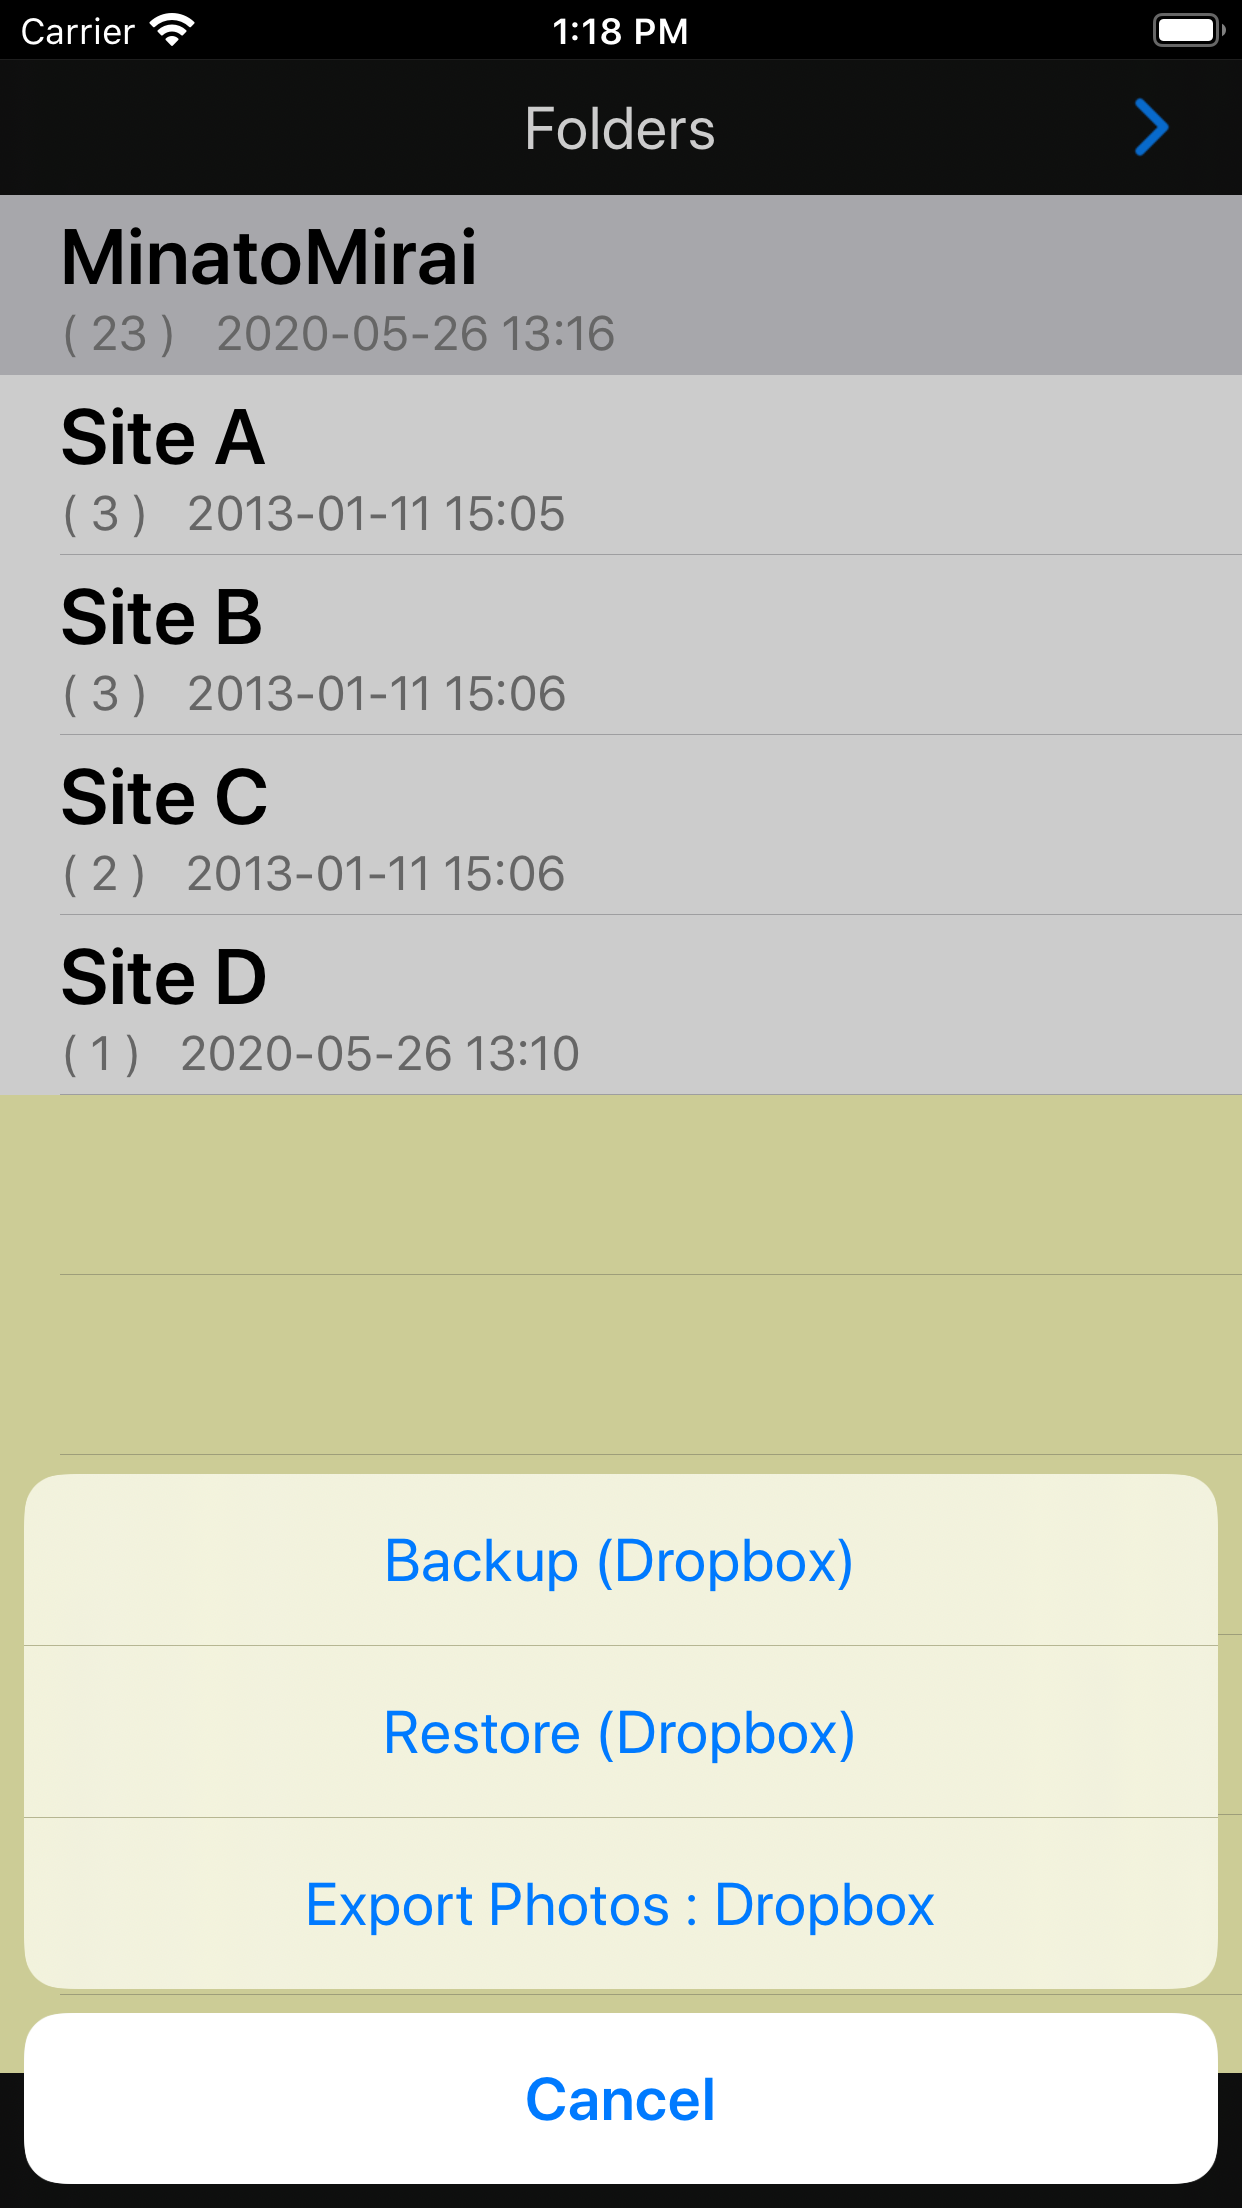
When you tap the “Backup” button at the bottom left of the list of folders screen, the action sheet will be displayed.
Backup (Dropbox)
Select the “Backup (Dropbox)” action from the action sheet to display the backup screen.
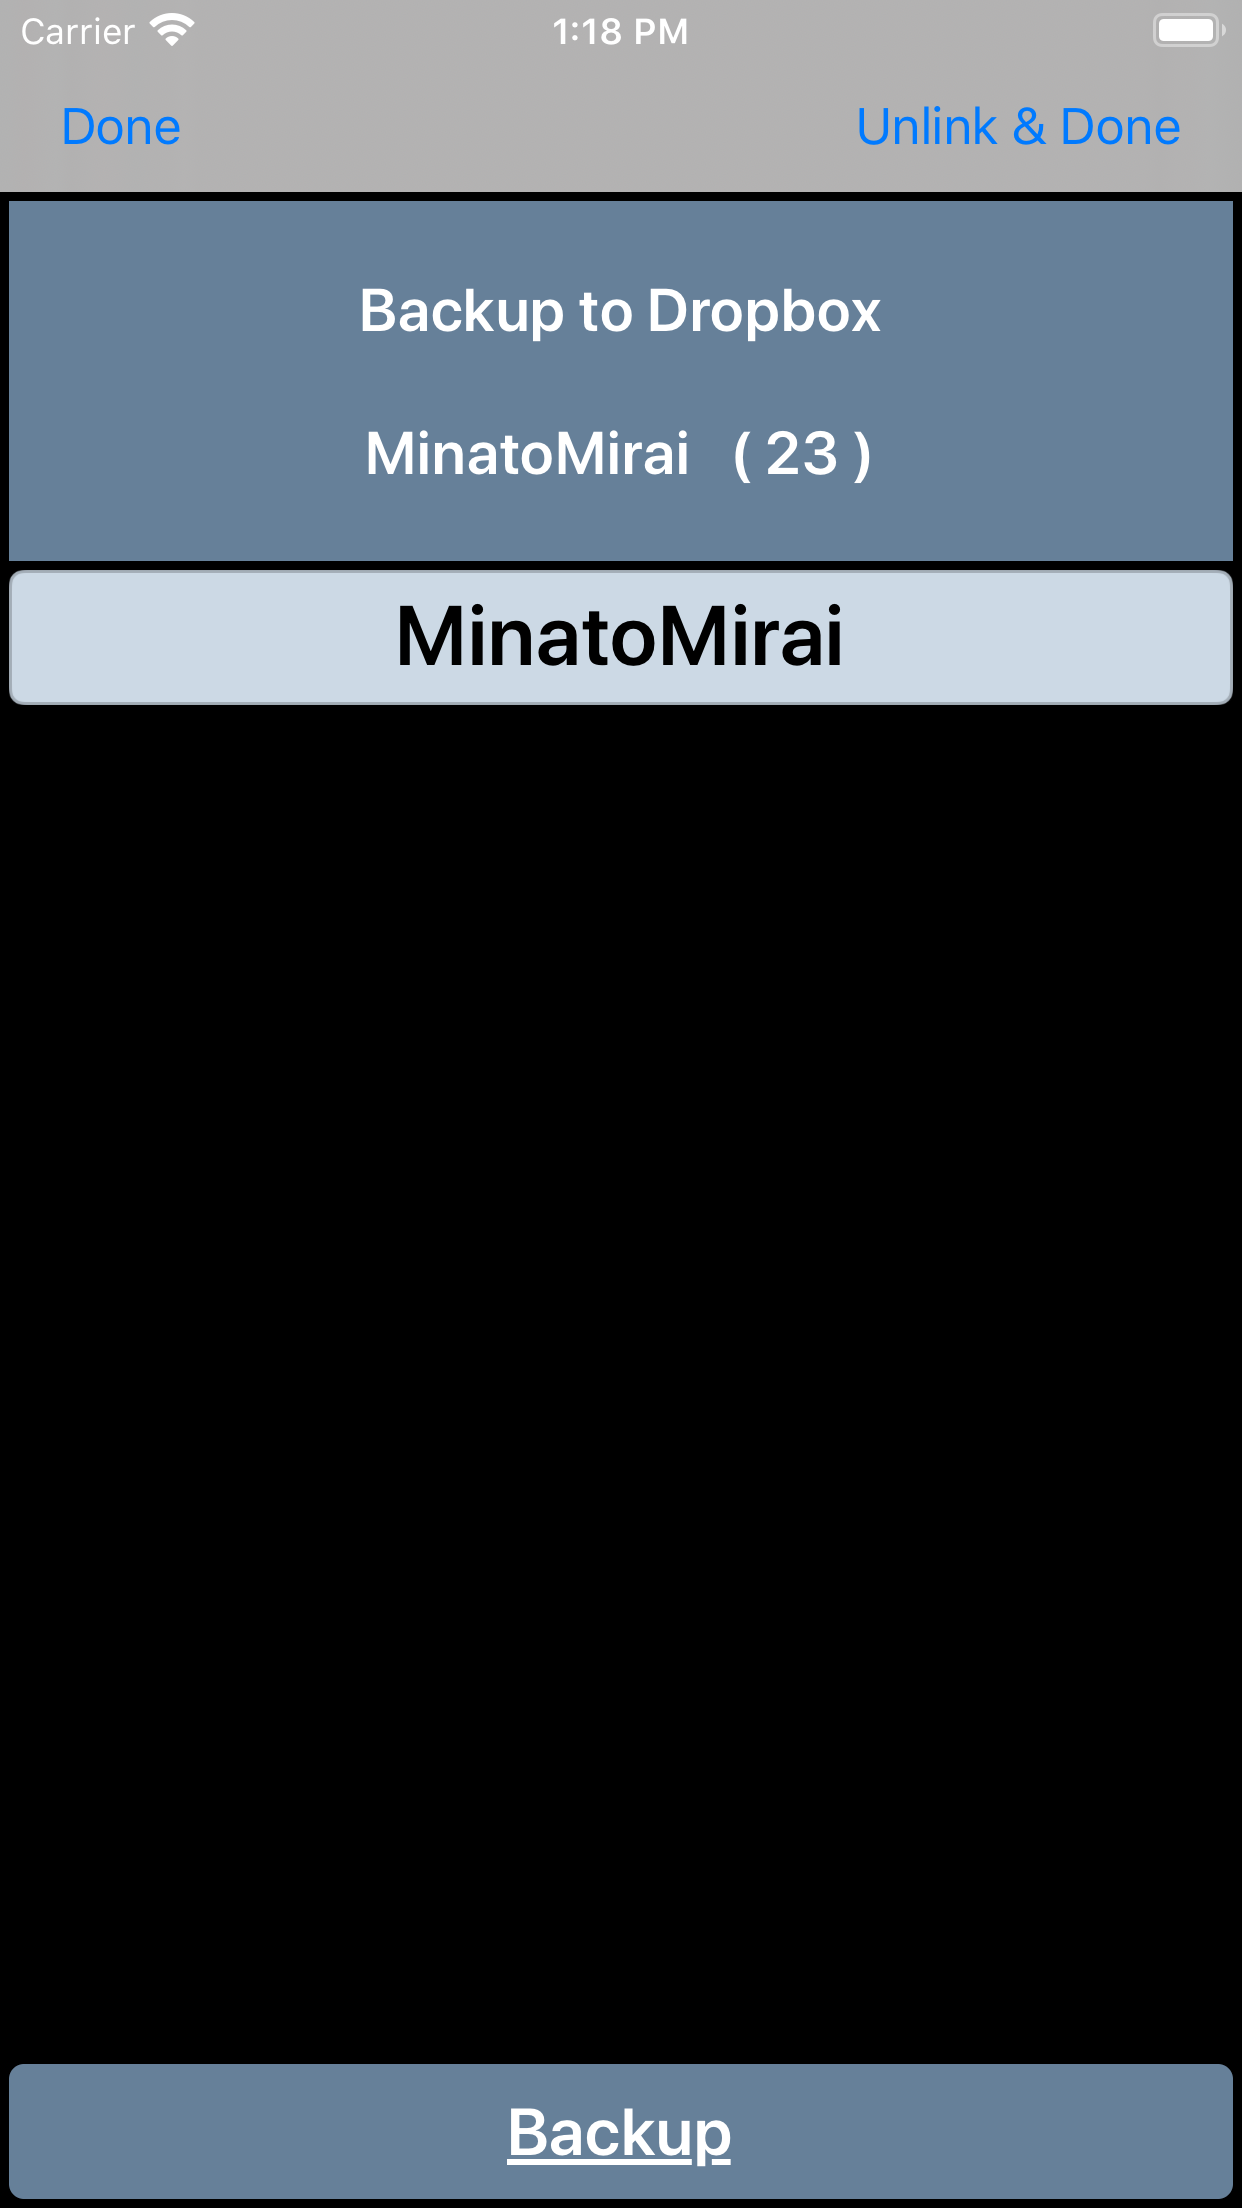
Tap the “Backup” button at the bottom of the screen to start the backup.
To edit the backup name, tap the backup name.
Tap “Done” button or “Unlink & Done” button to return to the list of folders screen. In the case of “Unlink & Done”, the connection with Dropbox will be disconnected, so the next time you back up, you will be asked for permission to connect to Dropbox again.
Restore (Dropbox)
When you select the “Restore (Dropbox)” action from the action sheet, the restore screen is displayed.

After selecting the folder to restore, tap the “Restore” button at the bottom of the screen to start restoring the backup.
By tapping the “Edit” button, a button for deleting the backup will be displayed. You can also delete a backup by swiping the backup title row left.
Tap “Done” button or “Unlink & Done” button to return to the list of folders screen.
Export Photos:Dropbox
Only photos are exported to Dropbox with “Export Photos”. Location information and memos are not exported.
The photos will be saved as JPG images under the export name folder on Dropbox.
When you select the “Export Photos: Dropbox” action from the action sheet, the Export Photos screen is displayed.
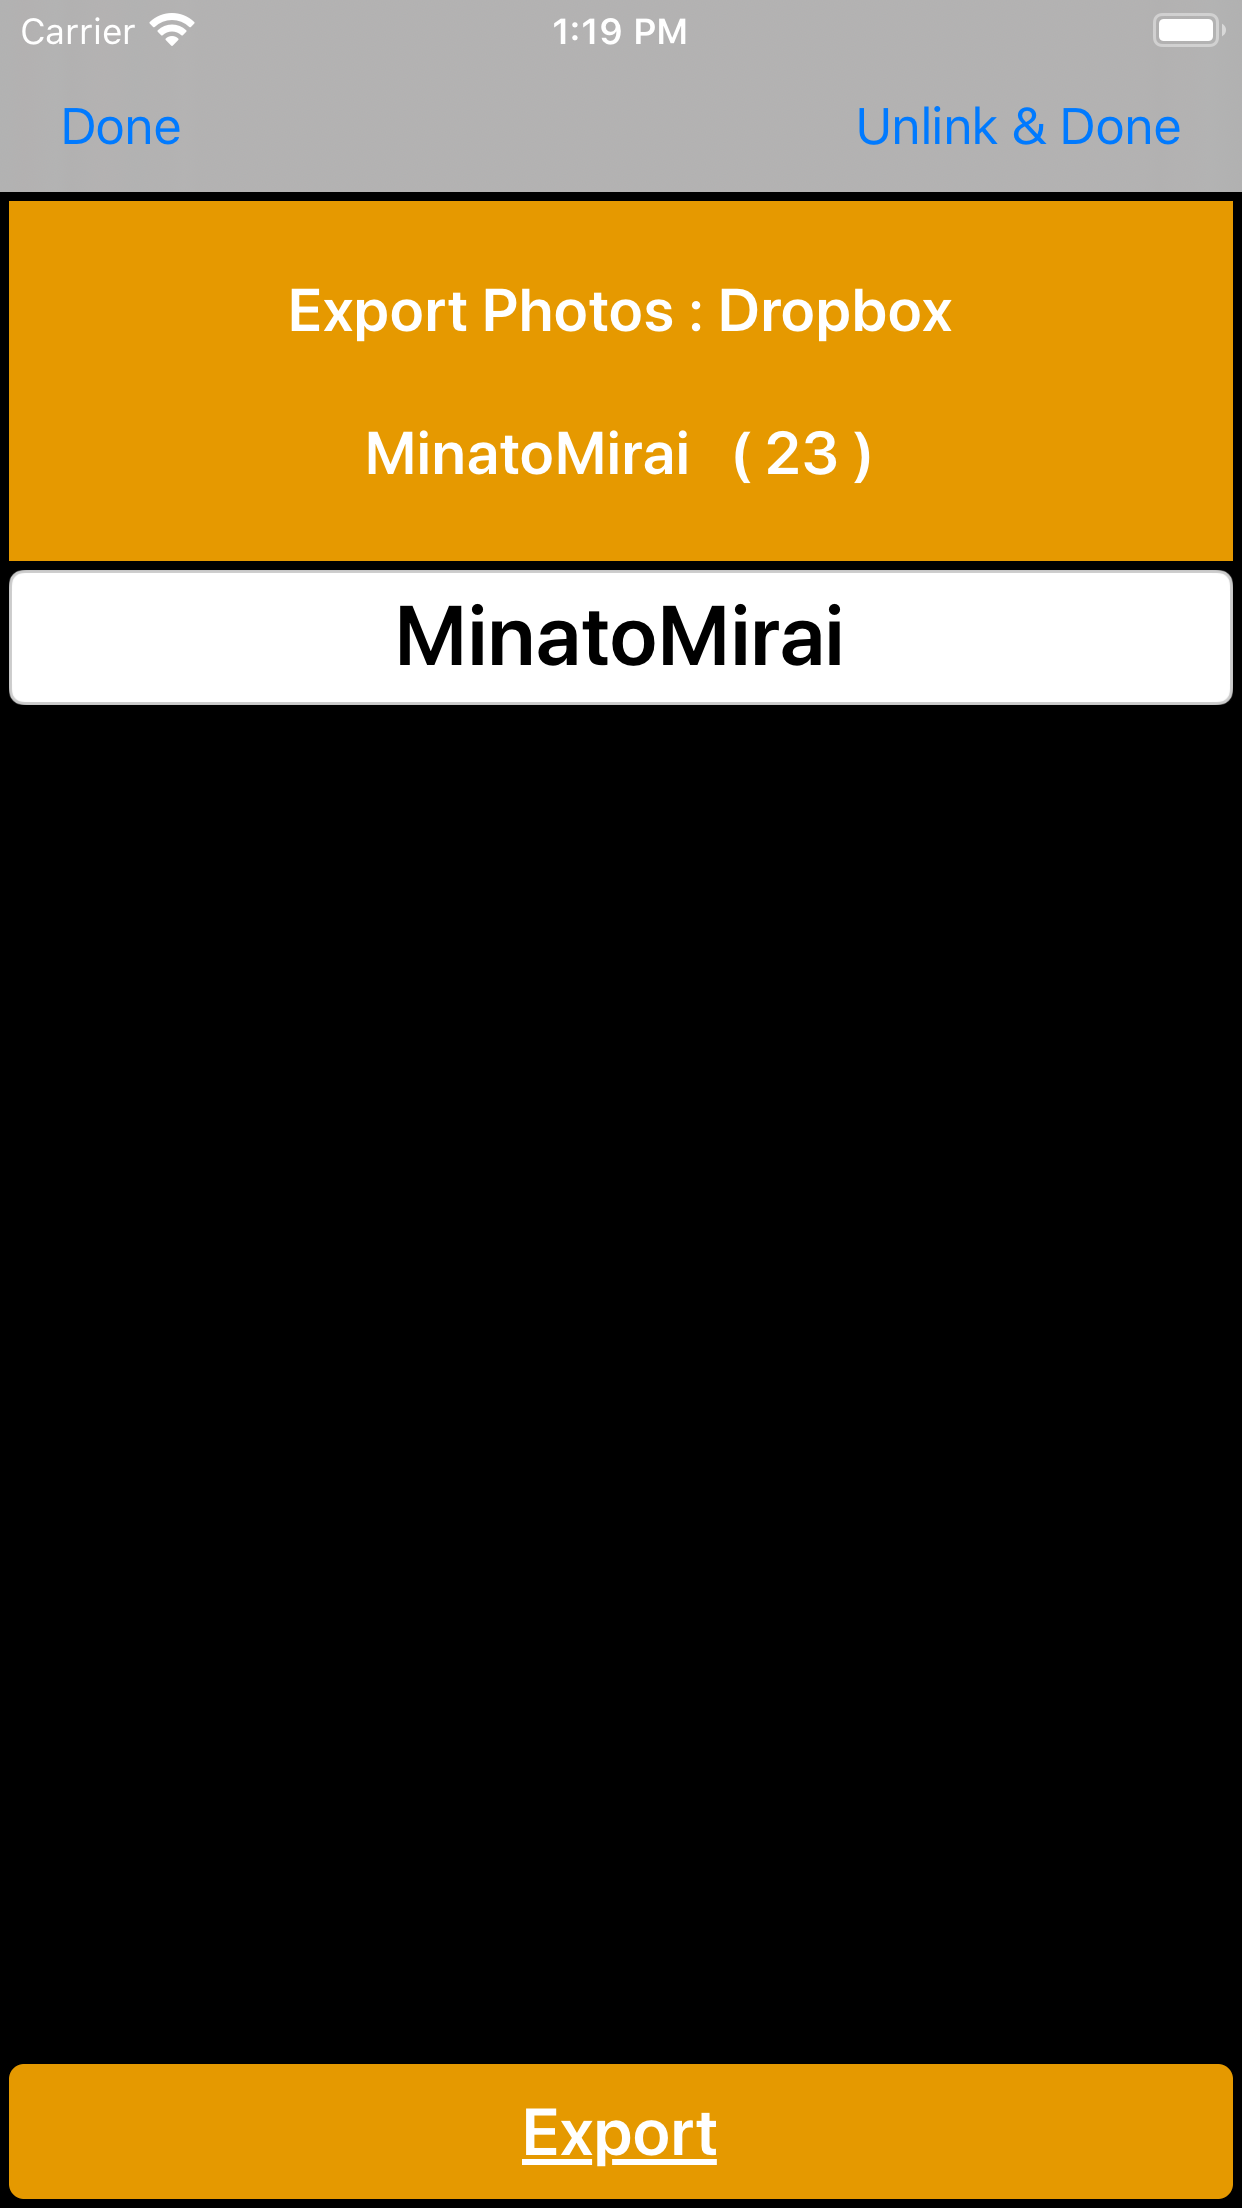
Tap the “Export” button at the bottom of the screen to start exporting photos.
To edit the export name, tap the export name.
Tap “Done” button or “Unlink & Done” button to return to the list of folders screen.
“CameraGPS Chunk” Free and Paid versions
The iPhone app “Camera GPS Chunk” has a Free version and a Paid version.
Free version: “CameraGPS Chunk”
Paid version: “CameraGPS3 Chunk”
With the Free version, you can upgrade to the same functions as the Paid version with in-app purchase.
![]() CameraGPS Chunk is currently unavailable. ※CameraGPS Chunk is only available in Thailand.
CameraGPS Chunk is currently unavailable. ※CameraGPS Chunk is only available in Thailand.
Free version
CameraGPS Chunk